

In an ideal world suspension seatposts are designed to take the sting out of surfaces allowing the rider to be less fatigued and so ride further and longer. They should be simple to adjust, be reliable, be a reasonable weight and hardest of all maybe, they should look good (or not too weird). So can the Redshift Shock Post achieve all these?
Suspension seatposts are a curious thing. They are made to isolate the rider from the surface the bike is rolling over. However they are not a rear suspension system like those found on mountain bikes. So if you are expecting trail bike plushness and inches of travel you’ll be disappointed.
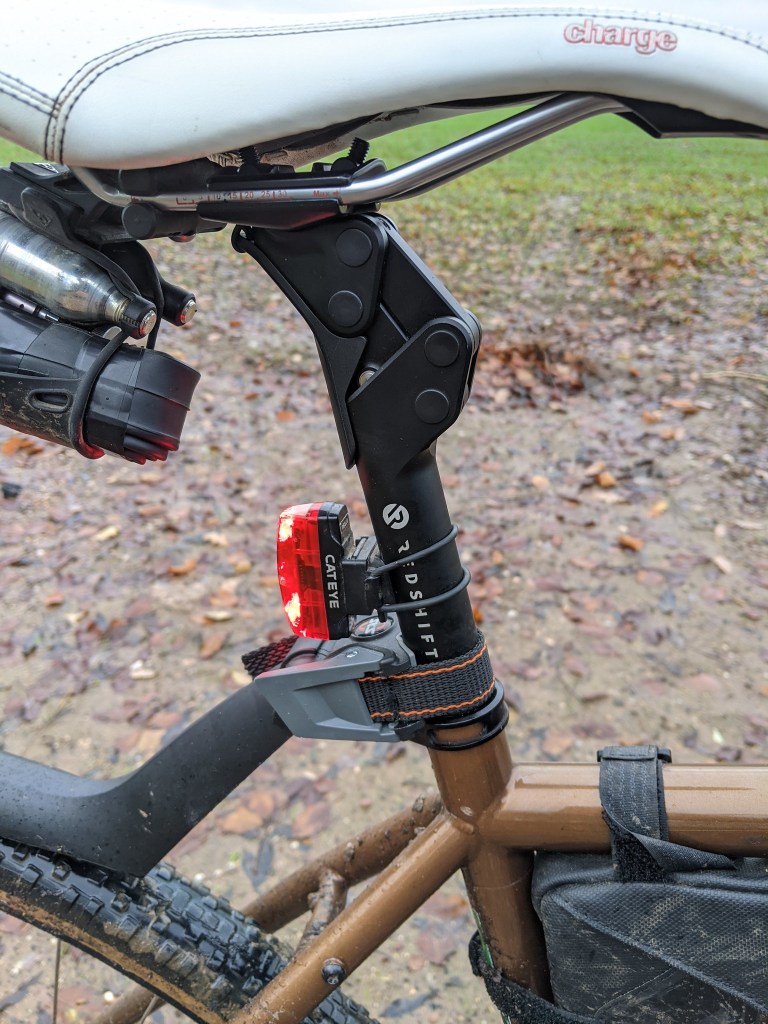
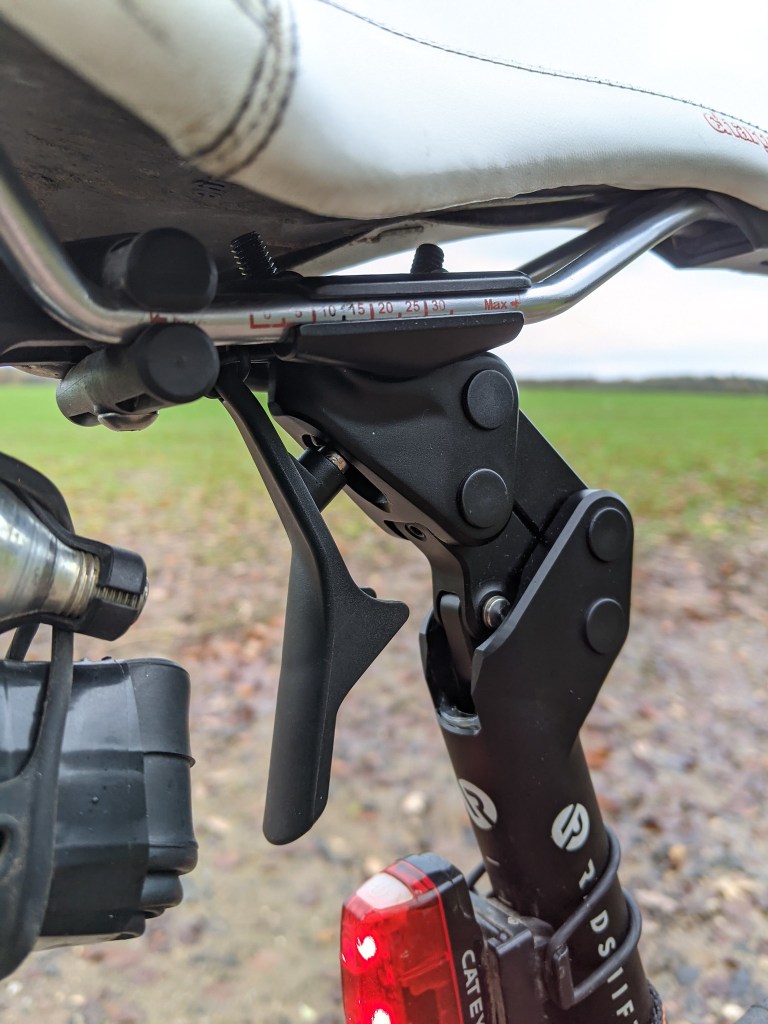
The Post is aluminium with an offset parallelogram design. the saddle clamp is a two bolt one and enables easy micro adjustments of the saddle angle and position. The adjustment to the amount of travel the post has and the “plushness” is found inside the main shaft of the post. There, a preload screw in cap hides the space where one or two springs (depending on your riding weight) sit. The parallelogram has a very neat cover that is magnetic and this protects the mechanism and the seat clamp adjustment bolts from rear wheel spray. The post is 27.2mm in diameter, shims are available when you buy to fit any size frame. Suspension travel is 35mm.
Set Up is very easy but does take some trial and error and a few test rides to get spot on. Get yourself kitted up in your normal riding gear and start by following the rider weight guide in the comprehensive instructions that come in the box. There are two springs that come with the post, one is already installed and depending on your weight you might need to add the smaller spring too. this fits inside the larger one on the inside of the post shaft, preload is adjusted by a screw in cap at the bottom of the post
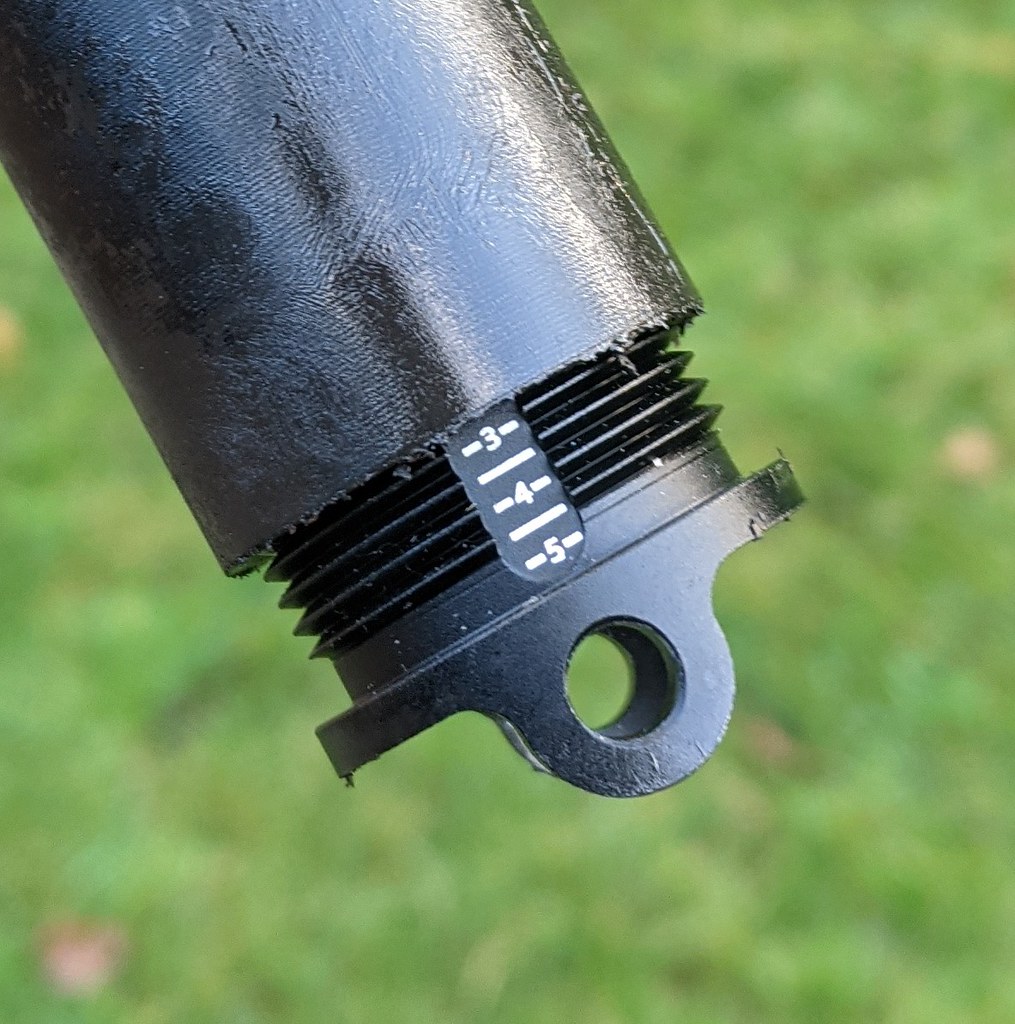
I set the preload to “2” then went for a short test ride, finding the post a little too soft for my liking I then turned the cap to “4” another short test and I turned it to “3” which seemed to suit me the best given my weight and how I wanted the post to feel. I like quite a firm ride so the post doesn’t bottom out on anything but a big impact and there is no noticeable bounce when pedaling on a smooth surface. It’s worth while taking some time setting the post up properly but the actual adjustments are quick and easy. Saddle fitting was equally easy, the magnetic cap pulls aside and the bolts are accessible with a standard Hex key and they haven’t come loose or needed adjustment during the length of the test period over a variety of surfaces.
The Ride The first ride after the couple of set up rides was completely in the dark due to the time of year and work commitments so I really didn’t want to be tweaking any of the post adjustments by torch light So i rode it as i had initially set it up. Anyone who knows me will tell you I can set the saddle position and post height to exactly how i usually have it and within one mile of the first ride I’ll have moved it at least twice to get the right feel! This time I raised the post a few millimeters to get that ” just right” feeling. This is a good example of why a few short test rides are needed before any long rides are undertaken especially on group rides as the people you are riding with won’t want to keep stopping for micro adjustments.
With the post raised I rode on for around 15 miles on a mix of road and off road light trails. the post showed no side to side movement or rattles and the vertical movement was smooth. i knew straight away that I’d set the preload too soft as the post bottomed out on larger bumps.
The next ride was in daylight and on much bumpier terrain and in the meantime I’d added one full turn on the preload. The post sat at the top quarter of it’s movement and this was my sweet spot. it wouldn’t bottom out except on the harshest of hits, those that I deliberately sat down for to test the post, normally I’d have been standing up for those anyway. The post action was smooth and there was no discernable bobbing up and down while pedaling. Over a few 30+ mile rides I actually forgot it was a suspension seat post so good was the experience.
I do suffer with lower back pain and after a 20+ mile ride my back tends to stiffen up especially in cold weather and i have to start on the bike stretches to help cope with it. I can report though that this was much reduced using the shock post. Tested back to back with a standard rigid post on the bike on consecutive days over similar distances my back was a lot more flexible and less painful using the Redshift post.
The only issue I had with he post wasn’t the fault of the post at all. The magnetic cover moves downwards as the post compresses to cover the pivots at all points of the travel but when I’d set the post too soft I was using a band on rear light around the post. As the post reached full travel the end of the magnetic cover would touch the mode button on the light and change the settings of the flash mode! It took me a while to work out what was happening while riding in the dark. Setting the compression preload correctly stopped this and it hasn’t happened since.
Does the Redshift shock post take the sting out of rough surfaces? Yes, my back issues seemed much improved using the shockpost compared to a standard post
Simple to adjust? yes, just screw in or out the preload cap to adjust, no bolts to undo and no special tools needed.
Reliable? yes, no play has been felt or seen over the duration of the test, the action is still smooth and silent. The magnetic cap keeps rear wheel spray out of the mechanism and the saddle clamp has not moved since i set it.
Weight the post with the second smaller spring weighs 559g
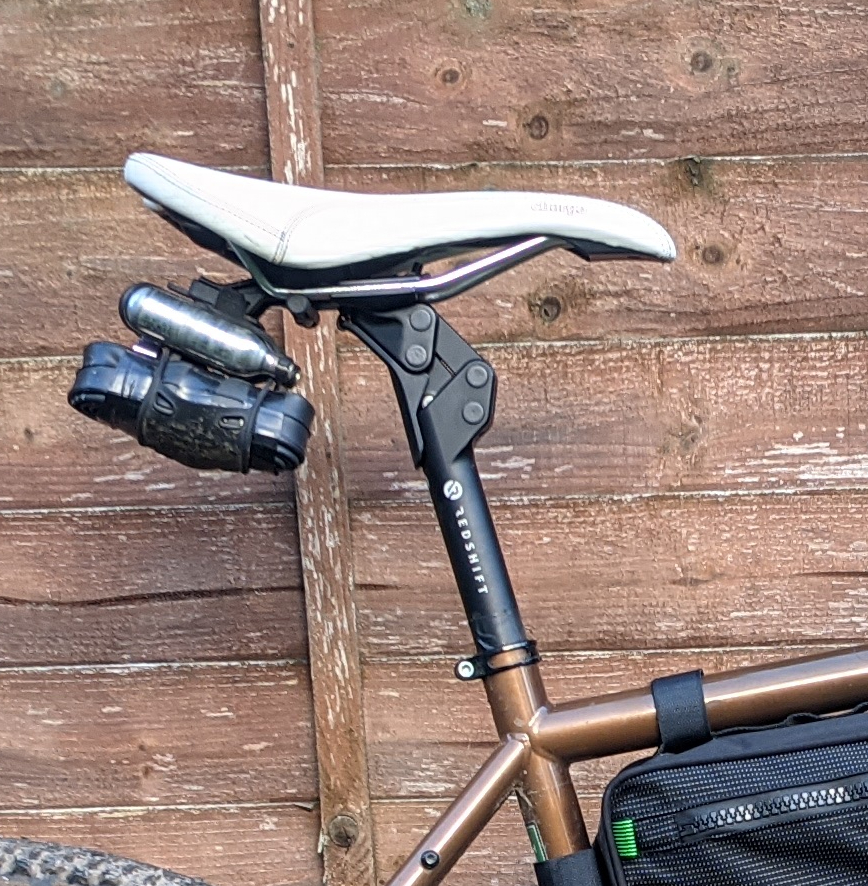
looks good (or not weird) the post is actually very low profile compared to other shock posts on the market. The engineering that has gone into the design is clever and the mechanism is compact. It takes a second glance to realise that it is actually a suspension post, so yes I think it passes the looks test.
A Redshift Suspension Shock Post will let you ride further for longer, is easy to set up and look after. It doesn’t have a massive weight penalty and would suit any rider. It shouldn’t be confined to just gravel bikes either. A bike packing hardtail MTB would benefit from this post too and fitting a rear bag to the post should be easy. The action is subtle enough (if that’s the way you set it) or you can set it to get more bounce. that’s all down to personal preference.
The post has stayed on my bike since the initial test rides when I could have easily gone back to my favourite rigid post and that is I think that decision is all you need to know.
more details on the shock post can be found here Redshift Shockpost or the Redshift instagram page has more pictures
As with all my tests, this is an impartial and real world review. I’m not sponsored and I’m just an average rider like most of the cyclists out there. I do inform anyone who sends me things to test that It will be an honest review good or bad.
