Some folks ride gravel bikes with flat pedals and I’m not here to say that is the wrong way, infact I’ve tried it and it’s a perfectly acceptable way to ride any bicycle. In fact I published a video on the subject here Gravel biking on flat pedals
For those of us who use clip in pedals it’s not always convenient. When you want to pop to the shop for some milk, the pub without waddling like a penguin in your clipless compatible shoes and in my case when I have to park 1.5 miles away from work because there’s no parking on site. I don’t want to have to put on special shoes for such a short journey, then have to change into shoes suitable for work and have to store the “special shoes” somewhere and then of course have to reverse the process at the end of the shift.
Pre internet (yes kids there was a time before WiFi!) Shimano had a solution which was the quite frankly hideous PD22 pedal adapter. These were a struggle to clip into your pedal but that struggle was in no way at the level of purgatory that was the attempt to get the damn things back off again! Having to twist a hard plastic pedal with teeth jutting out cutting into your hand to the correct amount of degrees to attempt to release it with out the leverage of a foot inside a shoe was impossible without backing the spring tension off so far that when you eventually got to ride the pedal as intended it didn’t retain the shoe cleat at all! So to cut a long story short they were unusable. The PD22 has had many copies over the years from various companies but nearly all of them still need that twist action to remove them.
Redshift Sports, well known for their suspension stems, seatposts and the Kitchen sink and Topshelf bar may just have come up with the perfect solution.
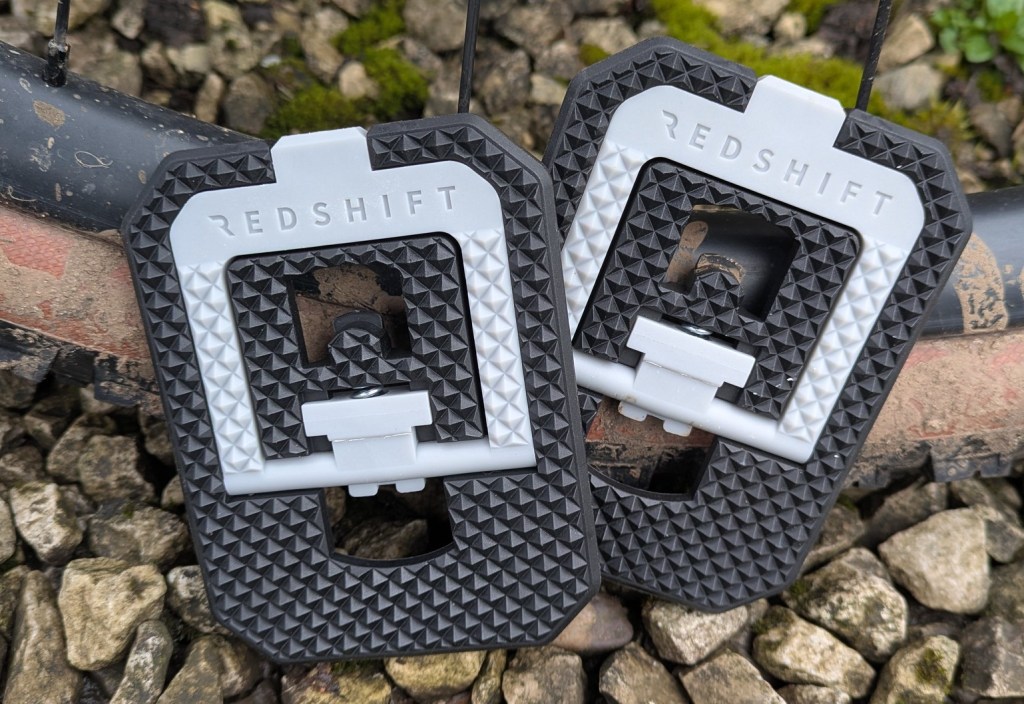
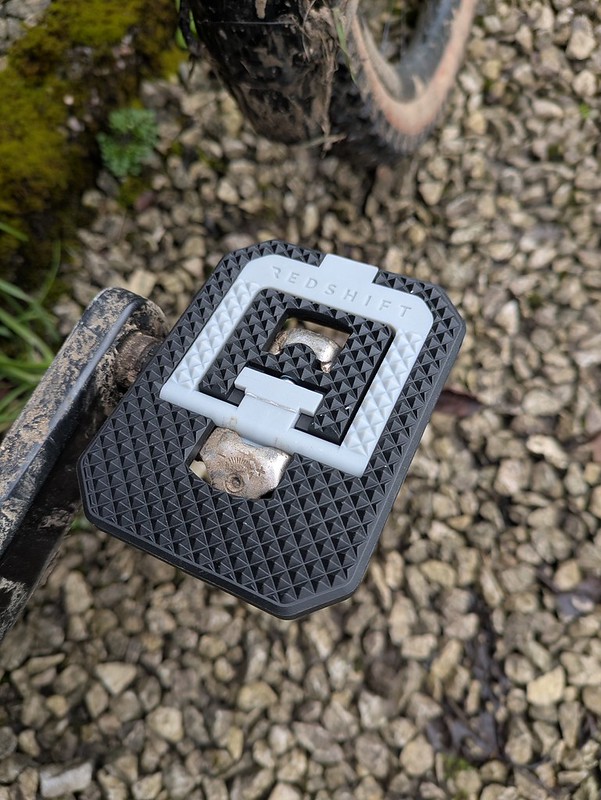
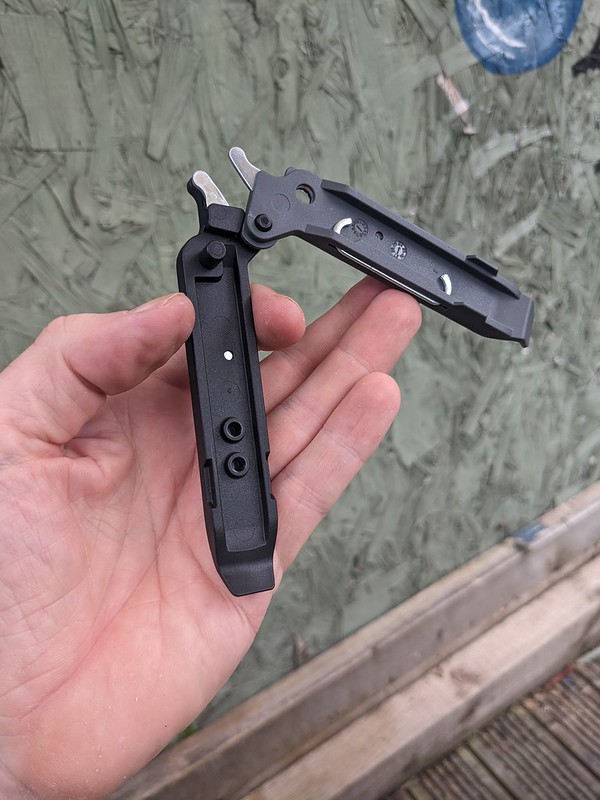
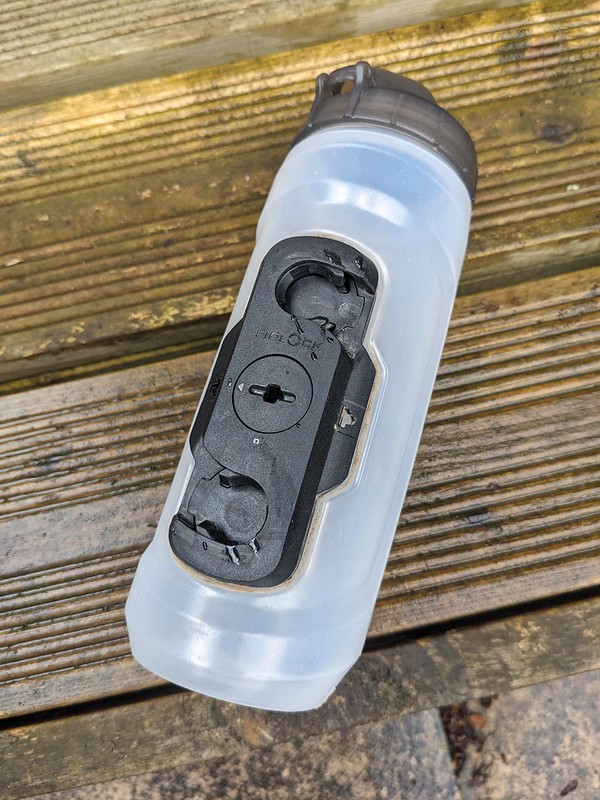
The Redshift Mousetrap Pedal adapter doesn’t do anything different from all those previous pedals. It still fits to one side of your clip in pedal and supports any style of shoe. What it does (actually doesn’t) have is that need to twist the adapter to remove it.
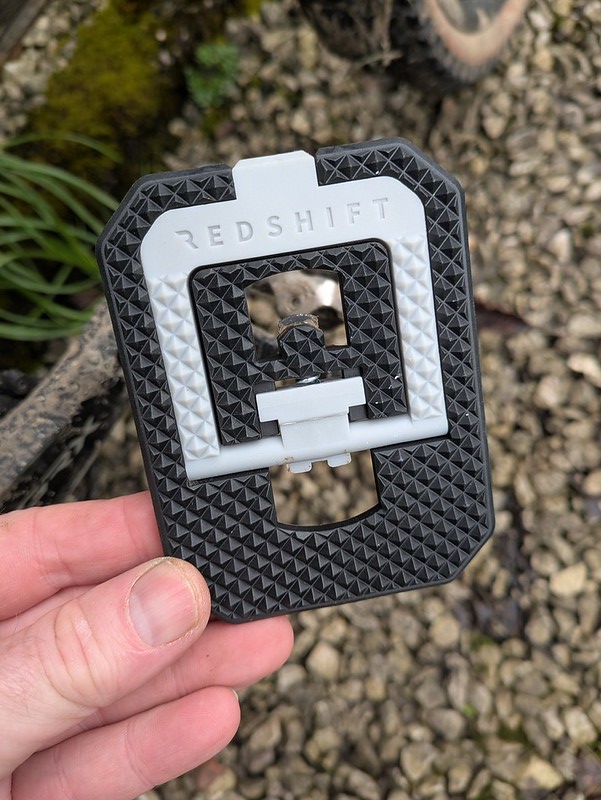
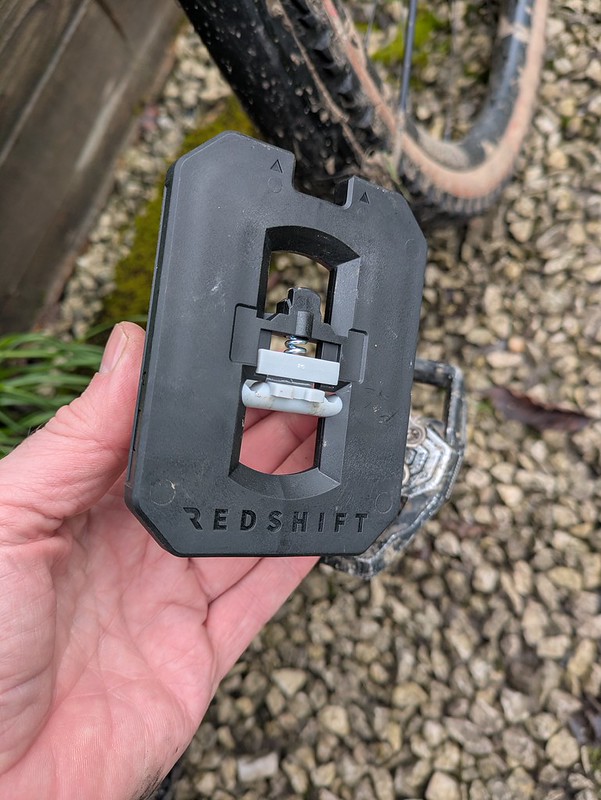
Redshift Mousetrap Pedal Adapter frontRedshift Mousetrap Pedal Adapter open
You just lift the lever, place the adapter on the pedal, it even has “front” embossed into it so you can’t get it wrong, then when seated you just close the lever and the adaptor is locked securely to the pedal. Guess how you release it? Yes, pull the lever and off pops the adapter, simple but effective, aren’t all the best ideas like this?
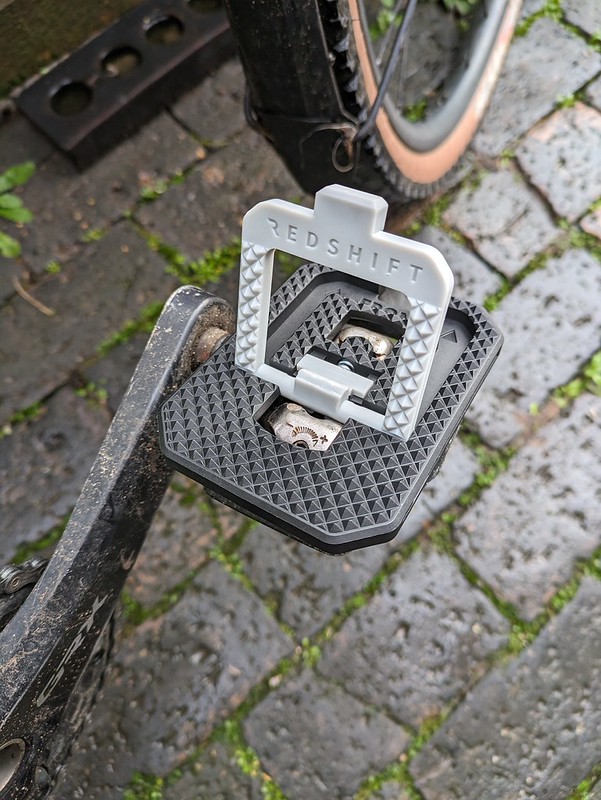
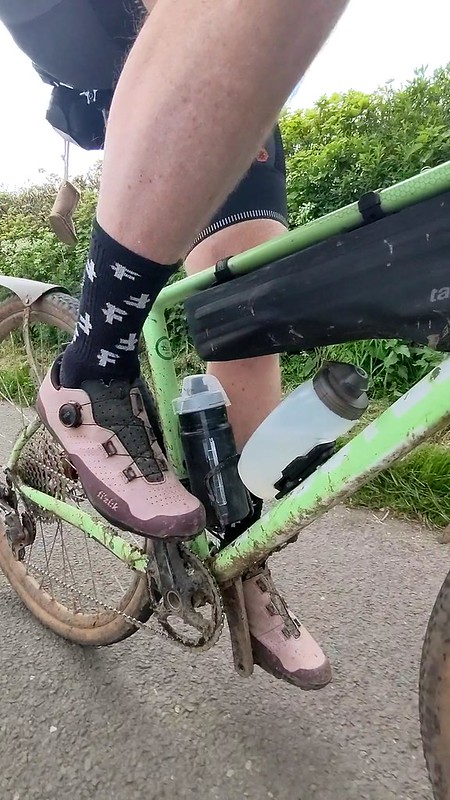
Ok, so like any one sided pedal, the heavier side with the adapter will always swing to the bottom so you will have to learn to look down to ensure you flip the pedal over with your foot, but thats hardly a chore and soon becomes second nature. Worried about loosing one? no need they have a tiny magnet that sticks them together for storage.
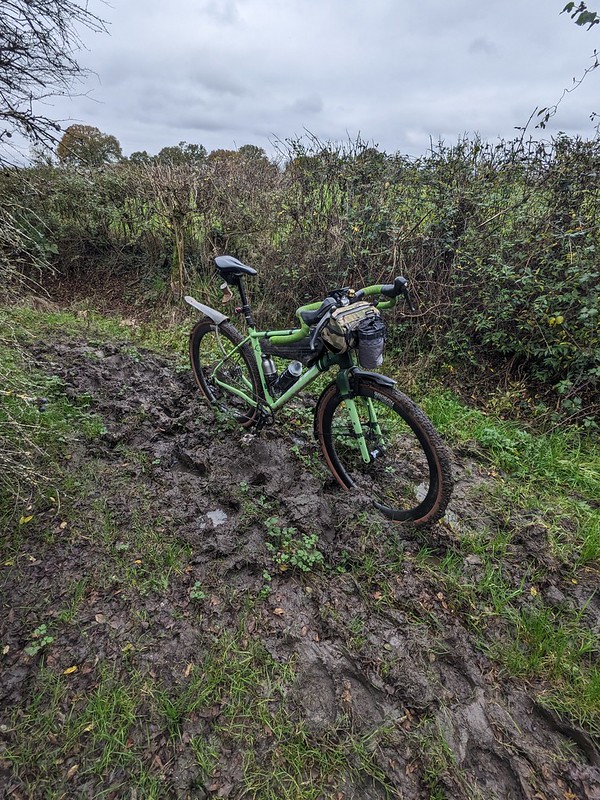
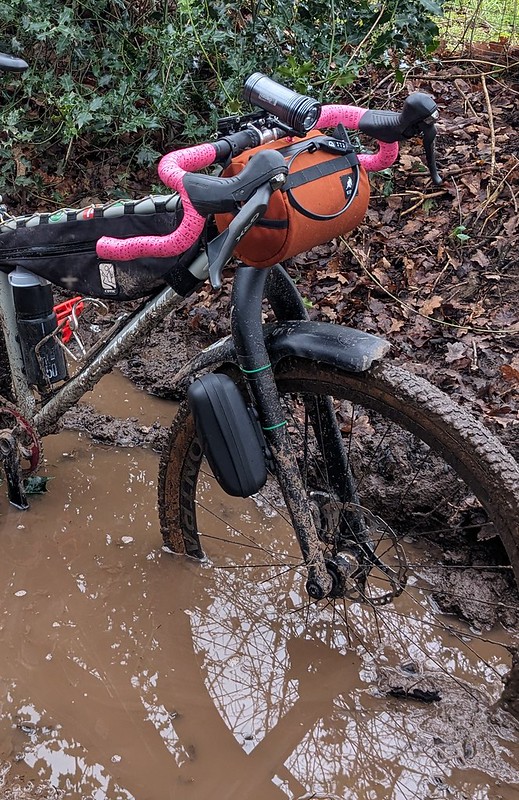
Redshift say they are not recommended for off road use and you can see from the tread they wouldn’t be grippy in muddy conditions. That’s not to say I haven’t ridden them off road as there’s some cheeky singletrack on my “commute” that I can’t resist and they’ve been fine.
Don’t like the colour? there will be options with different colour levers. They are Shimano SPD compatible only at the moment but SPD-SL, Look Keo, and Crankbrothers compatible variants will be out in Autumn 2026.
You may not need these adapters but for those of us who use our bikes for lots of other things apart from weekend riding the Redshift Mousetrap pedal adapters are a great design and the perfect thing to keep in your work bag/car/van for those unexpected but essential rides for beer, cake and sadly to work.
I’m going to try to write this first paragraph without sounding like an old git reminiscing about the good old days of biking. First off I’ll say that the old days, the late 1980s early 1990s when Mountain bikes were new and those of us who got into off road riding at that time took our first pedal in the dirt were pretty bad. Bad bikes unless you spent a silly amount of money, bad components and hardly any parts back up if you broke anything. This was pre internet so no surfing the web for the best prices or “how to” videos, even your local bike shop unless you were very very lucky was really only interested in road bikes so were reluctant to stock parts for MTBs…….ok, I know those of you born this side of the milienium are now thinking “get on with it grandad!” well my point is (and this will reinforce the old fogey opinions) you’ve never had it so good!
Back then, we expected that the bike was probably not going to make it to the end of the ride without some sort of mechanical. I’m not just talking punctures either although they were many as we only had tubes and tyres were heavy and still managed to be fragile. I’m talking about broken chains, rear mechs, front mechs (remember them?) 26″ rims that needed truing after every ride, ball bearings either seizing as the seals were so bad water just flowed straight past them or bearings just falling out as the manufacturing tolerances were stuck in the 70s and not designed for the job. It was fun, learning to rebuild your bike on a friday night until 1am so you could at least get to the start of the ride on Saturday morning was a great way to learn how things worked and I’m still amazed I could rebuild a shimano freehub with bearings scrounged from my local motor factors on my stairs with totally inappropriate tools, some of which came from the cutlery draw in the kitchen!
I think I’ve painted a picture there and I’ve done it to point out how good todays bikes are. We have come a long way. The bikes still shift with deraileurs be it cable or electronic but I can’t remember the last time I had a mechanical problem out riding and with the advent of tubeless technology I have to check my pump and tyreslevers are still working every now and again as they get used so infrequently. Bikes are much more reliable now and are built so they can take on the demands of off road riding and still be in one piece afterwards. But being blasé about this reliability is a mistake. Even the best most expensive bike still needs maintenance, you need tools to do this and to fit those gram saving upgrades to your pride and joy, some tools will even indirectly save you money.
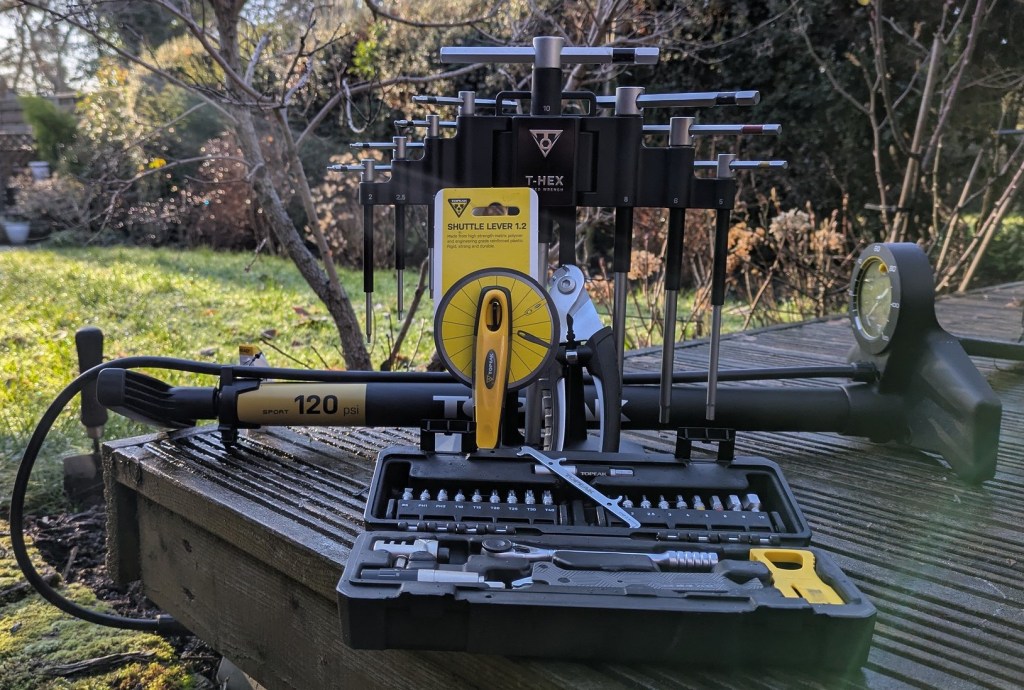
So here are a few of the tools I think every home mechanic should have in the garage/shed/bottom of the stairs, Topeak and their importer Extra UK very kindly took a look at my list and sent out the Topeak tools they thought best fitted the bill.
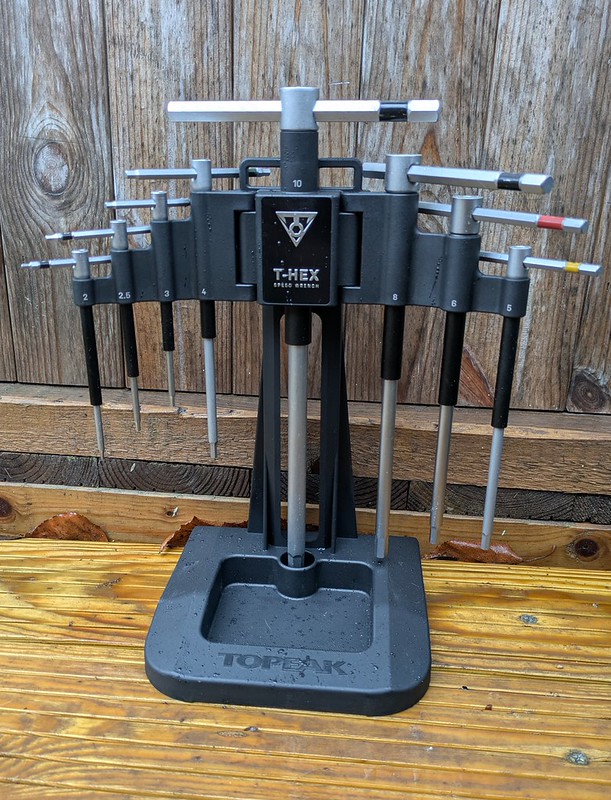
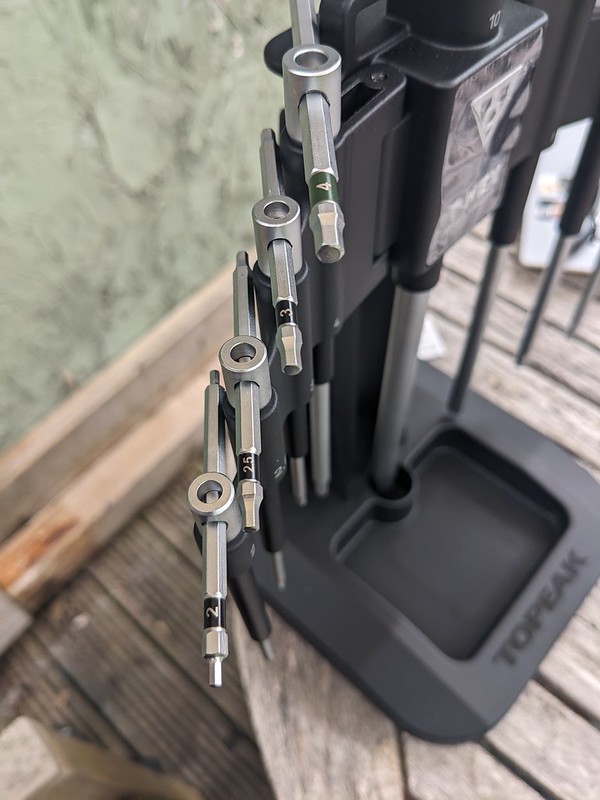
Topeak Hex set
A good quality set of Allen wrenches/Keys should be at the heart of every cyclists home maintenance kit, this one from Topeak runs from 2, 2.5, 3, 4, 5, 6, 8 and 10mm. They are “T type” and the T piece is moveable, sliding from one side to the other enabling you to get into tight areas. The T gives you more control and leverage than the standard “L” shaped wrench. Each also has a plastic “speed” sleeve on the main shaft which you can hold while you twizzle (technical engineering term for turning rapidly) the end for rapid tightening and untightening of bolts. The wrenches have a straight cut end rather than a ball end. This makes engaging bolt heads at an angle more awkward but does ensure the risk of rounding off of allen bolts is reduced and gives excellent tool to bolt engagement when undoing stubborn hardware.
The tools come in a plastic stand that feels robust, has a magnetic tray so you don’t loose tiny steel parts and the hex key carrier can be detached to hang on a tool wall. It also fits to topeaks work stand, the E-up Pro. The tools seem to be of excellent quality and weight and should last many years of bike tinkering by expert and the most hamfisted amongst us *waves* alike. The size range should be adequate for all modern gravel, MTB and road bikes unless your bike has some left of field bolt head sizes, if it does its probably Italian.
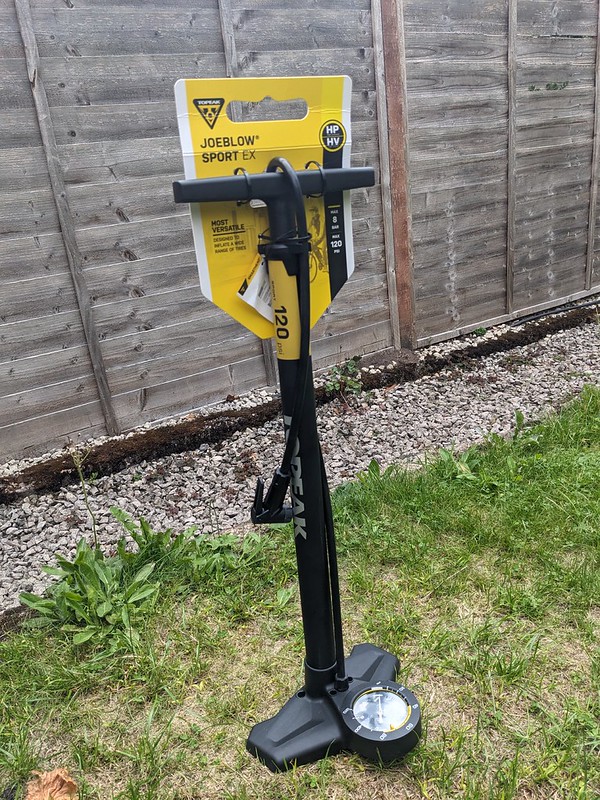
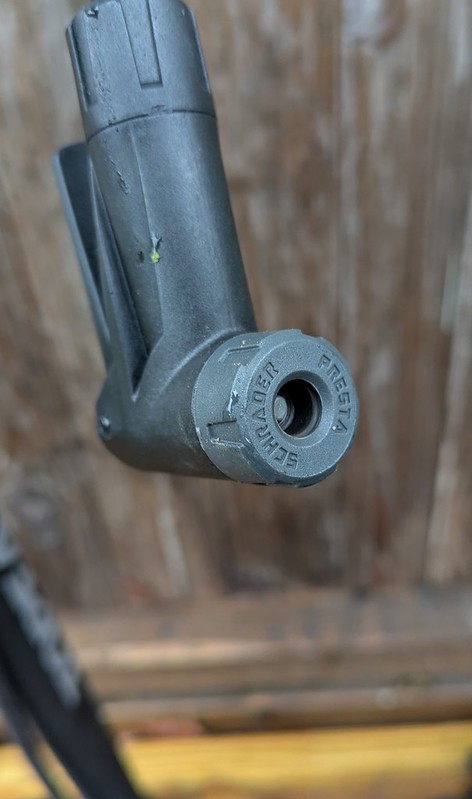
Even in the days of tubeless tyre technology you still need to add or reduce the air pressure in tyres. A track pump is a home workshop must have. It takes all the work out of pumping up tyres that you get with using a small hand pump. This JoBlow 120 is the ideal thing to have, it’s not complicated at all, you don’t even have to swap parts in the pump head to change from Presta (thin) to Schrader (car valve) valves. The Topeak smart head does both without fuss. I even used this pump to inflate a car tyre in an emergency one frosty 5am Morning. There I was half asleep on my non working day standing outside not looking forward to swapping and losing the parts of my old pump (all are set to presta) in the dark but i suddenly thought of the smart head and it just pushed straight on, with the lever locked I was able to inflate the tyre and get my other half off to work and go back to bed, I was in love with Topeak smart heads from then on!
The Topeak Sport EX pump will inflate tyres to 120psi, hence the name but even roadies have abandonned rock hard tyres now haven’t they? but if you need that pressure it’ll do it. I’ve even used it to seat tubeless tyres but that might be more about how tight the tyre bead was on the rim and the quality of my rim taping. It isn’t designed for that job but it was a pleasant surprise. The pressure dial is large and even though its situated at the bottom of the pump it is easy to read. I’ve got nothing other than my thumbs to test the accuracy of the dial but it is definately in the ball park of how much squidge I like from my tyres at 30psi. The pump has a barrel made of steel and a plastic foot and feels sturdy enough to take some knocks. At less than £37 at time of writing it is great value and I can’t see you needing anything more than this for your home workshop.
Topeak cable cutterTopeak cable cutter’s nifty cable end opener
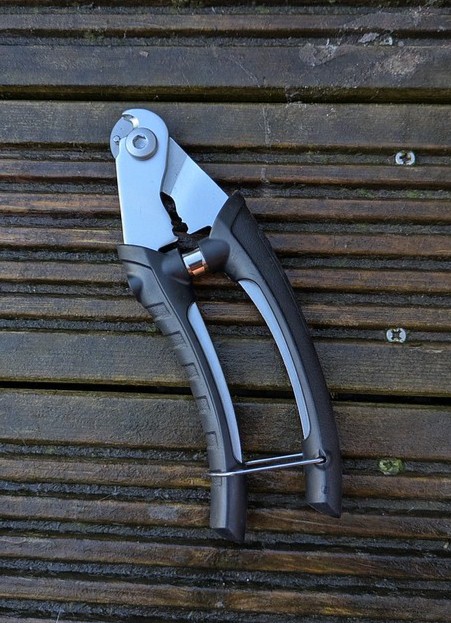
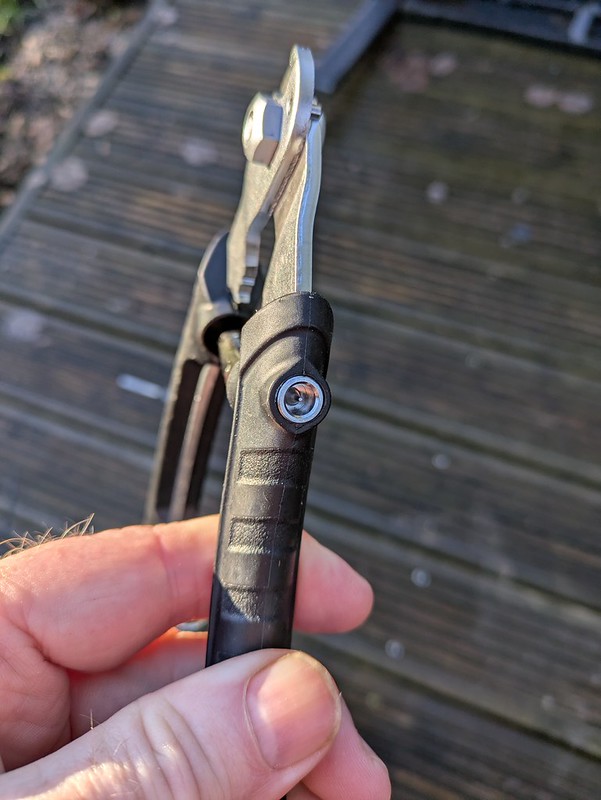
Frayed cables not only look bad they can get you into trouble too. The frayed end can fail, pull out form under a bolt when under tension and this is at best a loss of gears and at worst a loss of teeth if its a brake inner on a non hydraulic system. Frayed cables are also a nightmare to thread through cables and ferrules if not cut precisely. The Topeak cable and housing cutter looks like a set of garden pruners but it is a simple design that works perfectly every time. They are long enough to get the required leverage to cut neatly through gear and brake inner cable and also through outer cable leaving a neat end with no fraying. They are spring loaded too making life easier. These cutters also have a bonus feature I’ve not seen on other models and thats a little pin that you can push into an outer cable and to open up the plastic sleeve to allow much easier access to pass an inner cable through. In a world where there are 100s of cable cutters out there doing the same job that little feature elevates the Topeak version above all the others.
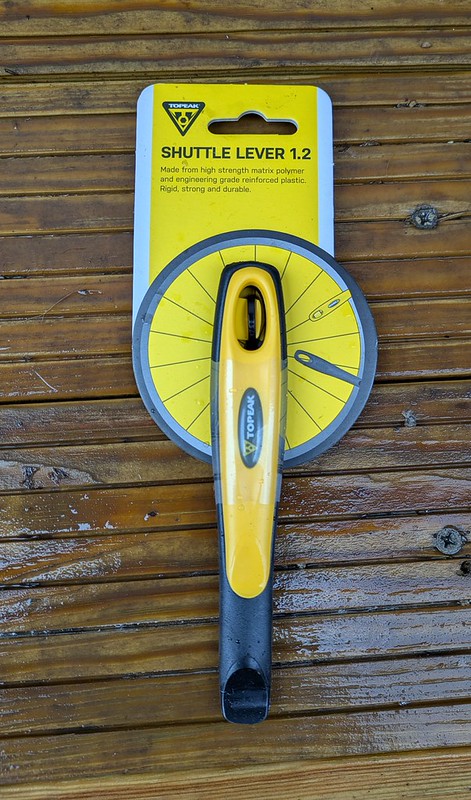
Topeak Shuttle tyre levers
With the demise of tubed tyres, tyre levers have become somewhat redundant until it comes time to swap tyres. These Topeak shuttle levers then are a worthy edition to your tool arsenal. Made of tough engineering grade plastic (I presume that makes then stronger?) they come as a set of two levers, one long and one shorter. The longer one has more leverage for stubborn tyres and because they are plastic they are less likely to damage rim tape or wheel rims if you have to get aggressive with them. They clip together which should stop them from getting lost in messy sheds or cars.However, because of the size of the one lever its not something i’d carry on the bike as they’d take up too much room and if you are running tubeless you’ll hardly ever need them but they are perfect for home and when a little more oomph is needed to remove or pop on a tyre.
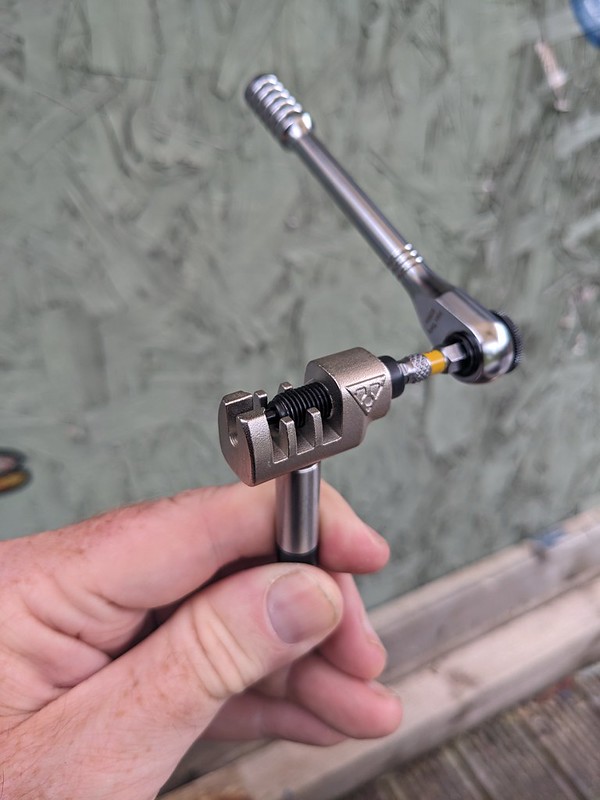
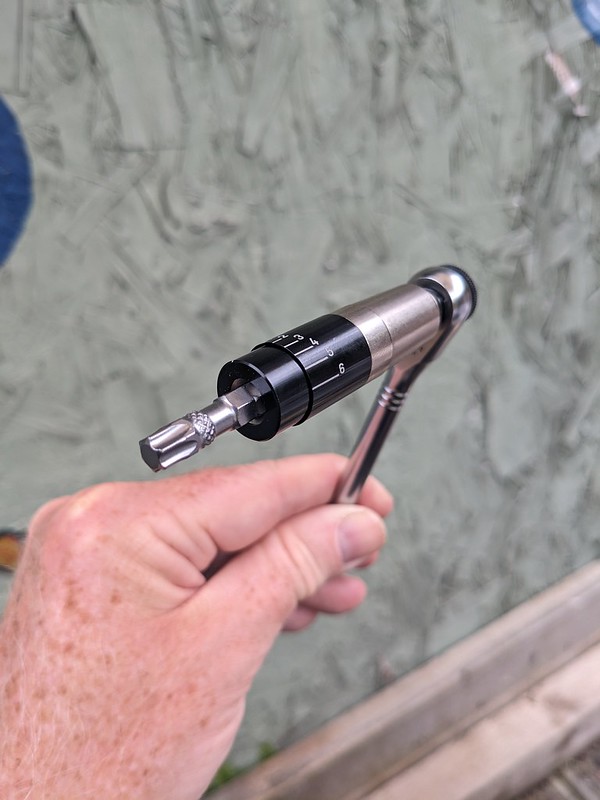
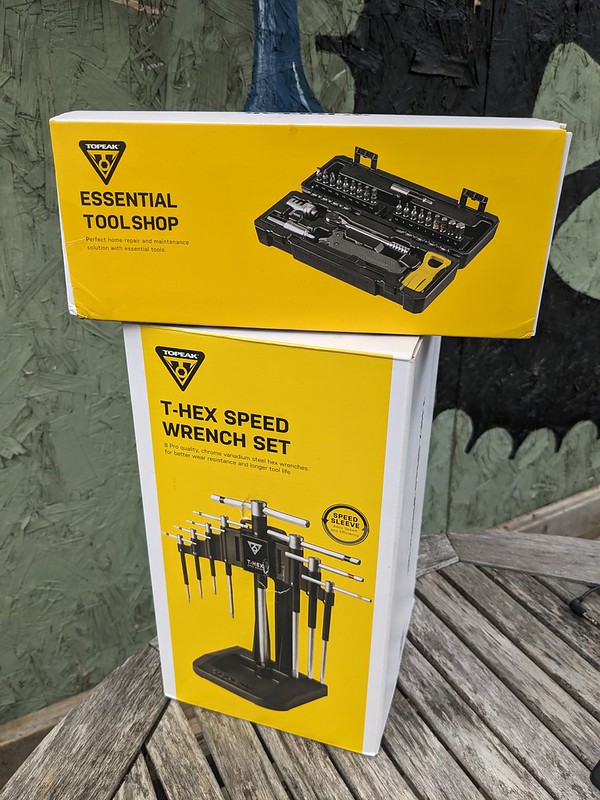
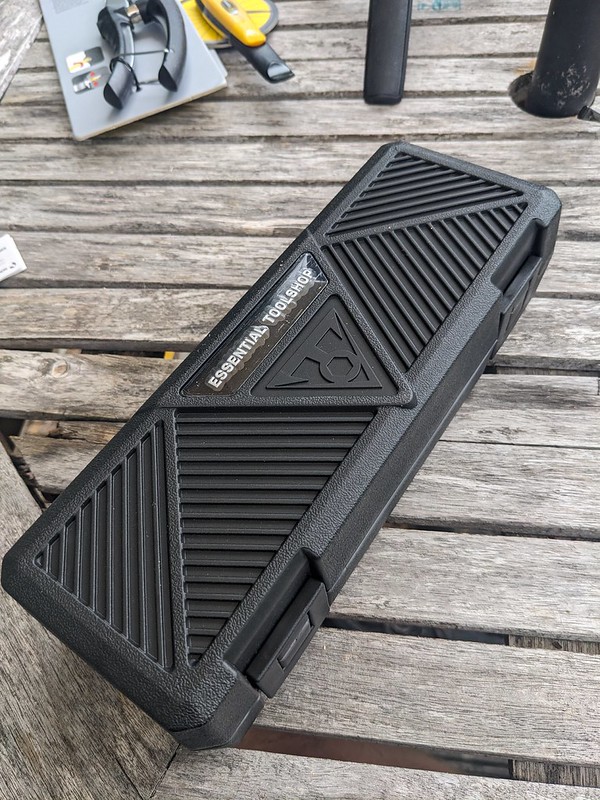
Topeak Essential ToolshopTopeak chain tool and ratchetTopeak torque sleeveTopeak quick link pliers and chain hook
Up to now the tools have been the basic essentials you get you started with home maintenance. Now if you want to go a touch further Topeak have their Essential Toolshop and it is pretty comprehensive. It consists of Hex (allen) bits 1.5, 2, 2.5, 3, 4, 5, 6, 8 and 10 mm. Torx bits T10, T15, T20, T25, T30, T40. Phillps x 2 and flat head bits. it has a ratchet for the bits with an extension bar (or speed sleeve as Topeak call it), a chain tool, chain quick link pliers and chain hook to aid rejoining chains, a disc brake/pad spacer and a “torque sleeve” to make sure your bolts are tightened to manufacturers spec. this all comes in a robust compact carry case.
Weirdly, even though this is a lot of tools, all of which are relevant for home bike maintenance the bits are small and fiddly and when swapping the most used bits, the 4-5mm I soon reverted to the Hex key set above. However the essential tool kit was perfect for keeping in the van/car for car park repairs or bolt checks, it’s come on every biking holiday and was much better than lugging bigger tools around. So, if you are stuck for space at home, I have friends who have to keep their bike in a cupboard under the stairs Harry Potter style then the Essential tool kit is ideal for keeping on a shelf somewhere taking up minimal space and works equally well in a cluttered garage or shed filled with lawn mowers.
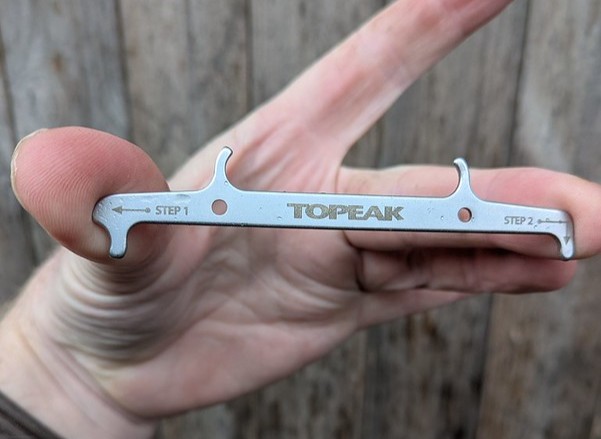
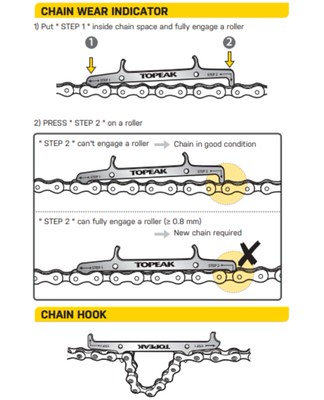
Topeak chain wear indicator
Finally a tool every cyclist should own. If you don’t own any other tools i recommend you buy one of these first. Its a chain wear indicator and it’s a tool that can save you money. A chain wears out, even a well lubricated one wears out and wears the other steel components it touches such as chainrings, cassette sprockets and pulley wheels on a rear derraileur at the same time. This is fine if you regularly change your chain. however if you don’t and wait until a chain is so worn out it starts to affect shifting or all the teeth on everything resemble sharks fins its too late. The wear on other components will be to such a level that simply adding a new chain won’t be enough. that brand new unworn chain will not interact with the other components that have litterally changed tooth shape to match the other chain. this causes skipping and chain slip. This is where it gets expensive, changing a cassette, chainring and associated items is going to cost an absolute fortune in parts (and labour if you need a mechanics help).
So this tool that costs less than £6 can save you hundreds of pounds by letting you know when to change a chain before it starts wearing out your drivetrain to the point of no return. it’s very straight forward to use but rather than write paragraphs in a “how to” style i’ve stolen Topeak’s instructions to show how easy it is, I’m sure (hoping) they don’t mind.
All of these Topeak tools I’ve written about have been in use working on my bike for the last 4 months. they endured my hamfistedness, got covered in oil and grease, have been sworn at when I’ve dropped one and the bolt I’ve been loosening has fallen to the floor never to be seen again. The essential tool kit has been to 3 different countries in the back of my van and saved a couple of my rides from being cancelled and helped a few strangers to get their bike going again. I’ve even fixed a couple of machines at work with that kit as no tools were in site! Nothing has broken, none of them look worn out so i’m confident to say that they will last the average home bike mechanic for years and years and with that longevity in mind it makes the inital outlay to buy them seem more and more insignificant.
You can find all of Topeaks tools, those above and many many more on their website here but be careful, once you start buying tools it can get addictive!
Over the last 6 months the bike accessory market has seen a flood of “E-inflators”. These small rechargable pumps have been marketed as a replacement for the traditional hand pump. Those pumps have been around really since bikes changed from solid tyres to pneumatic rubber versions and are carried on the bike or in a pocket so in the event of a puncture or just a tyre pressure adjustment to cope with a change in riding terrain you can add or release air to suit.
The big thing that those traditional pumps have going for them is that they are mechanical. You as the rider are the engine that powers them. As long as you’ve made the required number of cake shop stops on your ride you should have endless energy to power them. The downside of course is that you need to carry that pump and pumping up a tyre, especially a road tyre to say 90psi takes quite a bit of effort. CO2 cannisters I hear you say! small, effective and they can seat a tyre onto the wheel rim easily. What I say is that they are mainly a one shot job, if you get the applicator incorrectly fitted to the valve you lose all the gas in one go, they can burn your fingers with the extreme cold the escaping gas produces and that cold doesn’t always play well with tyre sealant. They are also not refillable and become litter straight away.
So a small, rechargable pump sounds ideal doesn’t it. lightweight compared to a frame pump, can be used again and again and they work with any sealant on the market. The air being pushed out of them even creates heat instead of cold (there’s even a warning about this on most inflators). The fact that it’s powered by a battery (hard to dispose of) and charged by electricity that (in the UK) is generated by coal fired or nuclear power stations and so is bad for the enviroment is another thing to consider. Then again modern frame pumps are mostly plastic and lets not even go there!
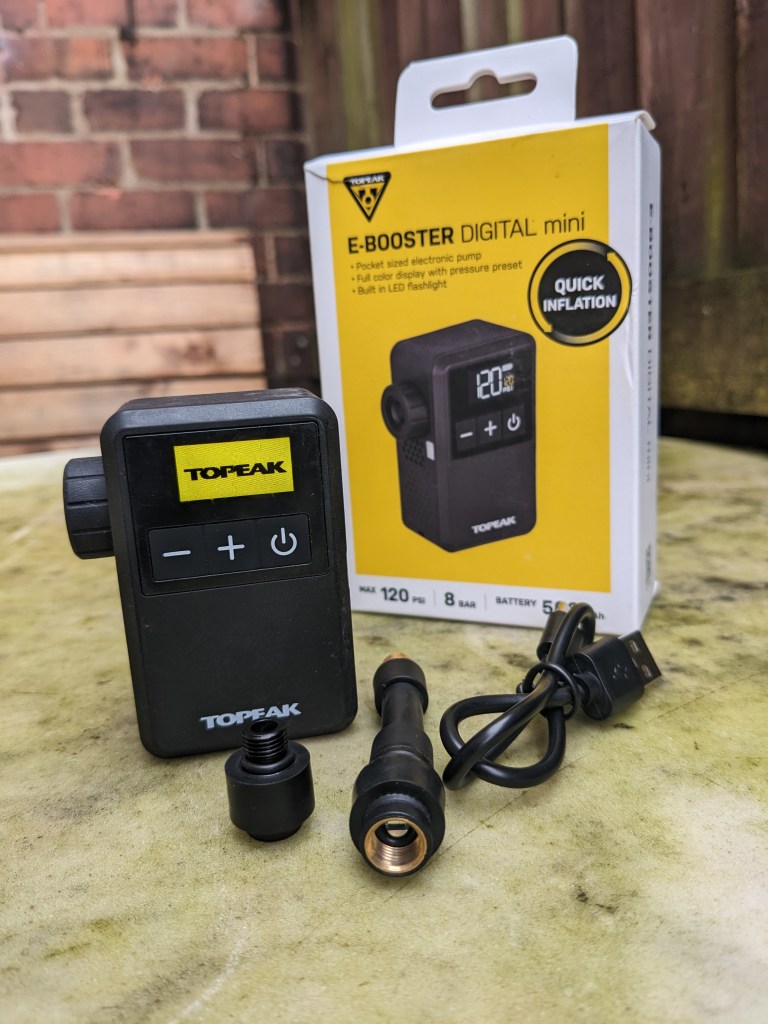
So, with the positives and the negatives of the concept of an e-inflator laid out lets look at the Topeak E-Booster mini. I’ve tested quite a few inflators now (5 others in fact) but the Topeak version has come along as the first that has UK distributor backing when it comes to warranty etc. Obviously they are all manufactured in China. All the others were direct from China also and any issues would need to be dealt with by contacting a company overseas. So 1st point to Topeak and Extra UK.
The Topeak E-Booster Mini weighs in at only 121g on my unverified kitchen scales and is 5.4 x 3.2 x 7.3mm in size.. It has an electronic display showing battery status and switchable PSI/BAR, an on/off button and +/- buttons. it comes with interchangable parts to fit presta or schrader valves and some disassembly is requred to change these over, but that’s no different to any other pump. Generally you’ll adjust it to how your valves are configured once and never change it again. it also comes with a flexible extension tube so if the inflator doesn’t fit between your spokes because of deep section rims or weird spoke patterns you can still use it. Topeak also recommend using the extension on TPU inner tubes as the heat generated by the pump might melt the plastic valves!
Operation is simple, a long press on the “on” button to turn the pump on. then using the + or – buttons set the PSi you want your tyre to inflate to. Then push the pump onto the valve and press the “on” button once and the pump will start pushing air into the tyre. Here’s a warning, these things are LOUD! and that goes for all e-inflators I’ve tried. The Topeak E-Booster Mini then happily pumps your tyre up to the pressure you’ve chosen and then shuts itself off when the pressure is achieved. If you want to stop it before then then one press of the “on” button will stop the inflator.
I’ve not checked to see if the pump achieves the stated pressure as I don’t have anything accurate enough to check. What I do have though is my thumbs and they are never wrong! So a quick squeeze to see if it’s in the normal range I like and then pull the pump off the valve and you are good to go. An extra feature on the Topeak E-Booster Mini I’ve not seen on any other inflator is the fact it has a torch light. A double tap on the “on” button turns the light on or off, quite handy when you drop your valve cap in the grass on a night ride!
Topeak claim that the E-Booster Mini on one charge will pump 80psi into 700×28 road tyres 3 times and 25psi into 29 x 2.4 4 times. I’ve found that it’ll inflate a typical gravel tyre such as a 700 x 45 to 35psi 4 times. The inflator takes 45-50 minutes to charge from zero to full using a USB-C cable and a little longer if that’s via a laptop or similar. The box also contains a handy drawer string cloth bag to keep the inflator and accessories together.
So, would I choose to throw away my traditional frame pump and just use an e-inflator? Well, yes and no. For local riding which in my case is probably 85% of my riding I’d definately only take the electric inflator. With the reliability of tubeless technology these days I can’t actually remember the last time I had to use a frame mounted pump, in fact I’d better check it’s not seized up! So I’m more than happy to rely on an e-inflator when i’m not too far from home and know where i am at all times and I think 4 tyre inflations would cover any eventuality. If i was riding a multi day ride somewhere remote I’d want analog back up of a manual pump.
Would I chose the Topeak E-Booster Mini over all the other e-inlfators I’ve tried? Yes definately, it’s proved to be reliable and robust, it’s taken a few knocks and drops and continued to work as described but a big thing for me is the UK back up and the peace of mind that comes with it.
you can find more details on the Topeak E-Booster Mini here
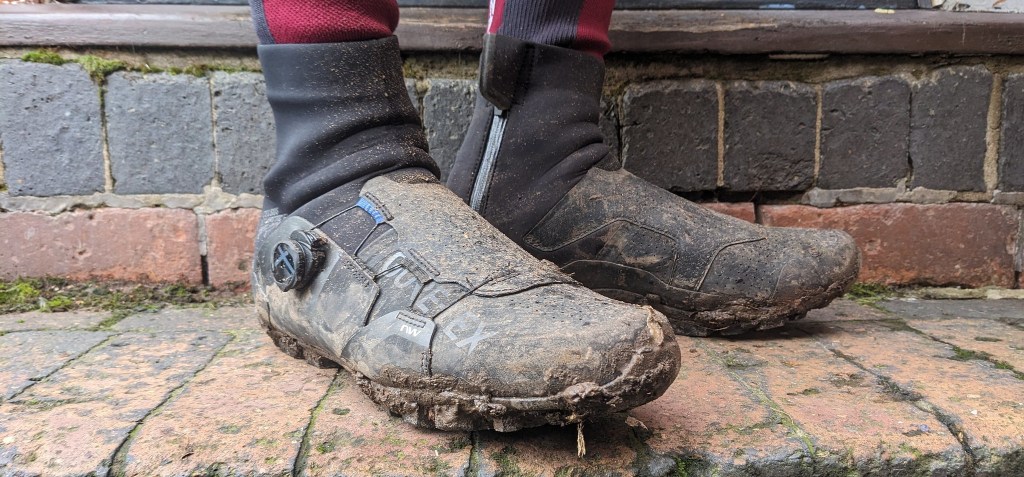
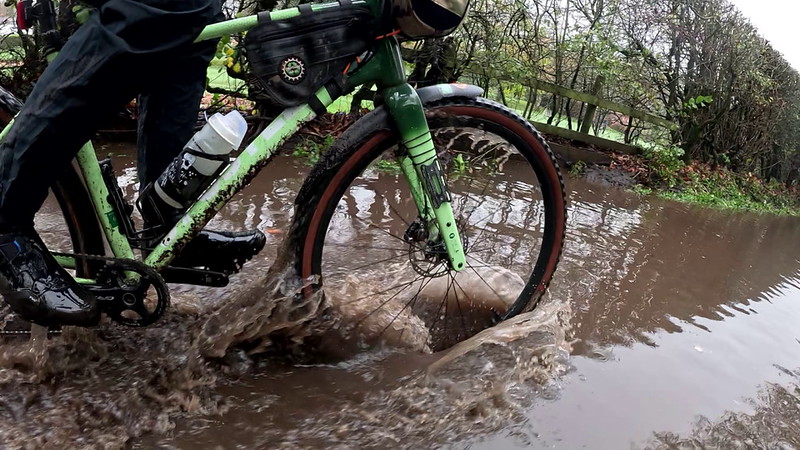
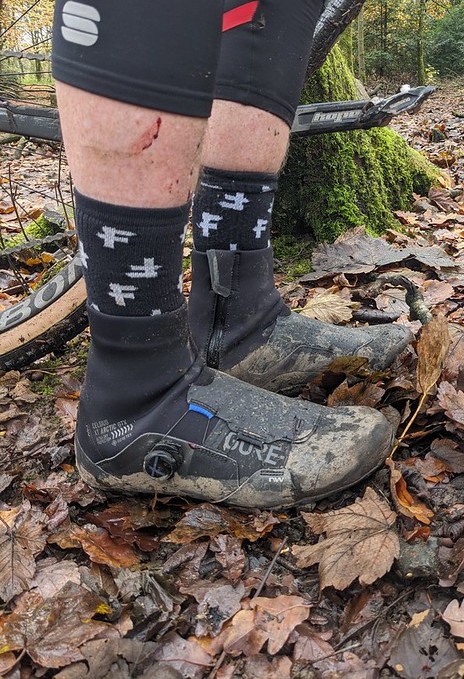
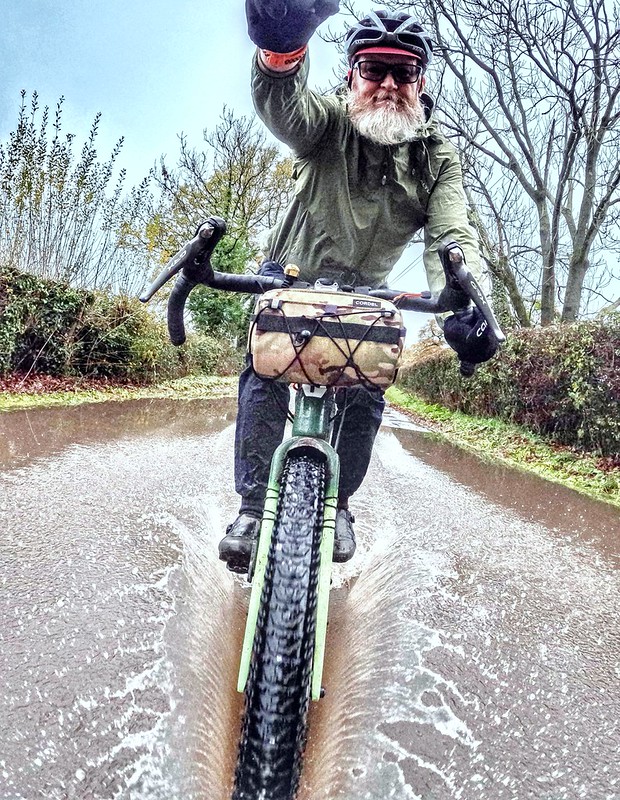
When it comes to feet, mine run cold and I’m always searching for the perfect solution to keeping my toes comfortable when the temperatures drop to single or minus figures. So it was either very brave or very foolish for Northwave to take up the challenge with their Celsius Arctic GTX shoes. Warning: there’s a lot of acronyms and product names in this review, such is the current fashion in the bike industry. Still, “Celsius Arctic GTX” does on the face of it sound impressively warm doesn’t it? Luckily the period of riding in these coincided with the UK weather reverting to normal with a named storm, torrential rain, floods that then turned into a cold snap of windscreen scraping mornings and crunchy puddles, so all in all perfect test conditions!
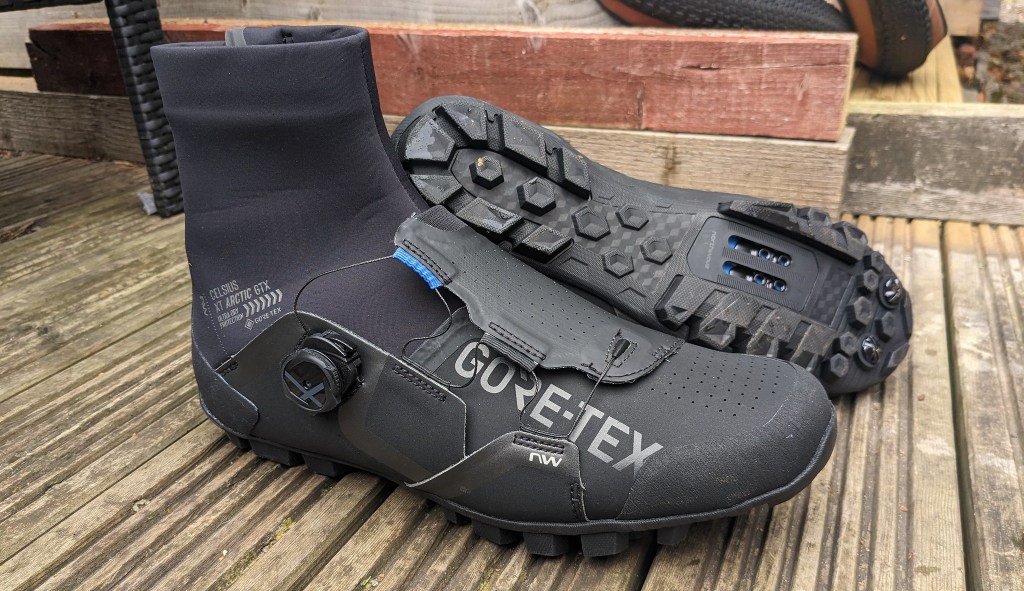
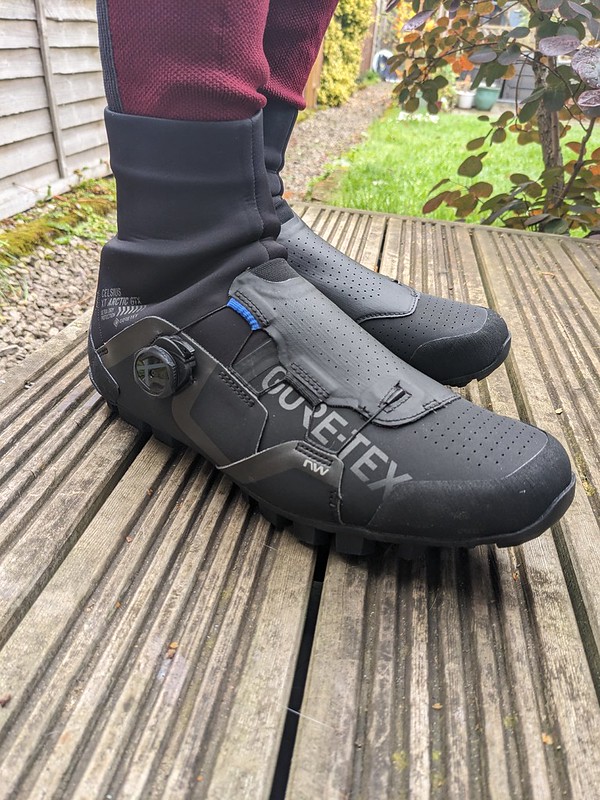
Northwave Celsius Arctic GTX the clean unworn edition
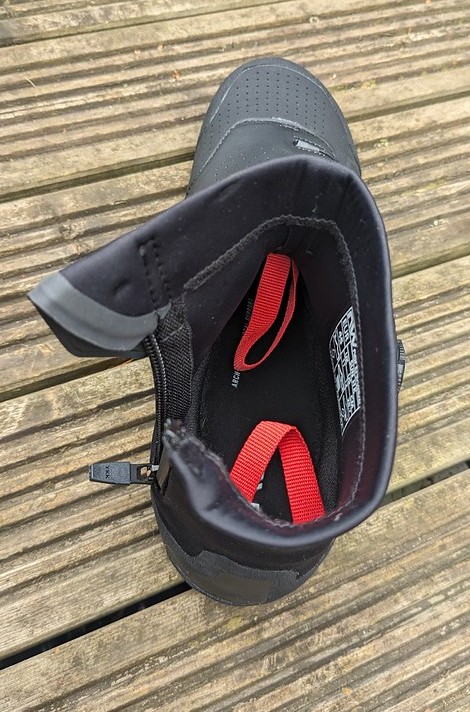
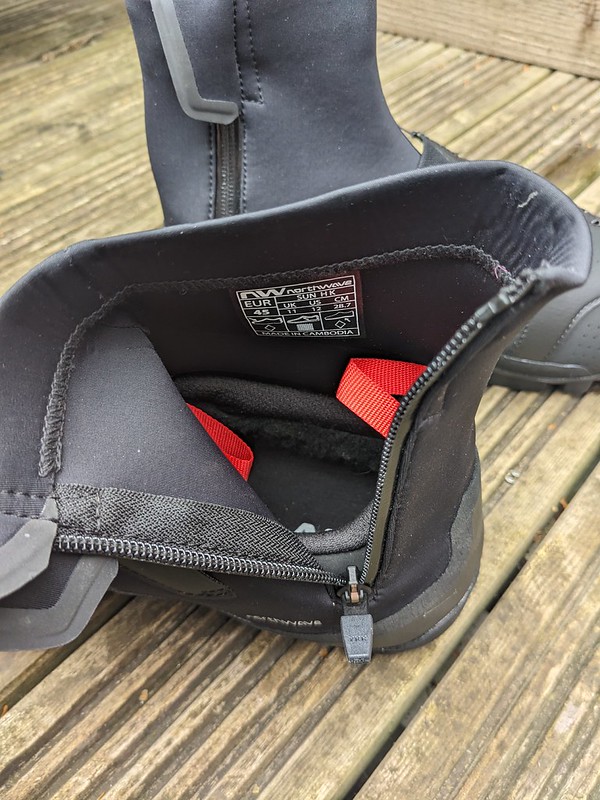
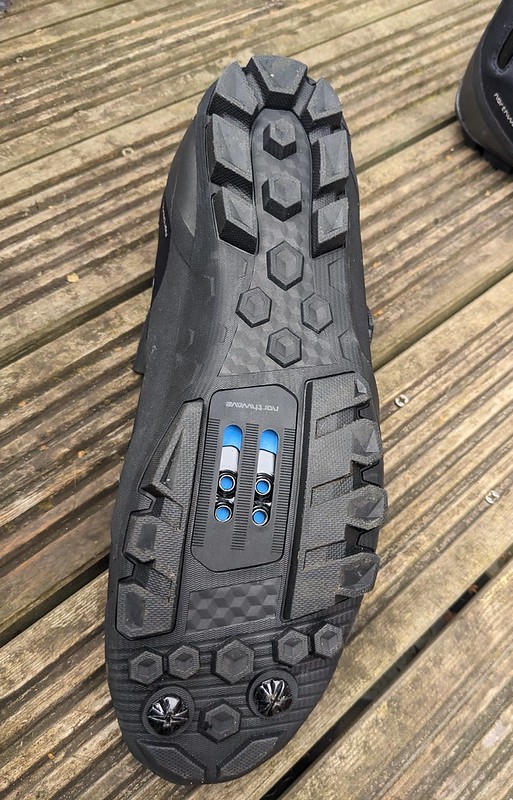
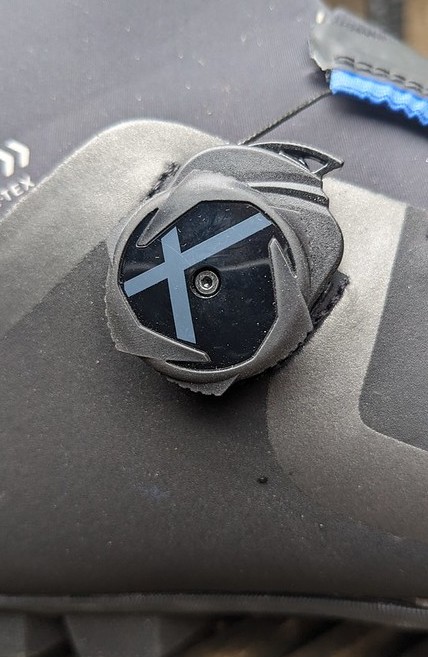
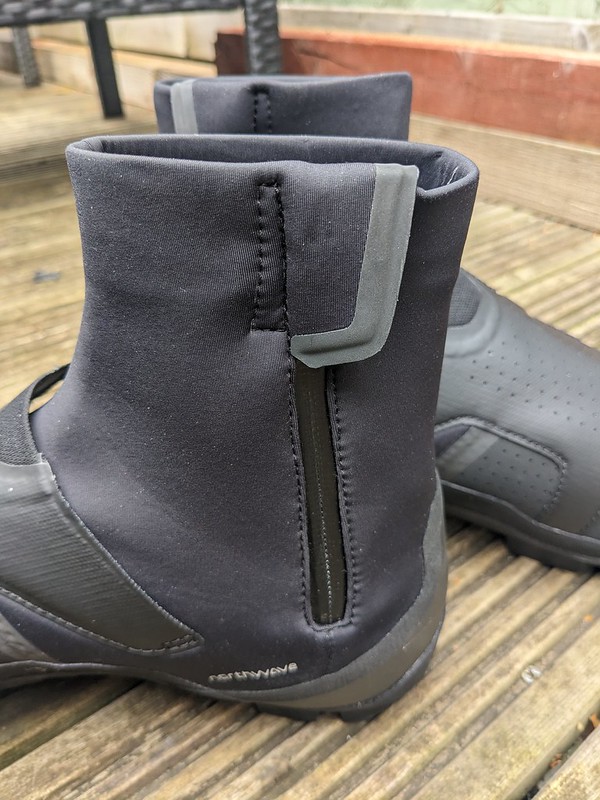
Ok, lets get some of the jargon and acronyms out of the way first, the Northwave Celsius Arctic GTX boots are advertised as having a “Cirrus XT 4L membrane made by Gore-Tex” for waterproofness and breathability, 200g recycled “Primaloft Gold thermal padding” inside and a “4 layer Arctic insole”. More of a shoe with a neoprene cuff than a boot they close using a “X-Dial SLW3” (think Boa but with a quick release lever) and a zip up the inside of the cuff. The sole has an aggressive looking “Jaws Evo sole” tread, with a SPD cleat pocket and the provision of fitting football boot studs at the toe for added traction if you are fit/mad enough to run with your bike on a cyclocross race.
Enough of the jargon, what are they like to wear? Well i asked for a size larger than my normal summer shoe size as I intended to run thicker or waterproof socks with them and Northwave agreed that was a good idea. With a thicker sock on my feet I attempted to put them on for the first time. There’s definately a knack to it. Inside the shoe are two red straps to aid pulling them on and they are needed. It was a bit of a wrestle to be honest and i was instantly worried I needed an even bigger size. However once on and my socks straightened by wiggling my feet in the shoe they felt totally the right size and i had plenty of toe wiggle room. Infact they are sort of T.A.R.D.I.S like as they seem bigger when on than when putting on if that makes sense?
Once on and the dial turned to snug the front of the shoe down and the zip done up they feel really comfortable, there’s loads of adjustment with the X-Dial and the neoprene like cuff fits well around the ankle and allows unhindered ankle joint articulation. So no resistance to pedalling.
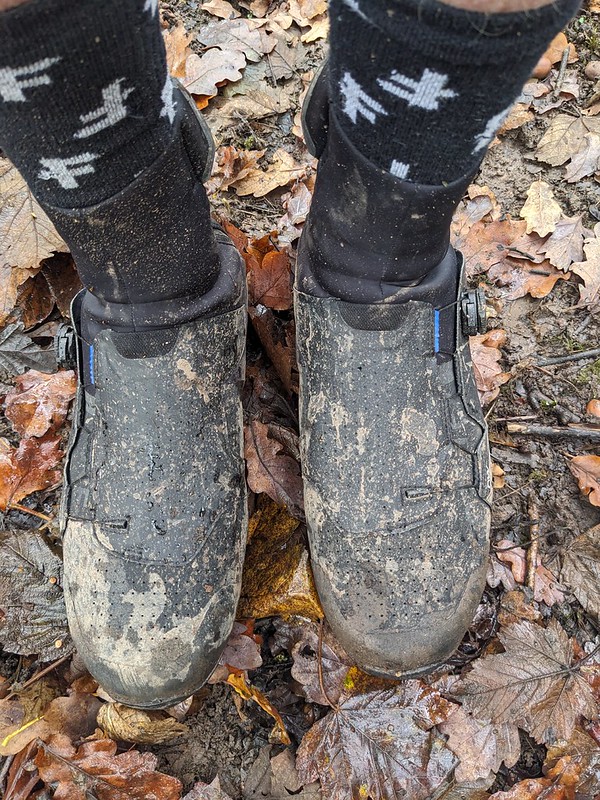
the sole has a very generous amount of cleat adjustment, I’d go as far as saying the most I’ve experienced on any clip in shoe. I set it as far back as it could go thinking the shoes were like most others and soon realised I had to move the cleat back towards the toe which is unheard of in my experience! The sole is aggressive and there’s lots of grip even without the toe studs for hike a bike sections. The close spaced knobs will get clogged with clay and leaves (your soil conditions may be different) but a quick bang on the pedals soon clears them though. Taking of walking, the sole has just the right amount of flex for trotting up muddy trails and lets face it more importantly they won’t make you look like a penguin when walking up to the counter in your favourite coffee/cake/chip shop/pub. Despite this flex there is plenty of stiffness at the cleat for efficient pedalling.
Northwave Celsius Arctic GTX test conditions
Are they waterproof then? the shoe part of the “boot” definately is, i know this because I deliberately on your behalf pedalled my bike through all the floods, stood in X-dial deep puddles and tried to (unsuccessfully) leap across a ford. The neoprene cuff though isn’t, it’s weather proof but will eventually get damp from spray. Bear in mind though that there’s a big hole in the shoe where your foot goes in so a wet sock cuff is equally caused by water running down the leg of my waterproof trousers as much as the neoprene. The good thing about neoprene though and why it’s excellent as a wet suit is that despite being damp it still insulates the wearer by trapping body heat. On the wettest day when i removed the shoes the top of my sock was damp but from the ankle down was as dry as when I put them on.
Northwave Celsius Arctic GTX in the wildNorthwave Celsius Arctic GTX full frontal
Despite having to really tug to get the shoes on the straps have remained intact. the X-Dial looks fragile put I have accidentally smashed it into a concrete bollard (Northwave sell spares) and the release lever allows very easy adjustment, in a juxtposition to putting them on the shoes come off at the end of a ride very easily which messes with my mind somewhat.
Northwave Celsius Arctic GTX X-Dial adjusterNorthwave Celsius Arctic GTX side zip
Did the Northwave Celcius Arctic GTX shoes keep my feet warm? Northwave needn’t have worried (I expect they weren’t losing any sleep) as my feet stayed warmer in these shoes a lot longer than I’ve experienced before. i’d go as far as saying they are the warmest cycling shoes/boots that I’ve tried so far and as the temperature drops the further we get into winter i’m looking forward to spending longer out on the bike than previous years.
Northwave Celsius Arctic GTX making wavesNorthwave Celsius Arctic GTX will never be this clean again
The Northwave Celsius Arctic GTX shoe is a comfortable, efficient pedalling, warm and weatherproof shoe that’ll help you go further for longer in the grimmest of conditions.
Northwave haven’t paid for this review, they took the risk of an honest review, there are no affiliate links or discount codes. I do (I hope) get to keep the shoes, not that anyone would want then after my plates of meat have been in them for a few weeks!
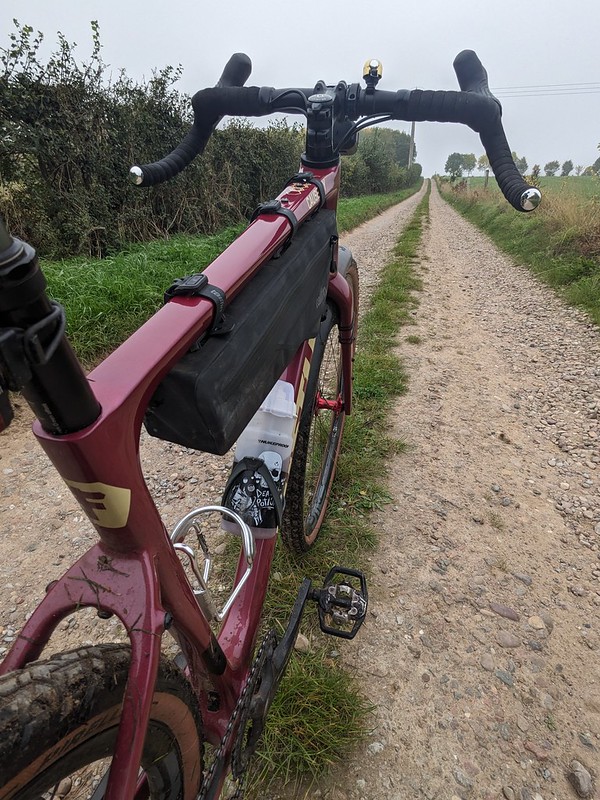
Back in 2020 as the first Covid lockdown loomed I contacted the owner of Fustle Bikes, It was a speculative move on my part. UKGRAVELCO up to that point was mainly based around instagram, reviews were on this website, including a couple of bikes but it was small potatoes really and reviews were mainly via contacts i’d made working in bike shops. I wanted to expand this but not review a bike from the mainstream big manufacturers as every website or magazine did this. instead i looked for more interesting brands who, even though the gravel scene was just beginning to gain momentum, were doing something different and putting their own design ideas into a bike rather than just rehashing a road frame with more clearance but sticking with traditional road bike geometry.
Fustle Causeway G2do both regularly
Fustle Bikes stood out as they were a fledgling bike company based in Northern Ireland and were designing their frames from scratch and using the experience of riding on the very same sort of terrain as we do in the UK rather than Californina or Wisconsin. That bike was the original Fustle Causeway G1 and I got to test it in the spring of 2020, you can read the original review here it’s worth reading the review to get a backround on this new version but if you don’t have the time the spoiler is this….I liked the bike so much i bought a frameset myself and it’s been my main bike for the last five years.
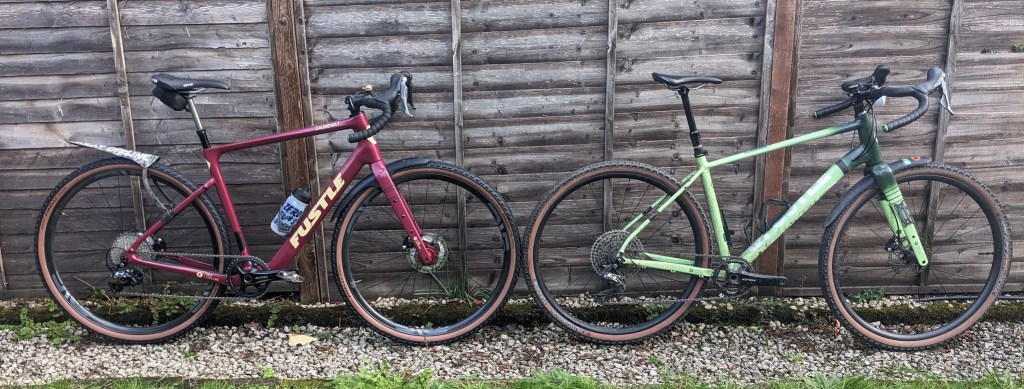
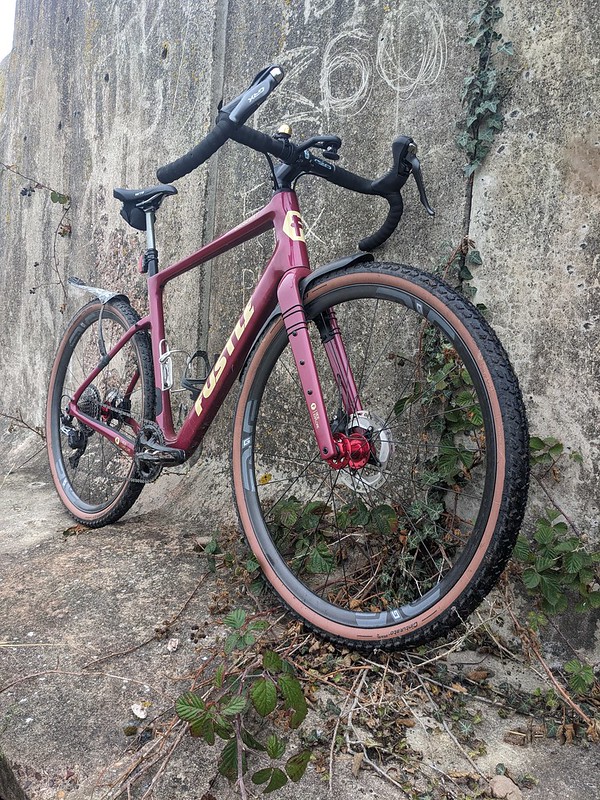
new Fustle Causeway G2 V G1
So to say i was intrigued by this latest iteration of the Causeway frameset would be a great understatement. Fustle in the meatime had brought out another frame, the Lakelander, which leans slightly more towards racing but has had a great reception. it was also Fustle’s first forary into carbon fibre and I was hoping for a version of the Causeway I love but in a lighter plastic package.
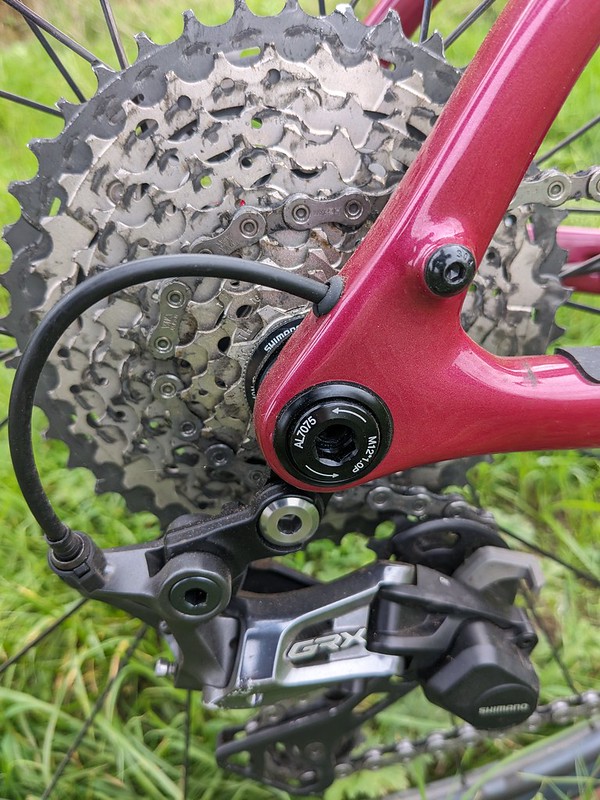
Alistair, the owner and designer at Fustle bikes sent me a bike that he had ridden at a local gravel sportive in Ireland. It was built with a basic 11 speed groupset and finishing kit and He was apologetic that it wasn’t the 12 speed Shimano GRX kit that all the production bikes get, this was down to the bike having launched a month or so before and all the available 12 sp stuff was going on bikes being sent out to customers. It was ideal for me though as my original bike has the very same groupset so comparing the two frames and how they ride would be much easier.
Side by side the two frames look very different. Alistair has taken feedback from customers and his own experience and added features to the new frame. the first is the front triangle. the G2 has much more space inside the frame for bottles or bags than the previous frame. it’s true that two large bottles would reduce the carrying capacity and size of any frame bag you decided to fit on the G1. the new frame manages to add more room without losing much of the standover. the top tube still slopes from headset to seatpost giving ample crotch clearance.
Fustle Causeway G2 mountsintegrated but clean
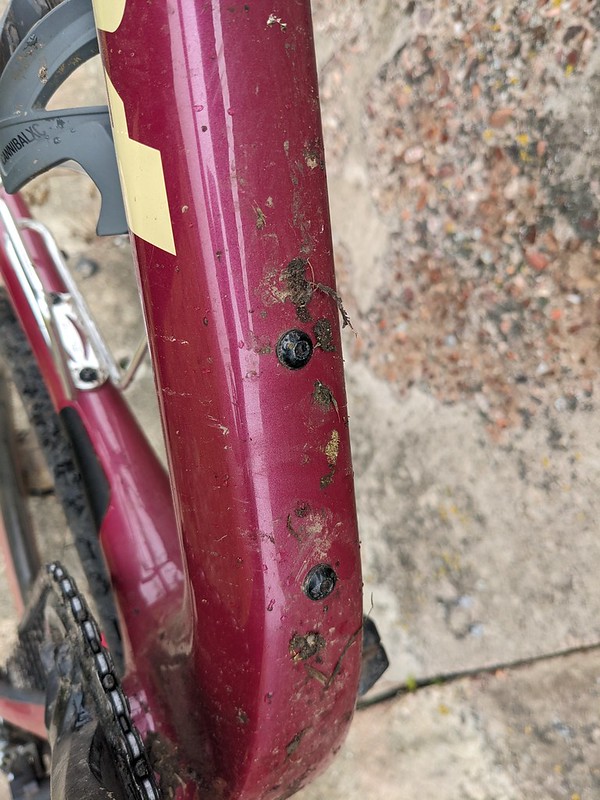
Talking of mounts and bike packing, the G2 has bolt mounts on the top tube, two sets inside the front triangle (one set that has three bolts so you can alter the position of a bottle cage up and down) mounts underneath the down tube, with rack and mudguard mounts on the rear end. The fork also gets three mounts per leg/blade too.
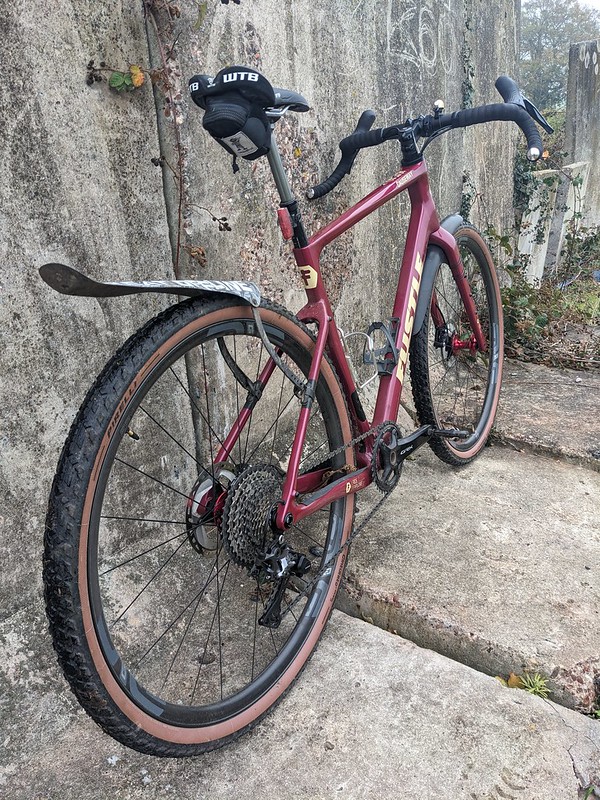
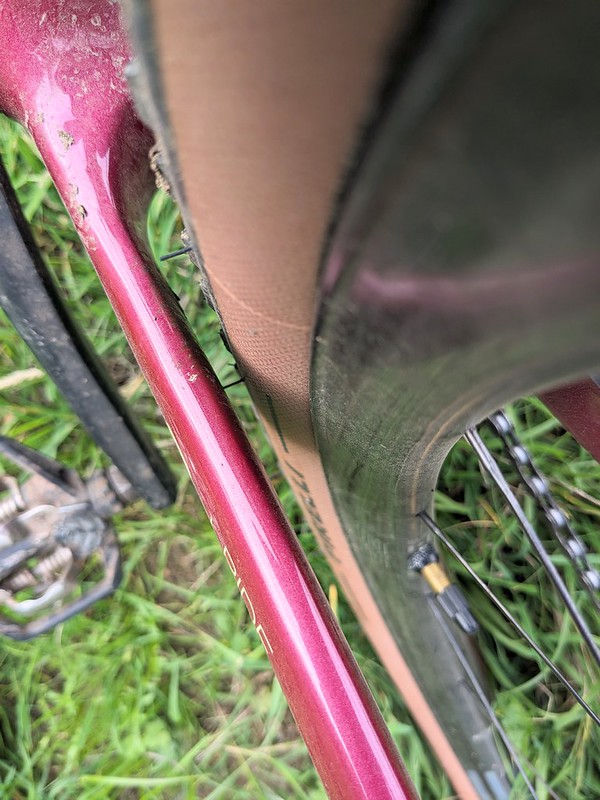
The next big difference on the new frame is tyre clearance. Officially the G2 will take a 50mm tyre with loads of mud room between that tyre and the frame. unofficially, and I’ve tried it, a 2.1″ (53mm) tyre will also fit. So the new trend of big tyres on gravel bikes is covered.
clearancefordays
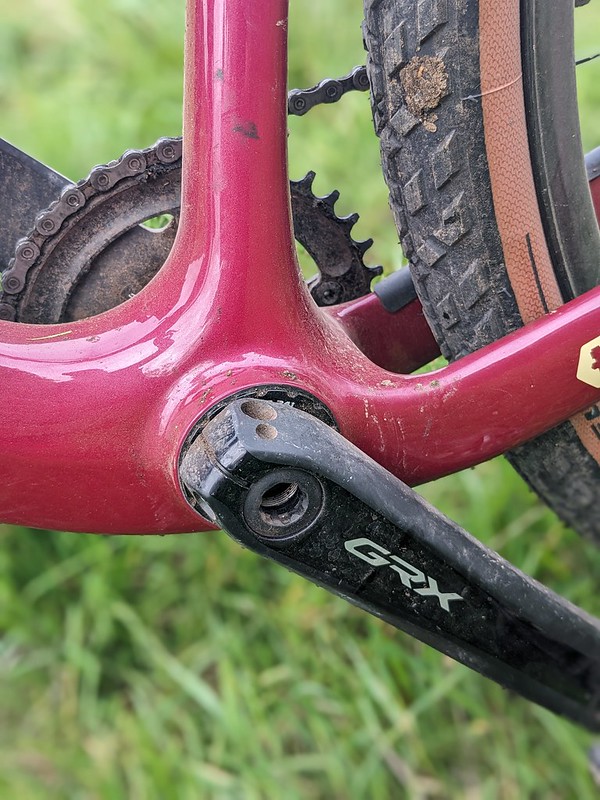
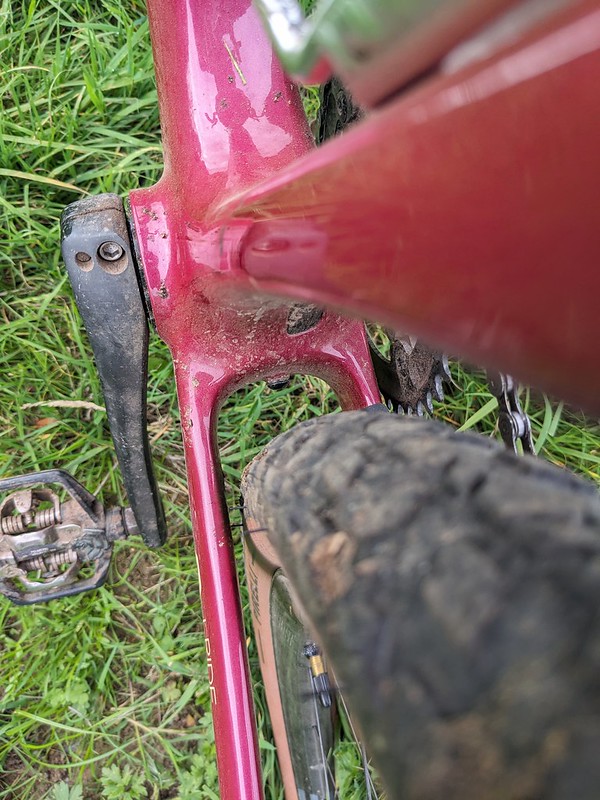
The frame features a T47 bottom bracket. You don’t need to know what that is just know that it is a threaded system and 100% less hassle to maintain and replace than a press-fit bottom bracket would be and thanks should go to Fustle for using this. they also use a Rideworks T47 BB which is a UK company making parts in the UK so applause for that too.
The seatpost clamp and adjustment is accessed from under the rear of the top tube and can be a bit fiddly to adjust as it’s hard to see but this is a minor thing because (especially if using a dropper post) you’ll set the height and not have to adjust it again other than for maintenance.
Fustle Causeway G2 hidden seatpost boltCause and effect
FIT and sizing The original G1 frame came in only 3 sizes, S/M M/L and L/XL and some riders found this limiting when trying to get a good fit. The new G2 frame is avaliable XS, S,M,L,XL so should make the frame accessable to more riders. the geometry of the new bike has been tweaked and the reach is slightly shorter and the head angle a tiny bit slacker. the wheelbase remains the same. Like for like the new frame is around 700g (1.5lb) lighter than the original
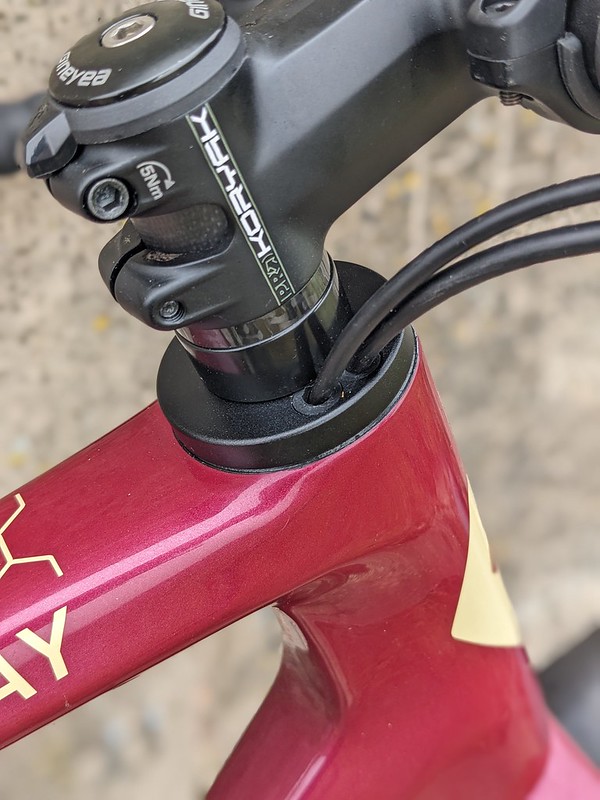
The cable routing is all internal including the dropper post. It looks amazing but does mean all those cables run through the inside of the headset bearings making changing those bearings at best a pain if you have the skills and tools or at worst expensive if you are paying a mechanic to dismantle the bike and rebleed the hydraulic system to change what in effect is a £10 part. Most carbon bikes now have this internal hose/cable routing so it’s nothing unique to Fustle. All that said though the bearings on my G1 are 5 years old and have suffered all sorts of abuse in all weathers and are still as smooth as the day I got the bike so not too much of a worry as Fustle clearly use quality components.
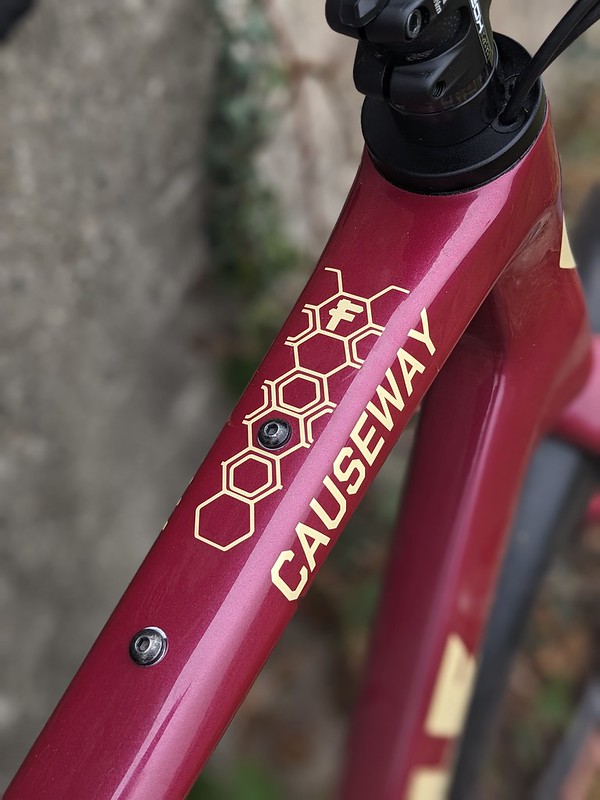
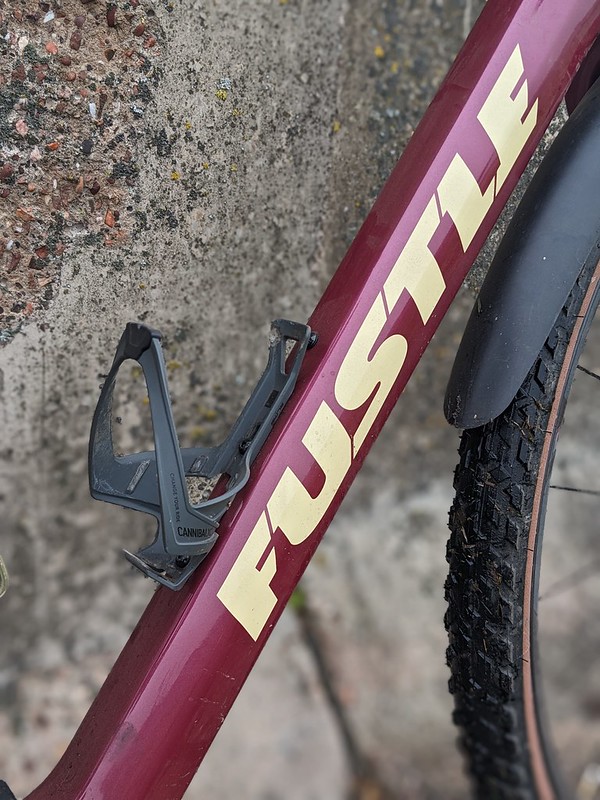
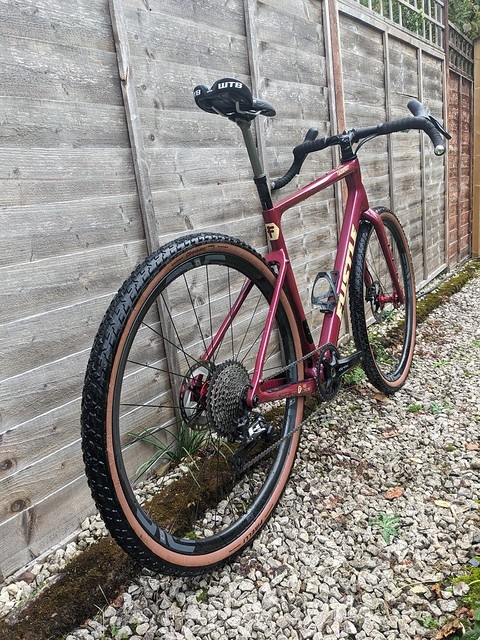
Finally on frame differences is the Fustle branding logo. It’s in the normal place you’d expect on the side of the down tube. I know this seems a weird thing to point out but on the G1 the logo hides under the top tube, gets covered in mud from the front wheel and you can’t see it. just a tiny thing but it’s always annoyed me!
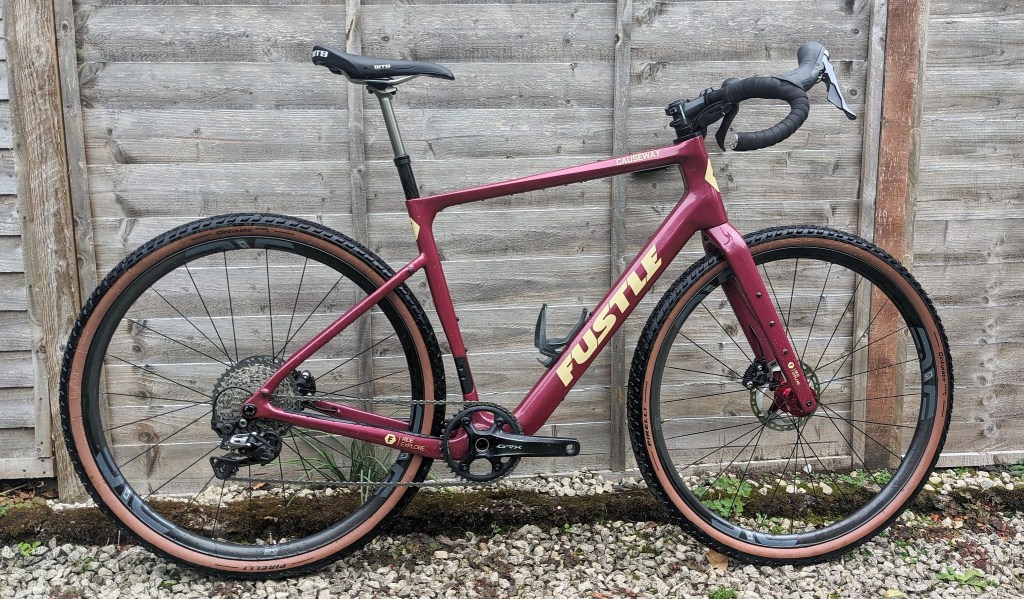
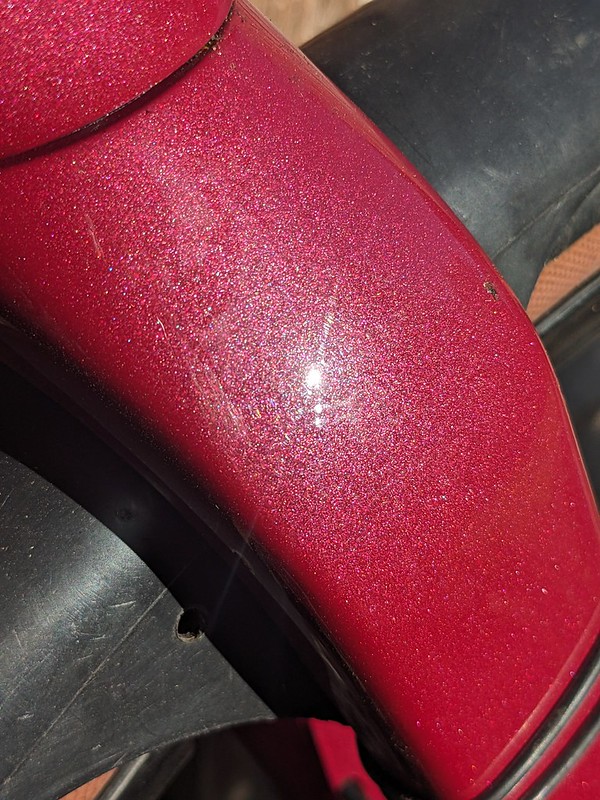
Fustle Causeway G2 logoFustle Causeway G2 paint
i must also mention the paint on the frame too, the colour is “Dunseverick Dingleberry” and is a lucious deep colour that has a lovely pearl fleck to it if seen in the sun. The other paint option is “Bushfoot Dune” which i’ve not seen in the flesh.
HOW DOES IT RIDE So no matter how the frame looks or how many features it has had added it always comes down to how it rides. Quite frankly it’s got big shoes to fill as the G1 rides superbly and in my case definately flatters my riding style. Carbon bikes are often described as being able to dampen fibrations and give a more comfortable ride. Well yes that can be the case but they can also be as stiff as hell and give the harshest feel. It all comes down to how the sheets of carbon are layered into the mould and where stiffness is added or compliance dialled in. Alistair the designer has vast experience of bike design and has put all that knowledge into the G2 and it shows
Tarmac, yes the T word, I know some of you spend a lot of time on the black top on your gravel bike so i need to tell you that the G2 bowls along very efficiently on tarmac and yes on our current rough ass roads it does feel smoother than the G1. it also turns into corners well with no flex at the head tube and despite the slacker head angle compared to a road bike it doesn’t feel sluggish or slow to turn. It does feel like the bike wants to propel you forward when you stamp on the pedals, the side to side flex of the frame is miniscule and you feel like non of your energy is wasted. It doesn’t though batter you, it’d be perfect for a cobbled sportive ride. if you are intending to ride it more on the road or with a road club i’d get the double chainset version to try and match any of your buddies using road groupsets as although the 1 x range of gears is perfectly adequate the quick changes of pace in a group ride are better suited to the double set up. One other thing to note if using as a road or winter bike is that because of the massive tyre clearance you’d be able to run a wider tyre and still fit full mudguards.
With full mudguards and a double chainset set up this bike would make a stunning long distance mile eater, perfect for Audax in fact.
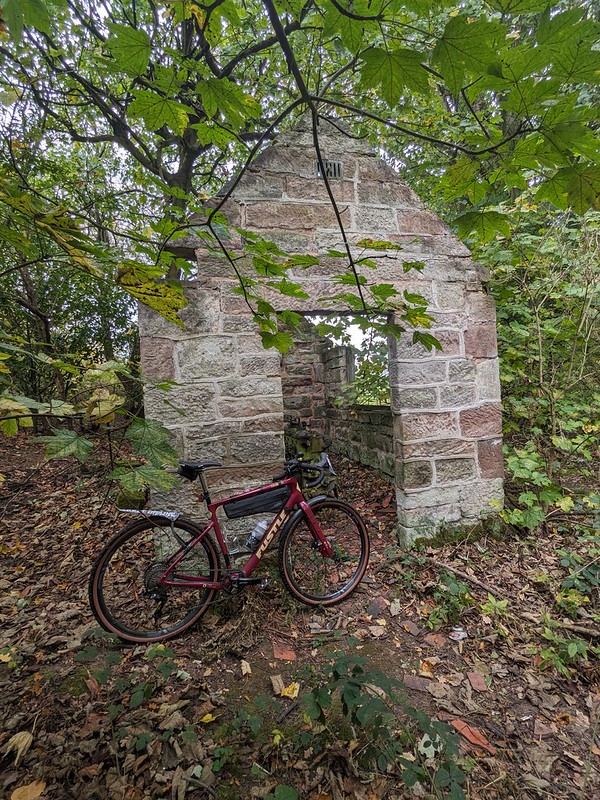
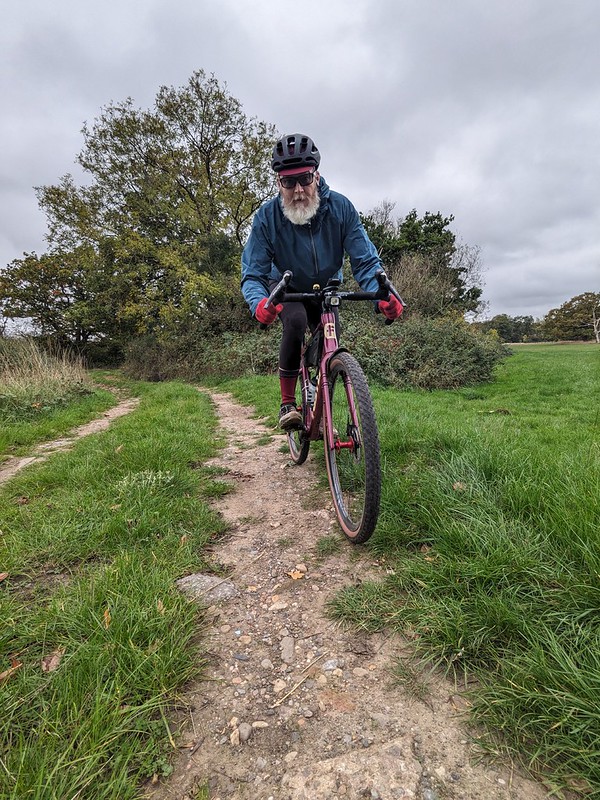
Off road is where the pressure to perform was highest for me, I set the bike up to be as close as possible to my original G1, reach, handlebar and saddle height etc so I’d be feeling at home straight away and able to concentrate on how the frame and fork felt in comparison and get over the “new bike” feel. this took a couple of rides to get right. Then I took the bike on familiar trails where I knew exactly how the old bike felt. All in all I think I’ve ridden around 300 miles during the time I had the bike to test.
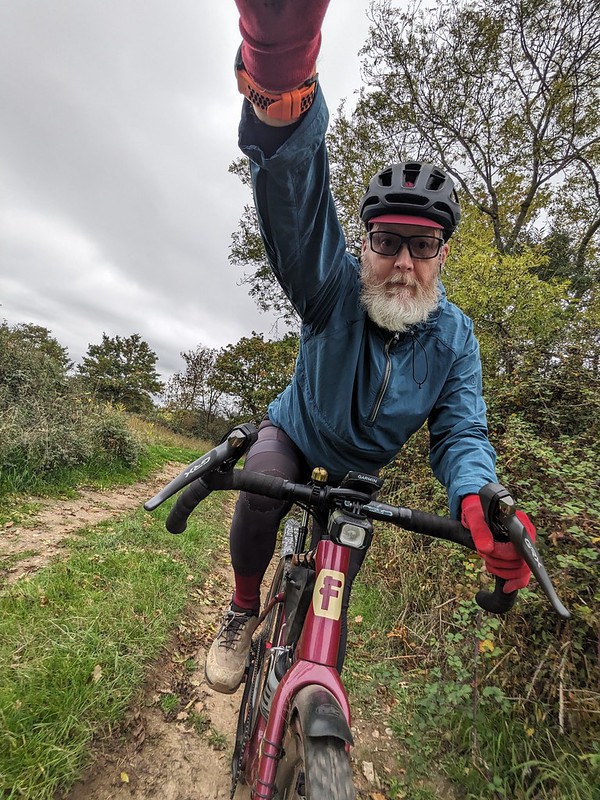
There’s a video below that’ll show you the sort of stuff I was riding and if you have time please take a look as it does give an insight on how the bike handled.
Riding the new frame felt different to the alloy version as soon as I started the first climb, yes, the lighter weight does make a difference. I swapped wheels and bags between the two and the new bike was just under 4lbs (1.8kg) lighter. The aforementioned feeling of all your effort being used to move the bike on tarmac applies here too. the bike is agile and you can pick a line on techy climbs with confidence. It’s easy to lift the front wheel over roots and fallen branches but it still tracks well in ruts and loose gravel. Riding along flat chunky gravel feels different too, this is no suspension bike, you can still feel the terrain under the wheels and you’re not isolated from anything but you do get a floaty feeling that combined with the pedalling efficiency makes you want to go faster! Downhill on gravel/fireroad and the typical cross country trails near my house I found myself using the brakes less and just letting the bike flow and do the work. Its lack of weight doesn’t mean it bounces off every hump or stone like a pinball like some light weight bikes do. I’m no engineer but I guess this the the slightly slacker head angle of the new bike helping here. the G1 is a fun and engaging descender helped by the length of it’s wheel base keeping things balanced and non twitchy, this is exactly the same on the new G2 and is confidence inspiring. there’s a set of steps you’ll see in the video which on a MTB i’ll usually drop off the last step of to maintain speed. On a gravel bike I’ll be slower and roll down them. After riding them once and going back a few times to film different angles I also dropped off the last step on the G2! Add the dropper post into the equation too and the bike becomes a little ripper down steep techy XC trails. Sit with your hands on the drops and you feel in control and stable.
The Fustle Causeway G2, and I hesitate to say this as it’s a bit of a cliché is a great all-rounder. It’ll scoot along quite nicely on tarmac, It’s forgiving enough to be a long distance bikepacking bike but having said all that where this bike shines for me is off road and that’s where it excels. if you are a beginner or coming from a road bike backround to gravel the G2 will flatter you and help you gain confidence, if you are an MTBer at heart you’ll feel at home as soon as you hit the dirt.
So i guess as I own the original Causeway i should say which of the bikes I prefer. I do love the aluminium G1 it handles great and we’ve had some top adventures together but if i had the money i’d definately go for the G2, same great handling in a lighter package and all that tyre and front triangle clearance, what’s not to like!
This Fustle Causeway G2 is like the person your mom warned you about but you ignored her, met up with that person and had the most incredible summer that you’ll remember forever!
here’s the video of my few weeks riding the G2, please take a look and please subscribe to my youtube channel, it costs nothing but really helps me grow this website.
you can find more information on Fustle Bikes here
The People behind GRVL.CC are first and foremost riders. I know this because I’ve been riding with them. What they also have is years of experience designing sportswear for other companies, some of them very big in the sports world. you’ve probably worn some of their designs but don’t know it.
The GRVL guys though wanted to produce products with more sustainability, in factories that are enviromentally friendly but still give the quality that they demand. All that is a tall order right?
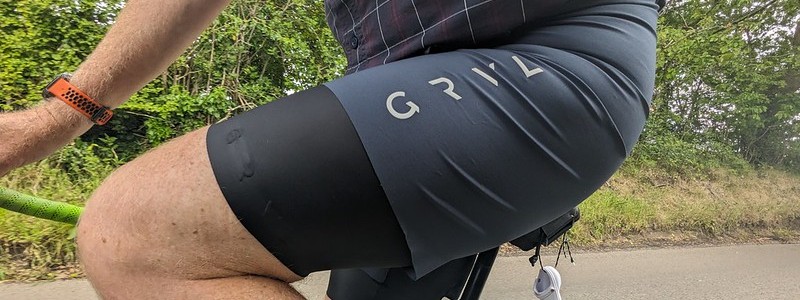
They sent me out a pair of their GRVL bib shorts to try and I’ve been riding short and long distances in them over the last couple of months to see if that list of demands they’ve made for themselves translates into something comfortable to wear, because you can have the most ethical clothing in the world but if it doesn’t feel good when you ride you’re not going to keep wearing it.
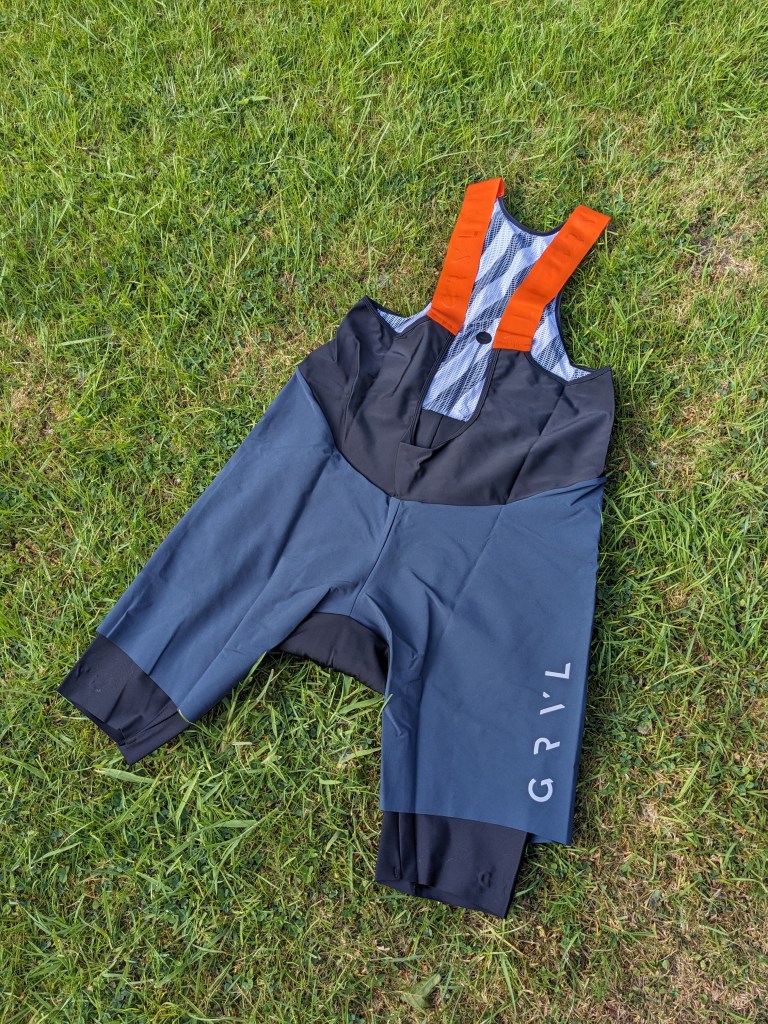
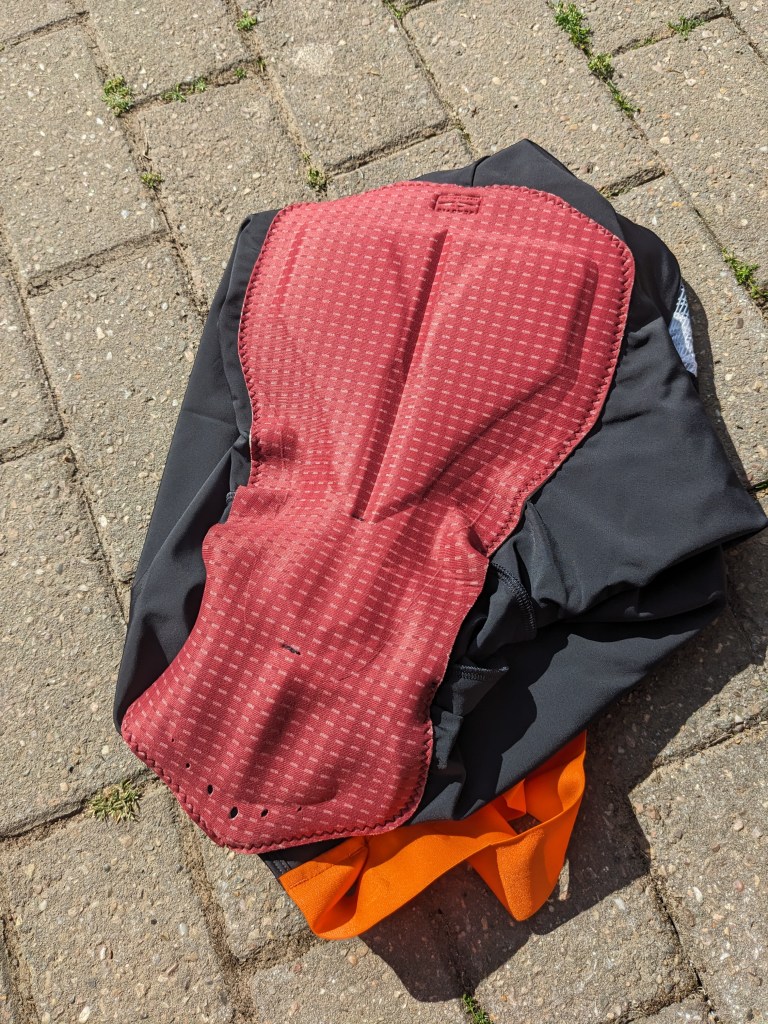
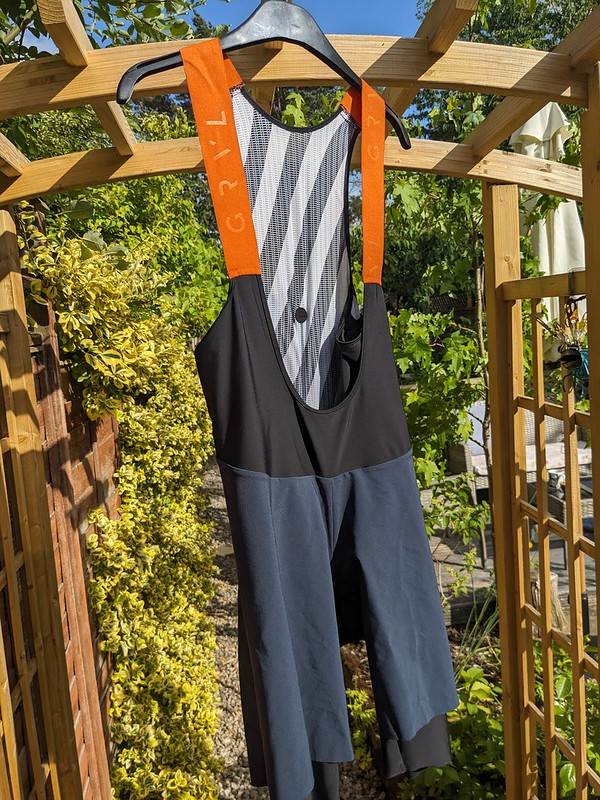
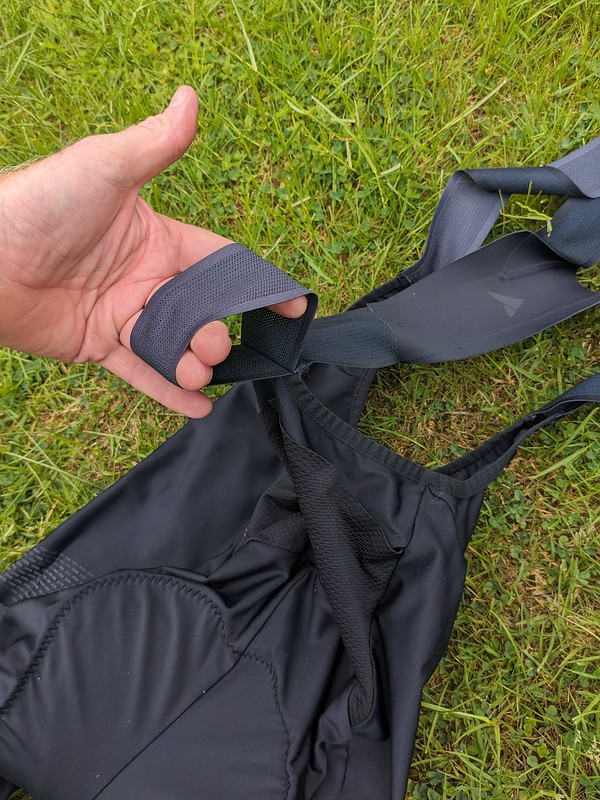
The first thing you’ll notice is that these shorts look like they have a baggy short included and they kind of do, but its sewn into the traditional lycra leg and joins at the inner thigh seam. So it’s not a lycra short inside a baggy one, it’s permanently fixed too. GRVL say it’s to give the rider extra protection from the weather, dust and mud. The GRVL logo appears on one leg, this is actually a nightmare for photos because it’s the non drive side leg (otherwise known as the left) and all shots of the bike should be from the driveside, that’s an unwritten bicycle marketing rule right there. I kinda like they’ve gone against the rules, lets hope it’s deliberate!
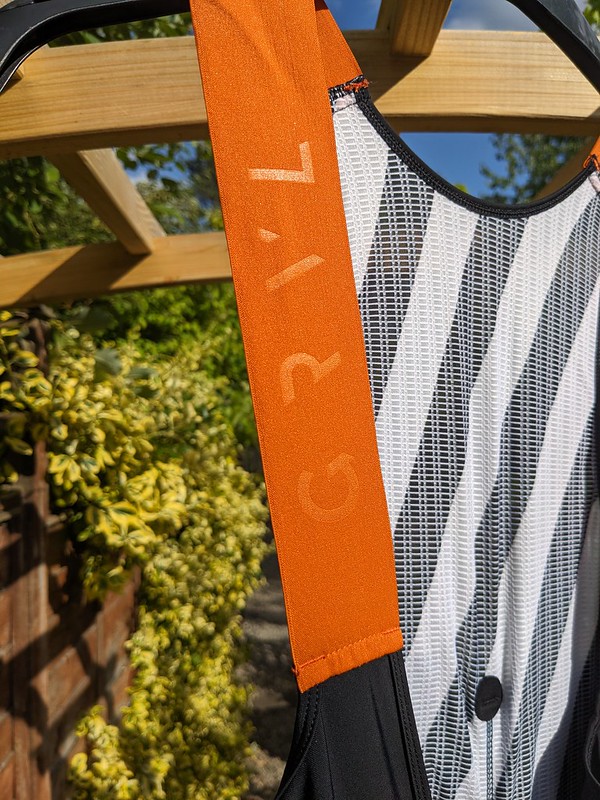
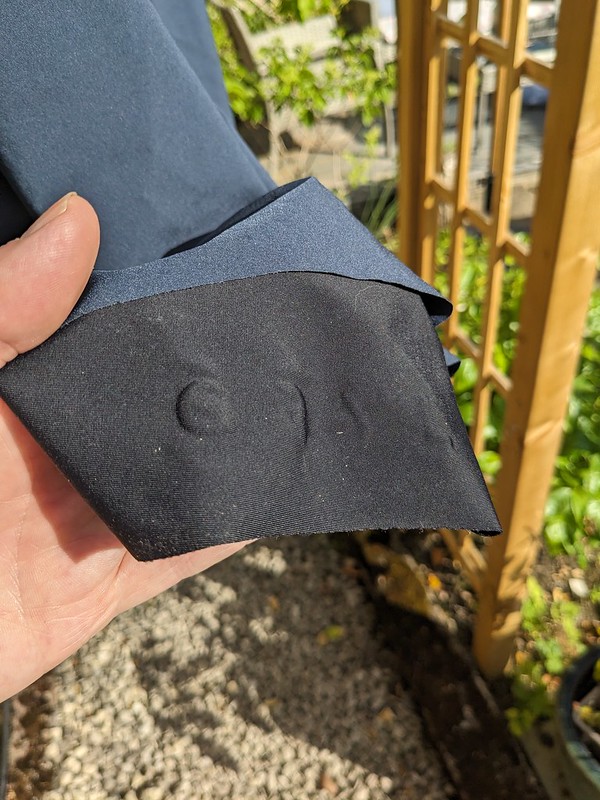
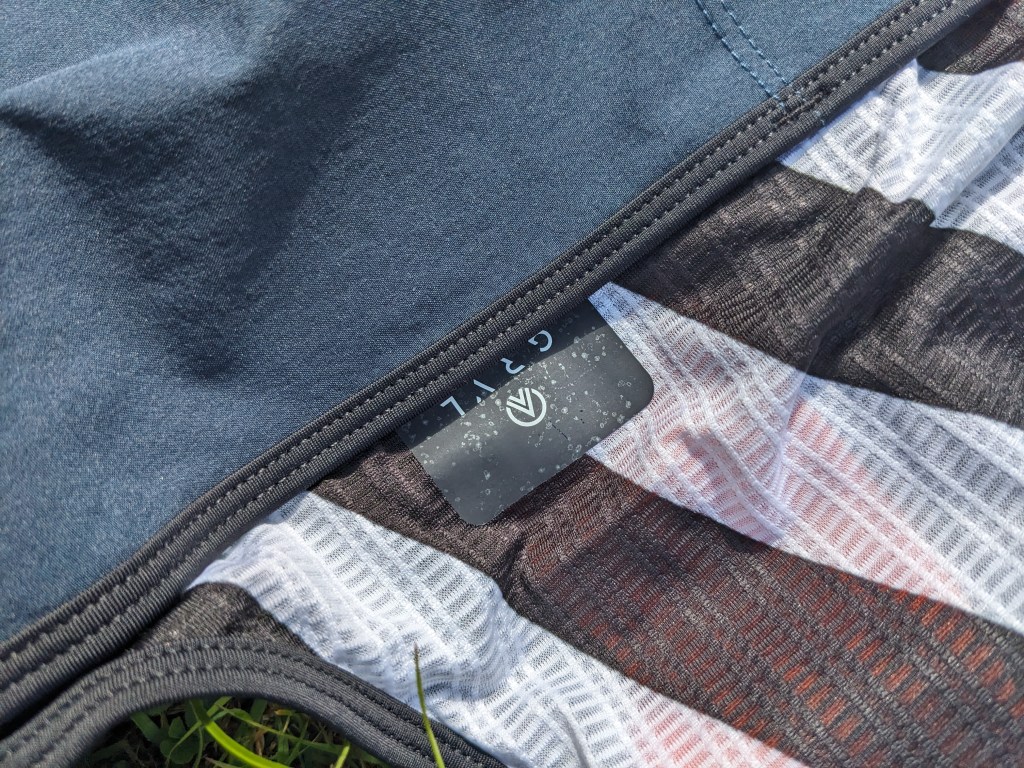
The logo shows up in a couple of other places and is embossed on the shoulder straps and the bottom of the legs and is a nice stylish touch that makes them stand out from other shorts in this price bracket.
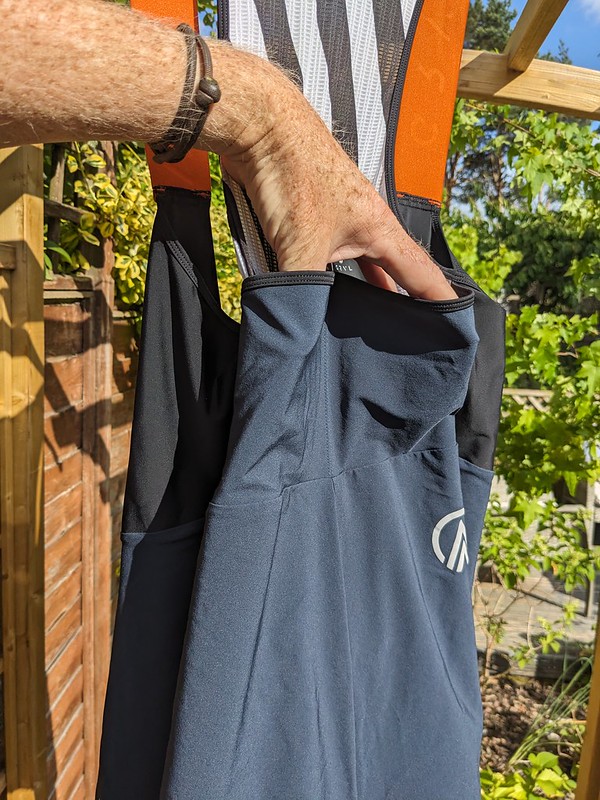
There are two rear pockets which I’d say were perfect for small snacks and gels etc. I did manage to get my phone in there (pixel 6) but had to position it sideways and stretch the pocket as in the vertical postion the pocket only just reached half way up the phone and it didn’t feel secure. Not really a fail on the shorts though as a phone isn’t what every rider stuffs in the pack pocket.
The fit is excellent, I usually take an XL size and these were a good fit, I’d have liked to try the next size down for a little more compression on the legs but when riding they felt spot on.
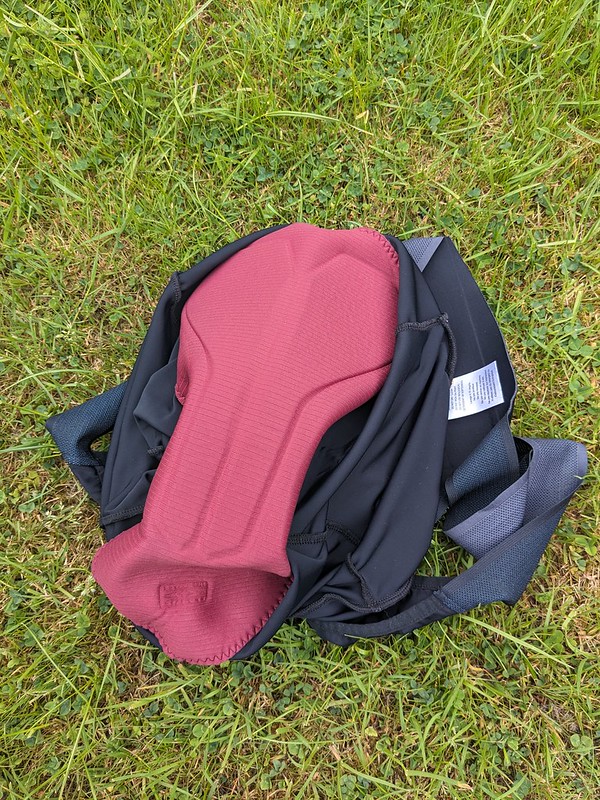
When I first posted a picture on my instagram account of these shorts I received a direct message from someone who had tried the shorts and said they wanted to warn me of the minimal padding on the chamois. GRVL say the chamois is for “comfort for rough terrain and big adventures” You can see from the picture that the padding isn’t as thick as some shorts on the market. I didn’t find this a problem when riding up to 60+ mile and lots of shorter rides. Not to be too graphic but my backside is well used to riding long distance on my saddle so it is a bit “hardened off”. A beginner rider might have a different view on this but I will say that too much padding is as bad non at all. The chamois does seem to breathe well though and I’ve been glad of this the last few weeks of high tempertures in the UK.
These shorts are not cheap, currently (July 2025) they retail at £185, not the most expensive shorts out there by any means but also not the most affordable. However, they are comfortable and the materials feel like quality. After numerous washes and abrasions from riding they still look good so GRVL have achieved that part of their wish list, the ethical side I take their word for as as I mentioned, they aren’t a faceless corporation, they actually go riding and I’d trust that over any fancy marketing campaign .
The extra baggy short look i’m not sure about. After a long time cargo pocket sceptic but now adopter I missed the leg pockets when riding.
The GRVL.CC bib short is comfortable over long distance, excells in it’s price bracket and manages to look different in a sea of similar looking bib shorts. Given the knowledge that they are striving for sustainability and if the integrated baggy short look is your thing then I’d definately consider these over a big name brand who just care about the profit margin.
Cyclists get a lot of flak from the non cycling fraternity for wearing the “uniform” of lycra shorts, tight fitting hi-viz yellow jersey (or dayglo/aero, add your own social media insult, usually from a post reporting a collision between a motor vehicle and a cyclist, their clothes somehow proving it was the riders fault!) and a cap and it’s a shame that even though lots of us don’t wear that outfit for riding we get grouped into the same tired stereotype.
However, one item on that list I’d say while not essential to riding, can enhance the experience much more than the latest carbon wheelset or electronic shifting gizmo. That item is the humble cycling cap or if you want to be really pretentious, a casquette.
Caps are great for wearing under a helmet when it’s cold, hot, when it’s wet or when it’s sunny. they also work for all these reasons without being under a helmet. At the cafe stop, the pub, the campsite etc etc. i take one on every ride in case I need it for any of the above reasons and not just because I’m folically challenged. I also did the same when i had enough hair to flick out of my eyes…..did i say they’ll keep hair and sweat out of your eyes too?
Uncle Pete THIS IS UNCLE PETE on instagram sent me a message asking if I’d like to review one of his handmade cycling caps. Being a big fan of the humble cap I of course agreed. Pete asked me to measure my head where the rim of a cap would normally sit, easily done with a tape measure and a mirror or a piece of string and a rule. Even easier if you have someone to measure it for you. He asked me what colour/pattern material I wanted and to look at his Etsy site for ideas. Now, I am lazy and colour blind so I said I’d leave it to him to decide.
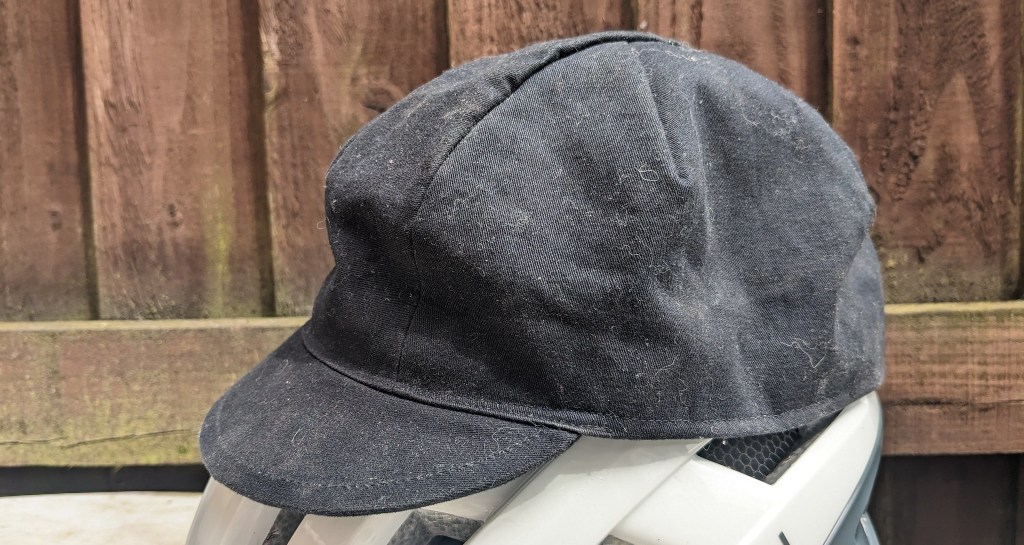
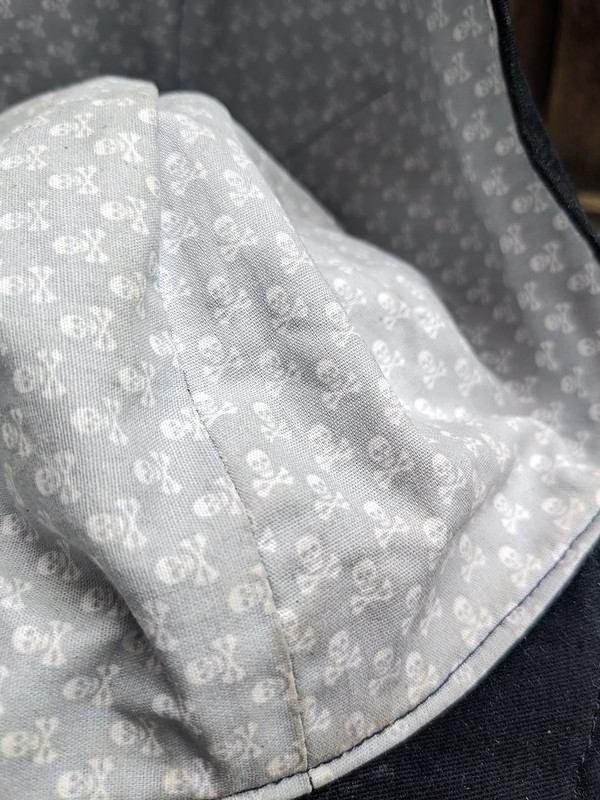
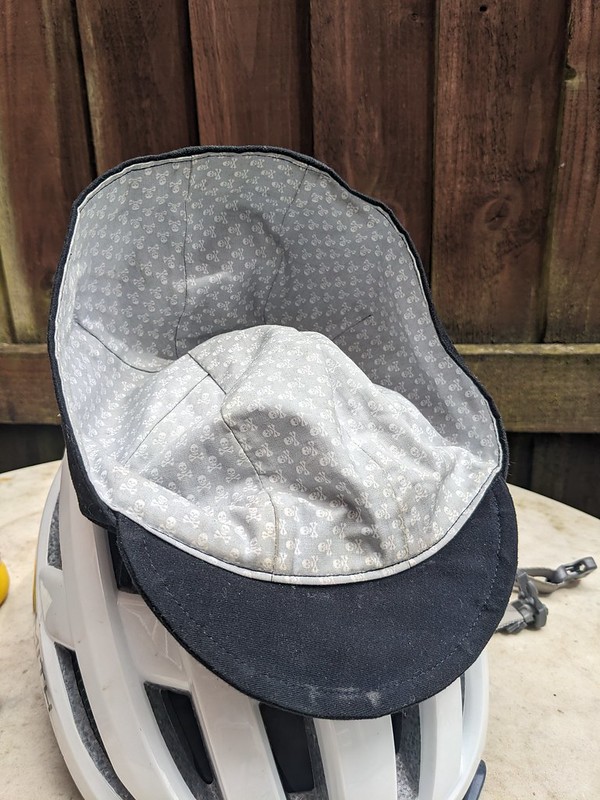
A few days later a parcel arrived for me and the cap in the pictures was the result. This navy blue cap is very understated, i was expecting something much more jazzy but I have to say it looks classy and not out of place in the non cycling side of my life, then i checked the lining material which was covered in a skull and crossbones material! A hidden treat.
The cap is super soft with a shallow stiff brim, I much prefer the smaller brim, it fits with helmets much better and looks so more stylish than the usual long brim seen on most caps which i always find hinders vision when on the bike unless you push your helmet too far backwards. The cap doesn’t have an elasticated rim because it doesn’t need one, it’s made to measure. This cap wins massively over off the peg caps because of this. Off the peg caps in my experience are either too big or too tight if you don’t possess an average size head and not many of us do.
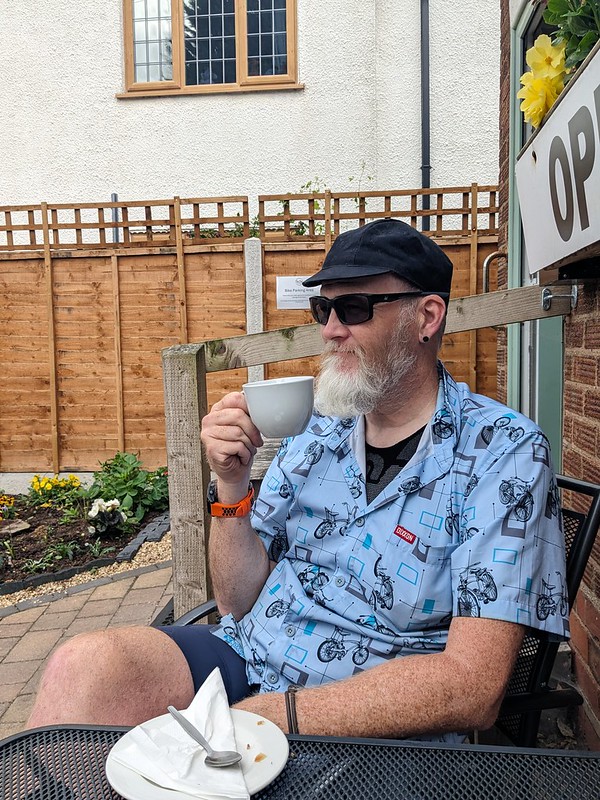
The cap has served me well the last few weeks and is so comfortable and it’s been tested in some of the best weather the UK has had in a while. It’s kept my head from being sunburnt and you can see from the pictures it’s been sweated in a few times. It’s made of cotton with a cotton liner and so is quite breathable but obviously in really hot weather the cotton does soak up any moisture. It does however wash really well.
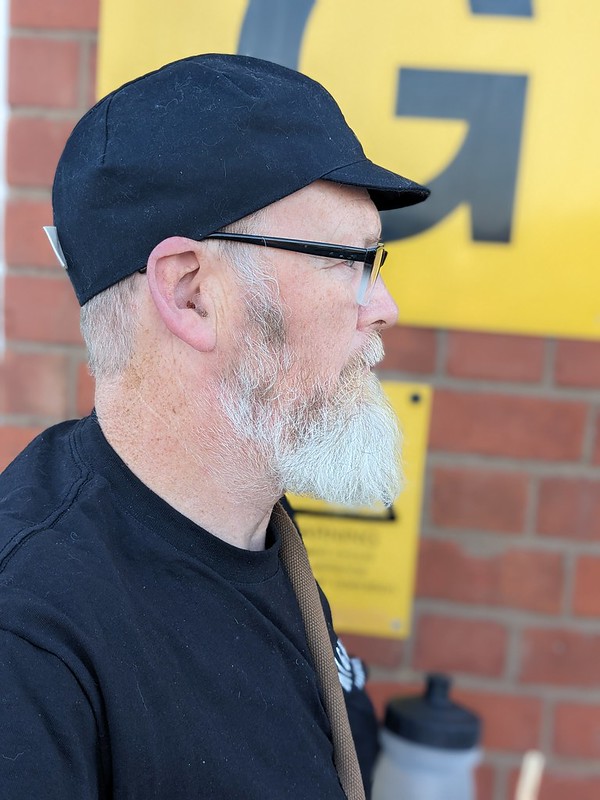
I really wish I’d taken the time to choose a brighter colour as this cap has quickly become my favourite and it deserves to shout “look at me!” the quality and finish is top notch and many many times better than the run of the mill caps available. Yes, its currently £30 for a cap, but thats only £5-10 more than the will it/won’t it fit cap with a big brand name on it that probably cost pennies to make in china.
I’ve even experimented with wearing it with the lining on the outside!
The quality of construction, the comfort, materials used and the fact it’s specifically made for your head by hand is worth every penny, just choose your colour and pattern wisely and treat yourself.
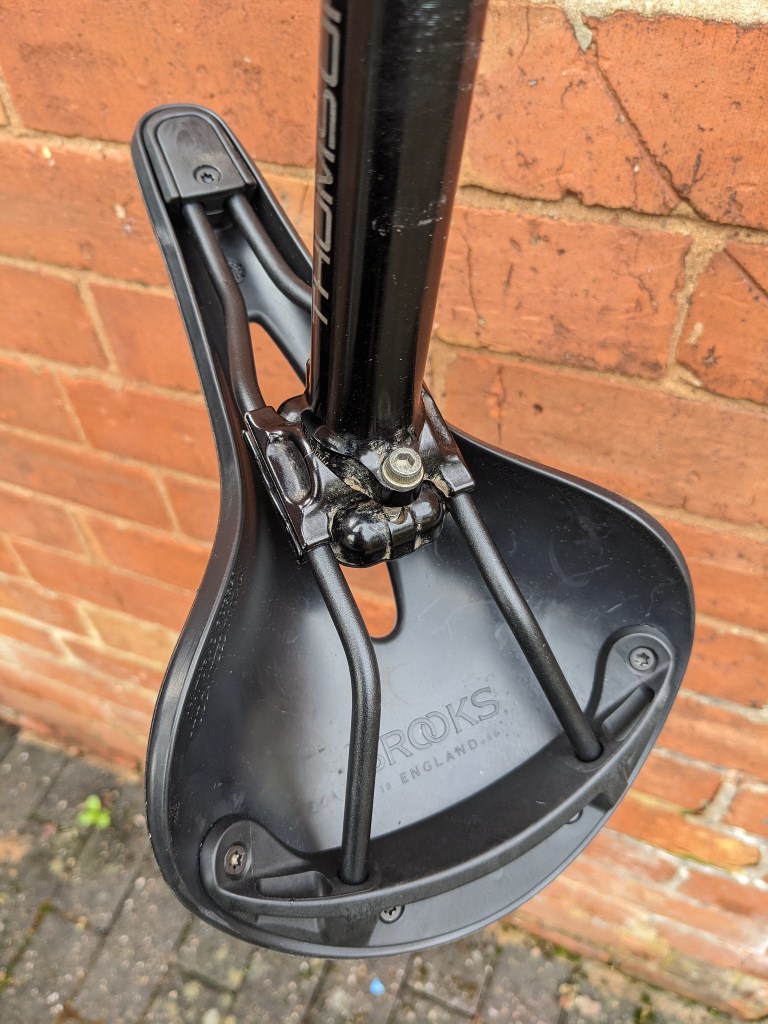
I recently got invited to visit the Brooks England factory in Smethwick, Birmingham as they were having an open weekend and conducting tours of the factory. Of course I accepted, especially as the premises is only a 14 mile pedal from my house using the extensive local canal system.
It wasn’t until I looked into the intinery and the history of the company that I realised what an opportunity this was. Brooks haven’t opened their factory to the public for over 150 years so this literally could be a once in a life time visit!
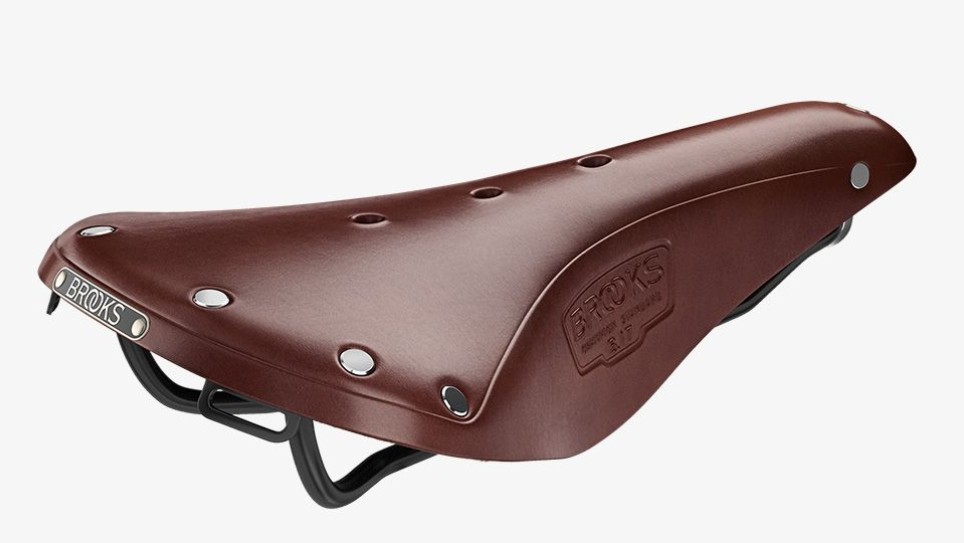
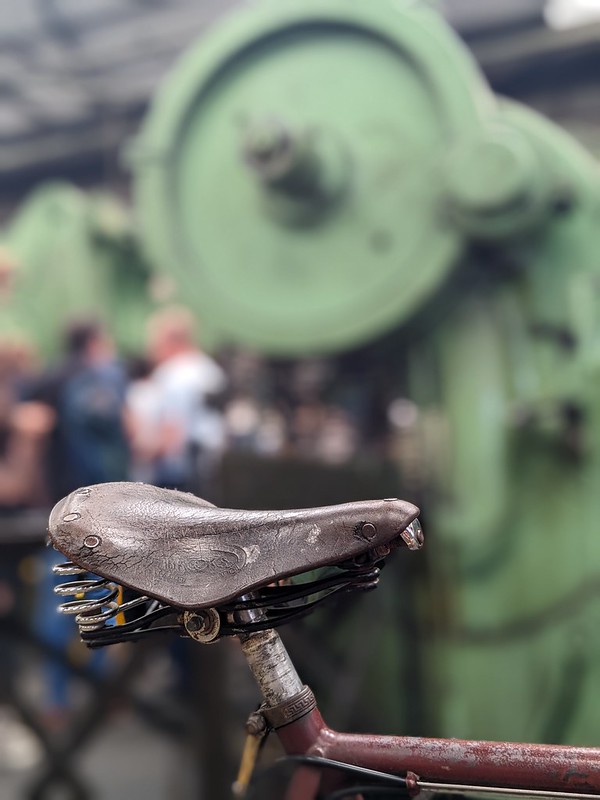
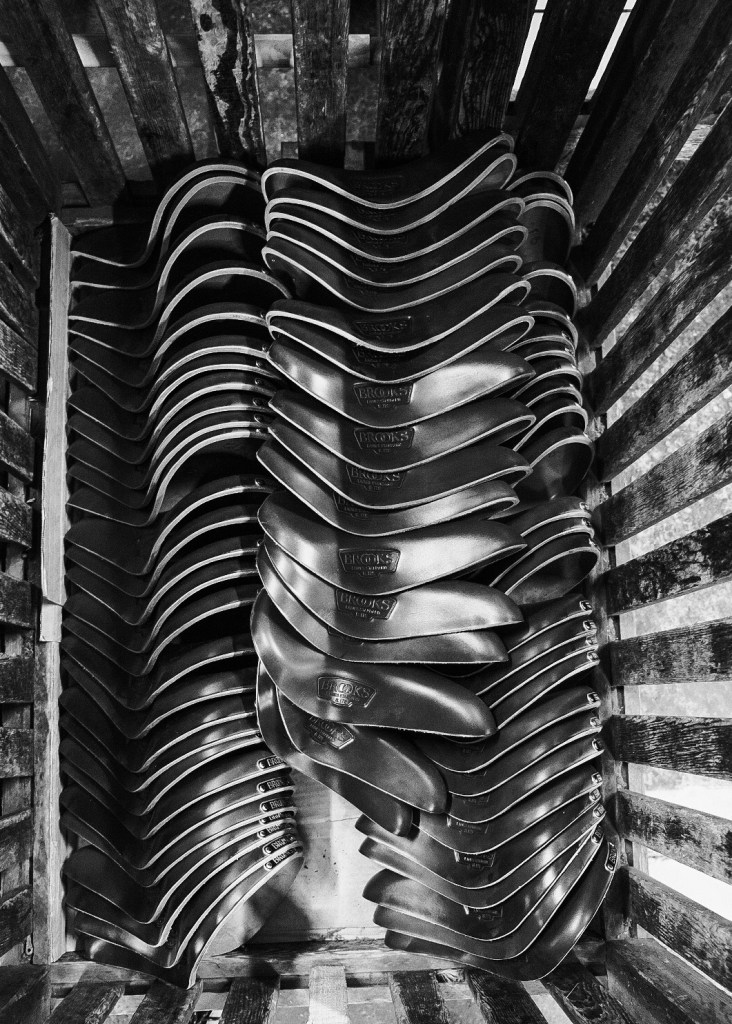
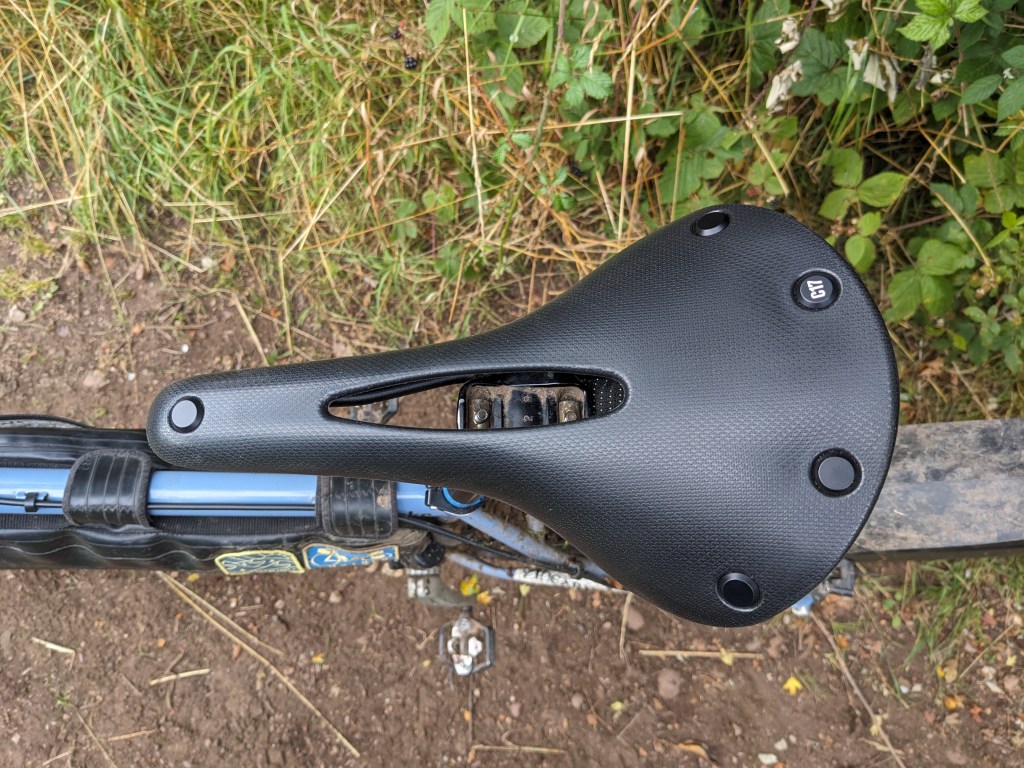
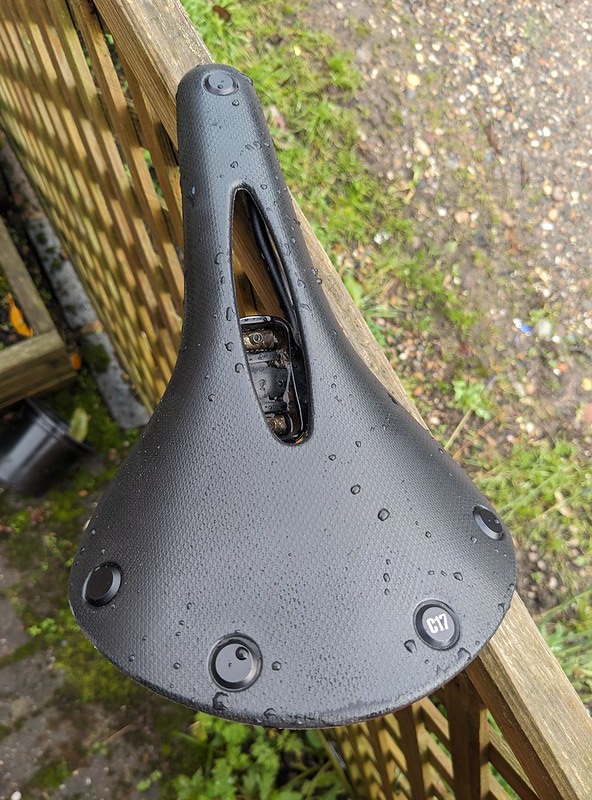
Brooks have a long long history in cycling, if you are seriously into your cycling then you have probably heard of Brooks and their leather saddles. If you are not into cycling at all and are asked to describe or draw a bicycle saddle i guarrantee you will picture the traditional Brooks B17 saddle that has been in continous production for over 100 years.
Brooks B17
It said that Brook’s founder John Boultbee Brooks, a horse saddle manufacturer since 1866 when the company was founded was unhappy at how the wooden saddle on his bike felt (we can all sympathise I’m sure) and decided he was going to make a better one out of leather and the first patent was filed in 1882. The company has been making saddles since then, it has been bought, sold, rescued and is now owned by Selle Royal who make all the non leather saddles in Italy but the Smethick factory continues to hand make saddles to this day.
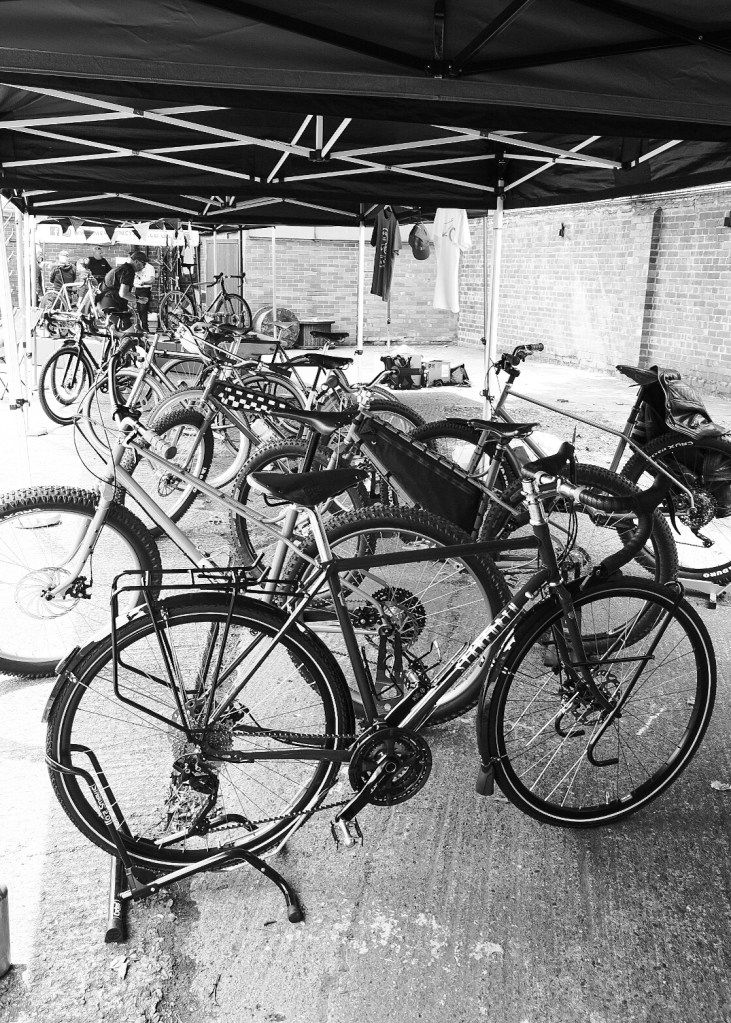
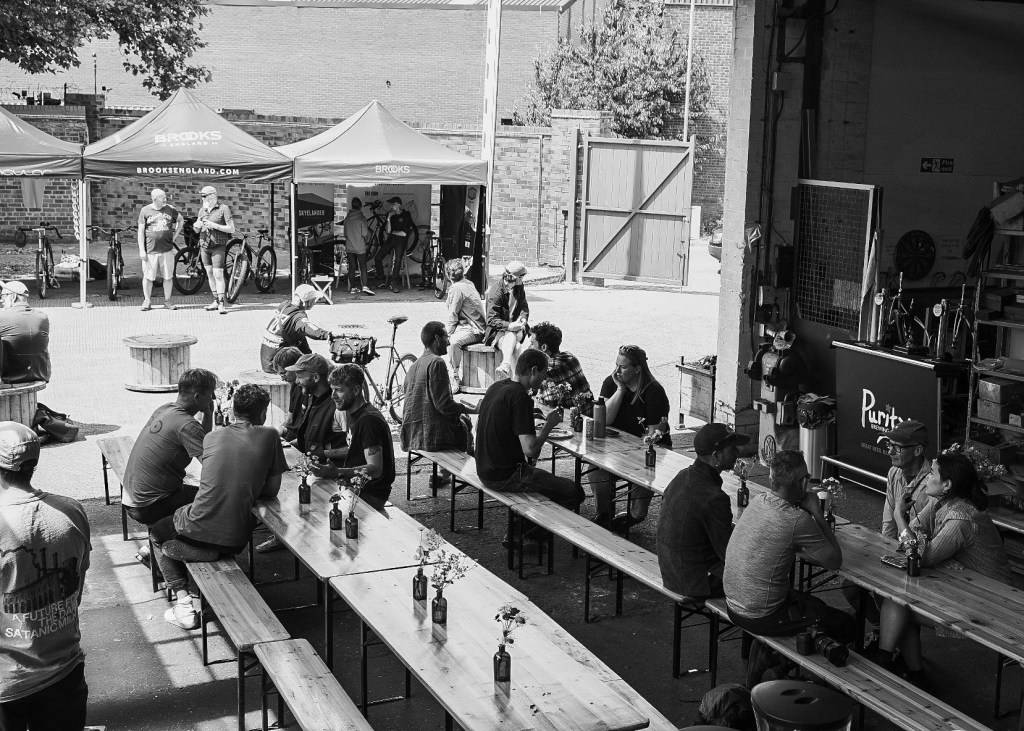
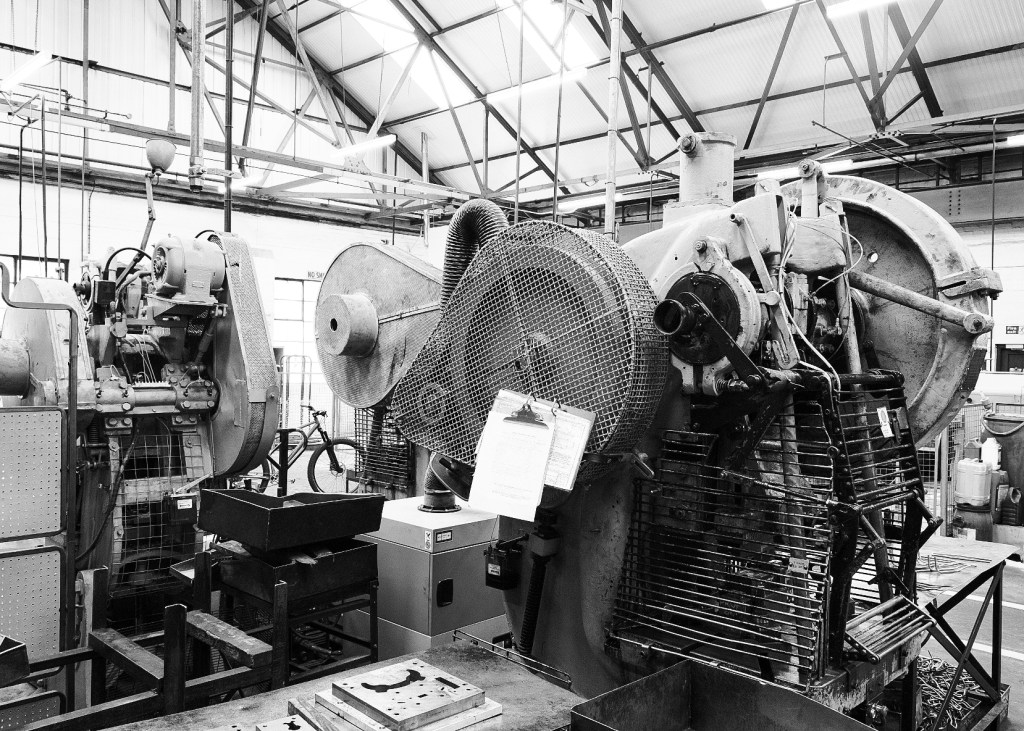
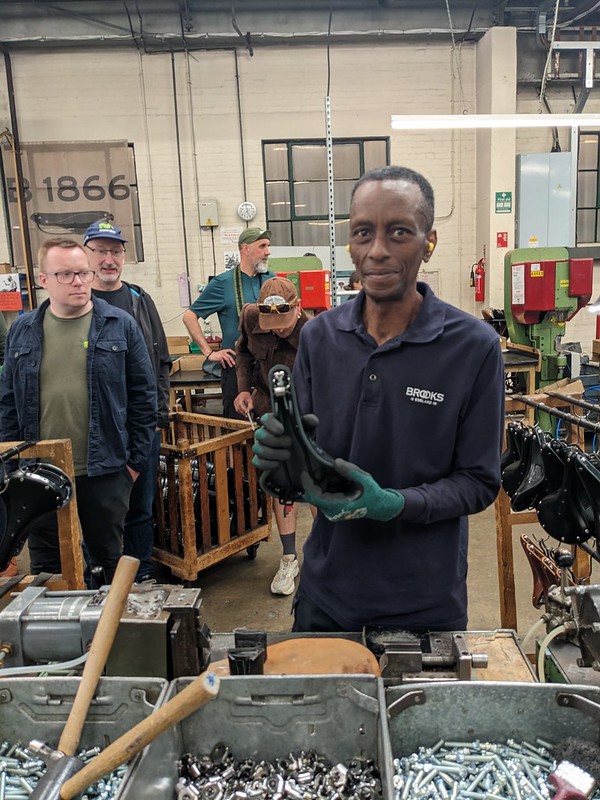
The Day started with coffee and pastries in the factory loading bay and a tour of the bike makers and designers set up in the courtyard who were all known for their use of Brook’s saddles on their bikes. its the best coffee I’ve had in a loading bay ever! The factory is just how you’d expect one to look dating back that far, it could have been a movie set but all the old boxes and stock on the shelves were there for a reason, even the toilet block should be a listed building it was so authentic!
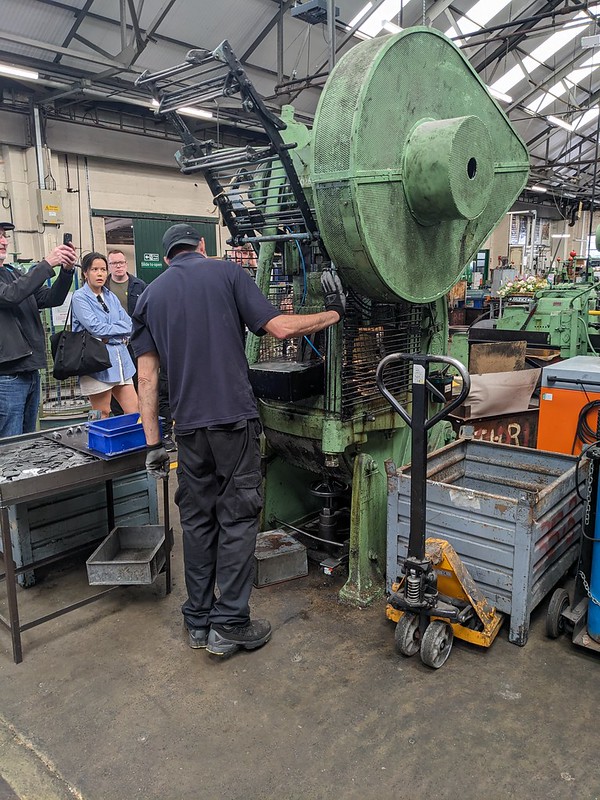
We then began the tour, guided by Steve who had been at the factory since he was 16 and he explained later he’s done pretty much every job in the factory from tea boy to machine press operator, even a stint in HR!
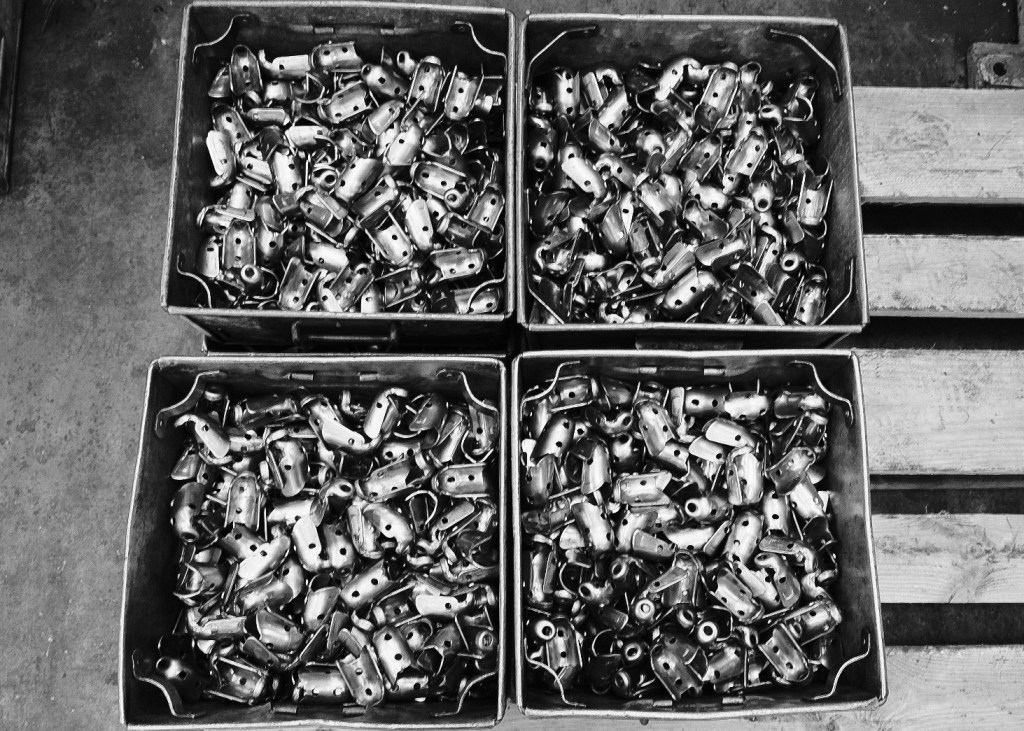
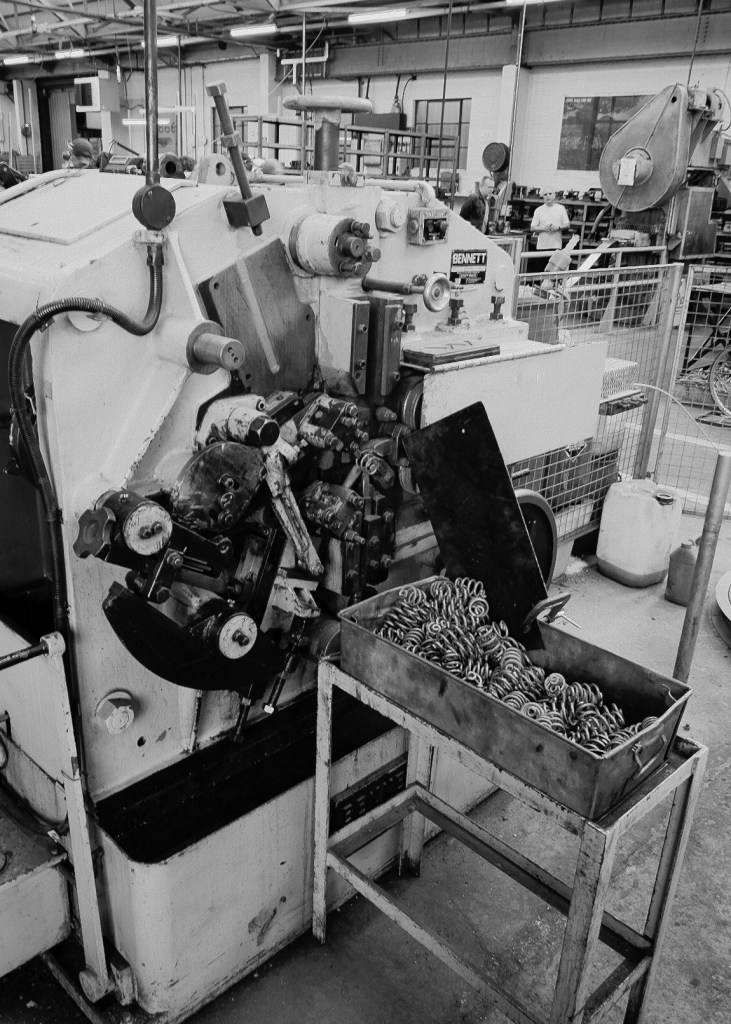
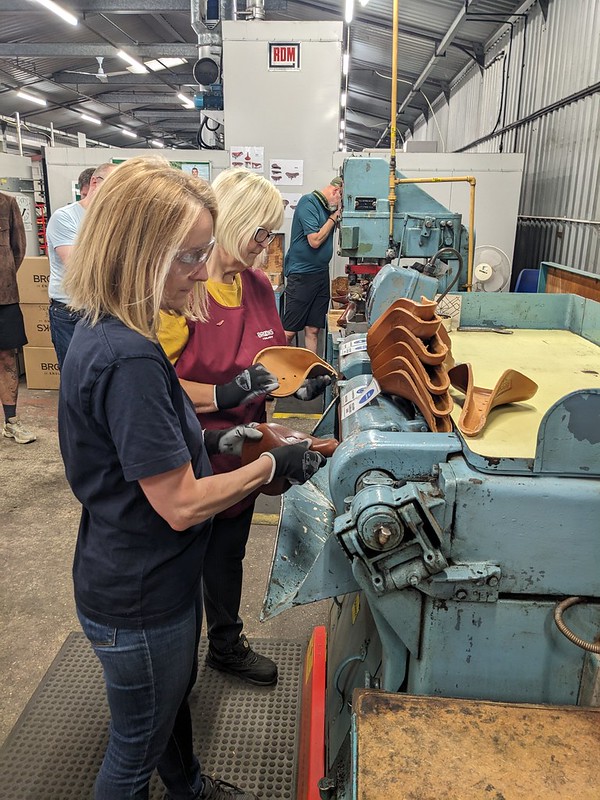
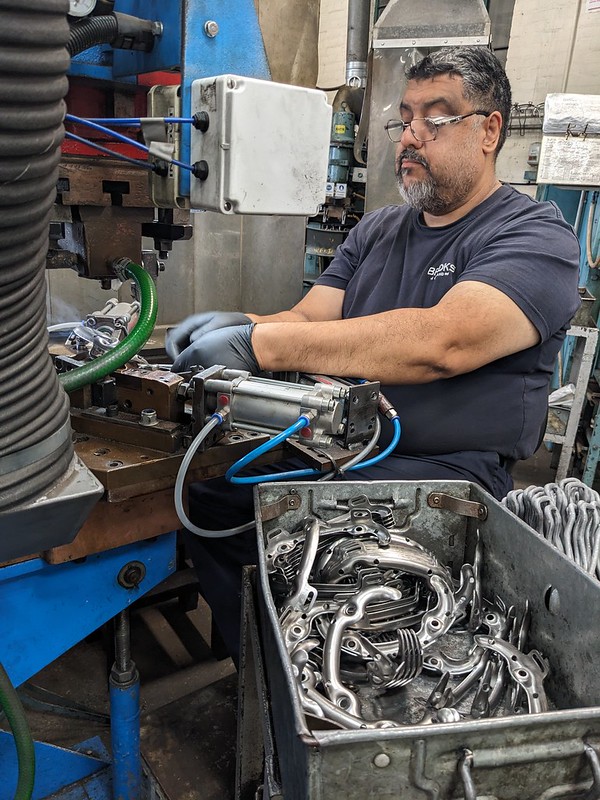
The tour progressed from the very vintage presses which were very loud to the cutting out of the leather which is soaked in water to soften it before it’s put into a press/shaper. Some of the machines were over 100 years old and i asked one of the guys, what happens when one of these machines that hasn’t been in production for so long breaks? He said, we just make a new part from scratch for it and if we can’t do it Birmingham’s renowned jewelry quarter is a couple of miles away and there are small factories there that can make anything you want.
Everything is done in house apart from the tanning of the leather which is done in Belgium. No UK company can cure the British hides to Brook’s exacting standards
The sights, sounds were outstanding but the smells in the factory were what made the experience so visceral.
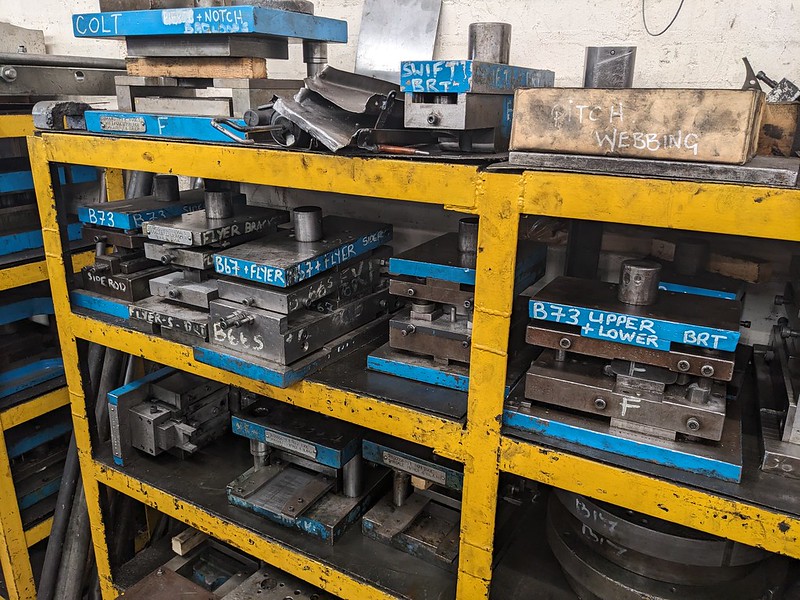
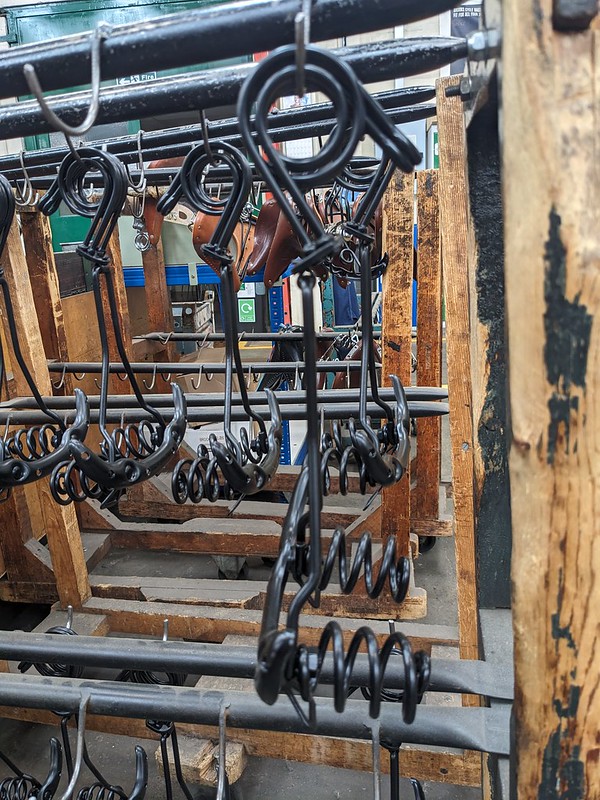
we saw springs and saddle frames being bent into shape using, quite frankly lethal looking machines which undoubtedly back in the day didn’t have all the safety guards they do now attached to them.
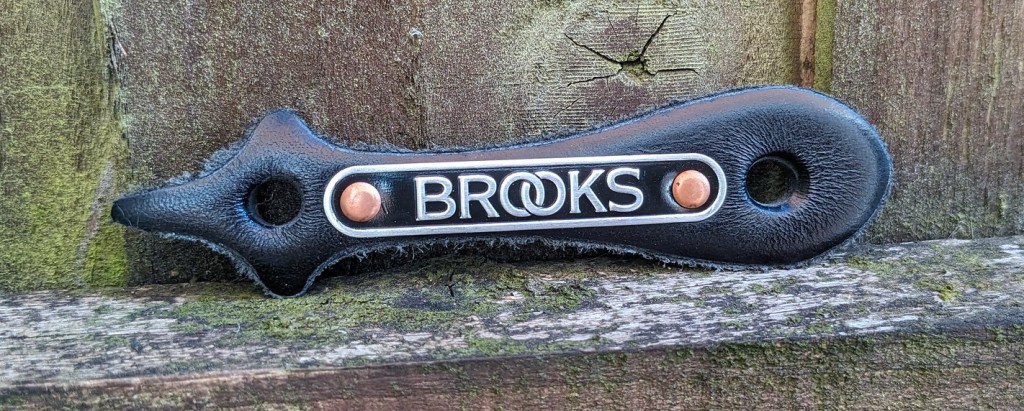
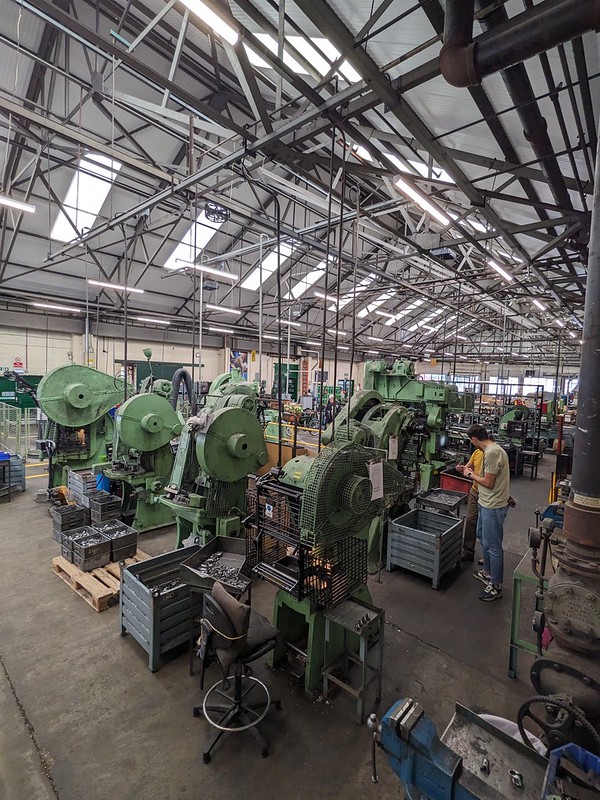
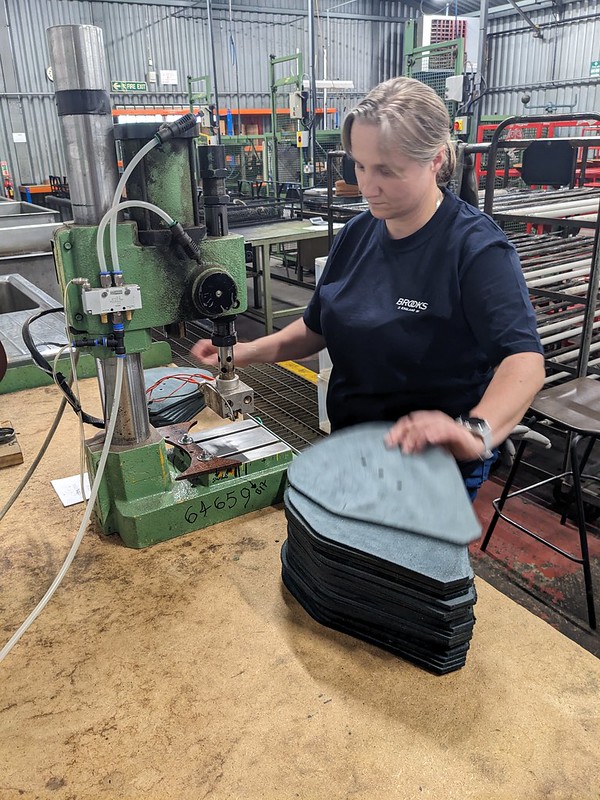
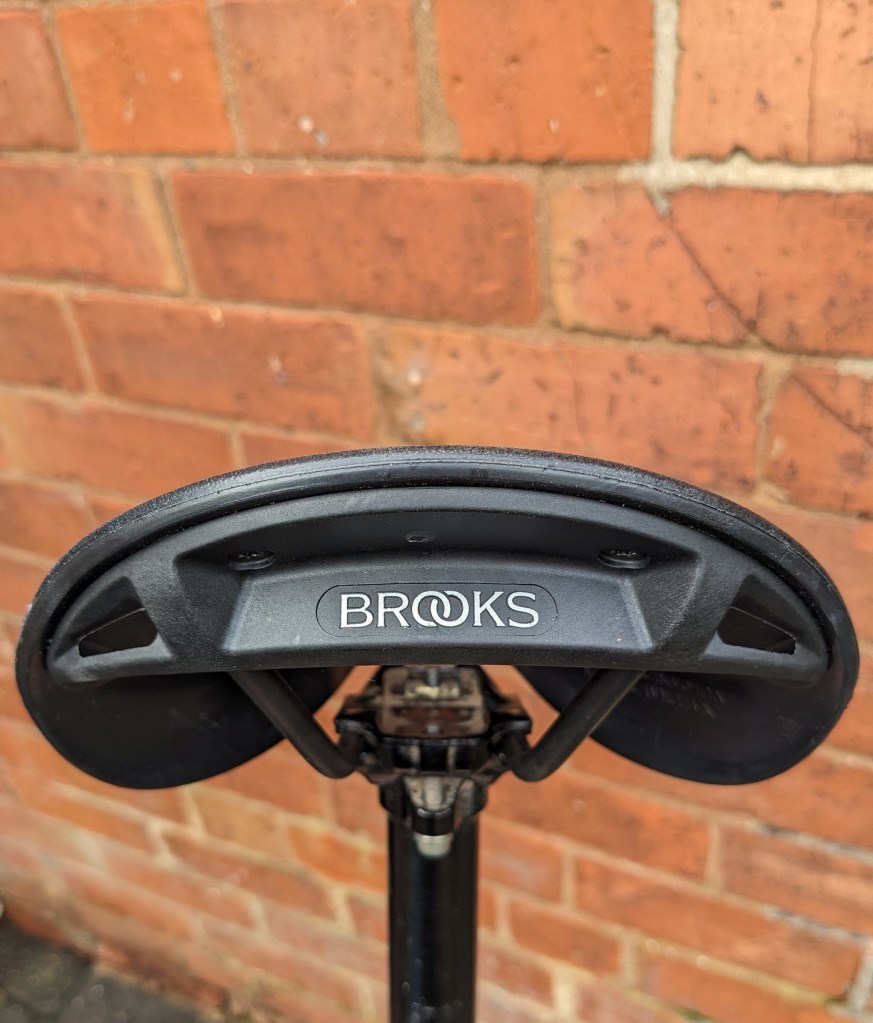
we went from raw materials through to the finishing touch of riveting the Brooks logo, also stamped in house, to the saddles. At every stage there was a human operating the machinery, it was mass production but on a much smaller and personal scale than I’d expected before visiting.
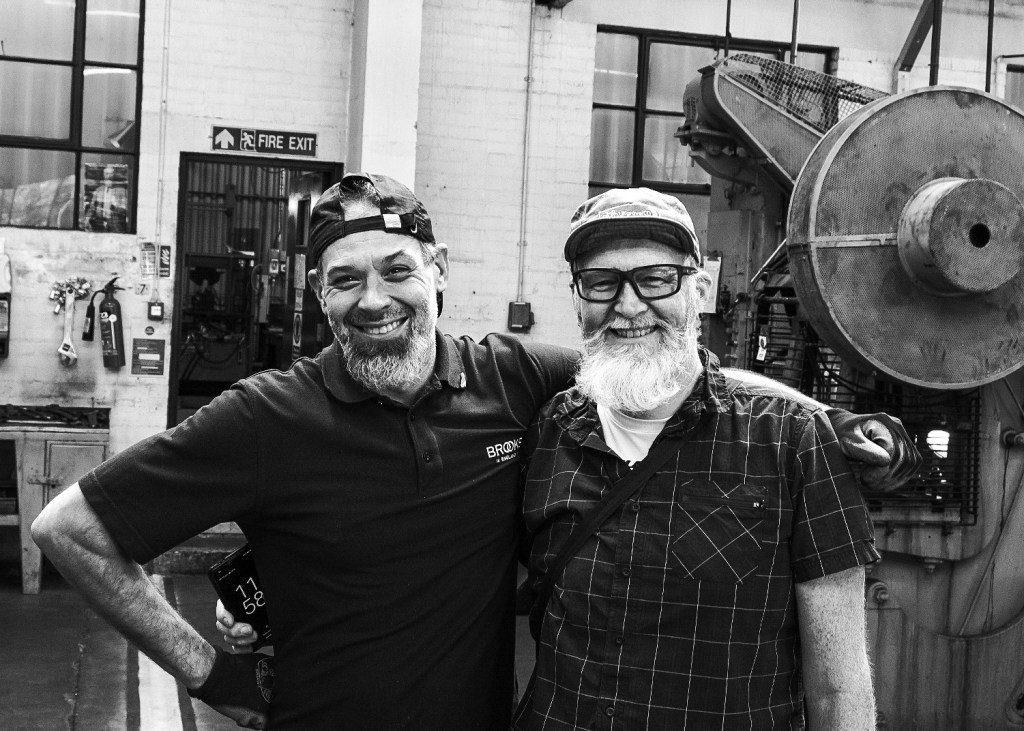
As we walked around I took the time to chat to the staff working there and I asked one candidly if they were amused that all these people were interested to see and photograph all the small parts of what must be a mundane everyday job to them and he said, no, he was proud that there was interest and he loved being there and what they do, of the people i chatted to the shortest time working there was 16 years, so they must like it!
It was an incredible day, i can honestly say one of the best things I’ve done as part of running UKGRAVELCO, I could have stayed there watching the process all day and not been bored. totally not how i thought it would be. The day was so well organised, fascinating and the people so friendly, open and warm.
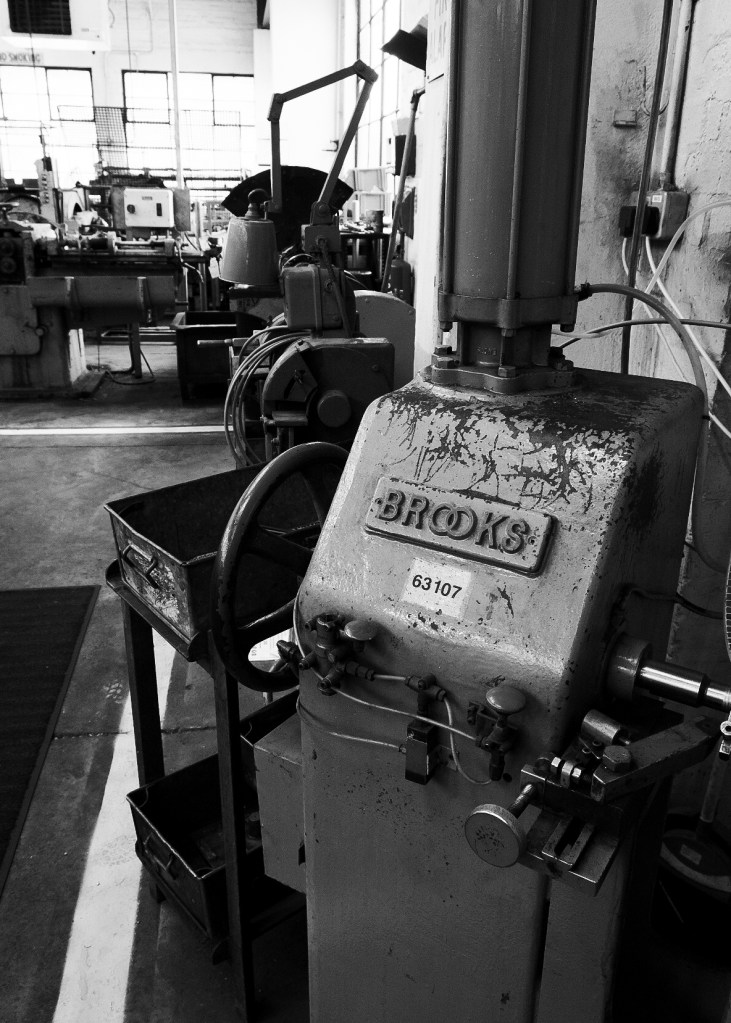
No robots, no CNC machines just skilled craft persons shaping metal and leather into some of the best cycling products on the market. What made it great for me was being able to chat to the people on the factory floor and despite it being their day job the enthusiasm and pride in the company came through.
You can get a bit blasé when you read the phrase “hand made” but now I know the true meaning and value of that label. With Brooks England though I think that also includes pride and maybe a little love in every product too.
Massive thanks to @brooksengland and @extra_uk for inviting me. you can see all the products that Brooks manufacture here Brooks england and if it doesn’t take another 150 years for them to open the factory to the public again make sure you are on that tour!
all the black and white professional pictures were taken by Dan Phillips Photography the less professional colour ones by me!
British brand Altura have long been known for good value practical clothing and kit. This season they have expanded their “all roads” collection and these items seem perfect for commuting, gravel biking and riding in general so to see if what’s written on paper is true I tried a few pieces out to see if they lived up to their billing.
altura all road cargo shortsaltura all road cargo shorts
All roads Cargo Shorts. First up then is an essential, in my opinion, part of any cyclists wardrobe if riding medium to long distance and that is a pair of padded shorts. I was a long time sceptic of bib shorts with pockets on the legs but since trying them I’ve become a complete convert and now wouldn’t consider a pair of bib shorts without some sort of storage option.
The Altura Cargo shorts actually have 5 pockets. two on one leg, one on the other, two rear pockets in a similar spot to where jersey pockets would be and also a loop at the rear which I found perfect to store an Altura rain pullover jacket.
The two pockets on one leg i found a perfect size to hold a phone and some gels and keep them separate from each other and the other side perfect for a bag of walkers! The two rear “jersey” pockets are sized just like jersey pockets so anything you’d be able to stuff in a top you’ll be able to fit here too. Bear in mind though that whatever you stow here will be nearer the heat of your body so chocolate bars are probably out but gels should be easier to swallow when warmer! Obviously if you put something heavy or unwieldy in the pockets they will drag the short legs down but trial and error is your friend here.
altura all road cargo shortsaltura all road cargo short pad
The pad in the shorts is comfortable for short and medium rides without any chamois cream for me, anything over 50 miles I’ll be slathering on the cream to stop any hot spots, but this is the same for any padded short regardless of cost.
The sizing is realistic, I usually take an XL to feel comfortable at over 6ft tall and XL in these shorts was spot on. numerous washes haven’t made the shorts baggy or tight so I can say with confidence they are worth a place in your wardrobe and may end up as your go to shorts.
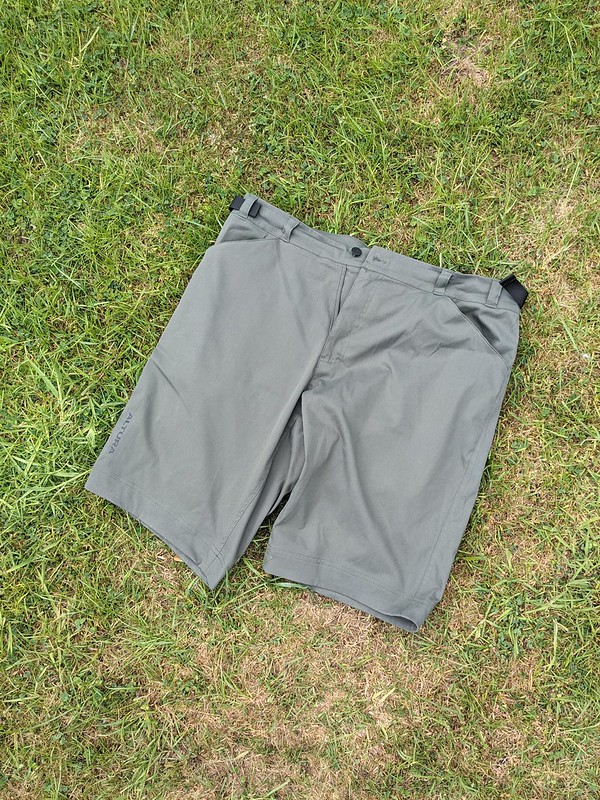
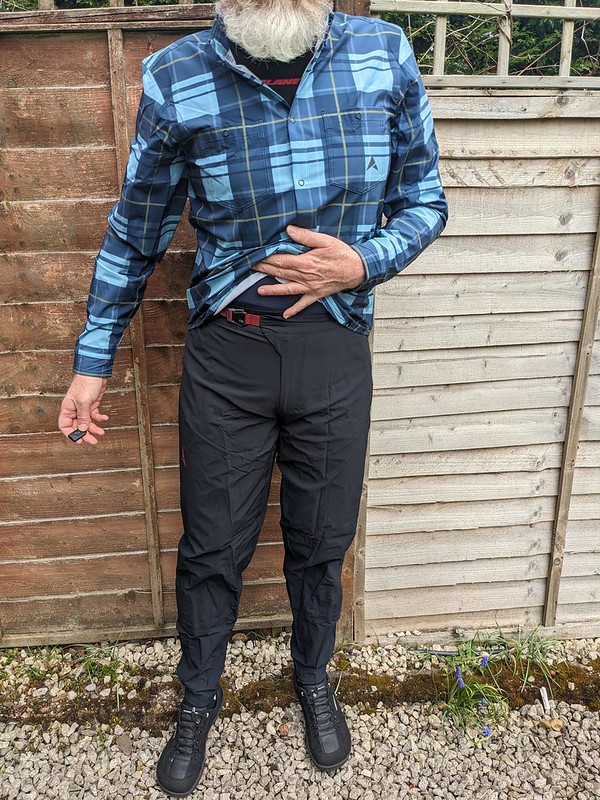
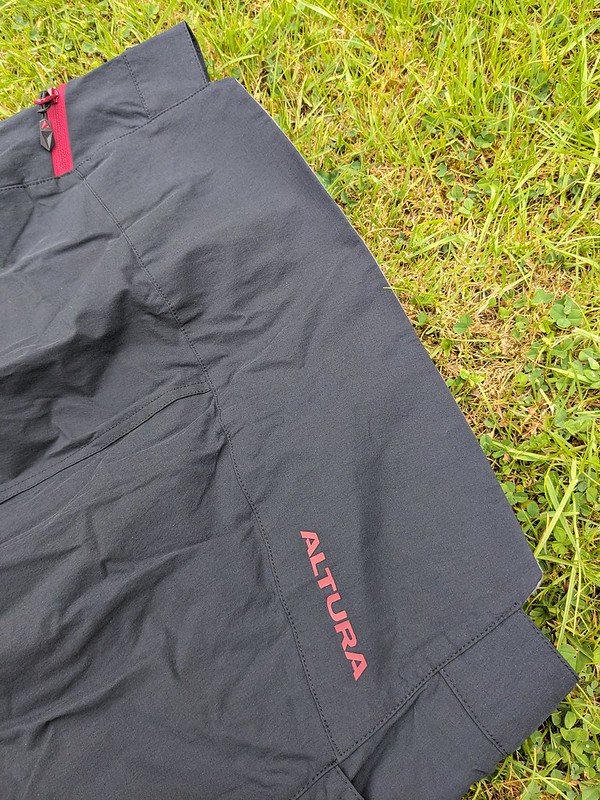
All Roads Shorts At the other end of the spectrum are the Altura All Roads “baggy” shorts. I’ve put those quotation marks in as although the shorts are baggy compared to bib shorts they are quite fitted and so look “normal”, more quotes but what I mean is you could wear these as everyday shorts and no one would bat an eyelid. Ride to work and wear them all day or in the pub. Personally i’d add a padded short too if going any distance as these shorts have no padding. What they do have tough is a stretch fabric so pedalling is easy in them with no pulling.
altura all road shortsaltura all road shorts adjuster
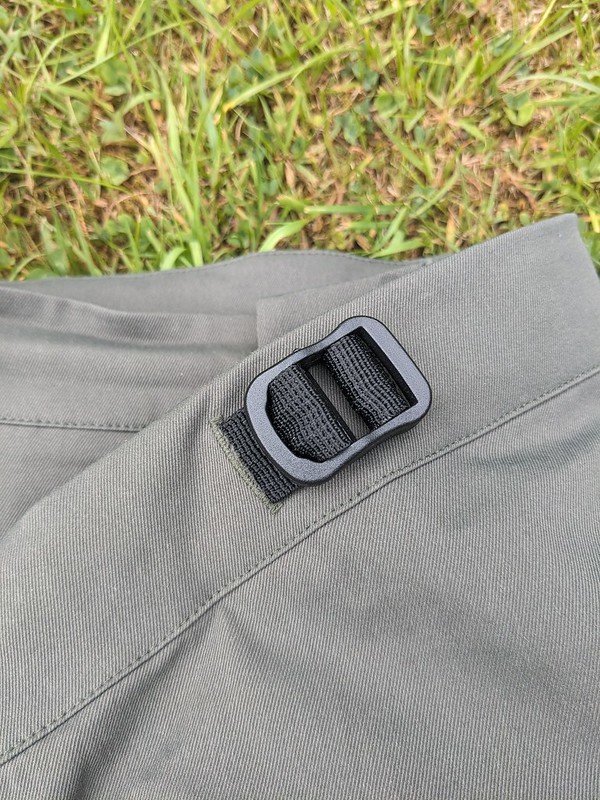
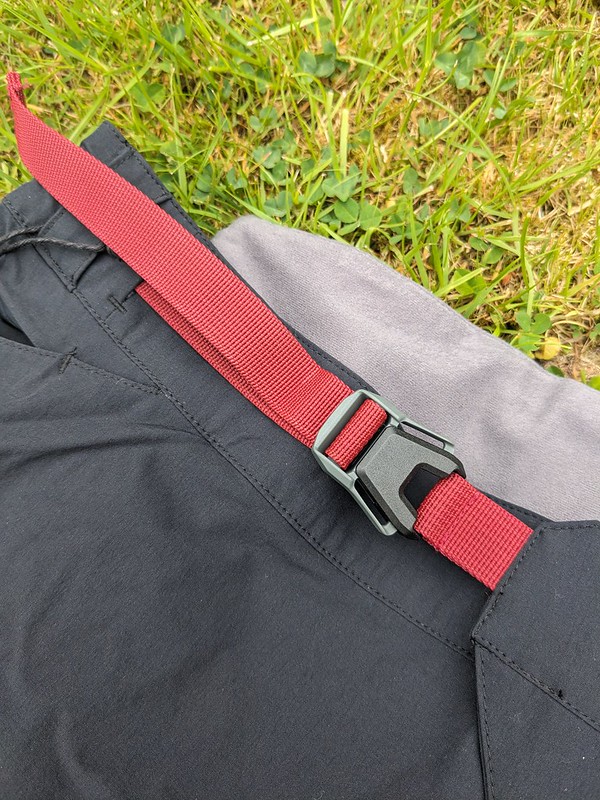
The shorts have waist adjusters and three pockets. The rear is zipped for security and the two side pockets are very useable in that you can ride with a phone in the pocket without it interfering with pedalling action. The material is lovely and soft to the touch but maybe a little thick to wear on the hottest of days. Sizing again is realistic and large for me with a 34″ waist was spot on.
altura all road shortsaltura all road shorts and shirt
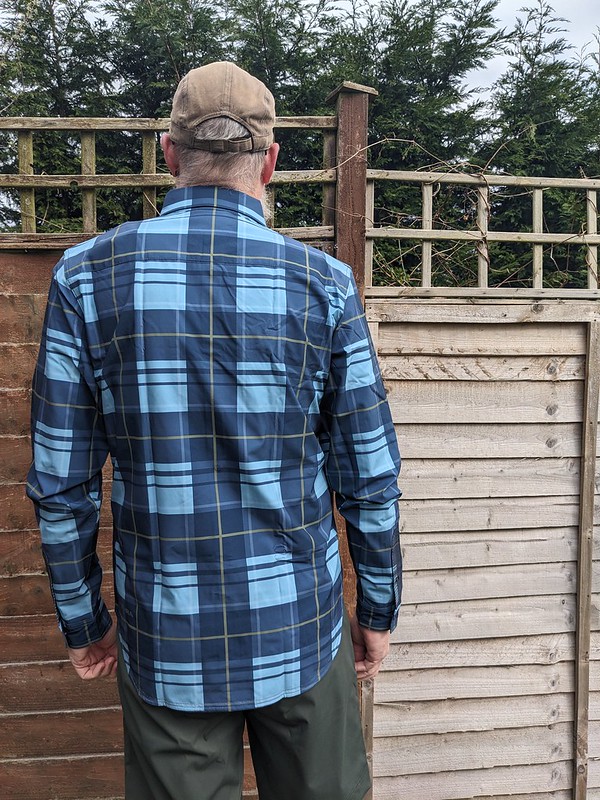
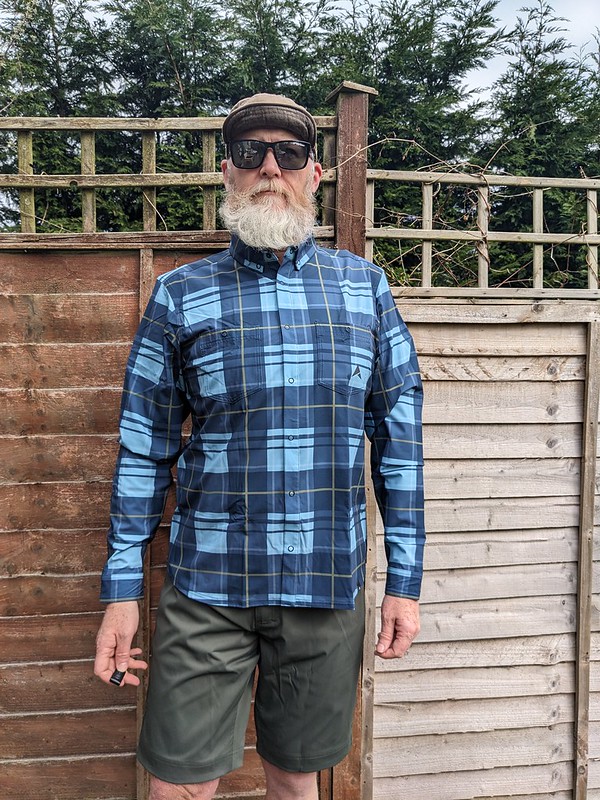
All Roads Cycling Shirt The ubiquitous check shirt, sometimes known as a flannel. Well Altura’s verion is not flannel at all. It’s a technical fabric more akin to a cycling jersey and is made of a polyester ripstop material, very handy when riding through the UK’s overgrown bridleway network. It has a lovely amount of stretch to the fabric has two chest pockets and snap button (or press-stud if you’re old enough) which makes venting on climbs very easy. Because it’s not flannel it folds up compactly so is great to stow away on your bike for pub stops or bike packing when you’ve made camp and are sitting around the fire…ok, maybe eating rehydrated cardboard dinners and hiding from midges but you know what I mean. The shirt also has some reflective detailing if the check pateern isn’t enough to get you noticed.
altura all road cycling shirtaltura all road cycling shirt front
A shirt like this should be in every riders kit as it’s so versatile and comfy to wear.
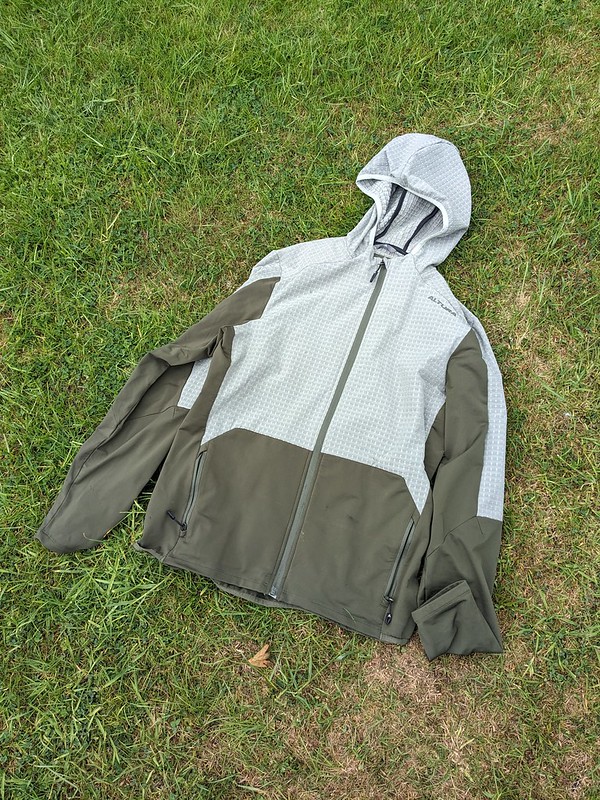
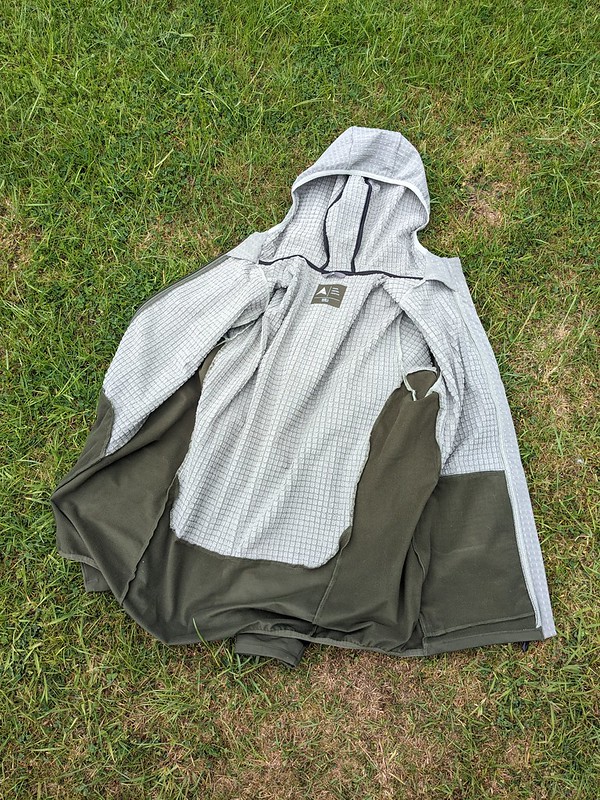
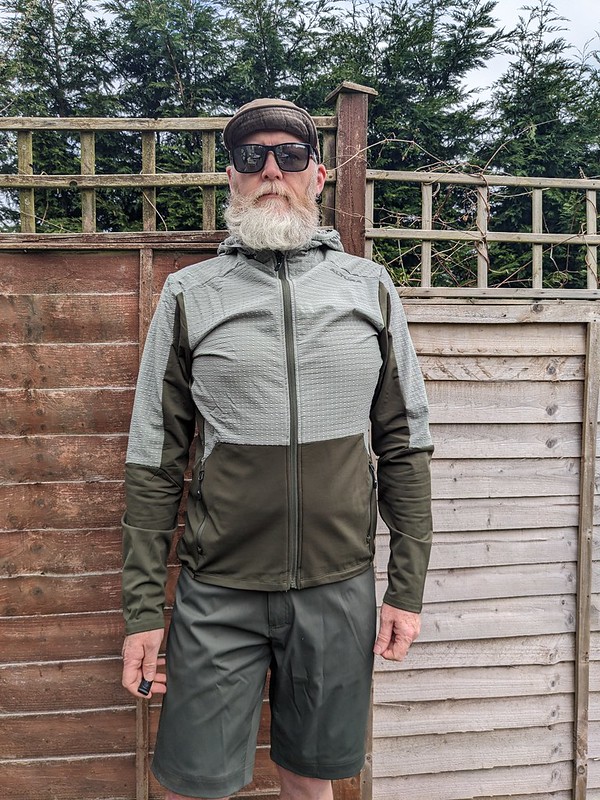
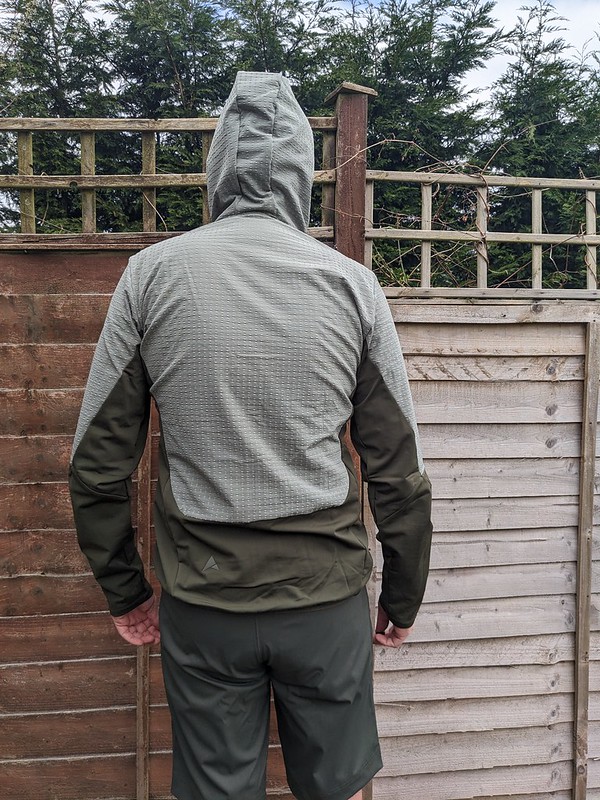
Altura Esker Cave Trail Hoody Hoodies for bike riding? doesn’t the hood just fill with air and act as a brake? sometimes yea in a high wind or speed situation but it really is just occasional and the benefits outweigh that drawback massively. The Altura Cave hoody (not sure what the Cave bit is about if i’m honest) is a soft feel jacket with high loft fleece areas on the chest and outer upper arms, just where windchill will make it’s presence felt. because of this it’s really an early or late in the day or an Autumn-winter-spring garment. The two zippered front pockets are big enough to stash a phone and the hoody is treated with a water repellent coating to shrug off spray and a light shower. And the hood? it’s actually elasticated so it’ll fit over a helmet and not fly off.
altura Esker hoodyinside altura Esker hoody
This hoody has been so comfortable and because the test period co-incided with the hottest spring for years has seen more use off the bike than on. That just shows it’s versatility though.
altura Esker hoody and all road shortsaltura Esker hoody and all road shorts
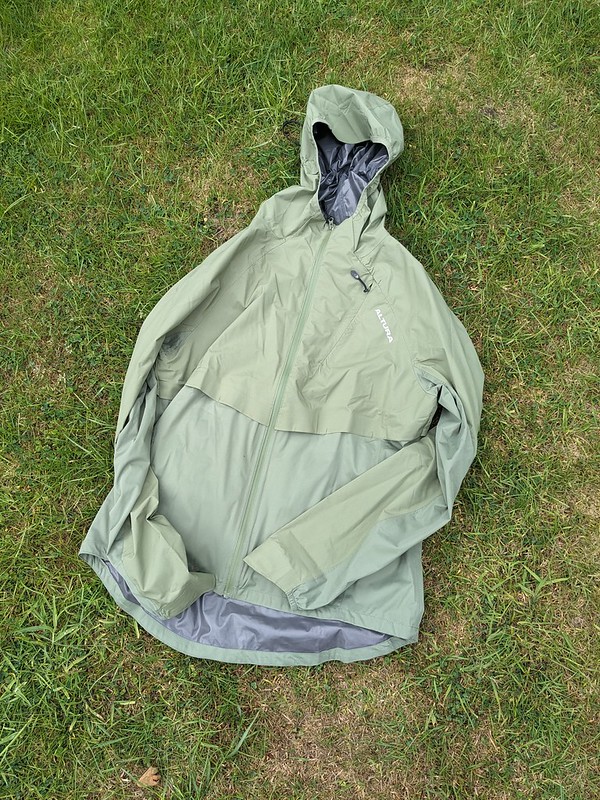
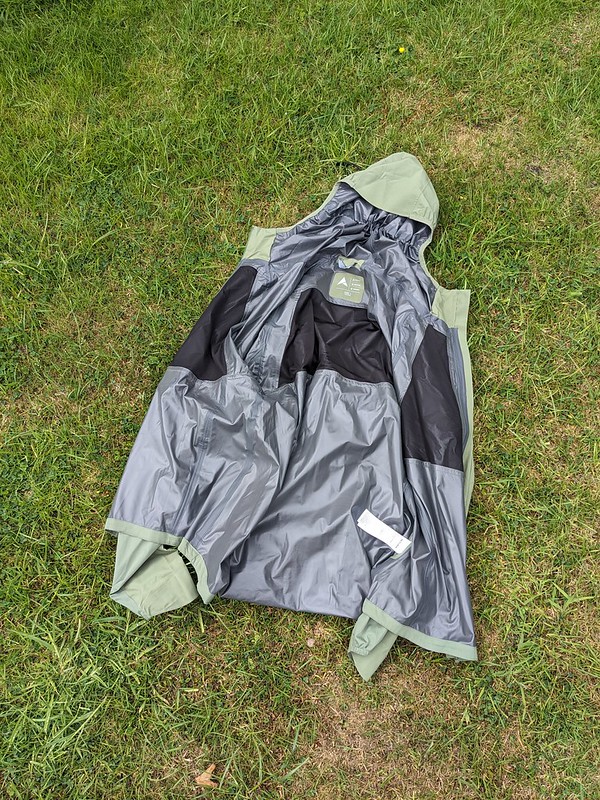
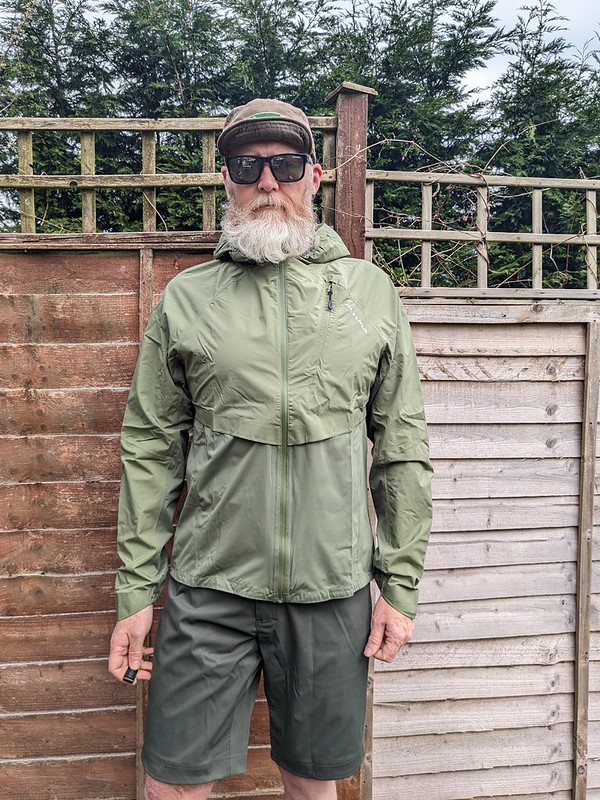
Altura Esker Waterproof Packable jacket Riding in the UK you will need a waterproof jacket at some point unfortunately. In my mind there are two types of waterproof cycling jacket. One that you wear when it’s already raining when you leave the house or one that you take with you, tucked away somewhere on you or the bike incase it starts raining when you are already mid ride. This Altura jacket is for the latter and it works pefectly in this respect as it is very packable and will fold away into it’s own pocket.
altura all roads waterproof jacketaltura all roads waterproof jacket
It is full waterproof with taped seams and has vents front and rear to aid breathability and an integrated hood. the hood has a drawstring adjuster to tailor the fit and prevent it blowing about. the jacket is cut for cycling and has sleeves that are longer to account for the cycling position. The cuffs are also partially elastic to stop draughts blowing up the sleeves. Again the fit is real world.
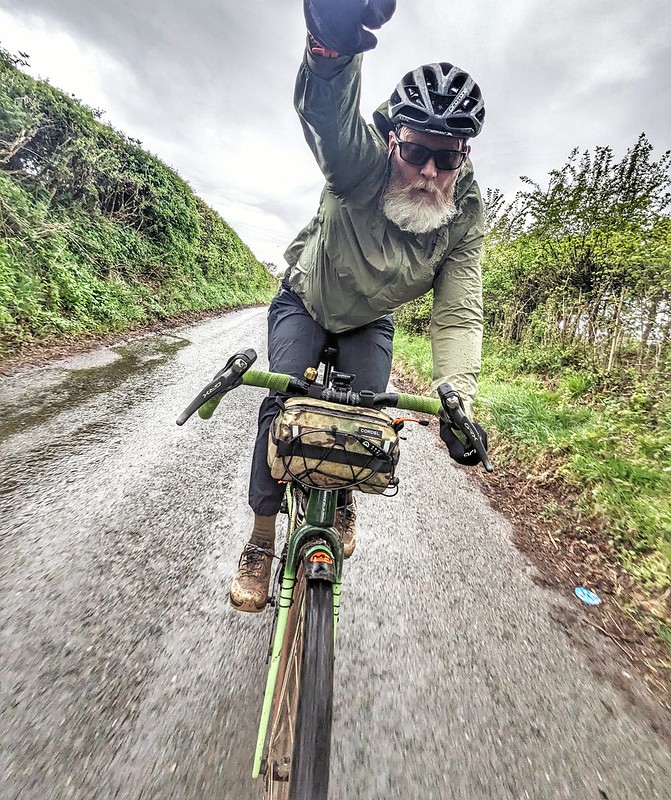
altura all roads waterproof jacketaltura all roads waterproof jacket and waterproof trousers
As with any waterproof jacket, even the most expensive, you will get warm riding in this jacket in warm humid conditions, that’s unavoidable but this jacket is no worse in that respect than jackets costing three times as much.
An essential waterproof jacket that takes up no room at all so you can take it with you for when you need it….and you will!
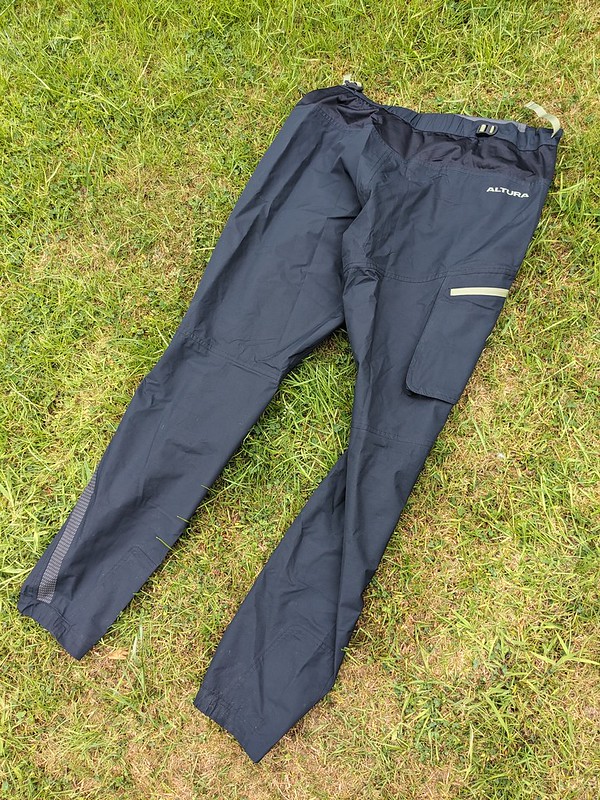
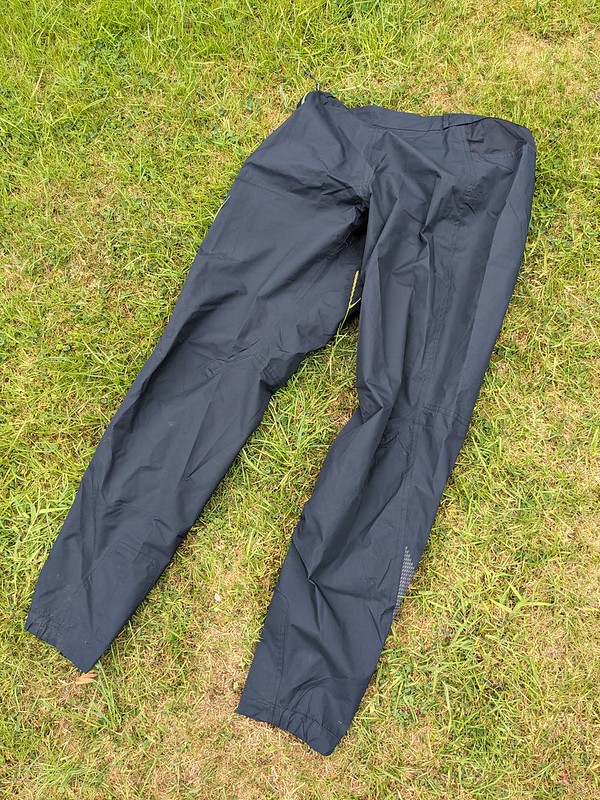
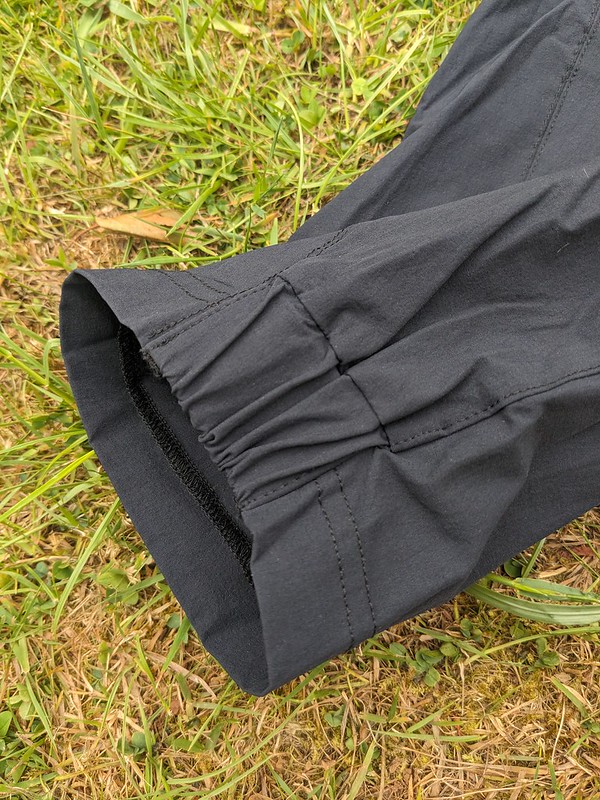
Altura All Roads Packable Waterproof Trousers Do you really need waterproof trousers? I’ve always thought this as all the waterproof leg wear I’ve tried in the past has been franly, horrible. Rustlely, clammy and hot is my experience with waterproof trousers so I put these on in trepidation, prepared to absolutely hate them but, what a revelation, these Altura waterproof trousers were truly excellent.
Altura All Roads Packable Waterproof TrousersAltura All Roads Packable Waterproof Trousers side zip
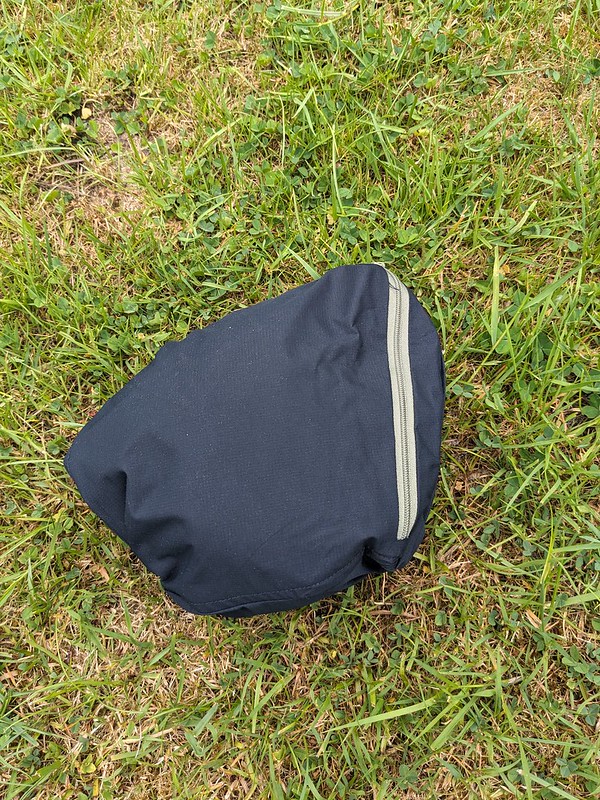
I picked a day when it had been raining for a couple of days and was still raining to give them a proper test. First thing to note is that the zip “fly” is off set to one side so no bunching up when you bend over and there’s a waist adjuster to get the fit just right. there’s also a side pocket that these trousers actually roll up into and are of small enough bulk to stash away on the bike making them perfect for bike packing or commuting.
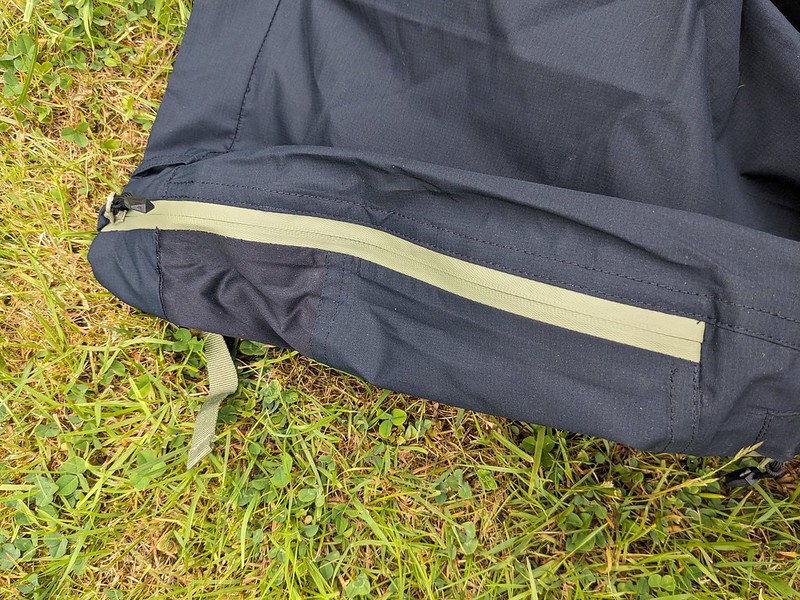
Altura All Roads Packable Waterproof TrousersAltura All Roads Packable Waterproof Trousers
The main thing I loved about these trousers was the fit. most cycling trousers tend to not have the correct articulation at the knee and the pedalling action pulls the trousers down when the knee grips the fabric. No such thing happened here, even standing up i didn’t have to adjust the waist height everytime. The material has a waterproof coating which made water bead off them and despite riding for a couple of hours in the rain in them I didn’t feel like i was over heating.
Fit again is good but I’d like to improve a couple of things, first the length. I’d like the legs to be longer, when riding there was a gap between trouser leg hem and shoe. easily rectified with a waterproof sock btu if you were using these as an emergency rain stopper them water will run off them into your shoes. the other thing is also hem related. the hem is elasticated and this ensures minimal trouser-chain interfaces but they fit so well here it’s definately a shoe off situation to get them on in that emergency deluge situation.
Those two things are far outweighed by how good the trousers perform and also how quiet they are when pedalling. no annoying rustle of the fabric. Invest in some waterproof socks, buy a pair of these altura all roads waterproof trousers and go and play in the rain!
Altura Esker Eco Trail Trouser winter riding sucks right? Its cold, dark and motivation is at an all time low. bib tights are just not cutting it in the single digit temps. That’s my feeling anyway so I bought the old version of these trousers and wore them with bibs and knee warmers underneath and they kept me toasty and able to extend rides because of the warm and how comfortqble they were.
Altura Esker Eco Trail TrousersAltura Esker Eco Trail Trousers adjuster
I was keen to try this new version to see if they were still as good and what differences there might be. The ECO part of the name is the result of using recycled materials in the fabric. there’s a water repellent coating that works well and the fit is great. the waist is a wrap around design with the adjuster over to one side so it doesn’t stick in your belly when in the cycling position. The material has a great stretch to it and it doesn’t hamper pedalling at all. Altura say there’s enough room at the knee for low profile knee pads, not something I’ve ever used but this room means the knees are free to move and don’t pull the material down. the close fitting hem length means there’s no flapping that might put the material into the chain.
Altura Esker Eco Trail Trousers hemAltura Esker Eco Trail Trouser raised rear
The fit is just as good as the original pair i bought and they pedal equally as well. If you hate riding through nettles and brambles in summer then these trousers are your go to. Despite me wearing mine in winter i have tried them in more clement conditions just to see how they faired and you won’t feel like a grain of rice in a boil in the bag sachet. They also pack up fairly small too so definately an option for bike packing.
The Altura Esker trail trousers are still my favourite full length riding trews!
This is just the tip of Altura’s clothing iceberg, they do road specific , commuting and MTB stuff too but these pieces above seem to cross all genres and so fit gravel riding perfectly.
The Altura All roads and Esker clothing range is good value, has realistic, real human sizing and is carefully designed by people who know about UK riding. Definately check them out when looking for kit to go riding in.
here’s a link to altura’s website, it’s not an afiliate link so I don’t get any money for this review, I do however get to keep the kit that they sent to me, afterall, no-one would want those bib shorts now would they?……hmm, maybe of of those specialist websites!
Ultimate Sports Engineering (U.S.E) have been making bicycle components for many years, I had one of their suspension seatposts on my mountain bike back in the 1990s. Together with the other arm of the business, Exposure lights, they have a well earned great reputation for well thought out and reliable components with excellent after sales service too.
I tested the modern equivalent of that original seatpost and you can read it here U.S.E now have a suspension stem in their line up and I was lucky enough to be sent one for a few weeks to try out.
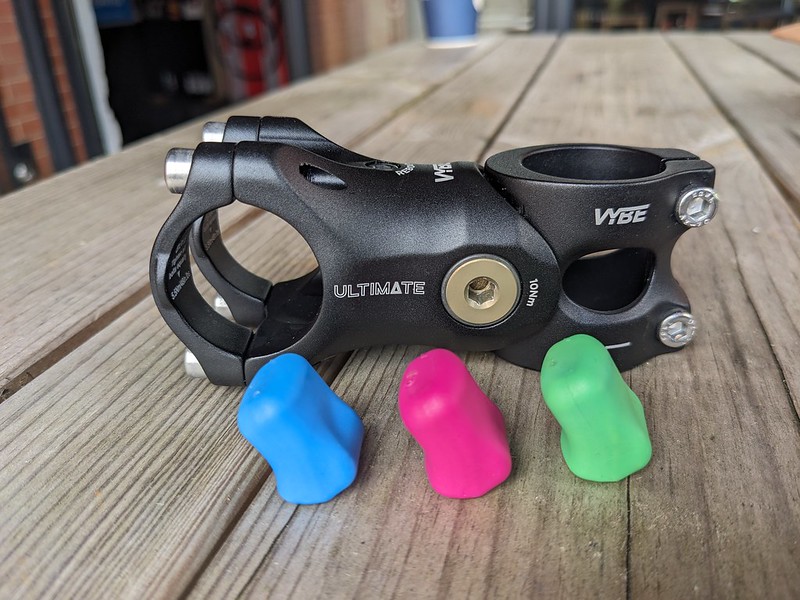
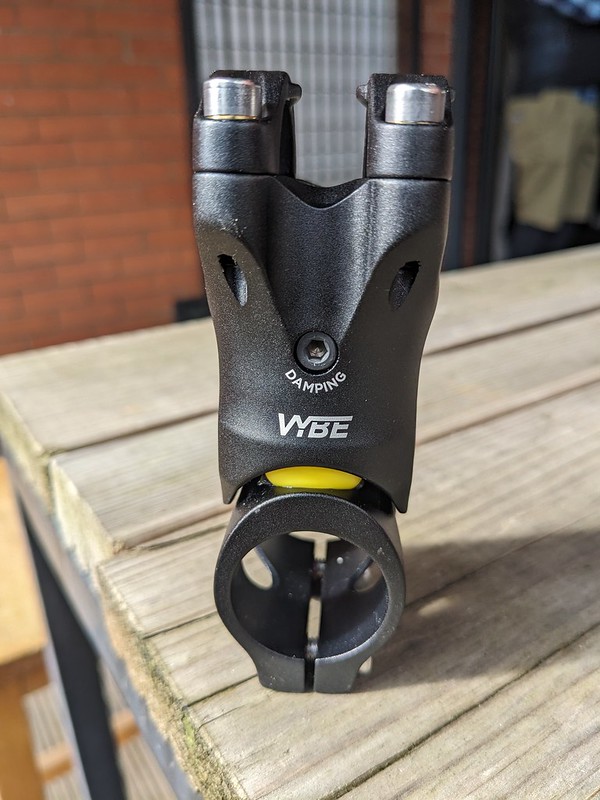
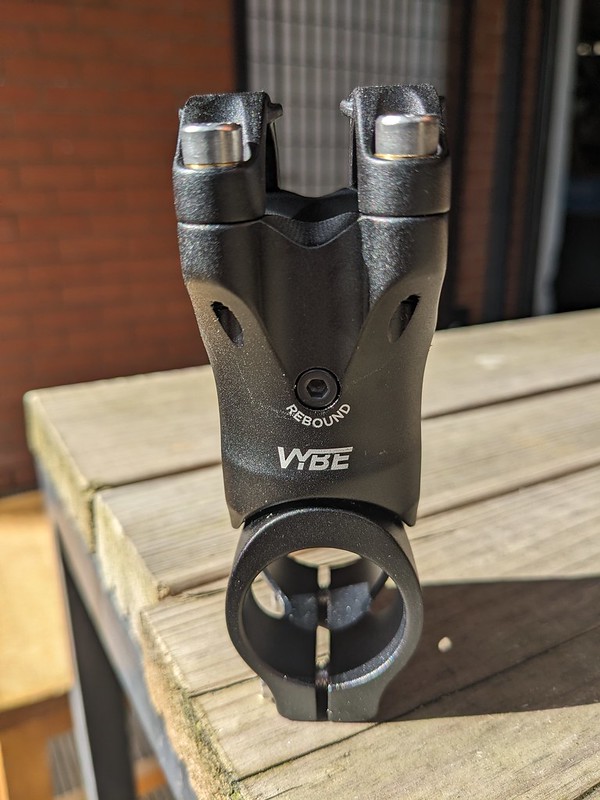
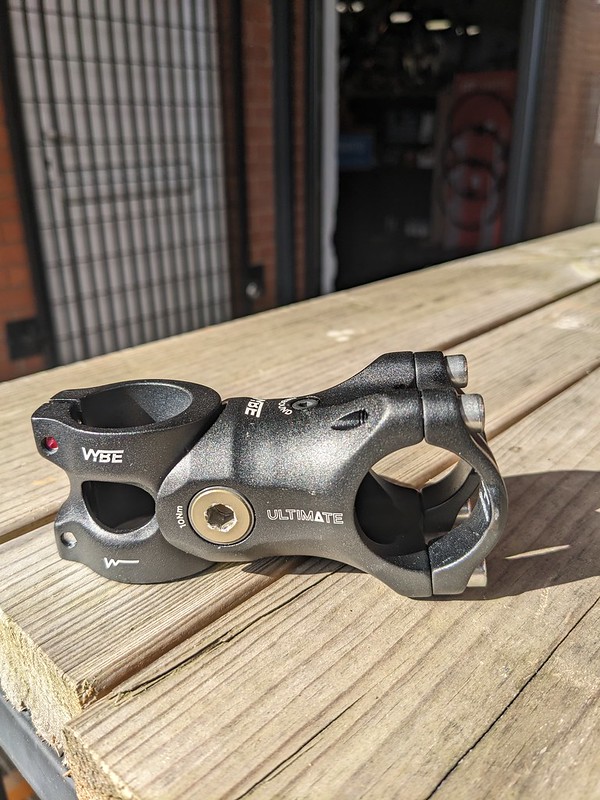
The stem is available in two lengths currently, 70 and 90mm and unlike other similar stems on the market is rated for use on drop or flat bars. It is constructed of aluminium, weighs194g for the 70mm version I tested It consists of one main pivot point that squeezes a changeable elastomer that allows the stem to move up to 20mm. The stem also has adjustment for rebound and compression, something I’ve not seen on any other suspension stem I’ve tried so far.
The first thing to say is that it looks like an ordinary stem, which to my mind makes it a much better prospect than some of the huge parallelogram style suspension stems on the market which are quite ugly in my opinion. When riding and you look down it looks good and is not something you’d want to hide!
As with most suspension stems, you need to dial in the stem to suit your weight and riding preferences. U.S.E. include 4 interchangeable elastomers that allow you to do this. The stem does have to be taken apart to swap the elastomers though. Happily there is a comprehensive guide included in the box and it’s on actual paper! no downloads needed. It’s pretty straightforward to swap, just make sure you put the stem back together as the U.S.E. guide states. U.S.E. also include a little tub of grease in the box which is a great touch.
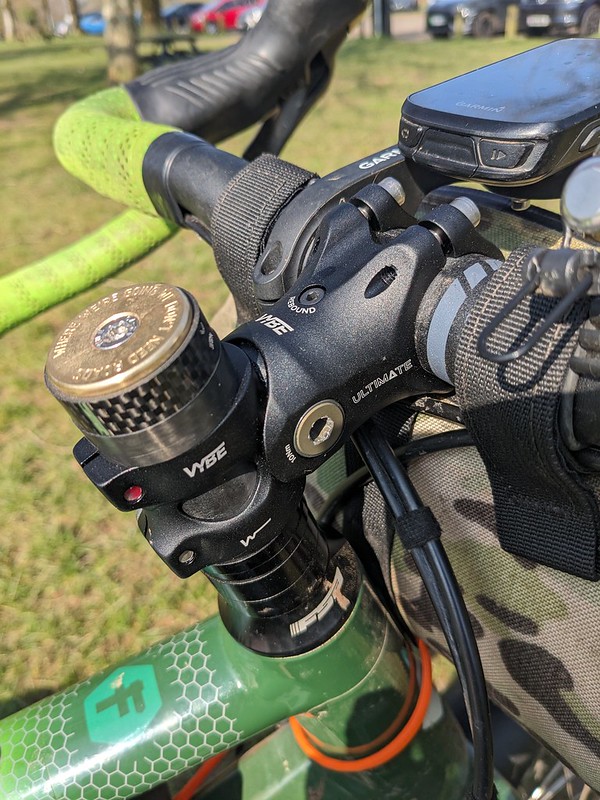
Set up with a yellow elastomer as per the rider weight guide and all bolts tightened to the correct torque I went for a series of rides to test out the stem, I’ve included a video below that shows the stem in action, please take a look (and subscribe to my youtube channel if possible, it’s free!)
So, does the U.S.E. Vybe suspension stem work, well yes and no. Firstly and this is the same as with any “suspension” stem, do not think of it as suspension like a suspension fork, it dampens the vibrations coming off the trail through your front wheel and rigid fork, it doesn’t suspend the rider from big hits. What it does by dampening those vibrations is reduce fatigue on you hands, arms, shoulders and upper body allowing you to ride further and recover more quickly. The U.S.E. Vybe stem does this brilliantly but there is one drawback and this is affected by your riding style.
Because the pivot point on the stem is very near the steerer of the fork the nearer your hands are to that pivot the less the stem moves. What this means when riding on drop bars is that the maximum compliance of the stem is achieved when riding on the hoods. Riding with hands on the drops and therefore further back than on the hoods mens the stem moves significantly less. So if like me you spend a lot of time on the drops for technical descending then you won’t really benefit from having that 20mm of travel. If you ride on the hoods you’ll get much more cushioning as you move along. So pedalling long sections of rough trail like forest fireroads or towpaths that are ridden on the hoods is where the stem really shines. I know for a lot of riders this is exactly what gravel riding is. Others like myself who don’t have that kind riding on our doorsteps and ride XC trails will find less benefit.
Since posting this review I’ve had messages from readers who have seen reviews of the stem where the main pivot bolt came loose during a ride. I can say for the 4+ weeks the stem was on my bike over various rides that bolt remained tight.
The Ultimate Sports Engineering Vybe Suspension stem is a well made and thoughfully designed component with added features over other similar stems on the market. If you are a fireroad/towpath/rough bridleway and typical UK pot holed road rider then it’s an excellent way to reduce fatigue and lengthen time in the saddle. if you push the boundaries of what a gravel bike is supposed to do it maybe of less benefit but who doesn’t ride all the above to get to the juicy challenging routes? Might as well take advantage of that suspension for those section as it won’t hinder you on the downs!
you can find more information about the U.S.E. stem on their website here
Restrap is a British company who have been producing bike packing bags and accessories since 2010. The company started from a bedroom in the North of England.
Now anyone who knows Northern England will know all to well that they get, and I’ll describe it generously as, “mixed” weather up there. So, they should know a thing or two about what works on a bicycle in those varied conditions. Restrap have had saddle bags in their range for many years but recently introduced some new models a 2.4ltr and a 4.5ltr bag. i was lucky enough to be contacted by Restrap and they asked me to give my opinion on the new models.
Restrap saddle packRestrap saddle pack dropper post
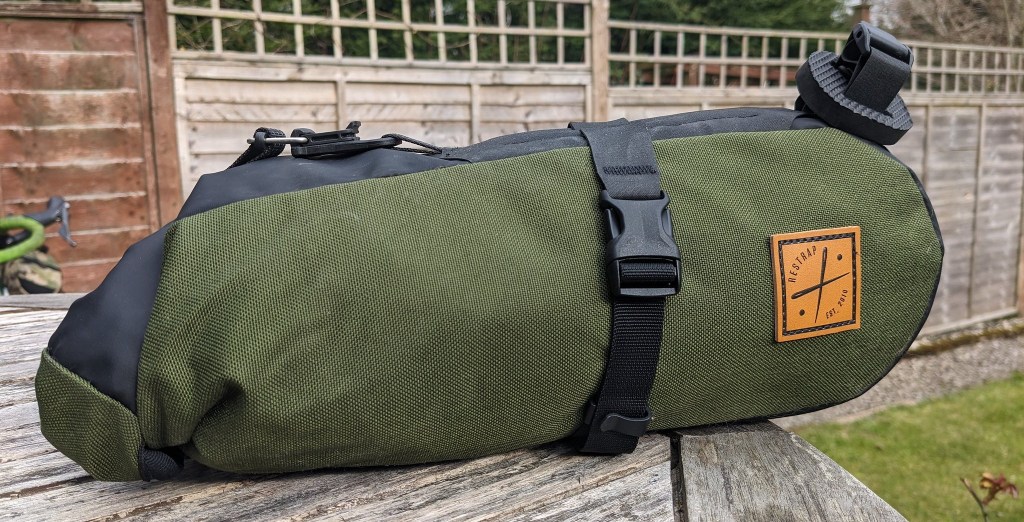
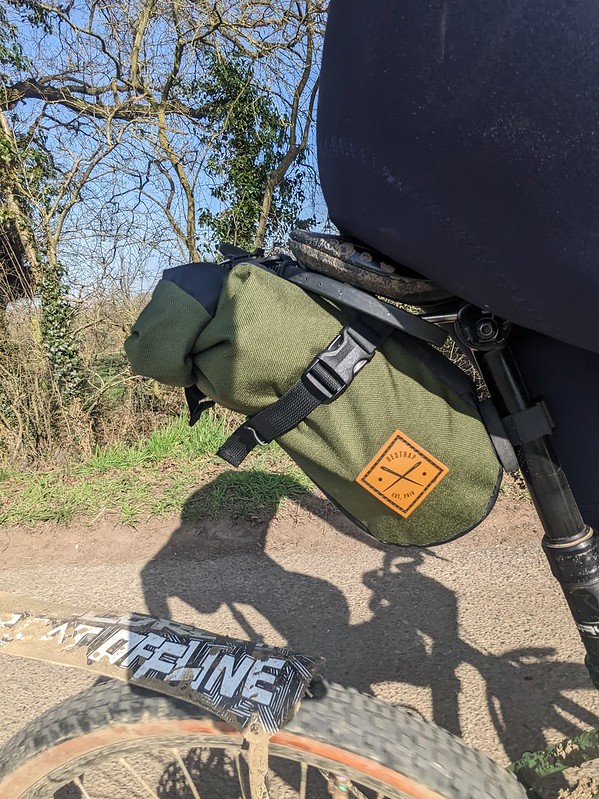
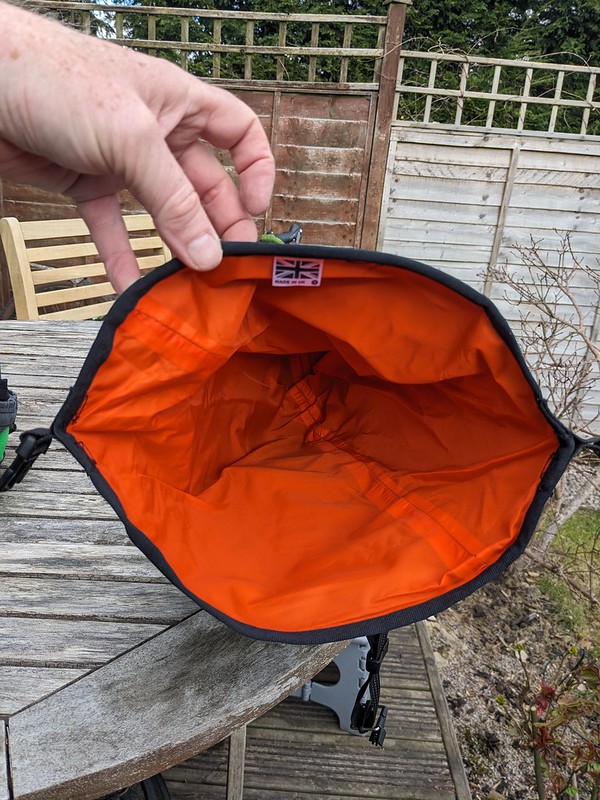
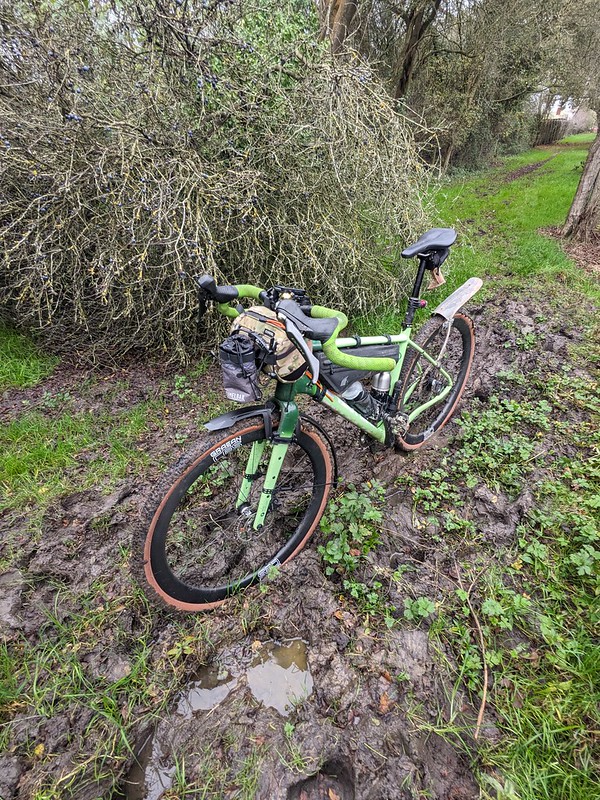
I plumped for the 4.5ltr version in a green colour (to match my Fustle Causeway) but they are available in black and orange too. Made from super hard wearing 1000d cordura nylon material the bag looks quality from the outset, it is also easy to wipe clean. The part of the bag in line with potential spray from the rear wheel is coated with a TPU rubber for extra water protection and the interior is seam sealed to keep 100% of any moisture out. The interior material is also a bright orange colour which makes finding items inside the bag in varying light conditions much easier than if it was the usual black colour.
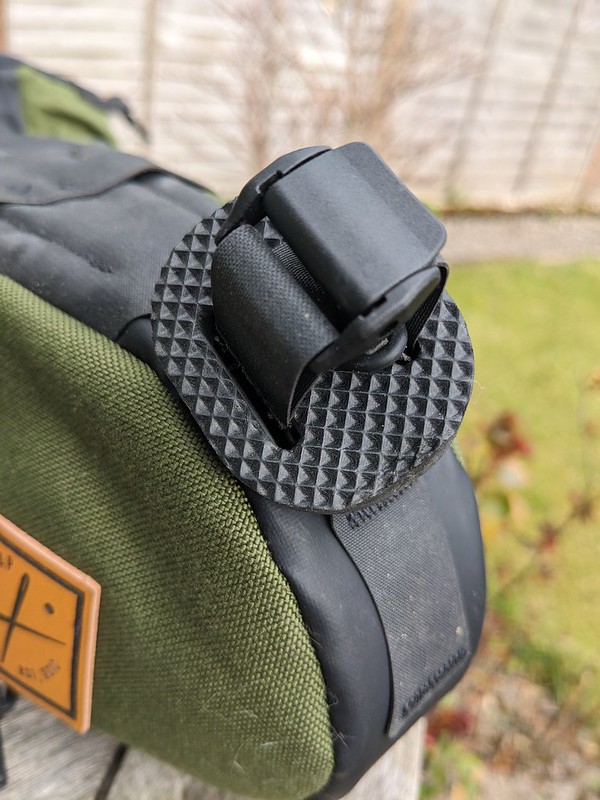
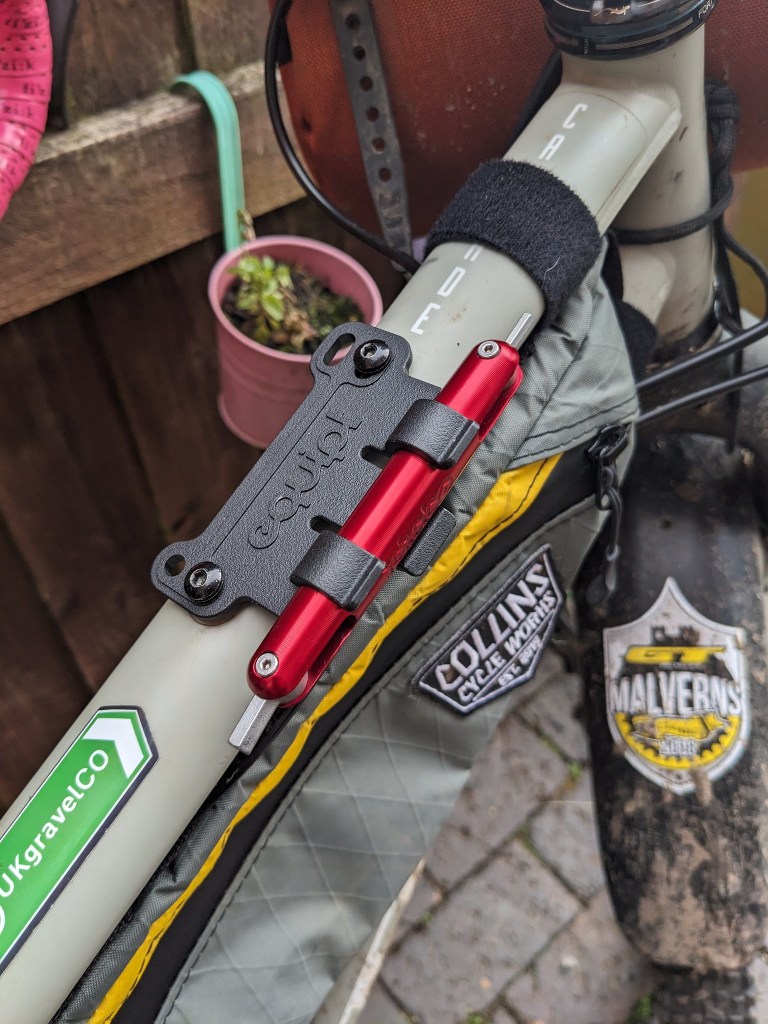
Fixing the bag to the bike is very easy. It has straps and buckles that fit over the saddle rails and a rubber strap with a sponge spacer to fit around the bike’s seat post. All these straps can be snugged right down to fit the bag neatly under the saddle, minimising movement. the straps can be neatly tucked away too with the supplied plastic clips making for a very neat surplus strap solution.
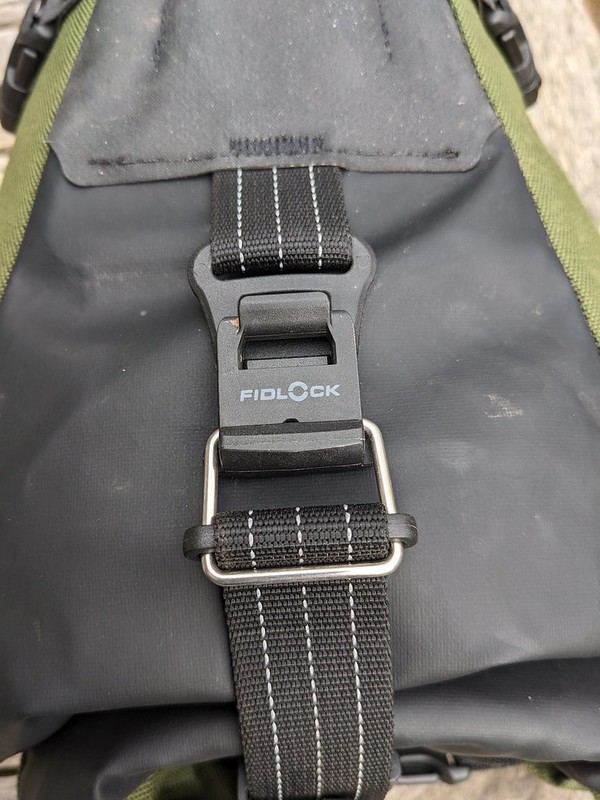
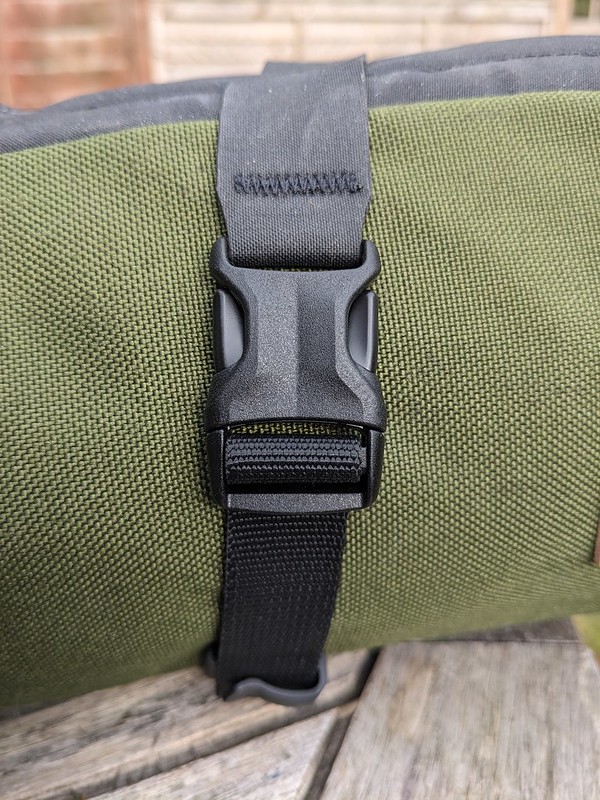
The saddle bag has a roll top and this means if you have only a small cargo to carry you can cinch it right down to stop any baggyiness and of course if you have a lot of kit you can do the smallest amount of roll and really stuff the contents in and it’ll still be secure. The bag closure features a lovely fidlock magnetic clasp that emits a very satisfying click when it engages.
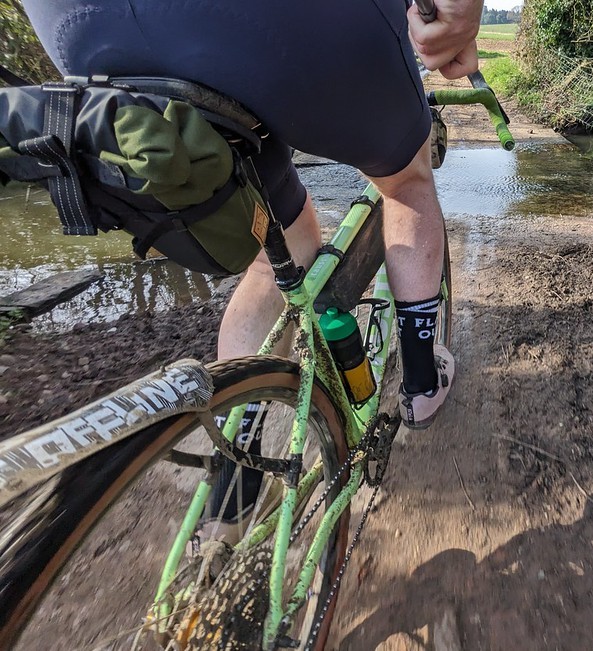
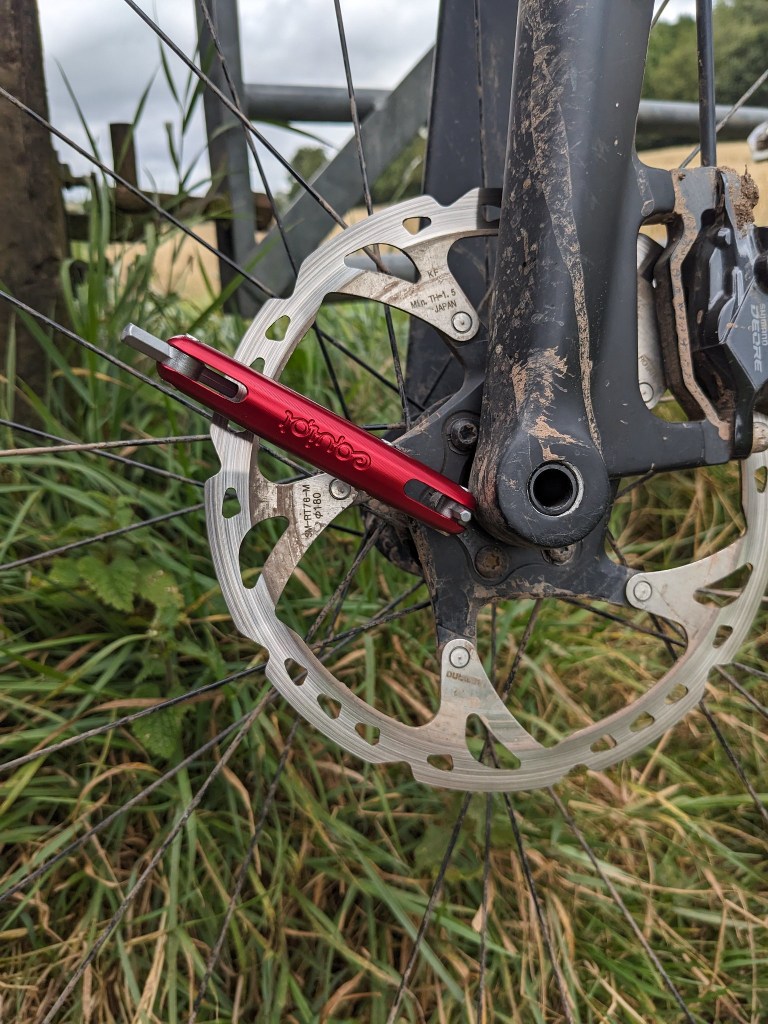
Although Restrap don’t mention it on their website the back will work with a dropper post. I’d recommend taping the post where the strap sits though.
On the bike and fully loaded the bag has impeccable manners, there’s very little side to side “wag” even when i deliberately put the heaviest items to the back of it. check out the video below to see it in action. it’s not a quick access bag as it sits out back, but if you wanted to replace a bar bag and just run a top tube bag for essentials it would be ideal. the fact that it easily detaches means if you are touring and need to take the bag with you into accomodation it’s straightforward and convienient. On that note, it’s not really a long distance bike packing bag unless you are one of those riders who can ride ultra events on 1 mars bar and 2 hours sleep in a hedge! For the rest of us it’s a great day ride or “credit card” touring bag where you carrying minimal kit and travel between B&Bs/AirB&B etc and aren’t carrying a tent and cooking paraphernalia.
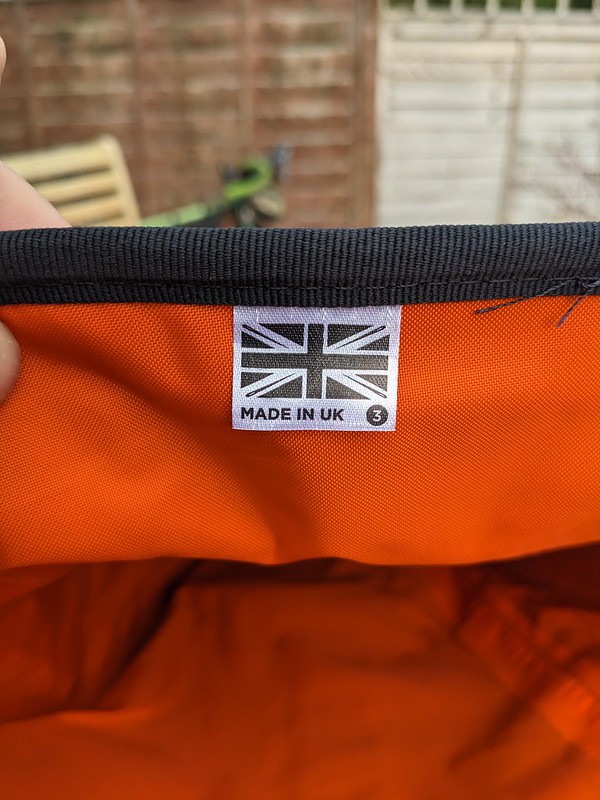
Restrap saddle pack est 2010Restrap saddle pack proudly made in the UK
the Restrap saddle bag is hard to review really as there aren’t any downsides. it’s always nice to suggest an improvement or a short coming and the bag doesn’t have these. I’m reluctant to say it’s boring, maybe drama-less is a better description as it just gets on with the job,…. if i think hard maybe it’s lacking a loop to attach a rear light as it’ll probably cover your seat post, the traditional spot for a light but really that’s just nit picking.
The Restrap saddle bag is made of quality materials with years of design experience learnt in true British conditions built in. it’s even great value when you look at other bags of similar size. there aren’t any downsides*
here’s a link to the Restrap website for this bag Restrap 4.5ltr please note this is not an affiliate link. i don’t get any kick back (£) from this review so you can be assured it’s a genuine one.
please check out the videp that goes alongside this review and please take the time to subscribe to my youtube channel, it’s absolutely free to do so!
*the only downside is i’ll have to probably send it back to Restrap!
This is going to sound obvious, but wheels are the most important part of a bicycle, after all it wouldn’t be a bi-cycle if it didn’t have a minimum of two wheels right? However the humble wheelset is often over looked when buying a bike. The shiny flamboyant (or drab, your choice obvs) paint job is the first thing you see right before you check out the gears and brake groupset that is on your potential purchase. Well, here’s the thing, bike manufacturers know this and so a fancy paint scheme and a chi-chi rear derailleur are added to turn the buyers head. The reality is the hidden bits, the bottom bracket, the finishing kit (handlebars, stem, seatpost etc) are never going to be more then functional unless you are spending a LOT of money. This is fine, all these parts are easily replaceable or upgradable in the future lifetime of bike ownership, they get the job done to start you off.
Unfortunately this lower standard of component also extends to those very important hoops that are your interface with the terrain you are riding on (apart from tyres, again, easily upgradeable when they wear out) and this is a shame as a good set of wheels can really improve the ride of a bicycle. Most original equipment wheels will come with basic bearings, heavy hubs and rims and may or may not be tubeless compatible should you choose to run without inner tubes.
So one of the first things I’d suggest you upgrade on a bike is the wheelset but this is going to be more expensive than swapping out a saddle or handlebars, not everyone is made of money so what you need to look for is affordability, build qualilty, ease of maintenance and ride characteristics.
Most of those wheels that come on a new bike will have been put together on a wheel building machine, these are wonderous things that literally take minutes to go from a set of hubs, spokes and rims to a fully built wheel and there maybe a cursory quality control check at the end of that production line but they will have been built to a price and will be nowhere near the quality or have the attention to detail afforded to them that a set of hand built wheels do. But hand built wheels cost mega bucks…dont they?
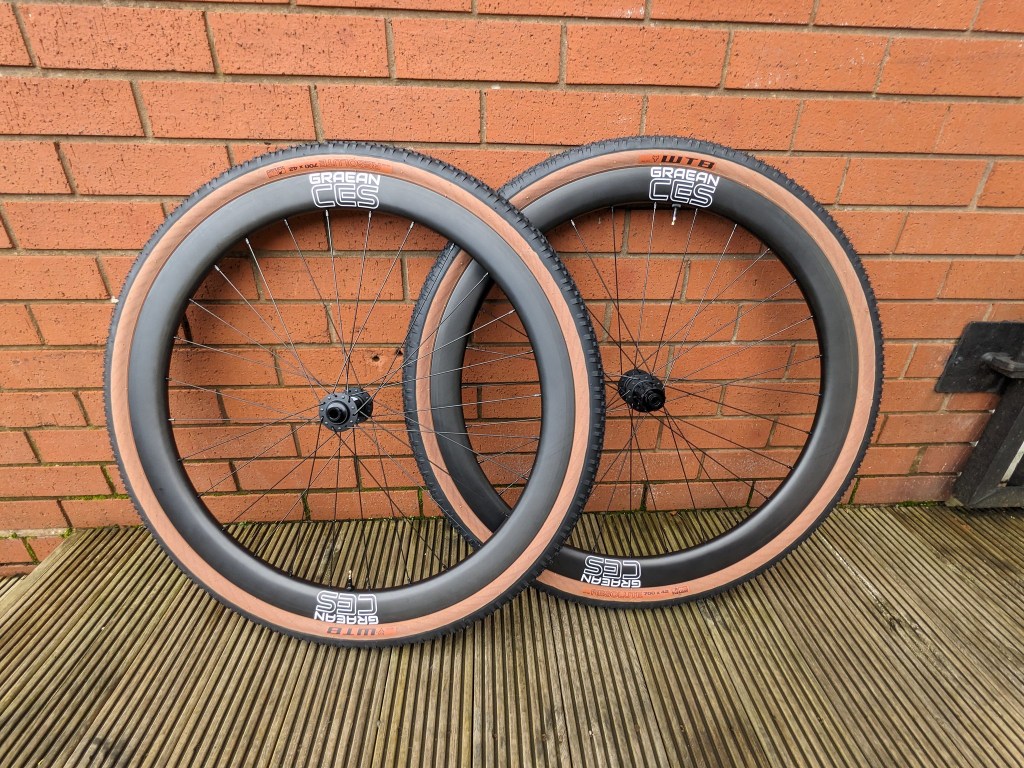
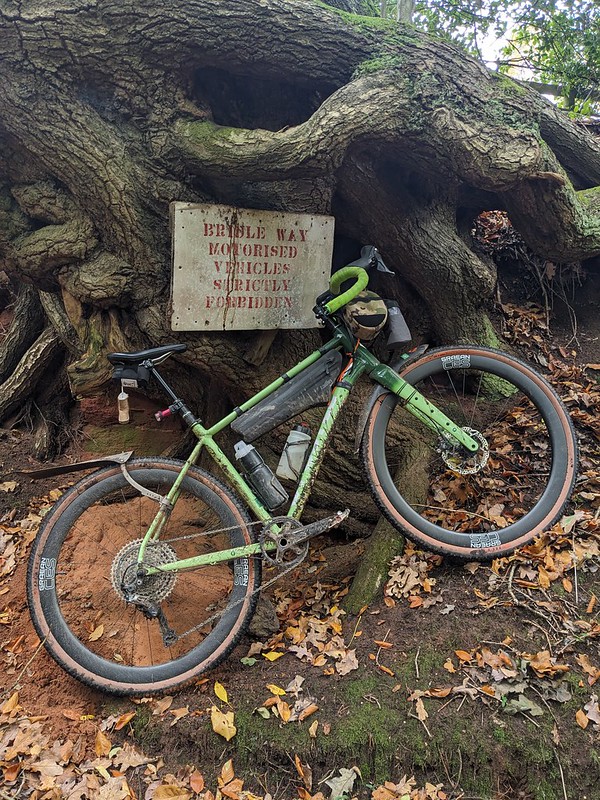
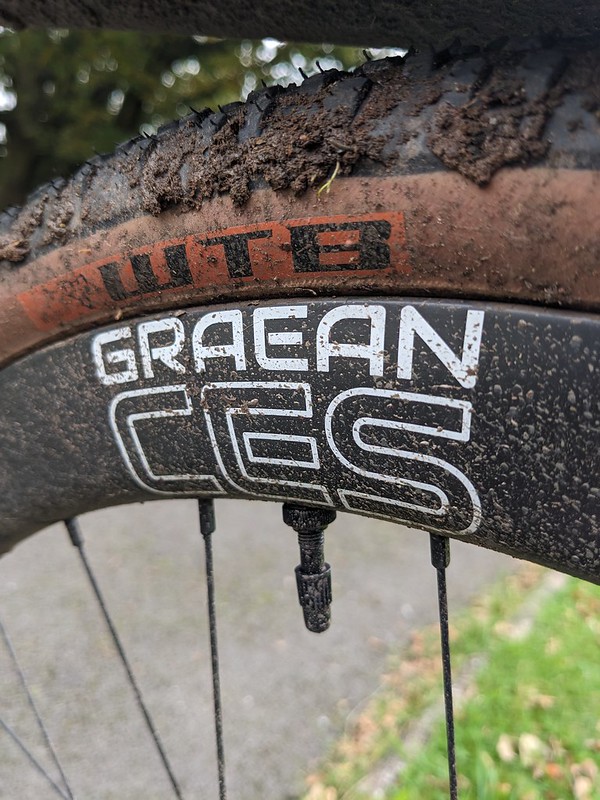
CES sport came to my attention when they followed me on instagram, I’ll admit it was the first I’d heard of the company and I did a bit of internet searching and read their bio and saw that after supplying wheels to the triathlon community they had branched out into gravel with their “Graean” wheelset. Unusual name you think to yourself, well not if you hail from Wales, which is where CES Sport is based “Graean” is the Welsh word for Gravel! I messaged Joe, the founder of the company and asked if he was willing to send a pair of wheels for review, with the usual caveat that It would be a honest review and that given the state of my local trails the wheels were not going to get an easy life. Joe was fully confident in the wheels and sent a pair out to me.
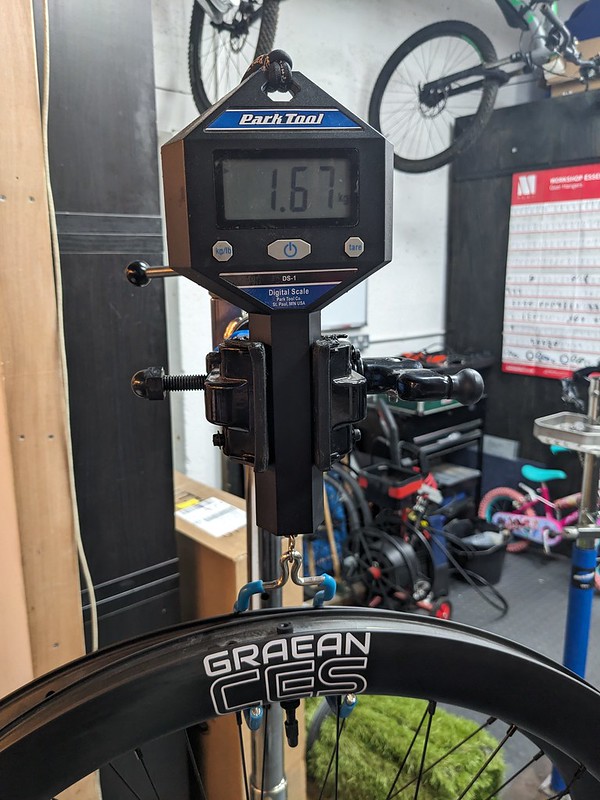
I asked that the only thing they should come with was tubeless valves as I intended to mount my own tyres. this is because I have a working knowledge of how those tyres behave so as not to muddy the water of the wheel review by getting used to a new tyre’s handling characteristics. I added tubeless tape, sealant and a pair of WTB Resolutes and then swapped rotors and cassette from my usual wheels, but before this I weighed both wheels (with valves) and they came out at 1670g. exactly the weight claimed on the CES Sport website, this was a first for a review!
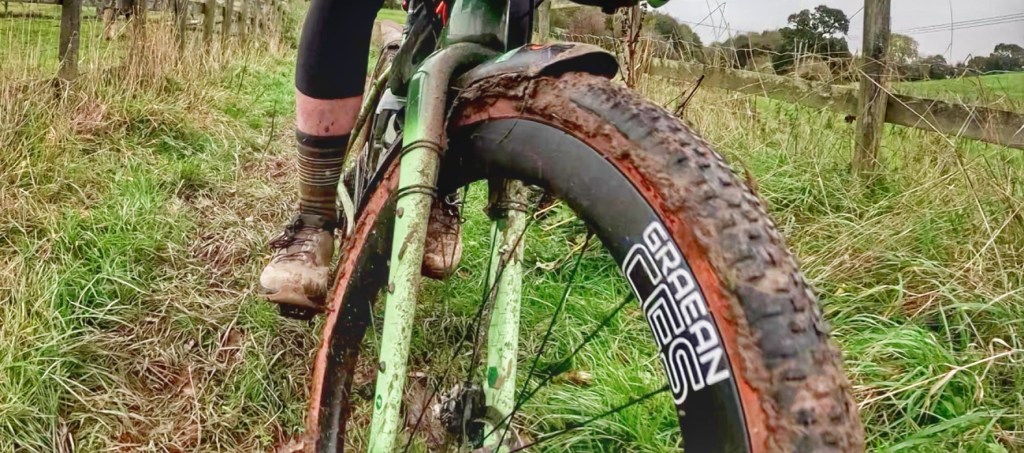
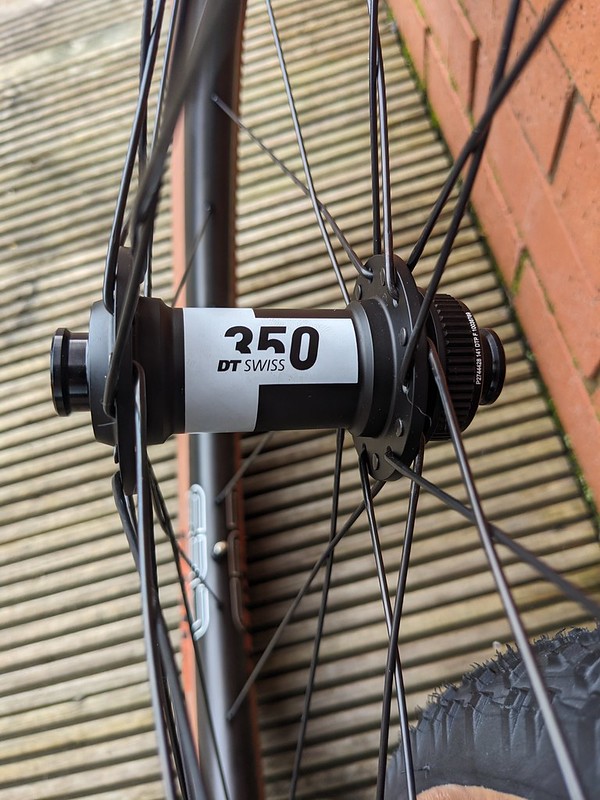
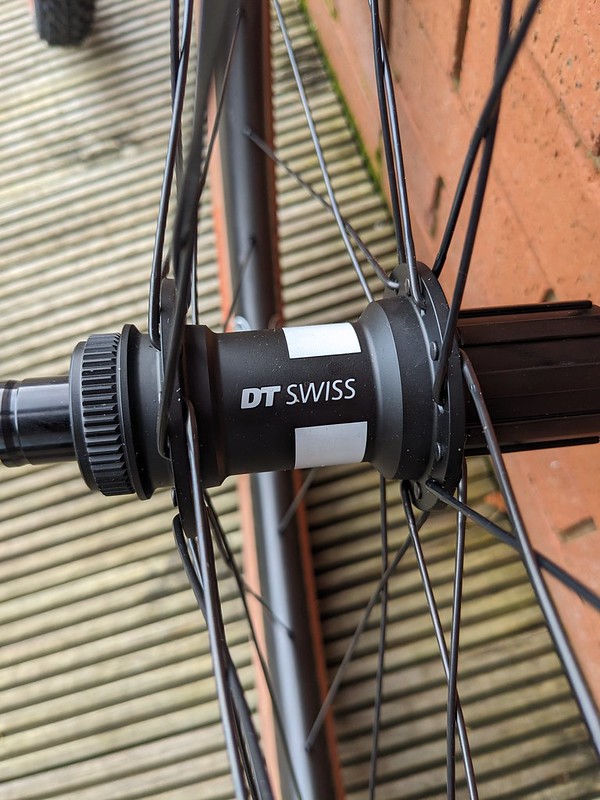
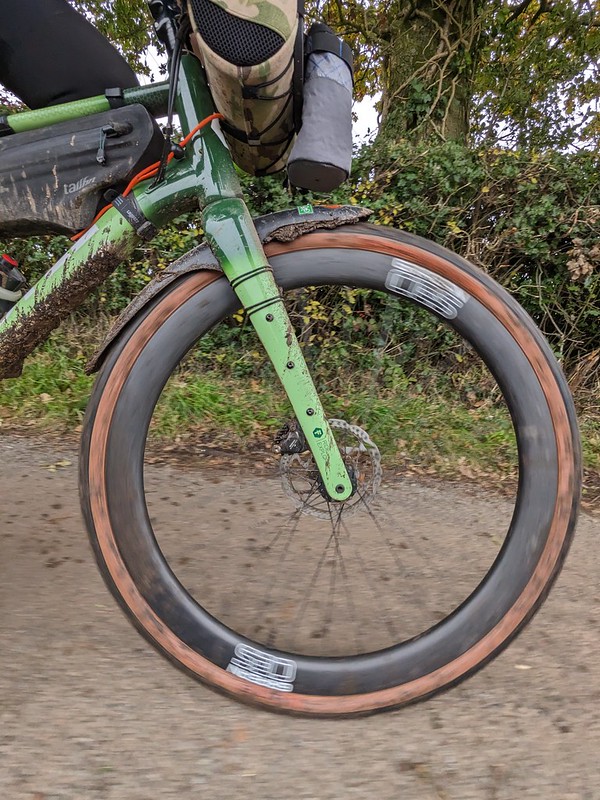
There’s a choice when you buy the wheels of having Bitex hubs or DT Swiss 350 hubs, I let Joe choose these and they came with the DT Swiss. These hubs ran smoothly throughout the test period although they did freak me out a little as I’m used to the loud buzz of Hope hubs and the DT Swiss were near silent. Talking of which, these deep section 35mm rims were also silent. A lot of deep section carbon road rims emit a frankly horrific rumble on tarmac that you can hear from miles away. (how you can ride with that noise I do not know) maybe it’s the higher volume tyres on a gravel bike that quiet them down but either way I was relieved at this characteristic.
The rims are 25mm across internally and 32mm across externally. My 42mm tyres seated first time with a track pump and sat with a pleasing round profile. The rims are not hookless so you are not confined to a few compatible tyres. They are built with Sapin j-bend spokes and brass nipples….yes! This may not mean anything to you but it ensures the wheels are easy to maintain, spokes are easy to source if you break one and the nipples are external. Too many wheelsets have fancy, hard to find proprietory bladed spokes. They have aluminium nipples that can corrode (react with the steel spoke) and break and the nipples are sometimes hidden in the rim meaning its a tyre off scenario just to true a wheel. This approach by CES is to be applauded, it may add a few grams but I’d rather have ease of maintenance any day.
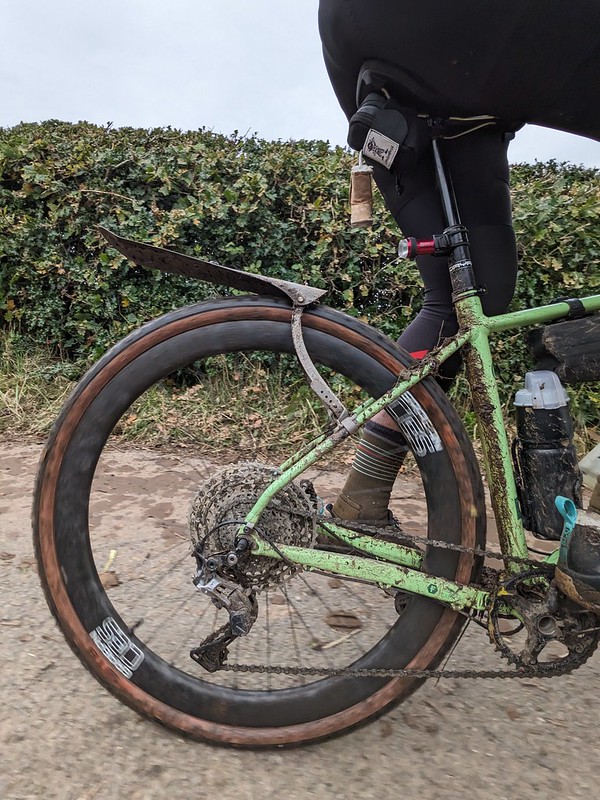
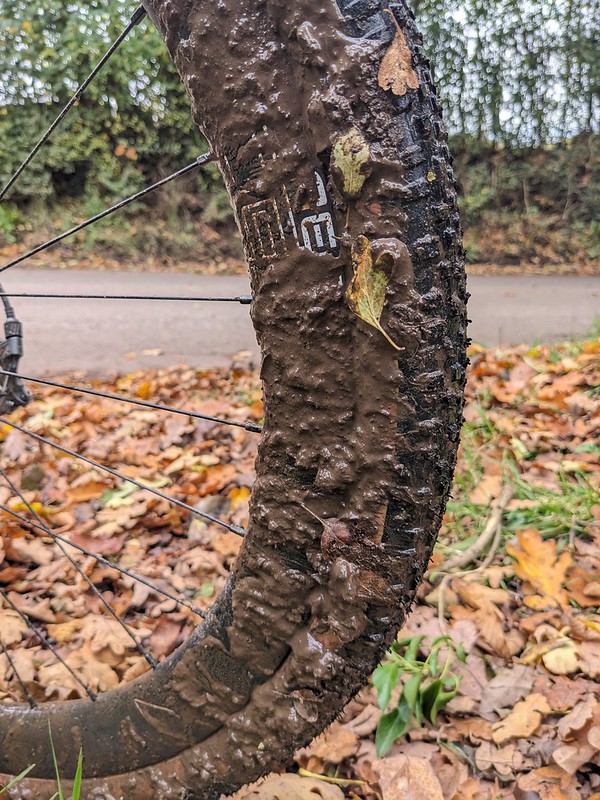
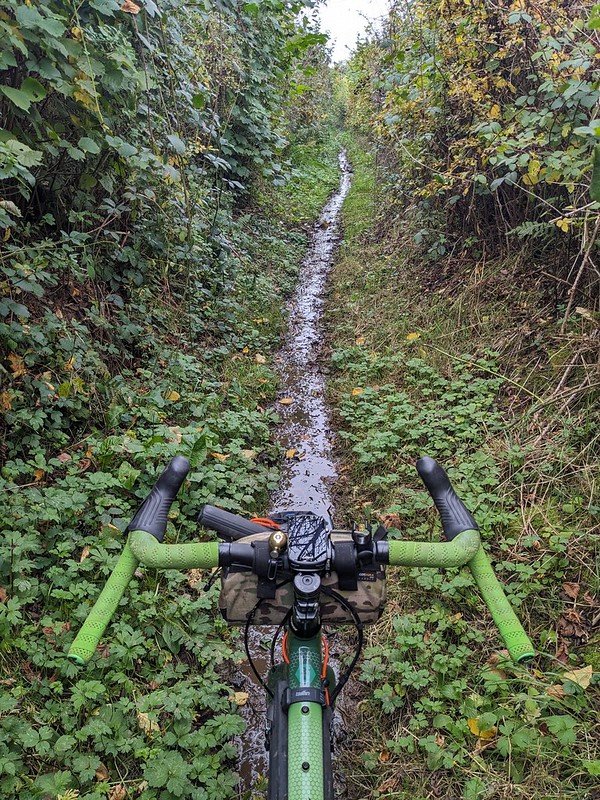
So on paper they sound good but how did they ride? Well I did not give them an easy life at all. My local trails are already hub deep in mud in places, soft ground and bridleways heavily used by our horsey friends see to this so they’ve had a baptism of fire mud. Mix this with a liberal scattering of leaves and a close fitting front mudguard and this saw the rim walls scaped with all sorts of trail detritus. I’m writing this in the garden now looking at the wheels drying in the pathetic bit of sun we have today after being washed and they look absolutely unscathed…..apart from a slight peel on a sticker, I’m told though that this is the demo wheelset and the stickers will be different on production rims.
The wheels are noticably stiffer than my usual aluminium rimmed wheels, out of the saddle flinging the bike from side to side to try and flex them there was no tyre rub on that close fitting mudguard, something that is very noticable on my normal wheels. It gives you the feeling that all the effort you put on the pedals is being transfered into forward motion. I did drop the pressures of the tyres by a couple of psi as at 32-35 on really rocky ground it did become bumpy but that seemed to do the trick and they became as comfortable as my usual wheels but without any squirmy feeling.
When you ride a wheelset for the first time after its been built the spokes tend to ping and bang a bit as they seat and you should check for trueness, these wheels through did not do that. This I put down to attention to detail from the builders. This is the difference between those bog standard wheels that come on your new bike and a set of hand built wheels, someone has taken the time to check their work and taken pride in doing so. Yes, the components are off the shelf, the rims are almost certainly built to spec in China (the DT Swiss hubs almost certainly are) but here they are chosen for a job rather than the price point being the be and end all, the fact that this set of wheels come in at an affordable, compared to other carbon wheels, price of less than £1200 (less than £950 for the other hubs) makes them stand out of the crowd.
The CES Sport Graean Carbon wheelset rides and works well, They are easy to maintain, are comfortable but still stiff and with the build quality and ease of tubeless set up I can’t think of a downside……oh no wait, If they had a stealthier sticker they’d be spot on, I guess thats the triathlon influence!
you can find more details on the CES Sport website here (not an affiliate link)
Checkout the video review of the wheels below, If you like or dislike this video please take the time to subscribe to my YouTube channel. It costs nothing but makes a huge difference to me
Brooks saddles have always scared me. Tales of having to do long rides to break in the leather top, the spanner that came with them to adjust the spring underneath to stretch or relieve the pressure on that top and the well, lets face it, the retro bygone era look of the things all contribute to asthetically make me not want to go near one with my tender under parts!
Well Grandad I hear you say (and probably Brooks reading that paragraph) things have moved on. Brooks have evolved and moved with the times. They do of course still produce those hand made leather saddles and I concede that once the breaking in period has passed and the saddle has molded itself to your undercarriage they are probably the comfiest saddle out there. However, who in the modern world has time to go through all that discomfort? I have to hold down a day job and also have the every day humdrum chores that we all do so my riding window is small and I need to make the most of it by jumping on the bike and go riding.
The Brooks Cambium range of saddles is their solution to those of us without the time to break in new parts (or break our own doing it) and shock horror it isn’t even made of leather!!! No the Cambium has a vulcanised rubber cover so no worries about water damage or having to treat the material to protect it. Wash and go at the same time as you clean the bike. It has tubular steel rails and aluminium rivets.
Yes rivets, you see Brooks haven’t abandonned the traditions completely. The saddle is still designed to have the “hammock” effect of the original saddle, the top is still riveted together but with anodised aluminium rather than copper rivets and it even has a traditional twin fitting for a saddle bag, such as Brooks’s own or something like a carradice waxed cotton one. Lets not stray too far into the past though, as sunlit and glorious in a rough stuff fellowship kind of way it might be. Make no mistake the Cambium is a well thought out modern saddle that has been designed for commuting, road riding, world travel, gravel biking & bikepacking in all weather conditions.
The 17 part of the name represents the width, Brooks produce a 15 and a 19 in these and their other saddles. I went with 17 as it was closest to the width of saddle I’m most used to. I received a “carved” version which means there is a cut out in the middle designed to add pressure relief and more flex for long hours in the saddle. The rails will fit any modern seatpost and theres is no tension adjustment for the top.
The ride then does not match what my preconceived ideas forecast. To my eyes it looks uncomfortable and hard. This though is as far from the truth as it’s possible to get! The saddle feels like you are easing into your favourite armchair. The first few rides I found the flex a little disconcerting and I thought I could feel the cut out move and close together a little as i sat down but I think this was entirely psychosomatic as it didn’t interfere with any of my delicate parts at all. I didn’t find this flex affected the ride though, there’s no bouncing pogo stick like over rough ground but I could tell the difference from my regular saddle. The ride wasn’t as harsh, its no substitute for a suspension seatpost (or full suspension bike) by any means but it does help with that trail chatter and that has got to help with fatigue over a long ride.
Brooks C17 carved rivetsBrooks C17 carved saddle bag mount
I’ve used this saddle over the summer and now into the wet autumn…..who am I kidding, the summer was nearly as wet! The rubber saddle cover has proved durable and actually doesn’t look like its been used at all! It shrugs off water and a quick wash with a sponge or hose cleans off any residual mud or grit completely. After multiple rides the only thing I think I’d change if I was to buy one of these saddles is to go with the narrower C15. This is because I’ve mostly been using the saddle on a bike with a standard seatpost, not a dropper post so going downhill I’ve had to get my weight and myself behind the saddle in the old fashioned way and the slightly wider rear of the saddle has made this a process I’ve had to concentrate more on than if it was narrower. The fact that this method of riding with a rigid post is the only old fashioned thing about the saddle is not lost on me given my first two paragraphs. I think I’d go with one of the colours too, black is rather too traditional!
The Brooks England C17 saddle, there for the long haul rides with armchair comfort and lasting looks
you can find out more details from Brooks England (not an affiliate link)*
*if you’d like to support these reviews and ukgravelco.com then please consider following this page, the instagram channel, subscribing to the youtube channel all of which are free to do or buying something from the ukgravelco shop, links below
Way back in the summer I took a trip up to Manchester to visit the Bespoke Bicycle Show which was hosted in Victoria Baths. It was a lovely venue, if a bit delapidated. The show it self was a shadow of its former self when it was in Bristol but there were some interesting exhibitors non the less. After an argument in the carpark I popped into the baths and immediately went straight into the deep end of the pool, thankfully this is where the show was and no, it wasn’t under water!
I was drawn to one exhibitor straight away though, I say exhibitor because stood by a wooden table, a table that was conspicuously empty of anything apart from a Japanese guy who was leaning on it looking a bit lost. Turns out his name was Koh and he owns and runs Equipt-Japan. Frustratingly for him, he had made it all the way to Manchester but his stock hadn’t. It was still in transit and he was hoping it would arrive by day two of the show! Not ideal, what was ideal though was that the only UK stockist of his items was Keep Pedalling in Manchester and he’d raided their display and had one example each of his multitool, the Sardine and a pedal spanner, the Cucumber. We stood and chatted and he offered to send me two of his tools when he got back to Japan. a few weeks later a package arrived at my doo containing a Sardine and a Cucumber…..
The Cucumber is one hefty lump of machined aluminium and because of this it’s a workshop or back of the car/van tool rather than a carry with you item. It has a 6mm and 8mm bit at one end , these pivot making it easy to use at different angles. Perfect for through axles or pedal fitting or removal
There’s not a lot to say, it works perfectly, has enough leverage for the most stubborn of pedals but the shape also allows a little finesse when using as an axle tightener/loosener. It comes in a miriad of colours, one of which is green and in my opinion that colour is the only thing that resembles a cucumber. Name aside though its an efficient tool and something that will definately stand out in your tool box.
The Sardine on the other hand is a different kettle of fish (yes, i did that on purpose and I’m probably going to have to explain it to Koh) it is a mutltitool designed to be with you on every ride. This is where the shape (it’s not fish shaped at all) is a winner. the long thin profile makes it sit in any bar, frame, saddle or top tube bag very neatly. if you don’t want to hide it away though it comes with a plastic mount that will sit behind a bottle cage or any two bolt mounts on your frame. I put this one on the top tube as it made taking pictures easy, in real riding I wouldn’t mount it there as I might catch it with my knee given my knee-in riding style.
The Sardine comes with 3, 4, 5, 6 and torx T25 bits that swivel out of the ends or from the middle. The middle one also locks into the plastic bike mount via a notch. The tool is very useful, as any multitool is but where it wins for me is that the shape means it’s not bulky like a lot of multitools and you can actually get some leverage unlike a lot of tools that have stubby little allen keys on them. It doesn’t have a chain splitter but I’ve yet to use a chain splitter on a multitool that I haven’t sworn or shouted at so I’m actually happy that I’d have to take a separate tool for that. It weighs around 40g so there’s no weight penalty for the length of it (95mm) the swivel bits mean you can hold it like a pen/screw driver or grip the handly like a spanner. Try doing that with a foldable tool that is designed to be folding or small rather than having function as its prime goal.
This leverage came in handy tightening an errant disc rotor bolt up when out riding.
Both the Cucumber and Sardine are not cheap coming in at £89 and £55 each but if you want something a little different to the normal run of the mill tools to stand out in your bike tool kit or on your bike then spend the extra because not only do they look good they also work too.
I absolutely love the fidlock clasp and bottle holder on the recently reviewed Collins Cycle Works Hip Pack so I was happy when Ison Distribution sent me a fidlock bottle and toolbox to try out.
Both items come with a magnet embedded strip of plastic that I guess you could say takes the place of the traditional bottle cage. Of course though there’s no “cage”. Both the bottle and toolbox have an integrated mount built into the bottom. This also contains a magnet and when you place the bottle or box over the strip they come together with a very satisfying click and are then held very securely. To release the bottle or box simply twist to one side and the magnets disengage.
The Twist bottle holds 590ml of liquid, has a self sealing mouthpiece and a cover to stop the part you drink out of getting covered in mud. It’s a very soft squeezy material with a wide opening screw off top. It works just like any bottle but because of the self sealing cap you do hve to give it a good squeeze to get the liquid flow going. The wide lid makes it easy to clean.
On the bike the clip on/twist off technique soon becomes second nature but you do have to look down to make sure the magnets are in the vicinity of each other before letting go! I had a couple of occasions where I missed and dropped the bottle. Once you dial in the technique though it becomes second nature
fidlock twist bottlefidlock twist toolbox fork leg
The Twist Toolbox works in exactly the same way but obviously you won’t be removing and replacing it as often as the bottle. It’s made from a water repellent material, which is just as well as I mounted it under the down tube in the way of spray from the front wheel. Despite the weather’s best efforts the interior has remained dry. It will take up to 550ml of kit. It has a zip opening and opens like a clam shell. There’s a few of elastic strips and a mesh section to hold tools steady and I’ve got an inner tube (full size mtb) tyre levers, a multitool and a tubeless repair kit in it. It has never detached itself from the bike but because the part that attaches to the bike frame is quite narrow and the toolbox quite wide and full of kit there’s is some noticable wobble.
fidlock twist tool box has seen some actionfidlock twist tool box openfidlock twist tool box contents
The bottle is very neat and allows for a very clean looking set up on the bike, drinking wise it’s the same as any other bottle, the twist system really works. You would need to commit to the fidlock system though as if you were to be handed a standard bottle in say a race situation there’s nowhere to put it. Theres also a financial element too as the bottle and mount are quite expensive. You can get kits to convert your normal bottles to the twist system though.
The toolbox works brilliantly and if you had more than one bike you could swap tools quickly between them if you had a mount on each frame.
The Fidlock Twist bottle and Toolbox, two pieces of great functioning and good looking kit but it’s best to go full Fidlock to get the most out of the concept.