Some folks ride gravel bikes with flat pedals and I’m not here to say that is the wrong way, infact I’ve tried it and it’s a perfectly acceptable way to ride any bicycle. In fact I published a video on the subject here Gravel biking on flat pedals
For those of us who use clip in pedals it’s not always convenient. When you want to pop to the shop for some milk, the pub without waddling like a penguin in your clipless compatible shoes and in my case when I have to park 1.5 miles away from work because there’s no parking on site. I don’t want to have to put on special shoes for such a short journey, then have to change into shoes suitable for work and have to store the “special shoes” somewhere and then of course have to reverse the process at the end of the shift.
Pre internet (yes kids there was a time before WiFi!) Shimano had a solution which was the quite frankly hideous PD22 pedal adapter. These were a struggle to clip into your pedal but that struggle was in no way at the level of purgatory that was the attempt to get the damn things back off again! Having to twist a hard plastic pedal with teeth jutting out cutting into your hand to the correct amount of degrees to attempt to release it with out the leverage of a foot inside a shoe was impossible without backing the spring tension off so far that when you eventually got to ride the pedal as intended it didn’t retain the shoe cleat at all! So to cut a long story short they were unusable. The PD22 has had many copies over the years from various companies but nearly all of them still need that twist action to remove them.
Redshift Sports, well known for their suspension stems, seatposts and the Kitchen sink and Topshelf bar may just have come up with the perfect solution.
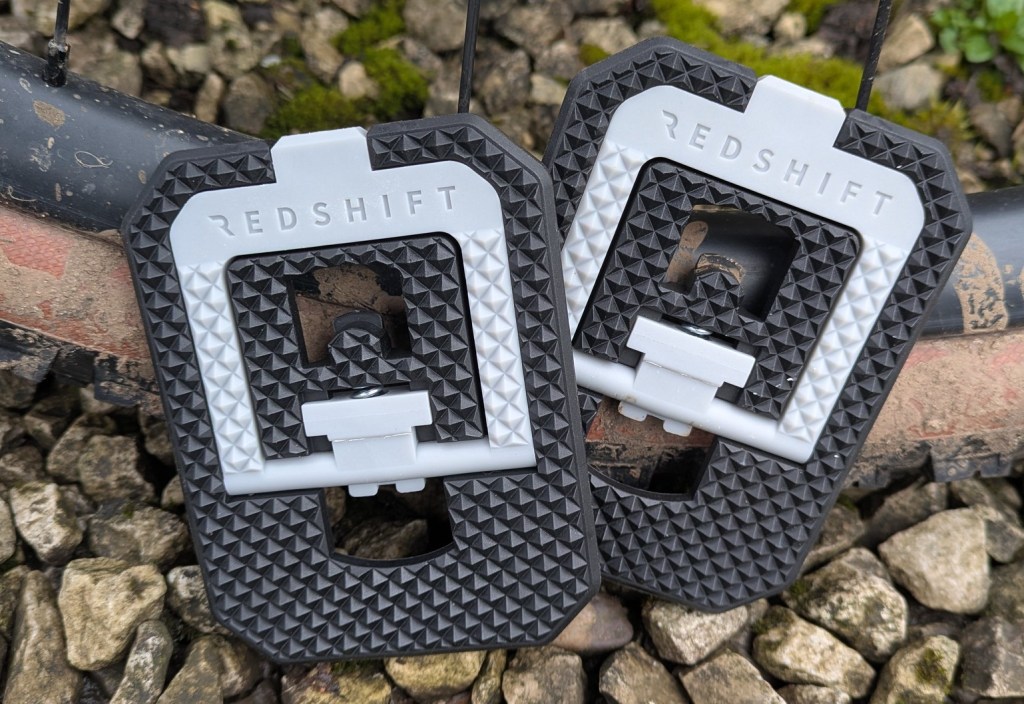
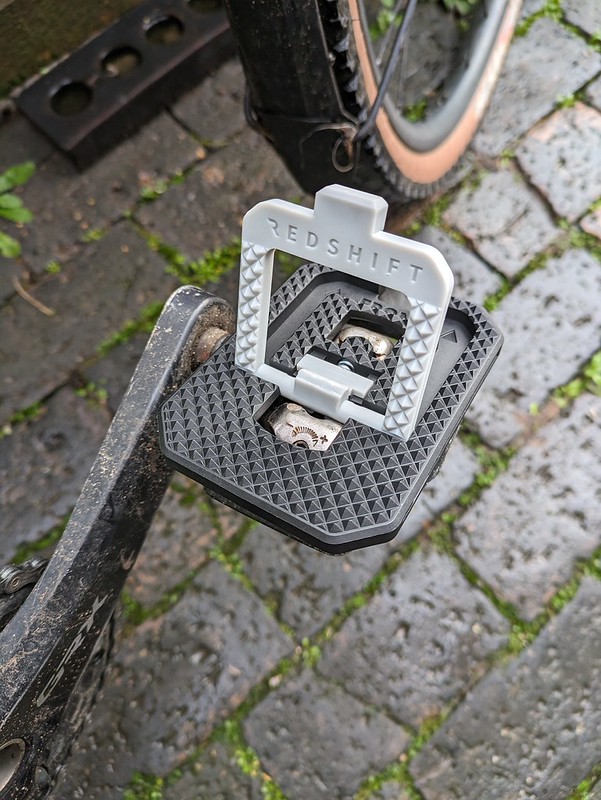
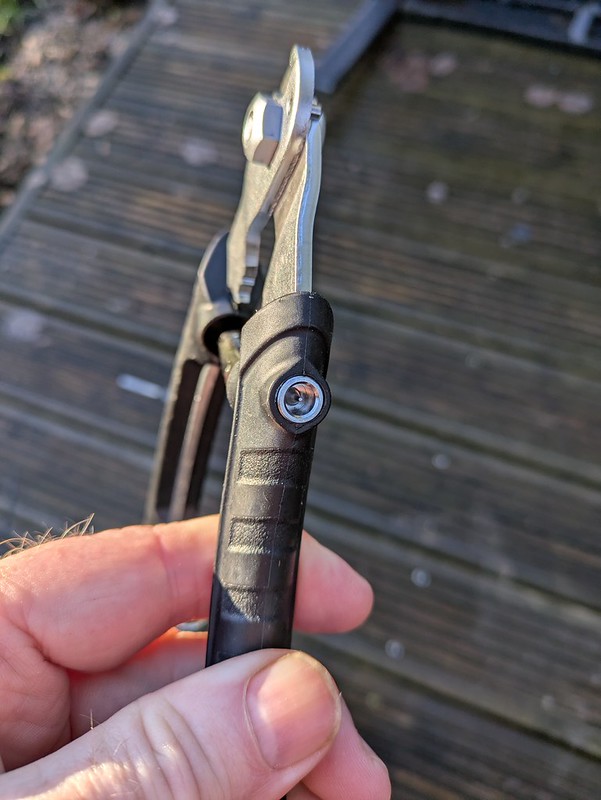
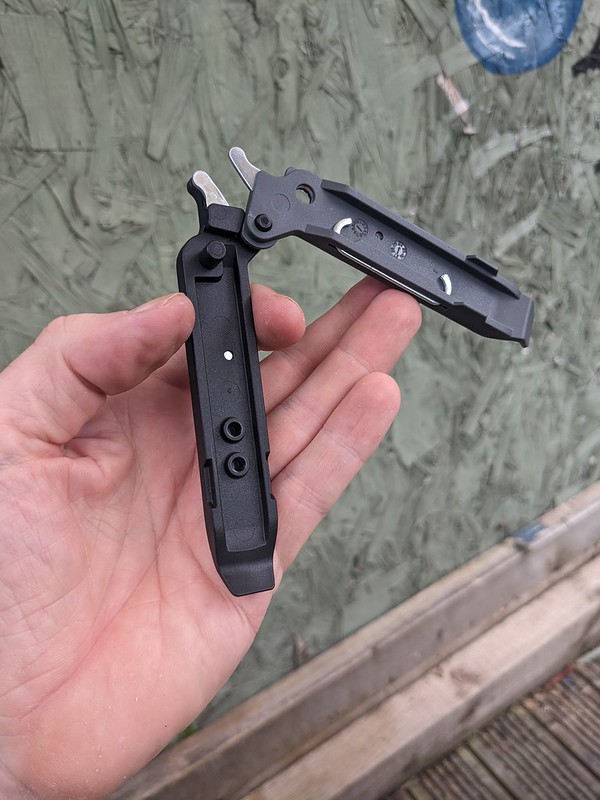
The Redshift Mousetrap Pedal adapter doesn’t do anything different from all those previous pedals. It still fits to one side of your clip in pedal and supports any style of shoe. What it does (actually doesn’t) have is that need to twist the adapter to remove it.
Redshift Mousetrap Pedal Adapter frontRedshift Mousetrap Pedal Adapter open
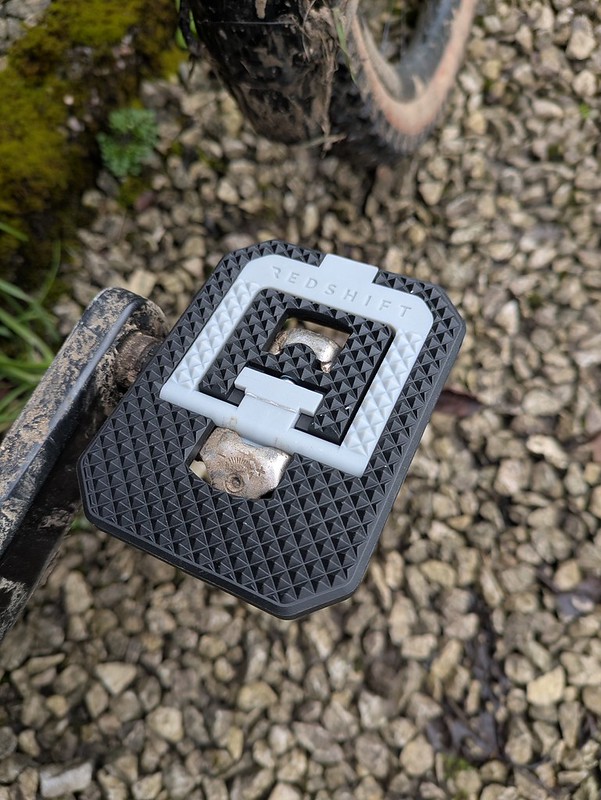
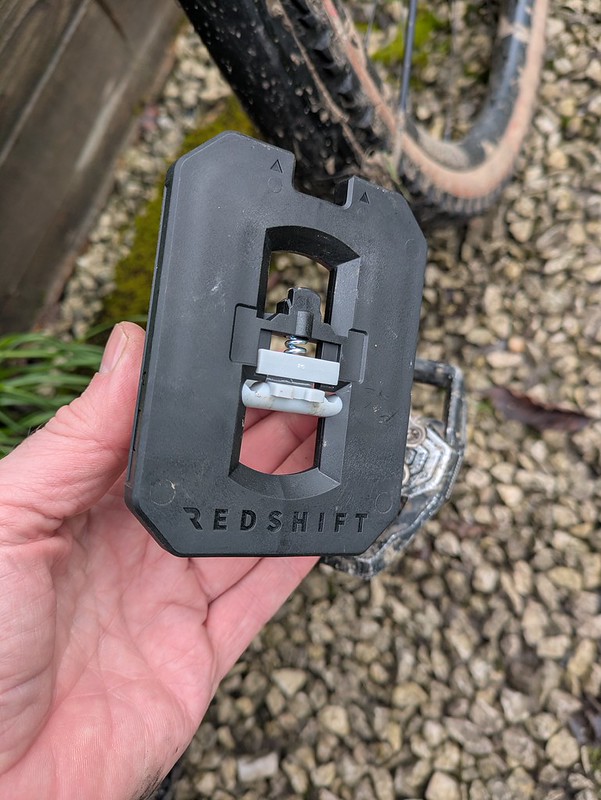
You just lift the lever, place the adapter on the pedal, it even has “front” embossed into it so you can’t get it wrong, then when seated you just close the lever and the adaptor is locked securely to the pedal. Guess how you release it? Yes, pull the lever and off pops the adapter, simple but effective, aren’t all the best ideas like this?
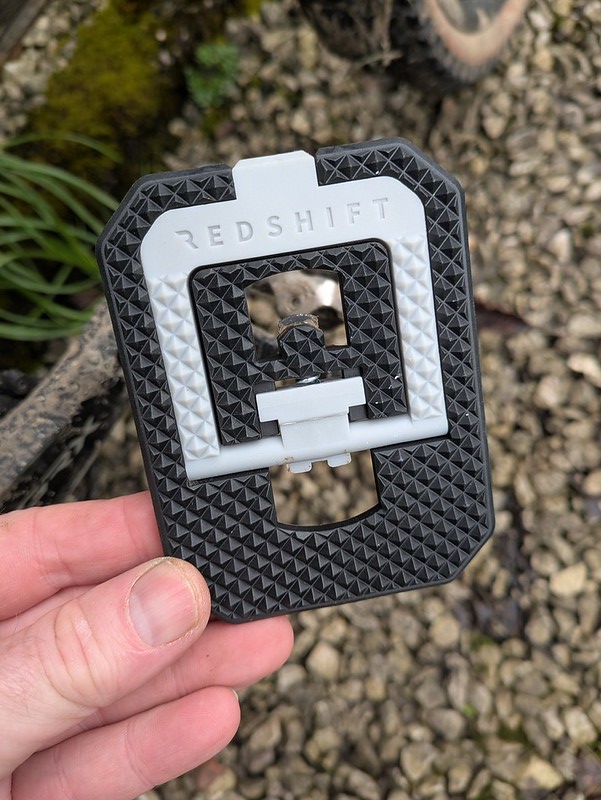
Ok, so like any one sided pedal, the heavier side with the adapter will always swing to the bottom so you will have to learn to look down to ensure you flip the pedal over with your foot, but thats hardly a chore and soon becomes second nature. Worried about loosing one? no need they have a tiny magnet that sticks them together for storage.
Redshift say they are not recommended for off road use and you can see from the tread they wouldn’t be grippy in muddy conditions. That’s not to say I haven’t ridden them off road as there’s some cheeky singletrack on my “commute” that I can’t resist and they’ve been fine.
Don’t like the colour? there will be options with different colour levers. They are Shimano SPD compatible only at the moment but SPD-SL, Look Keo, and Crankbrothers compatible variants will be out in Autumn 2026.
You may not need these adapters but for those of us who use our bikes for lots of other things apart from weekend riding the Redshift Mousetrap pedal adapters are a great design and the perfect thing to keep in your work bag/car/van for those unexpected but essential rides for beer, cake and sadly to work.
I’m going to try to write this first paragraph without sounding like an old git reminiscing about the good old days of biking. First off I’ll say that the old days, the late 1980s early 1990s when Mountain bikes were new and those of us who got into off road riding at that time took our first pedal in the dirt were pretty bad. Bad bikes unless you spent a silly amount of money, bad components and hardly any parts back up if you broke anything. This was pre internet so no surfing the web for the best prices or “how to” videos, even your local bike shop unless you were very very lucky was really only interested in road bikes so were reluctant to stock parts for MTBs…….ok, I know those of you born this side of the milienium are now thinking “get on with it grandad!” well my point is (and this will reinforce the old fogey opinions) you’ve never had it so good!
Back then, we expected that the bike was probably not going to make it to the end of the ride without some sort of mechanical. I’m not just talking punctures either although they were many as we only had tubes and tyres were heavy and still managed to be fragile. I’m talking about broken chains, rear mechs, front mechs (remember them?) 26″ rims that needed truing after every ride, ball bearings either seizing as the seals were so bad water just flowed straight past them or bearings just falling out as the manufacturing tolerances were stuck in the 70s and not designed for the job. It was fun, learning to rebuild your bike on a friday night until 1am so you could at least get to the start of the ride on Saturday morning was a great way to learn how things worked and I’m still amazed I could rebuild a shimano freehub with bearings scrounged from my local motor factors on my stairs with totally inappropriate tools, some of which came from the cutlery draw in the kitchen!
I think I’ve painted a picture there and I’ve done it to point out how good todays bikes are. We have come a long way. The bikes still shift with deraileurs be it cable or electronic but I can’t remember the last time I had a mechanical problem out riding and with the advent of tubeless technology I have to check my pump and tyreslevers are still working every now and again as they get used so infrequently. Bikes are much more reliable now and are built so they can take on the demands of off road riding and still be in one piece afterwards. But being blasé about this reliability is a mistake. Even the best most expensive bike still needs maintenance, you need tools to do this and to fit those gram saving upgrades to your pride and joy, some tools will even indirectly save you money.
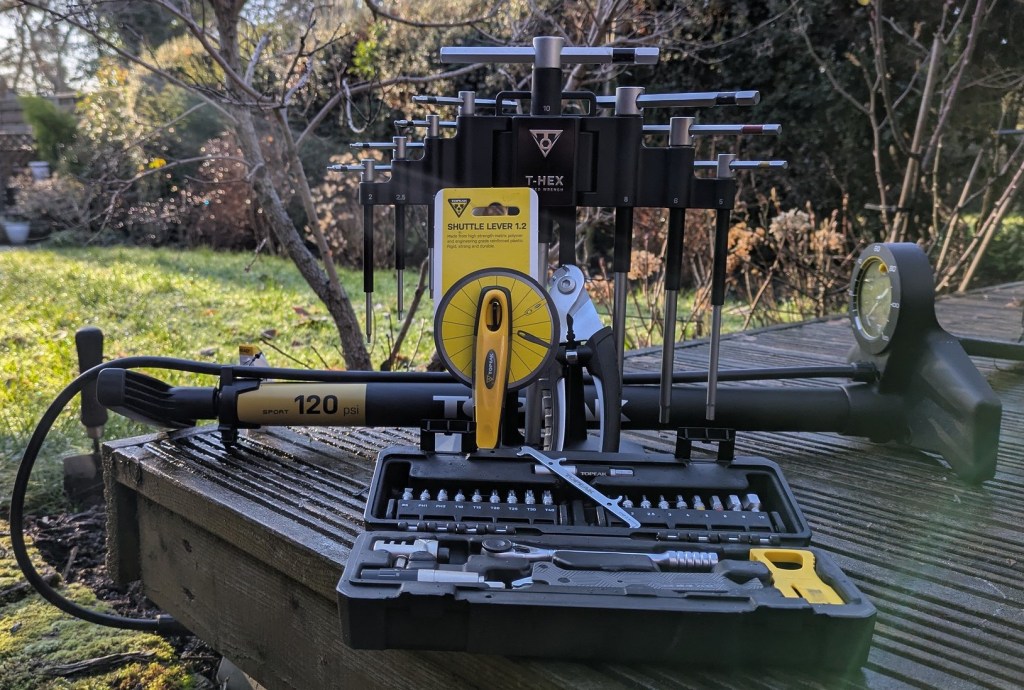
So here are a few of the tools I think every home mechanic should have in the garage/shed/bottom of the stairs, Topeak and their importer Extra UK very kindly took a look at my list and sent out the Topeak tools they thought best fitted the bill.
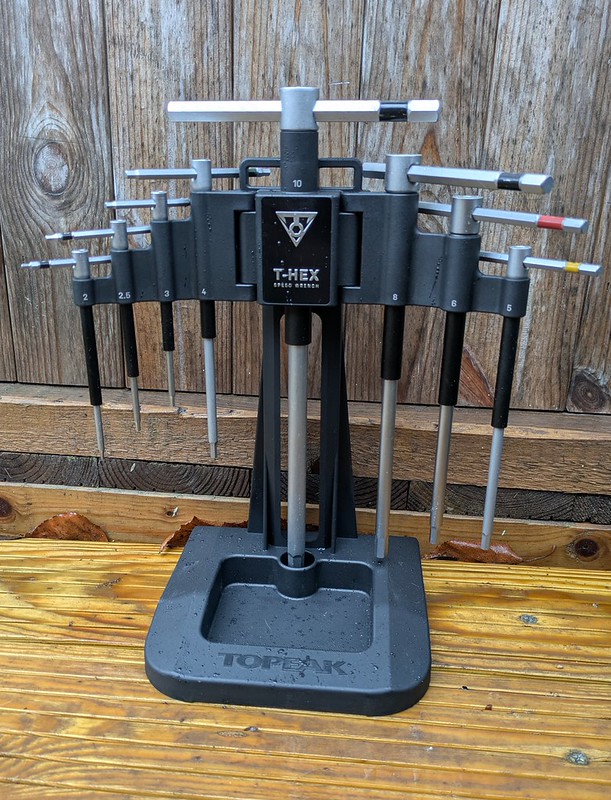
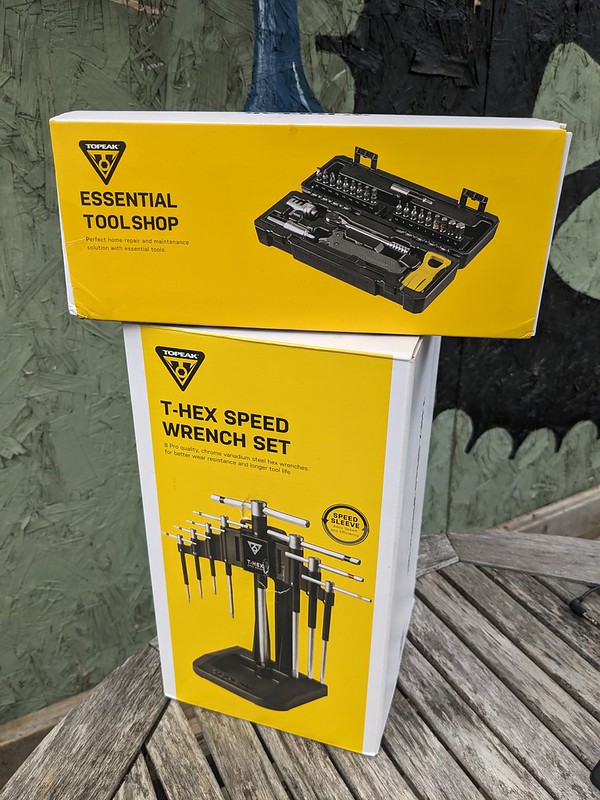
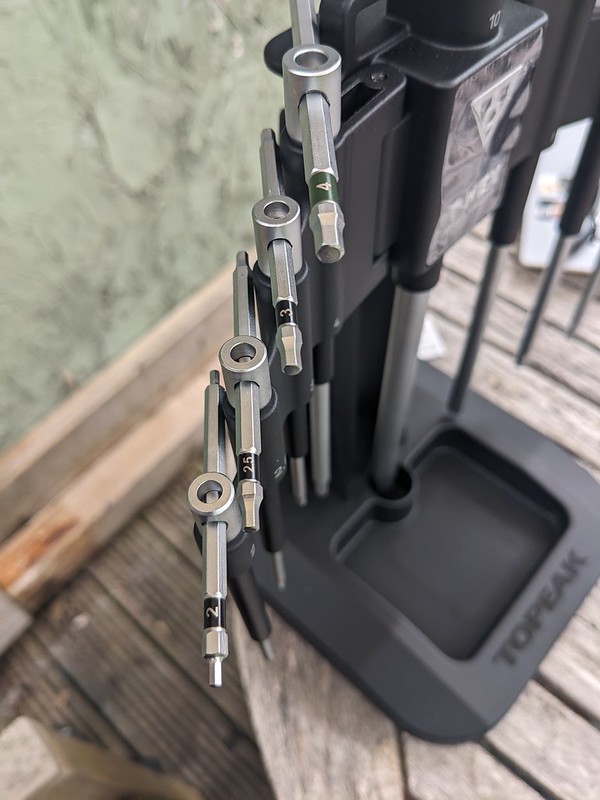
Topeak Hex set
A good quality set of Allen wrenches/Keys should be at the heart of every cyclists home maintenance kit, this one from Topeak runs from 2, 2.5, 3, 4, 5, 6, 8 and 10mm. They are “T type” and the T piece is moveable, sliding from one side to the other enabling you to get into tight areas. The T gives you more control and leverage than the standard “L” shaped wrench. Each also has a plastic “speed” sleeve on the main shaft which you can hold while you twizzle (technical engineering term for turning rapidly) the end for rapid tightening and untightening of bolts. The wrenches have a straight cut end rather than a ball end. This makes engaging bolt heads at an angle more awkward but does ensure the risk of rounding off of allen bolts is reduced and gives excellent tool to bolt engagement when undoing stubborn hardware.
The tools come in a plastic stand that feels robust, has a magnetic tray so you don’t loose tiny steel parts and the hex key carrier can be detached to hang on a tool wall. It also fits to topeaks work stand, the E-up Pro. The tools seem to be of excellent quality and weight and should last many years of bike tinkering by expert and the most hamfisted amongst us *waves* alike. The size range should be adequate for all modern gravel, MTB and road bikes unless your bike has some left of field bolt head sizes, if it does its probably Italian.
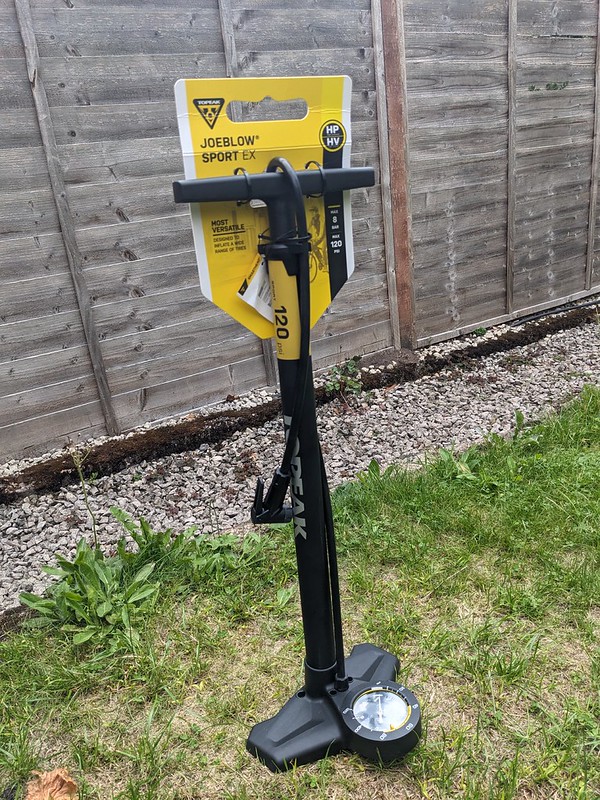
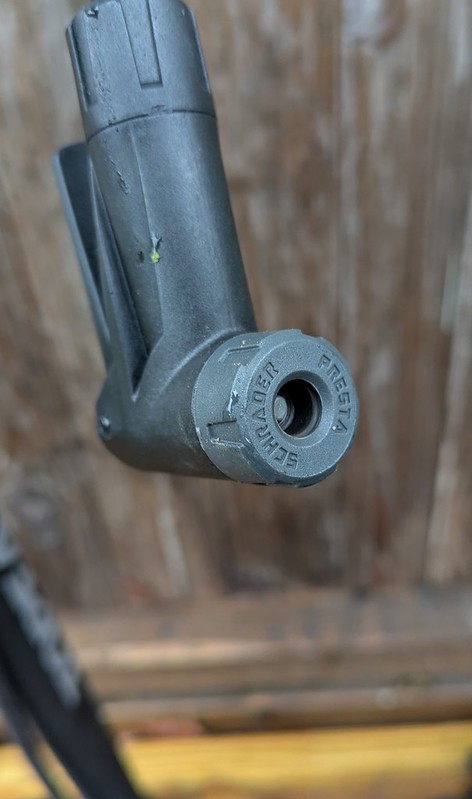
Even in the days of tubeless tyre technology you still need to add or reduce the air pressure in tyres. A track pump is a home workshop must have. It takes all the work out of pumping up tyres that you get with using a small hand pump. This JoBlow 120 is the ideal thing to have, it’s not complicated at all, you don’t even have to swap parts in the pump head to change from Presta (thin) to Schrader (car valve) valves. The Topeak smart head does both without fuss. I even used this pump to inflate a car tyre in an emergency one frosty 5am Morning. There I was half asleep on my non working day standing outside not looking forward to swapping and losing the parts of my old pump (all are set to presta) in the dark but i suddenly thought of the smart head and it just pushed straight on, with the lever locked I was able to inflate the tyre and get my other half off to work and go back to bed, I was in love with Topeak smart heads from then on!
The Topeak Sport EX pump will inflate tyres to 120psi, hence the name but even roadies have abandonned rock hard tyres now haven’t they? but if you need that pressure it’ll do it. I’ve even used it to seat tubeless tyres but that might be more about how tight the tyre bead was on the rim and the quality of my rim taping. It isn’t designed for that job but it was a pleasant surprise. The pressure dial is large and even though its situated at the bottom of the pump it is easy to read. I’ve got nothing other than my thumbs to test the accuracy of the dial but it is definately in the ball park of how much squidge I like from my tyres at 30psi. The pump has a barrel made of steel and a plastic foot and feels sturdy enough to take some knocks. At less than £37 at time of writing it is great value and I can’t see you needing anything more than this for your home workshop.
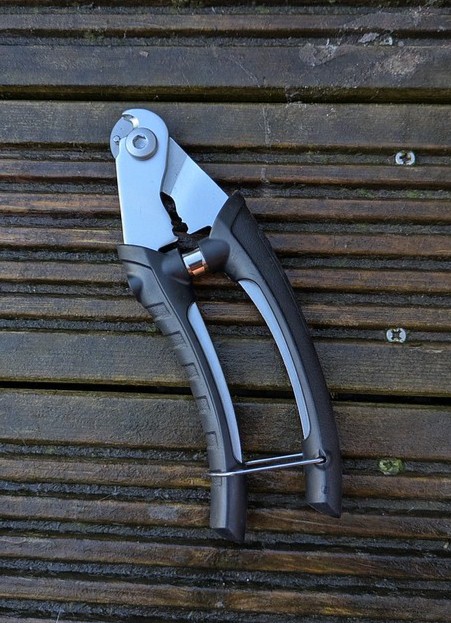
Topeak cable cutterTopeak cable cutter’s nifty cable end opener
Frayed cables not only look bad they can get you into trouble too. The frayed end can fail, pull out form under a bolt when under tension and this is at best a loss of gears and at worst a loss of teeth if its a brake inner on a non hydraulic system. Frayed cables are also a nightmare to thread through cables and ferrules if not cut precisely. The Topeak cable and housing cutter looks like a set of garden pruners but it is a simple design that works perfectly every time. They are long enough to get the required leverage to cut neatly through gear and brake inner cable and also through outer cable leaving a neat end with no fraying. They are spring loaded too making life easier. These cutters also have a bonus feature I’ve not seen on other models and thats a little pin that you can push into an outer cable and to open up the plastic sleeve to allow much easier access to pass an inner cable through. In a world where there are 100s of cable cutters out there doing the same job that little feature elevates the Topeak version above all the others.
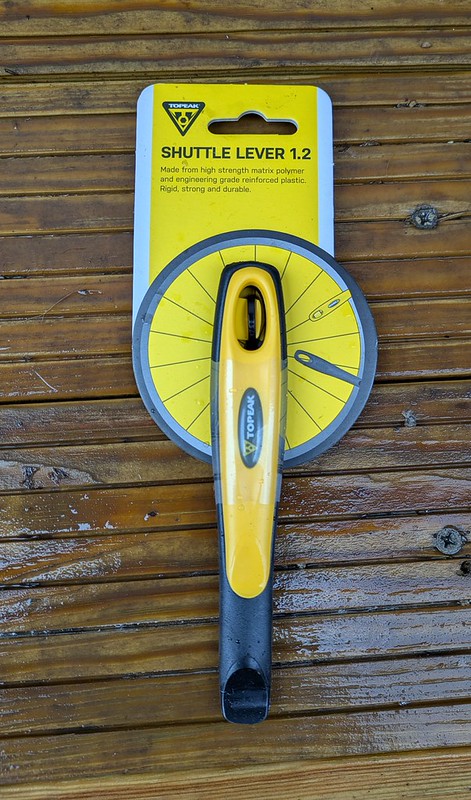
Topeak Shuttle tyre levers
With the demise of tubed tyres, tyre levers have become somewhat redundant until it comes time to swap tyres. These Topeak shuttle levers then are a worthy edition to your tool arsenal. Made of tough engineering grade plastic (I presume that makes then stronger?) they come as a set of two levers, one long and one shorter. The longer one has more leverage for stubborn tyres and because they are plastic they are less likely to damage rim tape or wheel rims if you have to get aggressive with them. They clip together which should stop them from getting lost in messy sheds or cars.However, because of the size of the one lever its not something i’d carry on the bike as they’d take up too much room and if you are running tubeless you’ll hardly ever need them but they are perfect for home and when a little more oomph is needed to remove or pop on a tyre.
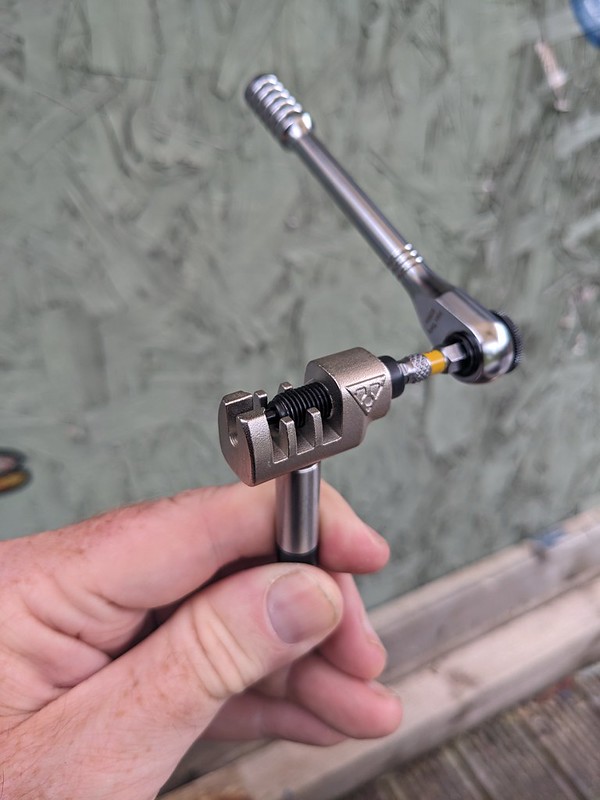
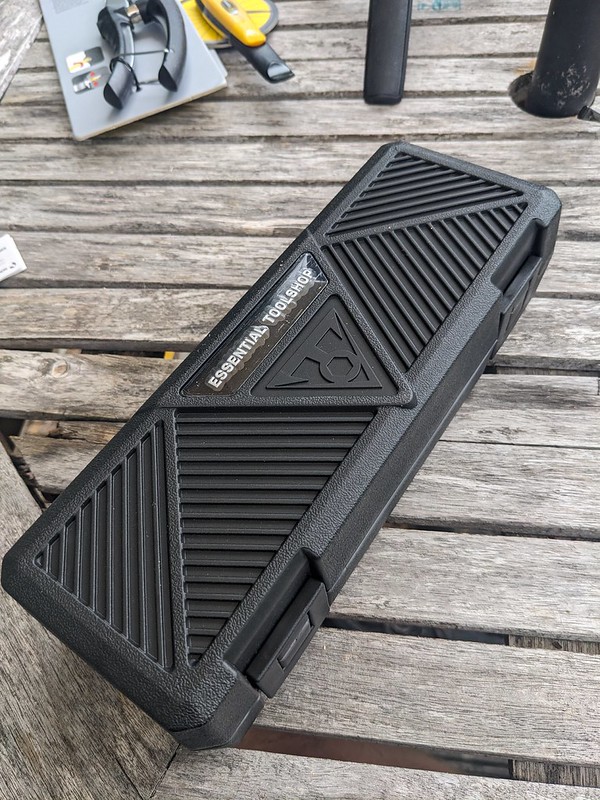
Topeak Essential ToolshopTopeak chain tool and ratchetTopeak torque sleeveTopeak quick link pliers and chain hook
Up to now the tools have been the basic essentials you get you started with home maintenance. Now if you want to go a touch further Topeak have their Essential Toolshop and it is pretty comprehensive. It consists of Hex (allen) bits 1.5, 2, 2.5, 3, 4, 5, 6, 8 and 10 mm. Torx bits T10, T15, T20, T25, T30, T40. Phillps x 2 and flat head bits. it has a ratchet for the bits with an extension bar (or speed sleeve as Topeak call it), a chain tool, chain quick link pliers and chain hook to aid rejoining chains, a disc brake/pad spacer and a “torque sleeve” to make sure your bolts are tightened to manufacturers spec. this all comes in a robust compact carry case.
Weirdly, even though this is a lot of tools, all of which are relevant for home bike maintenance the bits are small and fiddly and when swapping the most used bits, the 4-5mm I soon reverted to the Hex key set above. However the essential tool kit was perfect for keeping in the van/car for car park repairs or bolt checks, it’s come on every biking holiday and was much better than lugging bigger tools around. So, if you are stuck for space at home, I have friends who have to keep their bike in a cupboard under the stairs Harry Potter style then the Essential tool kit is ideal for keeping on a shelf somewhere taking up minimal space and works equally well in a cluttered garage or shed filled with lawn mowers.
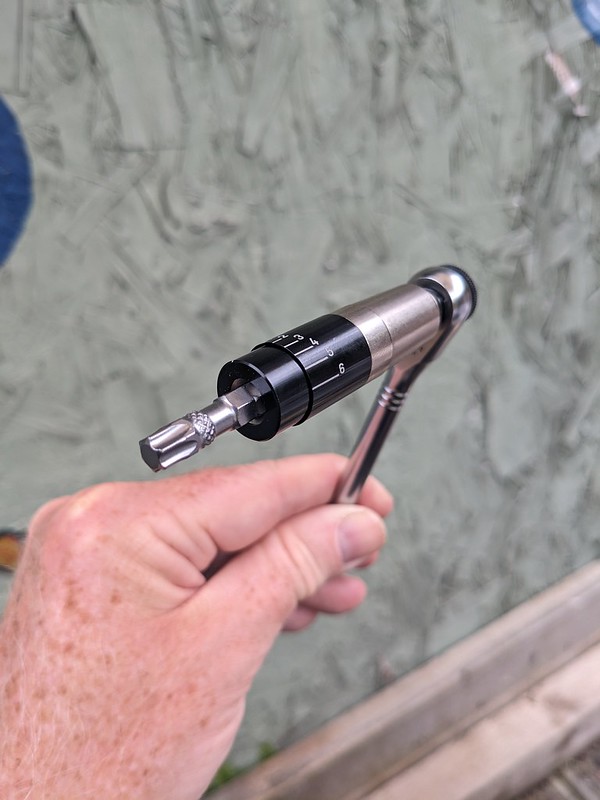
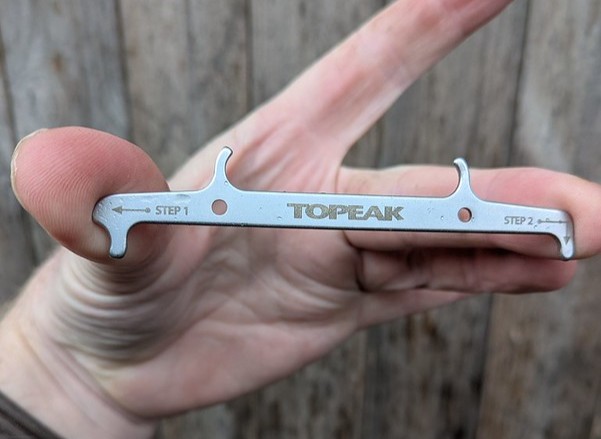
Topeak chain wear indicator
Finally a tool every cyclist should own. If you don’t own any other tools i recommend you buy one of these first. Its a chain wear indicator and it’s a tool that can save you money. A chain wears out, even a well lubricated one wears out and wears the other steel components it touches such as chainrings, cassette sprockets and pulley wheels on a rear derraileur at the same time. This is fine if you regularly change your chain. however if you don’t and wait until a chain is so worn out it starts to affect shifting or all the teeth on everything resemble sharks fins its too late. The wear on other components will be to such a level that simply adding a new chain won’t be enough. that brand new unworn chain will not interact with the other components that have litterally changed tooth shape to match the other chain. this causes skipping and chain slip. This is where it gets expensive, changing a cassette, chainring and associated items is going to cost an absolute fortune in parts (and labour if you need a mechanics help).
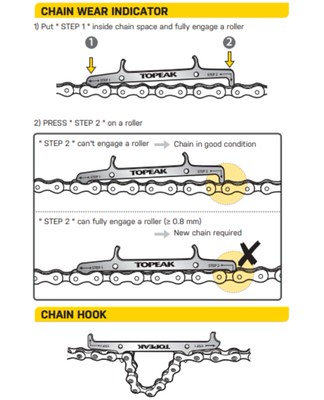
So this tool that costs less than £6 can save you hundreds of pounds by letting you know when to change a chain before it starts wearing out your drivetrain to the point of no return. it’s very straight forward to use but rather than write paragraphs in a “how to” style i’ve stolen Topeak’s instructions to show how easy it is, I’m sure (hoping) they don’t mind.
All of these Topeak tools I’ve written about have been in use working on my bike for the last 4 months. they endured my hamfistedness, got covered in oil and grease, have been sworn at when I’ve dropped one and the bolt I’ve been loosening has fallen to the floor never to be seen again. The essential tool kit has been to 3 different countries in the back of my van and saved a couple of my rides from being cancelled and helped a few strangers to get their bike going again. I’ve even fixed a couple of machines at work with that kit as no tools were in site! Nothing has broken, none of them look worn out so i’m confident to say that they will last the average home bike mechanic for years and years and with that longevity in mind it makes the inital outlay to buy them seem more and more insignificant.
You can find all of Topeaks tools, those above and many many more on their website here but be careful, once you start buying tools it can get addictive!
Back in 2020 as the first Covid lockdown loomed I contacted the owner of Fustle Bikes, It was a speculative move on my part. UKGRAVELCO up to that point was mainly based around instagram, reviews were on this website, including a couple of bikes but it was small potatoes really and reviews were mainly via contacts i’d made working in bike shops. I wanted to expand this but not review a bike from the mainstream big manufacturers as every website or magazine did this. instead i looked for more interesting brands who, even though the gravel scene was just beginning to gain momentum, were doing something different and putting their own design ideas into a bike rather than just rehashing a road frame with more clearance but sticking with traditional road bike geometry.
Fustle Causeway G2do both regularly
Fustle Bikes stood out as they were a fledgling bike company based in Northern Ireland and were designing their frames from scratch and using the experience of riding on the very same sort of terrain as we do in the UK rather than Californina or Wisconsin. That bike was the original Fustle Causeway G1 and I got to test it in the spring of 2020, you can read the original review here it’s worth reading the review to get a backround on this new version but if you don’t have the time the spoiler is this….I liked the bike so much i bought a frameset myself and it’s been my main bike for the last five years.
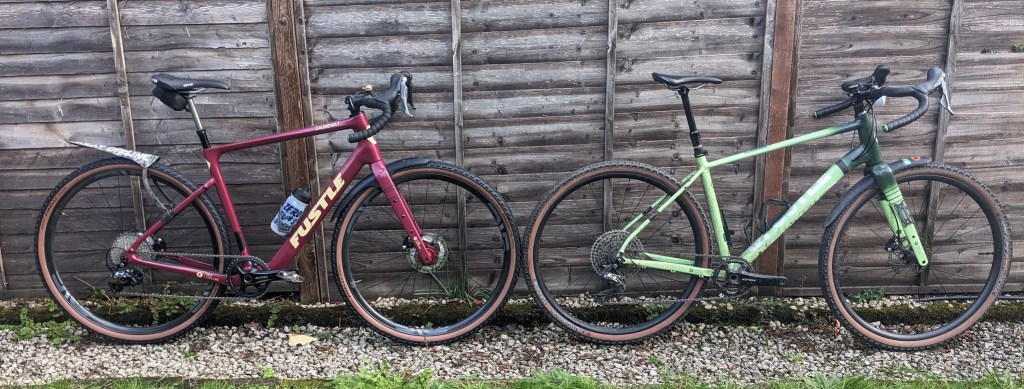
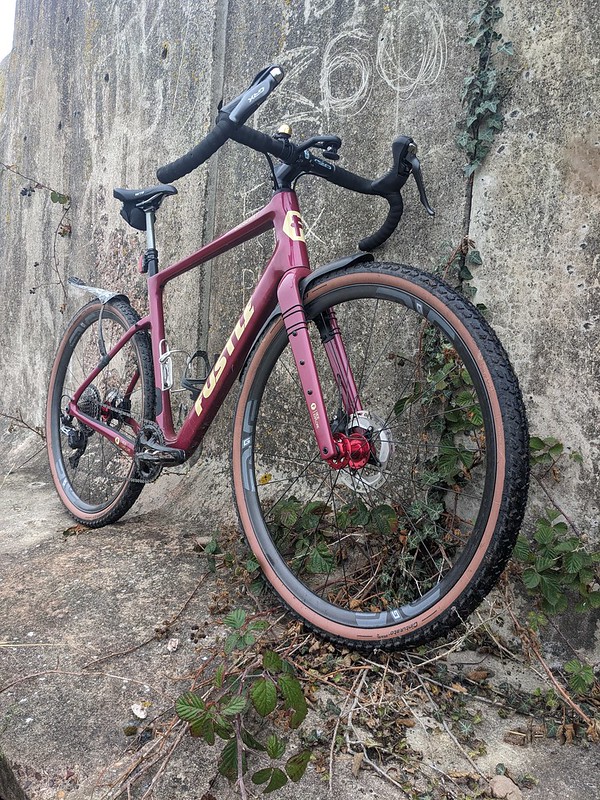
new Fustle Causeway G2 V G1
So to say i was intrigued by this latest iteration of the Causeway frameset would be a great understatement. Fustle in the meatime had brought out another frame, the Lakelander, which leans slightly more towards racing but has had a great reception. it was also Fustle’s first forary into carbon fibre and I was hoping for a version of the Causeway I love but in a lighter plastic package.
Alistair, the owner and designer at Fustle bikes sent me a bike that he had ridden at a local gravel sportive in Ireland. It was built with a basic 11 speed groupset and finishing kit and He was apologetic that it wasn’t the 12 speed Shimano GRX kit that all the production bikes get, this was down to the bike having launched a month or so before and all the available 12 sp stuff was going on bikes being sent out to customers. It was ideal for me though as my original bike has the very same groupset so comparing the two frames and how they ride would be much easier.
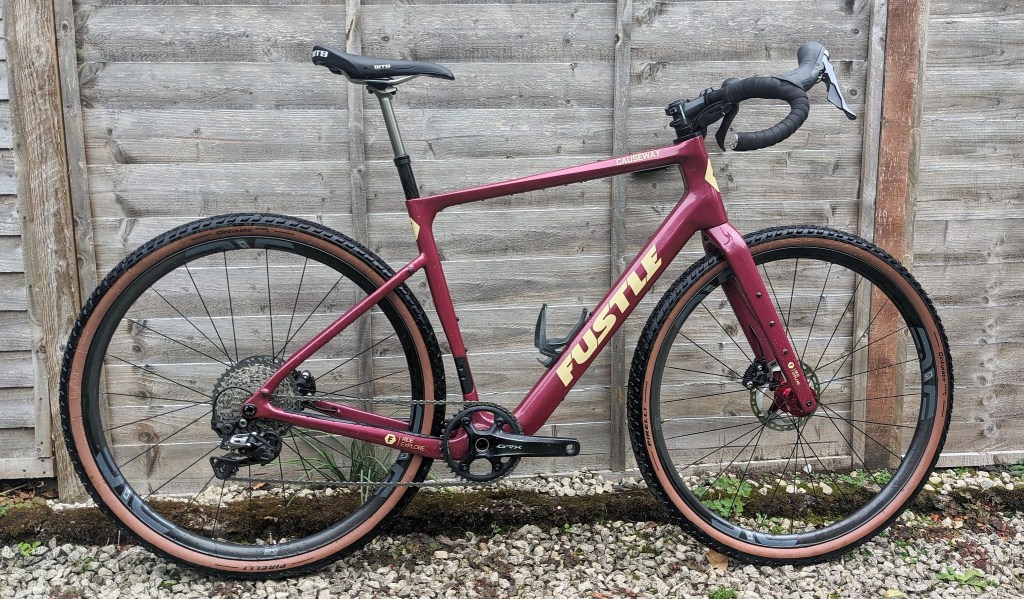
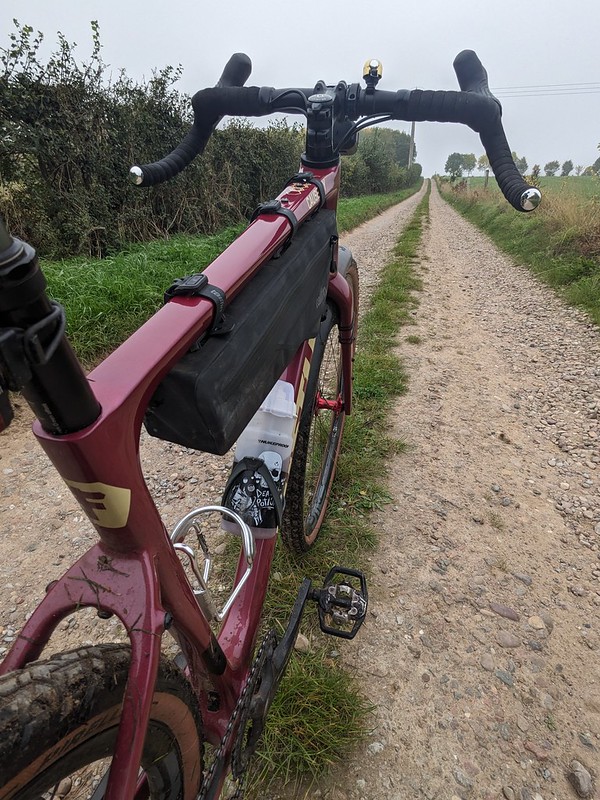
Side by side the two frames look very different. Alistair has taken feedback from customers and his own experience and added features to the new frame. the first is the front triangle. the G2 has much more space inside the frame for bottles or bags than the previous frame. it’s true that two large bottles would reduce the carrying capacity and size of any frame bag you decided to fit on the G1. the new frame manages to add more room without losing much of the standover. the top tube still slopes from headset to seatpost giving ample crotch clearance.
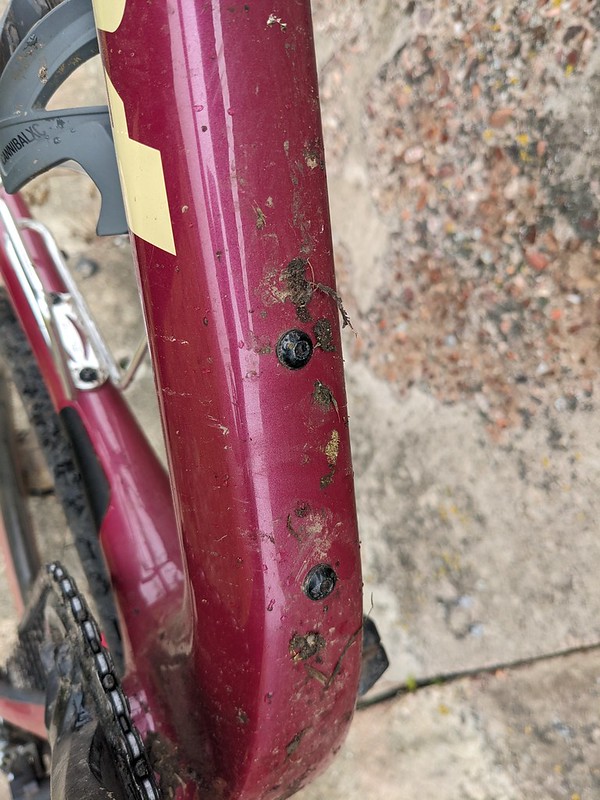
Fustle Causeway G2 mountsintegrated but clean
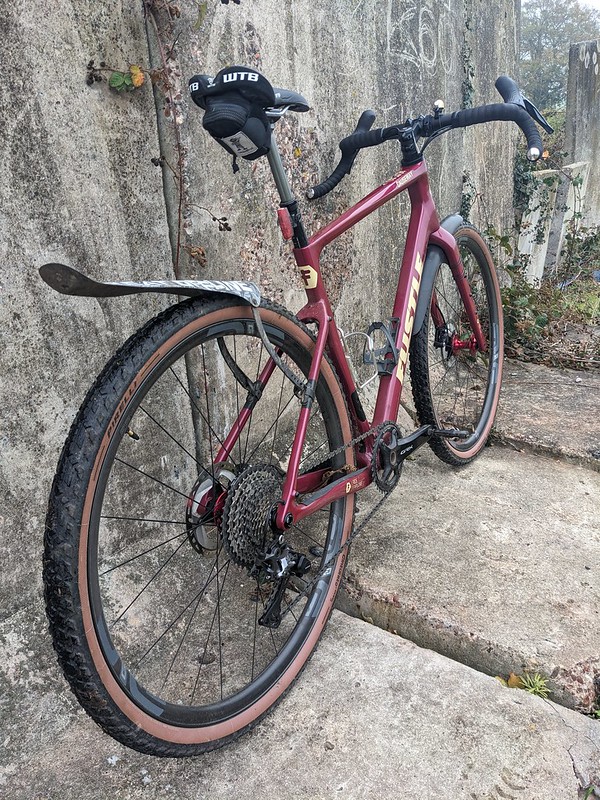
Talking of mounts and bike packing, the G2 has bolt mounts on the top tube, two sets inside the front triangle (one set that has three bolts so you can alter the position of a bottle cage up and down) mounts underneath the down tube, with rack and mudguard mounts on the rear end. The fork also gets three mounts per leg/blade too.
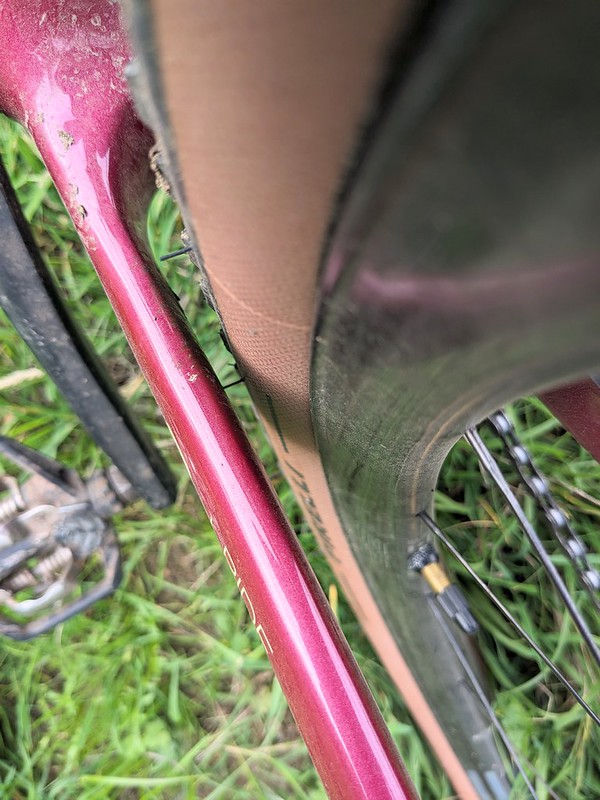
The next big difference on the new frame is tyre clearance. Officially the G2 will take a 50mm tyre with loads of mud room between that tyre and the frame. unofficially, and I’ve tried it, a 2.1″ (53mm) tyre will also fit. So the new trend of big tyres on gravel bikes is covered.
clearancefordays
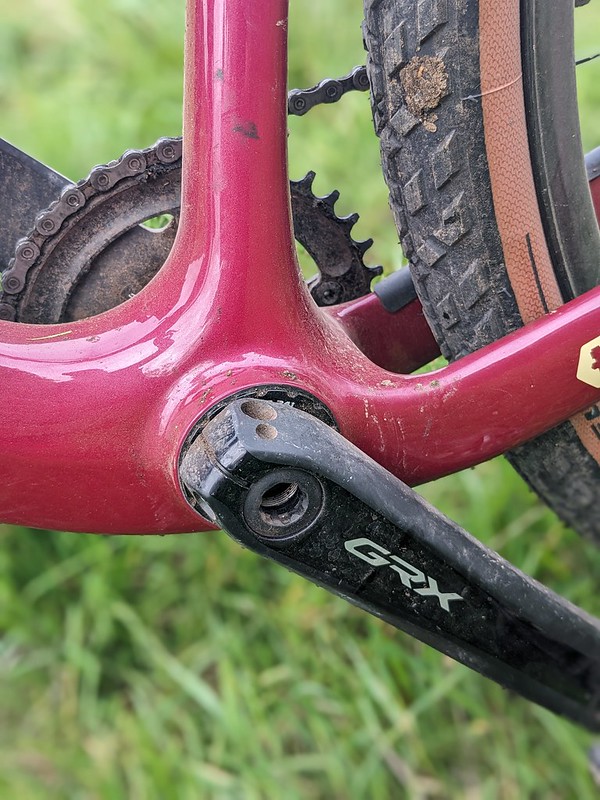
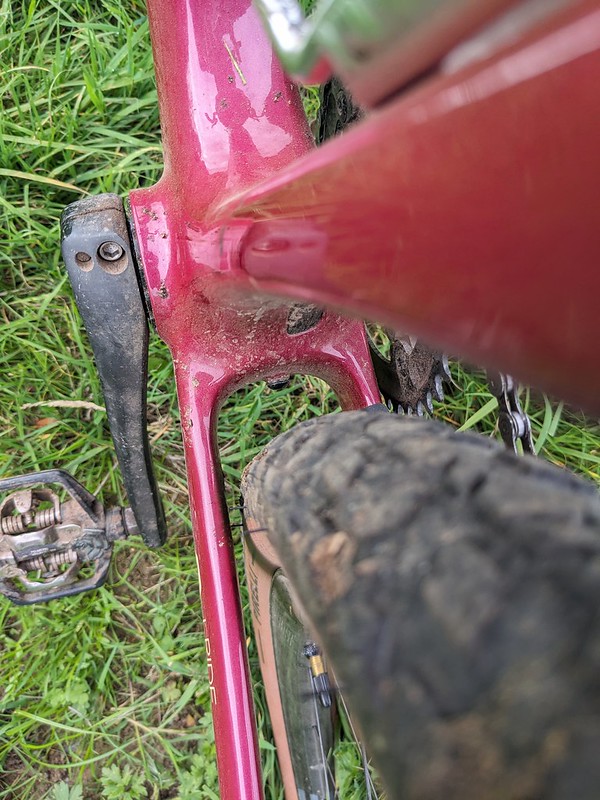
The frame features a T47 bottom bracket. You don’t need to know what that is just know that it is a threaded system and 100% less hassle to maintain and replace than a press-fit bottom bracket would be and thanks should go to Fustle for using this. they also use a Rideworks T47 BB which is a UK company making parts in the UK so applause for that too.
The seatpost clamp and adjustment is accessed from under the rear of the top tube and can be a bit fiddly to adjust as it’s hard to see but this is a minor thing because (especially if using a dropper post) you’ll set the height and not have to adjust it again other than for maintenance.
Fustle Causeway G2 hidden seatpost boltCause and effect
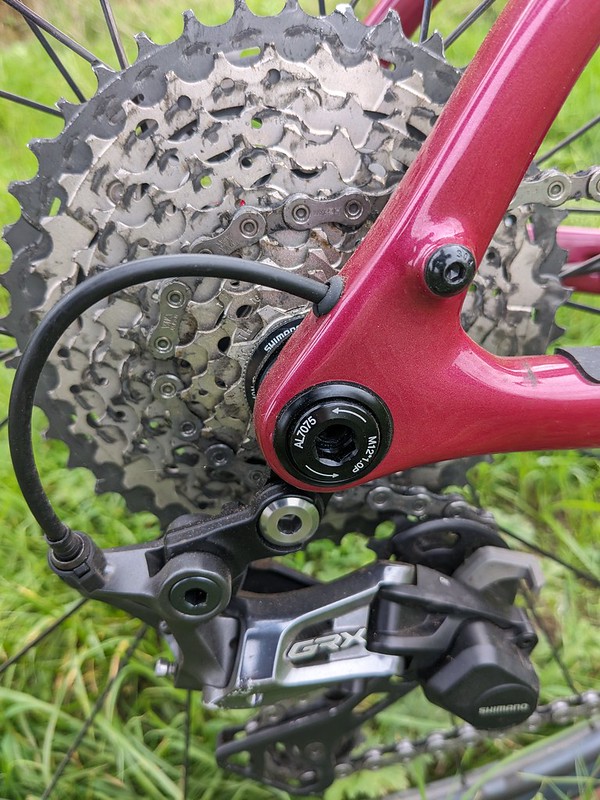
FIT and sizing The original G1 frame came in only 3 sizes, S/M M/L and L/XL and some riders found this limiting when trying to get a good fit. The new G2 frame is avaliable XS, S,M,L,XL so should make the frame accessable to more riders. the geometry of the new bike has been tweaked and the reach is slightly shorter and the head angle a tiny bit slacker. the wheelbase remains the same. Like for like the new frame is around 700g (1.5lb) lighter than the original
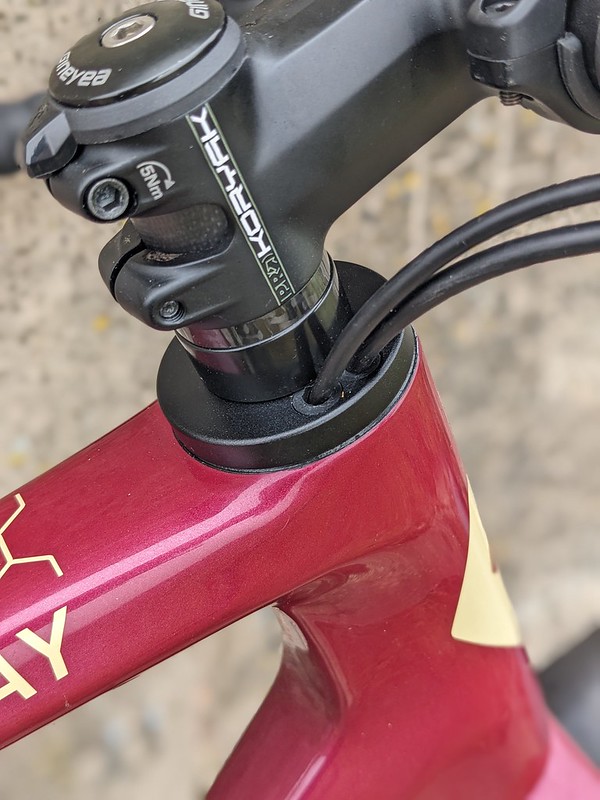
The cable routing is all internal including the dropper post. It looks amazing but does mean all those cables run through the inside of the headset bearings making changing those bearings at best a pain if you have the skills and tools or at worst expensive if you are paying a mechanic to dismantle the bike and rebleed the hydraulic system to change what in effect is a £10 part. Most carbon bikes now have this internal hose/cable routing so it’s nothing unique to Fustle. All that said though the bearings on my G1 are 5 years old and have suffered all sorts of abuse in all weathers and are still as smooth as the day I got the bike so not too much of a worry as Fustle clearly use quality components.
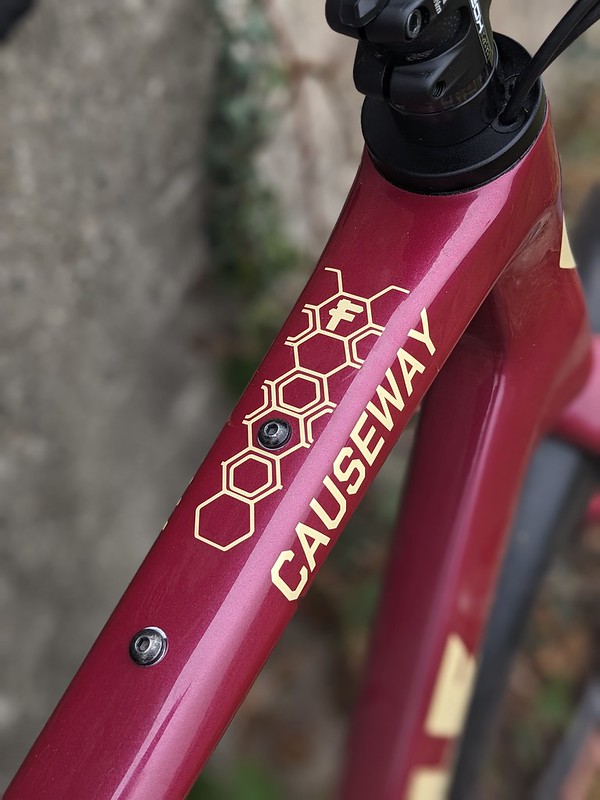
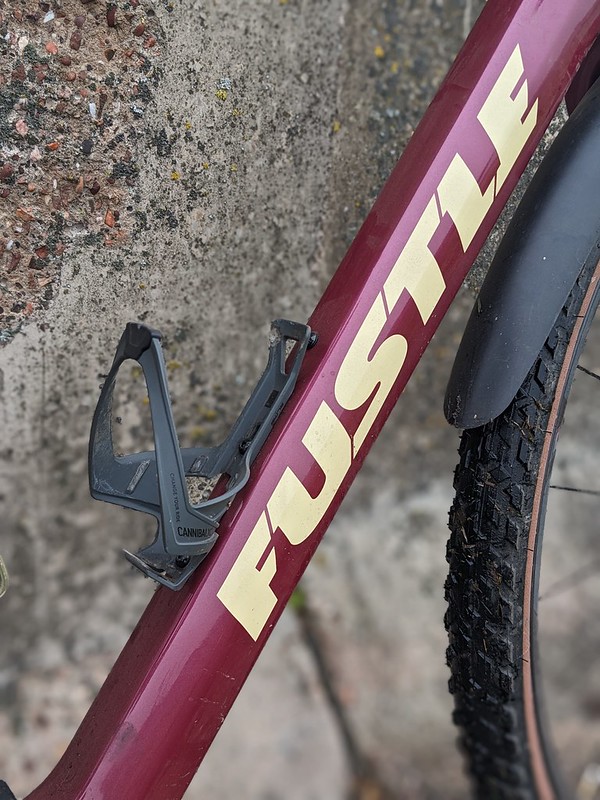
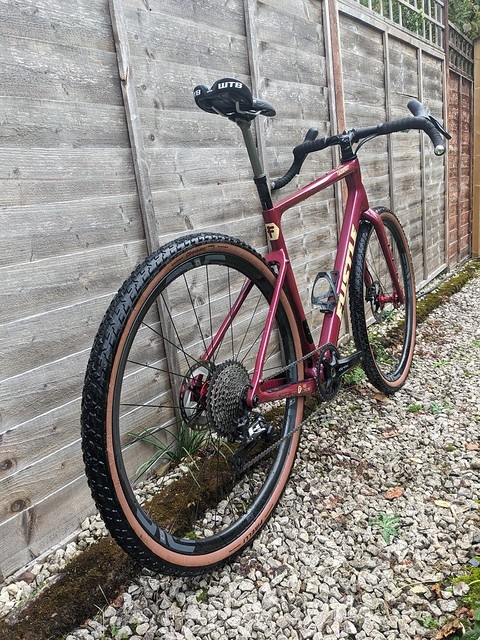
Finally on frame differences is the Fustle branding logo. It’s in the normal place you’d expect on the side of the down tube. I know this seems a weird thing to point out but on the G1 the logo hides under the top tube, gets covered in mud from the front wheel and you can’t see it. just a tiny thing but it’s always annoyed me!
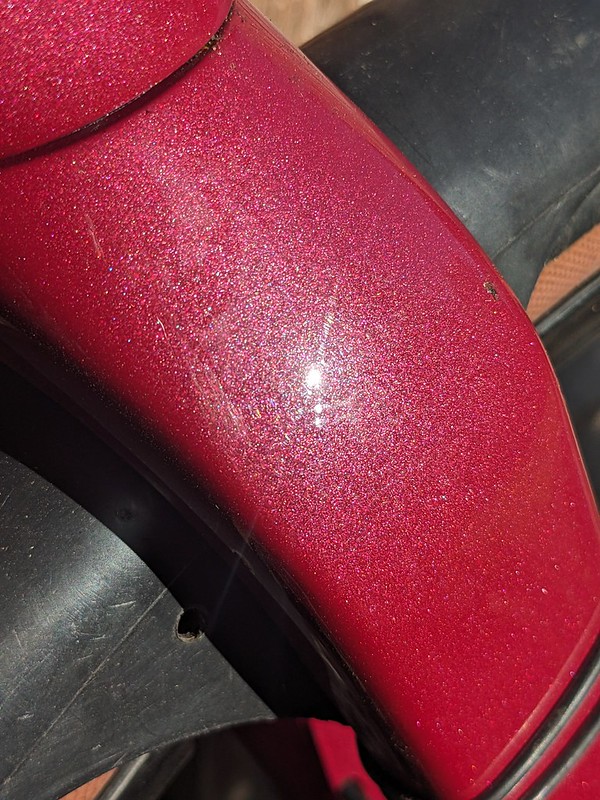
Fustle Causeway G2 logoFustle Causeway G2 paint
i must also mention the paint on the frame too, the colour is “Dunseverick Dingleberry” and is a lucious deep colour that has a lovely pearl fleck to it if seen in the sun. The other paint option is “Bushfoot Dune” which i’ve not seen in the flesh.
HOW DOES IT RIDE So no matter how the frame looks or how many features it has had added it always comes down to how it rides. Quite frankly it’s got big shoes to fill as the G1 rides superbly and in my case definately flatters my riding style. Carbon bikes are often described as being able to dampen fibrations and give a more comfortable ride. Well yes that can be the case but they can also be as stiff as hell and give the harshest feel. It all comes down to how the sheets of carbon are layered into the mould and where stiffness is added or compliance dialled in. Alistair the designer has vast experience of bike design and has put all that knowledge into the G2 and it shows
Tarmac, yes the T word, I know some of you spend a lot of time on the black top on your gravel bike so i need to tell you that the G2 bowls along very efficiently on tarmac and yes on our current rough ass roads it does feel smoother than the G1. it also turns into corners well with no flex at the head tube and despite the slacker head angle compared to a road bike it doesn’t feel sluggish or slow to turn. It does feel like the bike wants to propel you forward when you stamp on the pedals, the side to side flex of the frame is miniscule and you feel like non of your energy is wasted. It doesn’t though batter you, it’d be perfect for a cobbled sportive ride. if you are intending to ride it more on the road or with a road club i’d get the double chainset version to try and match any of your buddies using road groupsets as although the 1 x range of gears is perfectly adequate the quick changes of pace in a group ride are better suited to the double set up. One other thing to note if using as a road or winter bike is that because of the massive tyre clearance you’d be able to run a wider tyre and still fit full mudguards.
With full mudguards and a double chainset set up this bike would make a stunning long distance mile eater, perfect for Audax in fact.
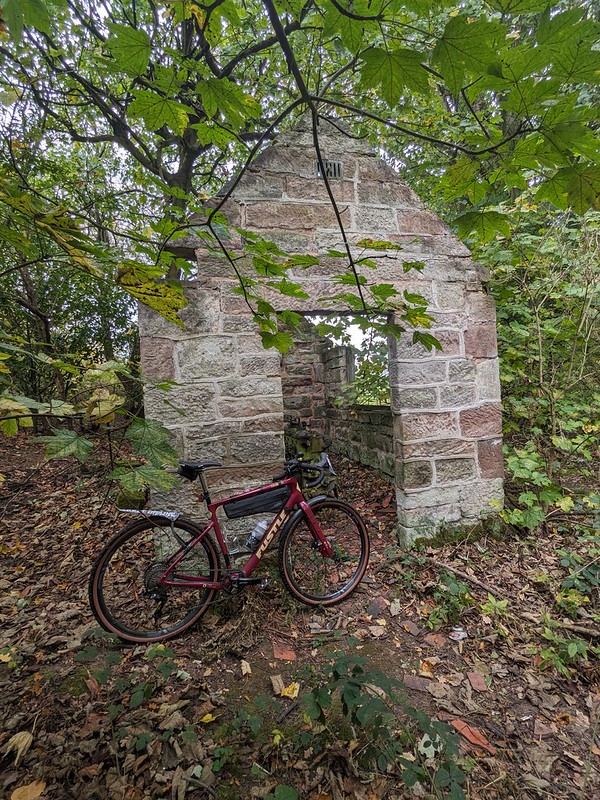
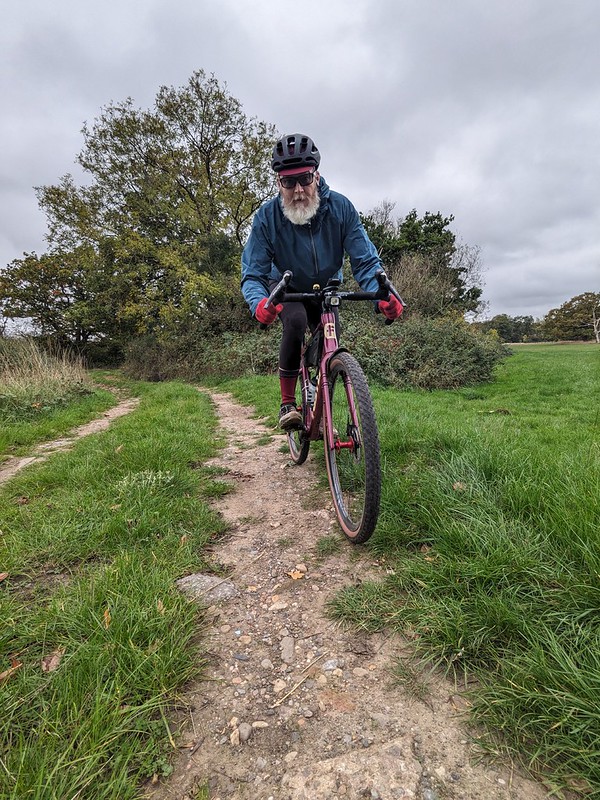
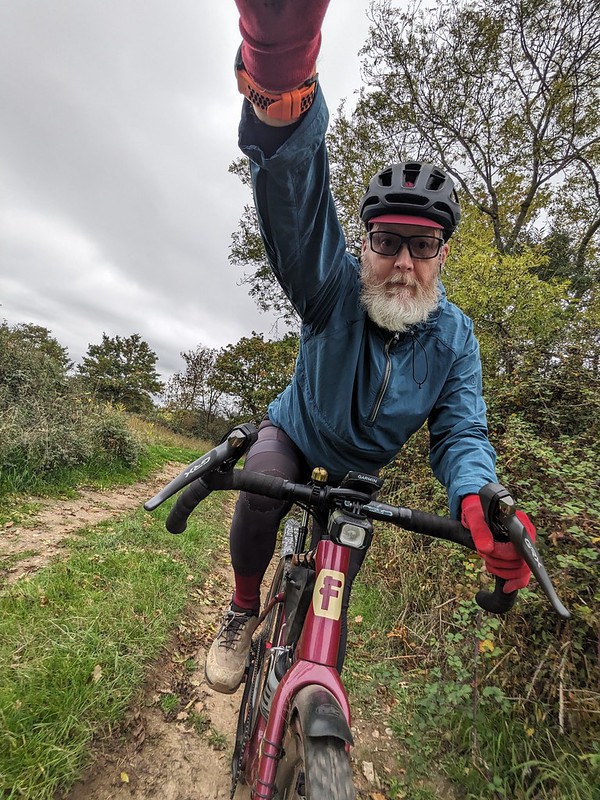
Off road is where the pressure to perform was highest for me, I set the bike up to be as close as possible to my original G1, reach, handlebar and saddle height etc so I’d be feeling at home straight away and able to concentrate on how the frame and fork felt in comparison and get over the “new bike” feel. this took a couple of rides to get right. Then I took the bike on familiar trails where I knew exactly how the old bike felt. All in all I think I’ve ridden around 300 miles during the time I had the bike to test.
There’s a video below that’ll show you the sort of stuff I was riding and if you have time please take a look as it does give an insight on how the bike handled.
Riding the new frame felt different to the alloy version as soon as I started the first climb, yes, the lighter weight does make a difference. I swapped wheels and bags between the two and the new bike was just under 4lbs (1.8kg) lighter. The aforementioned feeling of all your effort being used to move the bike on tarmac applies here too. the bike is agile and you can pick a line on techy climbs with confidence. It’s easy to lift the front wheel over roots and fallen branches but it still tracks well in ruts and loose gravel. Riding along flat chunky gravel feels different too, this is no suspension bike, you can still feel the terrain under the wheels and you’re not isolated from anything but you do get a floaty feeling that combined with the pedalling efficiency makes you want to go faster! Downhill on gravel/fireroad and the typical cross country trails near my house I found myself using the brakes less and just letting the bike flow and do the work. Its lack of weight doesn’t mean it bounces off every hump or stone like a pinball like some light weight bikes do. I’m no engineer but I guess this the the slightly slacker head angle of the new bike helping here. the G1 is a fun and engaging descender helped by the length of it’s wheel base keeping things balanced and non twitchy, this is exactly the same on the new G2 and is confidence inspiring. there’s a set of steps you’ll see in the video which on a MTB i’ll usually drop off the last step of to maintain speed. On a gravel bike I’ll be slower and roll down them. After riding them once and going back a few times to film different angles I also dropped off the last step on the G2! Add the dropper post into the equation too and the bike becomes a little ripper down steep techy XC trails. Sit with your hands on the drops and you feel in control and stable.
The Fustle Causeway G2, and I hesitate to say this as it’s a bit of a cliché is a great all-rounder. It’ll scoot along quite nicely on tarmac, It’s forgiving enough to be a long distance bikepacking bike but having said all that where this bike shines for me is off road and that’s where it excels. if you are a beginner or coming from a road bike backround to gravel the G2 will flatter you and help you gain confidence, if you are an MTBer at heart you’ll feel at home as soon as you hit the dirt.
So i guess as I own the original Causeway i should say which of the bikes I prefer. I do love the aluminium G1 it handles great and we’ve had some top adventures together but if i had the money i’d definately go for the G2, same great handling in a lighter package and all that tyre and front triangle clearance, what’s not to like!
This Fustle Causeway G2 is like the person your mom warned you about but you ignored her, met up with that person and had the most incredible summer that you’ll remember forever!
here’s the video of my few weeks riding the G2, please take a look and please subscribe to my youtube channel, it costs nothing but really helps me grow this website.
you can find more information on Fustle Bikes here
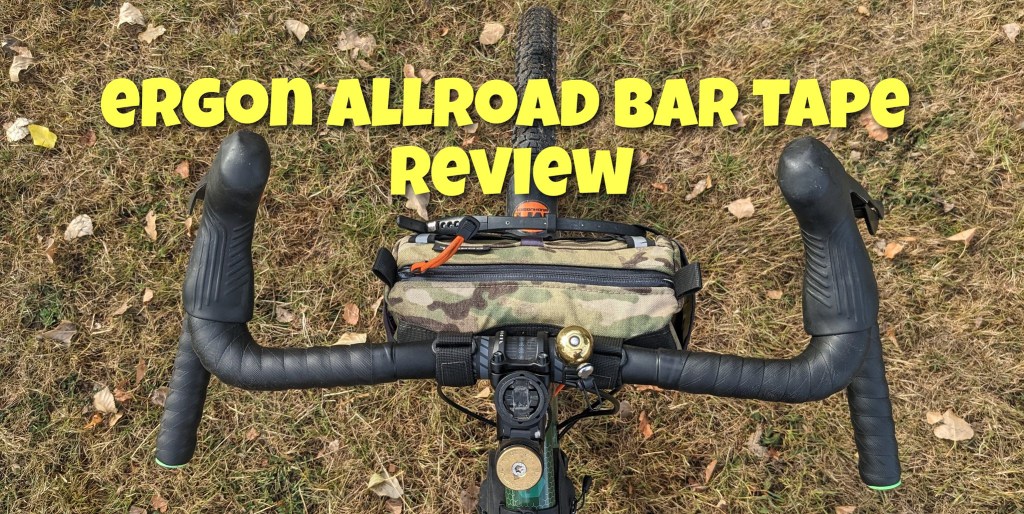
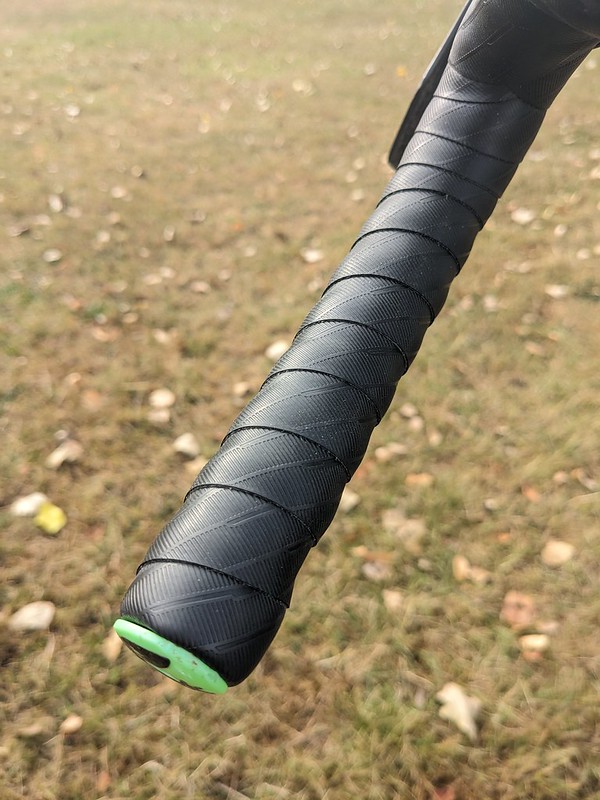
I am a self confessed thick bar tape hater, I don’t even like wearing gloves unless the temperatures really take a dip. So the concept of a cushioned bar tape designed to provide “excellent damping” with 2.5mm thickness left me a bit cold.
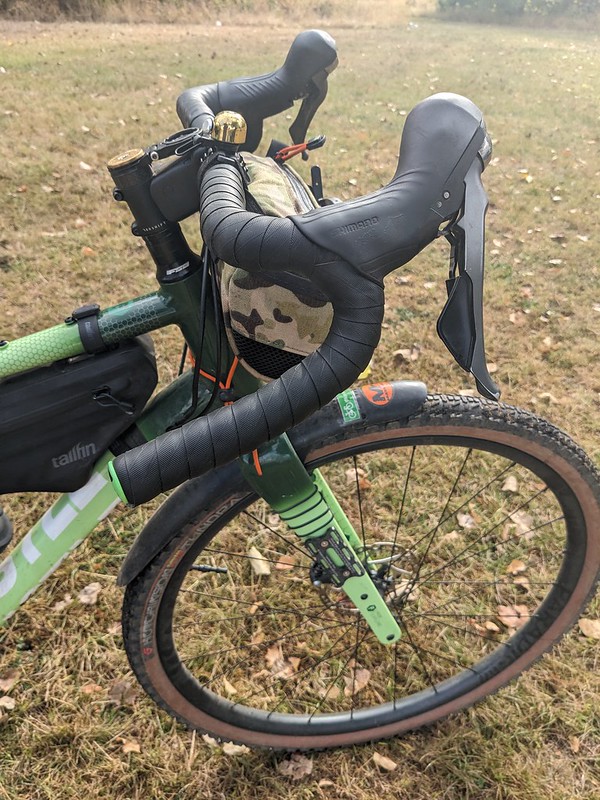
Fitting was relatively easy, the tape doesn’t have much stretch but is flexible enough to fit around the shifters without the need for cheat strip use and there’s plenty of it to fit my 44cm bars which have a generous flare to contend with too.
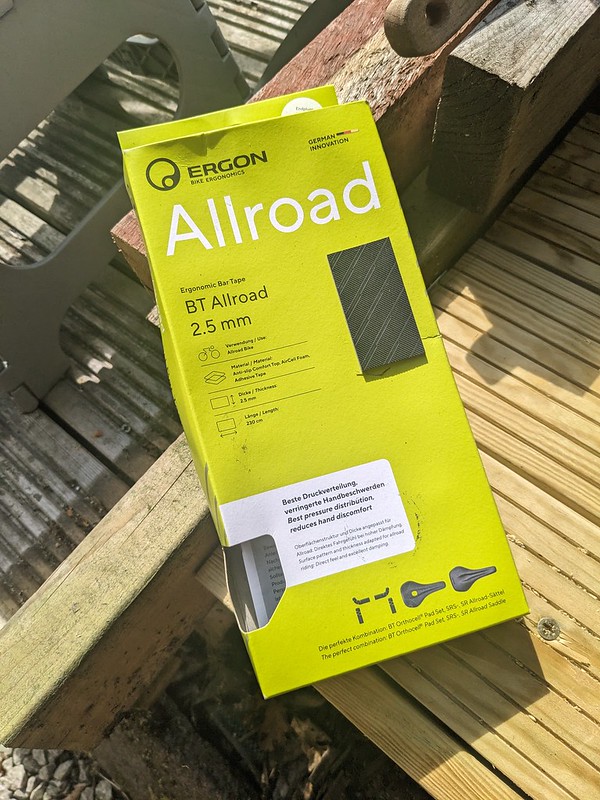
Ergon BT allroad bar tapeErgon BT allroad bar tape
the tape has the usual sticky strip on the underside but its not too superglue like that you can’t unwind it from the bars to make adjustments if you need to when fitting. The tape comes with simple push in bar end plugs but i opted to use my own wedge plugs because they match the frame colour and I’m a tart! The tape does come in other colours, white, blue, red and green. Green would have been my prefered colour (see previous sentence).
Ergon BT allroad bar tapeErgon BT allroad bar tape
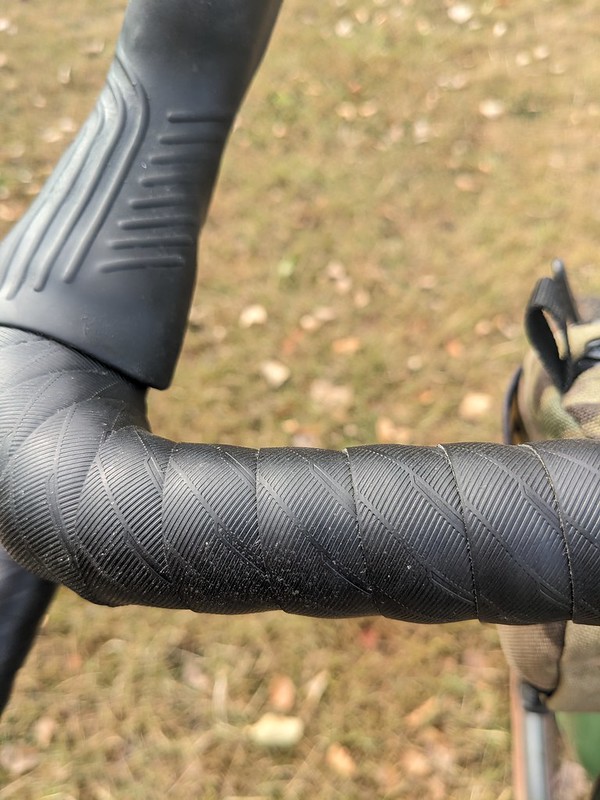
The Ergon allroad tape has a patterned finish said to aid grip and looks pretty good too. After a month of riding, including in the rain I found that my fears about the thickness of the tape were unfounded. The tape has a pleasing squish and is grippy without being tacky even with bare hands. The 2.5mm thickness does give the feeling that it’s actually giving a little help with the vibration coming from the bike compared to my usual tape that was much thinner.
The Ergon Allroad bartape has survived very hot sun (yay!), dust, mud and quite a bit of sweat. It has coped well with being leaned on various cafe and pub walls, lots and lots of bramble brushing, hedgrow interfaces and being loaded into vehicles. Infact with a quick wash with soapy water it looks almost like it’s just been mounted to the bike.
Ergon pitch this tape for riding on all roads and they have a gravel specific tape that is 1mm thicker but I think if you are like me and don’t get on with the very thick bar tapes then this all you need. It’s up there with the premium bar tapes when it comes to price (£34.99 RRP) but performs well if not better than its competition
Ergon BT Allroad Bar tape, a tape for all roads and off roads, it’s expensive but the comfort and ability to brush off the rigors of off road riding is worth it.
you can find more details here ALLROAD BT this is not an affiliate link, although I don’t think Extra UK will want the tape back after many weeks of me gripping it!
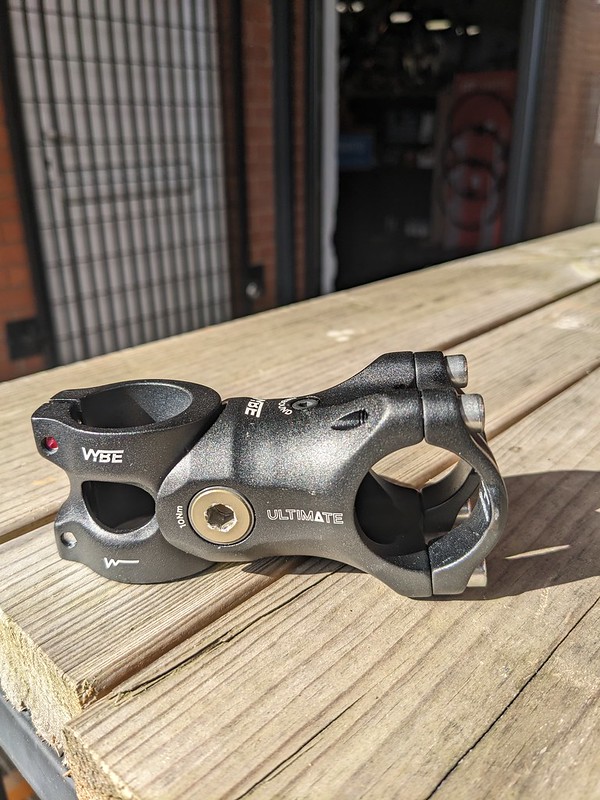
Ultimate Sports Engineering (U.S.E) have been making bicycle components for many years, I had one of their suspension seatposts on my mountain bike back in the 1990s. Together with the other arm of the business, Exposure lights, they have a well earned great reputation for well thought out and reliable components with excellent after sales service too.
I tested the modern equivalent of that original seatpost and you can read it here U.S.E now have a suspension stem in their line up and I was lucky enough to be sent one for a few weeks to try out.
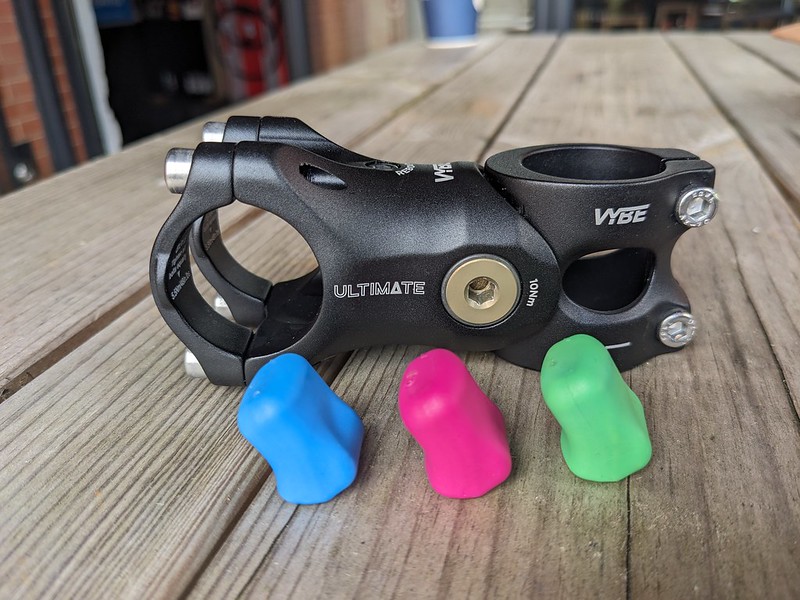
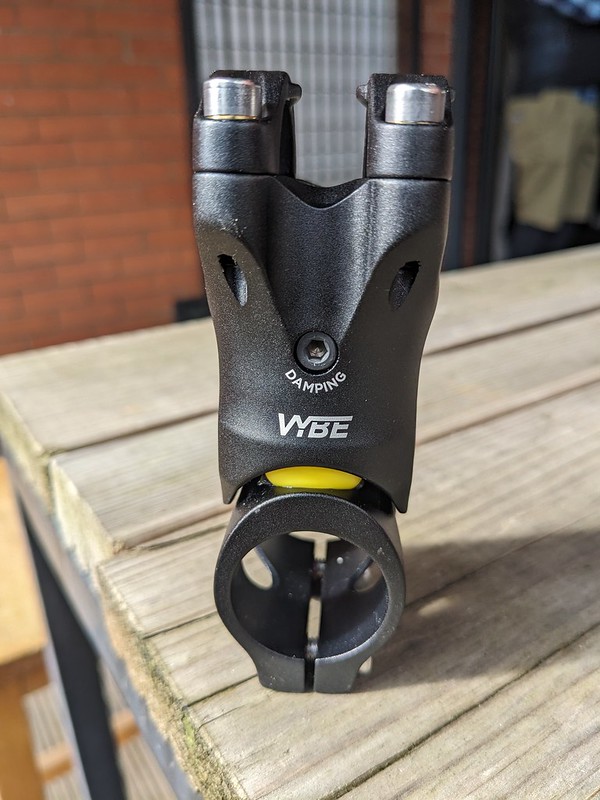
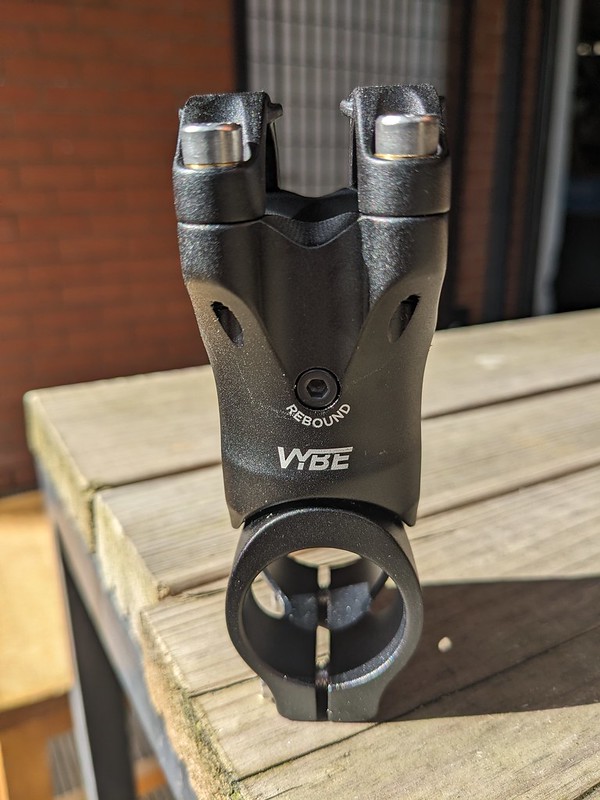
The stem is available in two lengths currently, 70 and 90mm and unlike other similar stems on the market is rated for use on drop or flat bars. It is constructed of aluminium, weighs194g for the 70mm version I tested It consists of one main pivot point that squeezes a changeable elastomer that allows the stem to move up to 20mm. The stem also has adjustment for rebound and compression, something I’ve not seen on any other suspension stem I’ve tried so far.
The first thing to say is that it looks like an ordinary stem, which to my mind makes it a much better prospect than some of the huge parallelogram style suspension stems on the market which are quite ugly in my opinion. When riding and you look down it looks good and is not something you’d want to hide!
As with most suspension stems, you need to dial in the stem to suit your weight and riding preferences. U.S.E. include 4 interchangeable elastomers that allow you to do this. The stem does have to be taken apart to swap the elastomers though. Happily there is a comprehensive guide included in the box and it’s on actual paper! no downloads needed. It’s pretty straightforward to swap, just make sure you put the stem back together as the U.S.E. guide states. U.S.E. also include a little tub of grease in the box which is a great touch.
Set up with a yellow elastomer as per the rider weight guide and all bolts tightened to the correct torque I went for a series of rides to test out the stem, I’ve included a video below that shows the stem in action, please take a look (and subscribe to my youtube channel if possible, it’s free!)
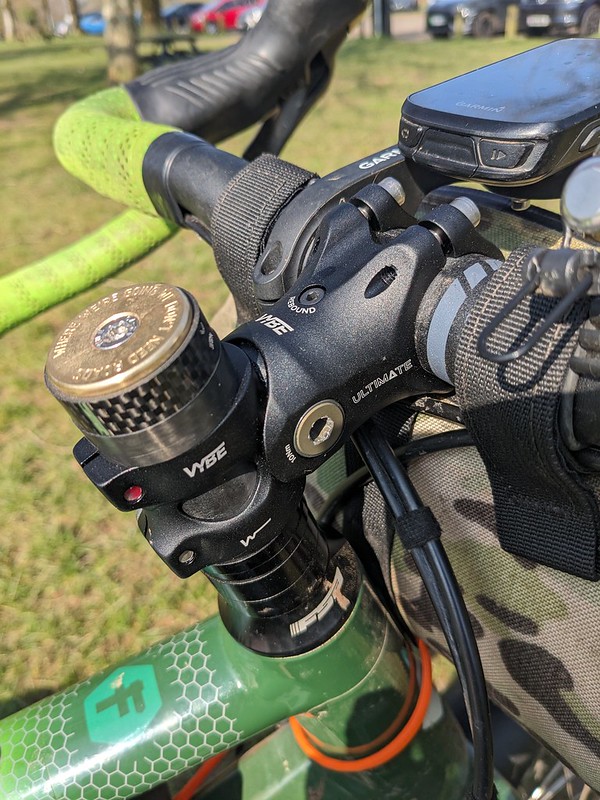
So, does the U.S.E. Vybe suspension stem work, well yes and no. Firstly and this is the same as with any “suspension” stem, do not think of it as suspension like a suspension fork, it dampens the vibrations coming off the trail through your front wheel and rigid fork, it doesn’t suspend the rider from big hits. What it does by dampening those vibrations is reduce fatigue on you hands, arms, shoulders and upper body allowing you to ride further and recover more quickly. The U.S.E. Vybe stem does this brilliantly but there is one drawback and this is affected by your riding style.
Because the pivot point on the stem is very near the steerer of the fork the nearer your hands are to that pivot the less the stem moves. What this means when riding on drop bars is that the maximum compliance of the stem is achieved when riding on the hoods. Riding with hands on the drops and therefore further back than on the hoods mens the stem moves significantly less. So if like me you spend a lot of time on the drops for technical descending then you won’t really benefit from having that 20mm of travel. If you ride on the hoods you’ll get much more cushioning as you move along. So pedalling long sections of rough trail like forest fireroads or towpaths that are ridden on the hoods is where the stem really shines. I know for a lot of riders this is exactly what gravel riding is. Others like myself who don’t have that kind riding on our doorsteps and ride XC trails will find less benefit.
Since posting this review I’ve had messages from readers who have seen reviews of the stem where the main pivot bolt came loose during a ride. I can say for the 4+ weeks the stem was on my bike over various rides that bolt remained tight.
The Ultimate Sports Engineering Vybe Suspension stem is a well made and thoughfully designed component with added features over other similar stems on the market. If you are a fireroad/towpath/rough bridleway and typical UK pot holed road rider then it’s an excellent way to reduce fatigue and lengthen time in the saddle. if you push the boundaries of what a gravel bike is supposed to do it maybe of less benefit but who doesn’t ride all the above to get to the juicy challenging routes? Might as well take advantage of that suspension for those section as it won’t hinder you on the downs!
you can find more information about the U.S.E. stem on their website here
I’ve been called many things over the years but probably the most annoying is that I’m an “influencer” Now you might say as I publish online reviews, you tube videos and have a instagram following that that is exactly what I am and up to a point I suppose you are right and also wrong, let me explain.
Back in 2018 I was working in the bike industry, selling and fixing bikes in a local bike shop. These new fangled “gravel bikes” had started to be a thing. Of course I wanted one and even tried to get as near to the concept as I could by adapting a hard tail MTB with narrow tyres and a rigid fork. A year later I was lucky enough to be allowed to ride the shop demo gravel bike, a Trek Checkpoint (check the dropdown above for a review of that bike) which I absolutely loved. At that time there were so many companies that were jumping on that gravel band wagon it was really confusing for the ordinary rider to know what was good, what was essential and what just wasn’t fit for purpose. No one really has the cash to throw away on a bike or product that the media tell you you need but in reality is so far from quality or purpose that you might as well just set fire to your pound notes (remember real money?)
So I decided to start UKGRAVELCO on instagram to share my pictures and repost others snaps to inspire people to ride and quite frankly to find people to ride with. I started to be inundated with messages asking my opinion on this or that bike, that wheelset, what should i wear etc etc you get the picture. At the time there was a lot of media attention for gravel, lots of articles online and in magazines (they existed back then!) and many pro riders and those with lots of followers recommending kit. All well and good you might think. However, working in the industry I’d had some of that kit that’d been recommended as essential in my hands and well I didn’t agree. It was then I launched ukgravelco.com to try and give an honest, balanced look and review on some of these items.
I started with bikes or kit I already owned and knew that worked or didn’t and this proved popular. I gained followers at a fast rate and traffic to the website was good. I was able to show this data and contacted a few companies and distributors to see if I could review some of their kit, always with the premise that it was at their risk. If i liked the product I would say so, but also if I thought it was lacking I’d put that in print too. It was a risky move, but I wasn’t doing it to make a living from the reviews, I was doing it to help others and yea, it was fun too. Luckily quite a few companies and marketing people had confidence in their products and sent them to me to try out.
“i bet you get to keep all that stuff you get sent” is a sentence I hear a lot and the answer is yes and a definate no. Understandibly no one wants clothing or shoes back after I’ve worn them for a few weeks, especially bib shorts! Bikes and wheels definately have to go back and a few times at my expense too. I’ve also agreed to review kit I can give away in a competition afterwards either in a straight free competiton with a random winner or by buying a ticket where all the profits go to a charity or good cause such as Nil’s Rider Resilience project.
“How much do you get paid to review stuff?” honestly, nothing, not a thing. Now this is really what inspired me to write this article really. This was because I recieive quite a lot of offers of product that comes with a ready written script from the manufacturer, that script is what they want you to write about their stuff. Basically a glowing review before I’ve even had the product in my hands. This comes usually with a sweetner of keeping the item or the promise of commission. I’ve even had emails asking how much I charge for a positive review! Needless to say I’ve always declined these offers. So have peace of mind that all the reviews on ukgravelco have not been paid for upfront or scripted by someone with a vested interest in having a good review.
I reviewed the ASS Saver Win-Wing last year after writing an email to see if they would send me one to review. I loved it, it’s such a simple idea that really works. I wrote a review and made a a video that got lots of attention. When Ass Savers produced the mark 2 win-wing they asked if I’d like to try one out to see the differences between the original and the new one. Of course I said yes. they liked the ensuing video so much they shared it and offered me a discount code to share with my followers. This was post review and not before it was written/filmed. This was something new to me and it came with what the industry calls a “kick back” This meant every time someone used my code ( GARYW_10 ) they would get 10% off their order and I would get a small percentage of that discount, This was a dilemma, would this compromise my neutrality? I decided that as i believed in the product so much and would recommend it anyway I would agree to it. After all the website hosting and domain does not pay for itself, plus a lot of the products I review I’ve paid for in full from my own money. So full disclosure, for one Ass Saver sale of £20.34 i receive £2.85.
All this is handled by an affiliate company. Usually an advertisement company or media company who handle publicity/promo codes and links for many companies at once. The company that handle ass-savers send out the codes and handle commission, if any and that’s not guaranteed. Most times when you see a link to a product at the end of a review it’s an affiliate link, if you click on it then either the reviewer or the website that is paying the reviewer to write the review gets a percentage kick back. This is why I’ve started putting a disclaimer next to any link I post that it isn’t an affiliate link.
It was while browsing the extensive list of companies on the affiliate website that I noticed that a good many of the accounts of “influencers” I follow on instagram had nearly all the cycling affiliate offers listed on their accounts. In some cases it was almost a carbon copy of the list. Taking a closer look at their content where they are saying “look at what I’ve been sent/this is the best thing ever” etc etc and seeing the long list of discount codes and links in their bio they are getting a kick back for every one. Honestly half the stuff listed i would not even give the light of day too. I get sent an email if there’s a new affiliate opportunity and It’s become a ritual to go to this account and see how long before they announce that they can’t live without that particular product and oh, here’s a discount code so you don’t miss out.
Is this influencing? I guess it is. I feel it’s wrong and this is why I do not like being called an influencer. I’ve had chats with a few cycle industry companies recently about reviewing the latest products and in all cases I own items they’ve produced in the past already, paid for with my own money and the subject of earning a kick back for reviewing their product has come up and I’ve said that I believe in their product and that I’d recommend it anyway regardless of kick back.
This is the only way I can go forward, I can’t continue reviewing without being totally honest. If there’s any offer code then I’ll be upfront about any kick back and I won’t be agreeing to that until I’ve properly seen and tested the item.
So choose your influencer carefully, there are genuine reviewers out there that will only take kick back on products they really believe can make a difference to your riding but unfortunately there are those who clearly are only in it for the money.
This may be old news to you, it may open your eyes and make you look at any review or influencer with a pinch of salt and if it’s the latter it’s been worthwhile writing this. No pictures on this one as I didn’t think it was fair to use unrelated pictures just to fill out the article and implicate any company, product or dare I say influencer wrongly
if you’d like to support these honest reviews and ukgravelco.com then please consider following this page, the instagram channel, subscribing to the youtube channel all of which are free to do or buying something from the ukgravelco shop, links below, non of which are affiliate
Brooks saddles have always scared me. Tales of having to do long rides to break in the leather top, the spanner that came with them to adjust the spring underneath to stretch or relieve the pressure on that top and the well, lets face it, the retro bygone era look of the things all contribute to asthetically make me not want to go near one with my tender under parts!
Well Grandad I hear you say (and probably Brooks reading that paragraph) things have moved on. Brooks have evolved and moved with the times. They do of course still produce those hand made leather saddles and I concede that once the breaking in period has passed and the saddle has molded itself to your undercarriage they are probably the comfiest saddle out there. However, who in the modern world has time to go through all that discomfort? I have to hold down a day job and also have the every day humdrum chores that we all do so my riding window is small and I need to make the most of it by jumping on the bike and go riding.
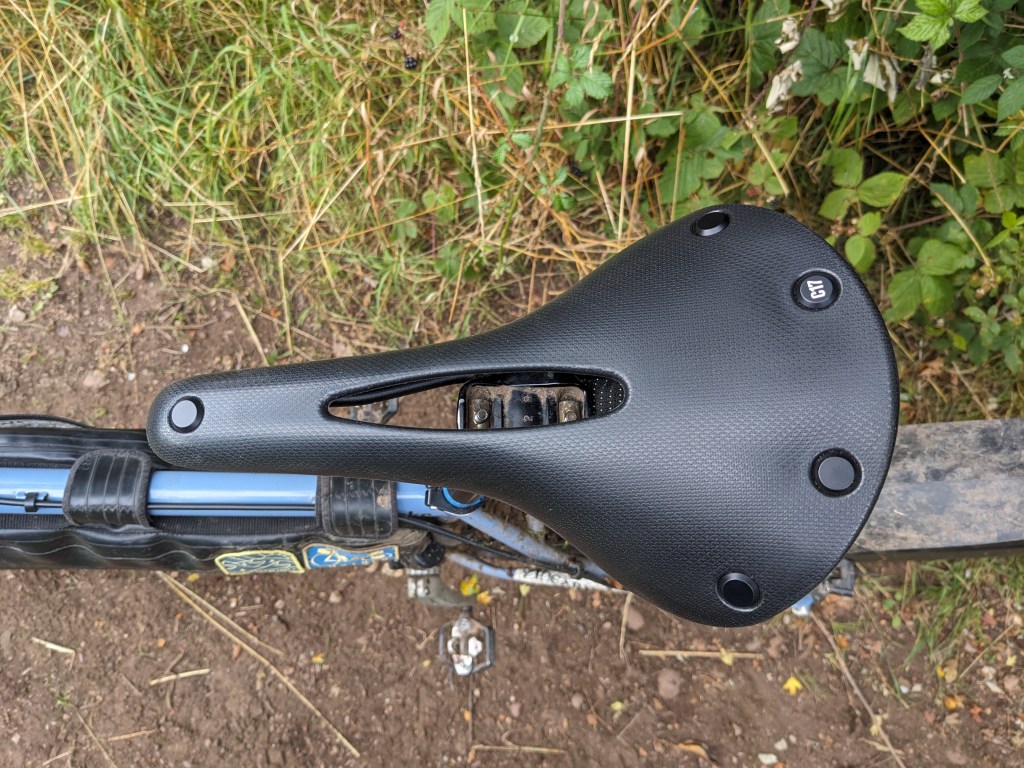
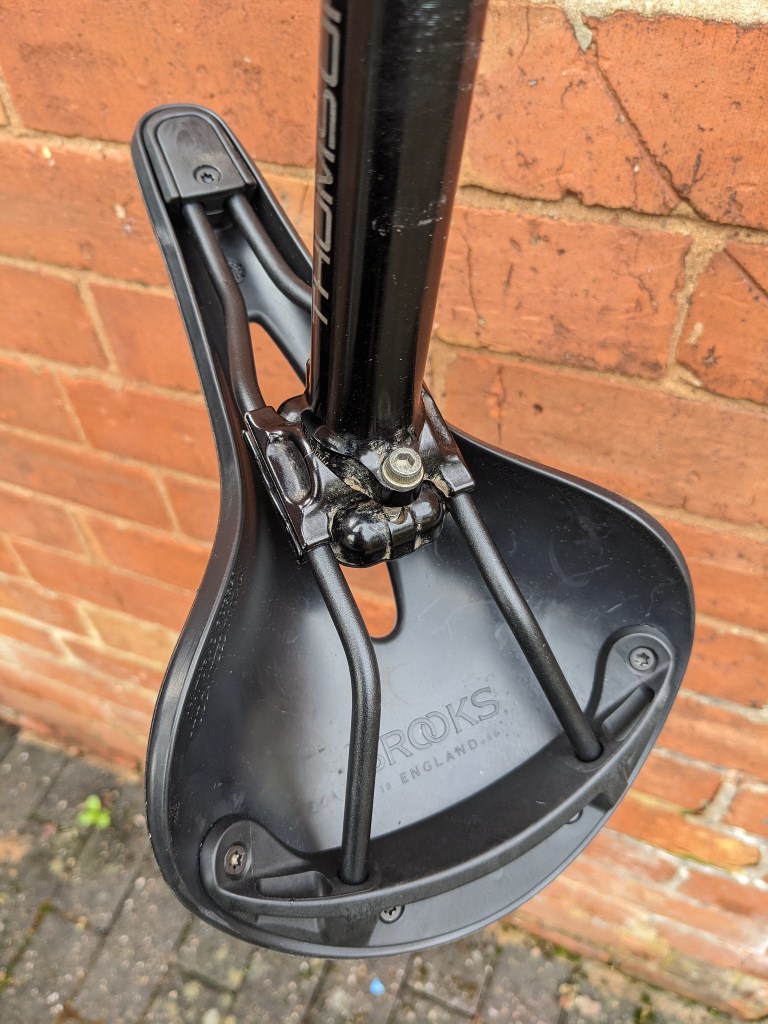
The Brooks Cambium range of saddles is their solution to those of us without the time to break in new parts (or break our own doing it) and shock horror it isn’t even made of leather!!! No the Cambium has a vulcanised rubber cover so no worries about water damage or having to treat the material to protect it. Wash and go at the same time as you clean the bike. It has tubular steel rails and aluminium rivets.
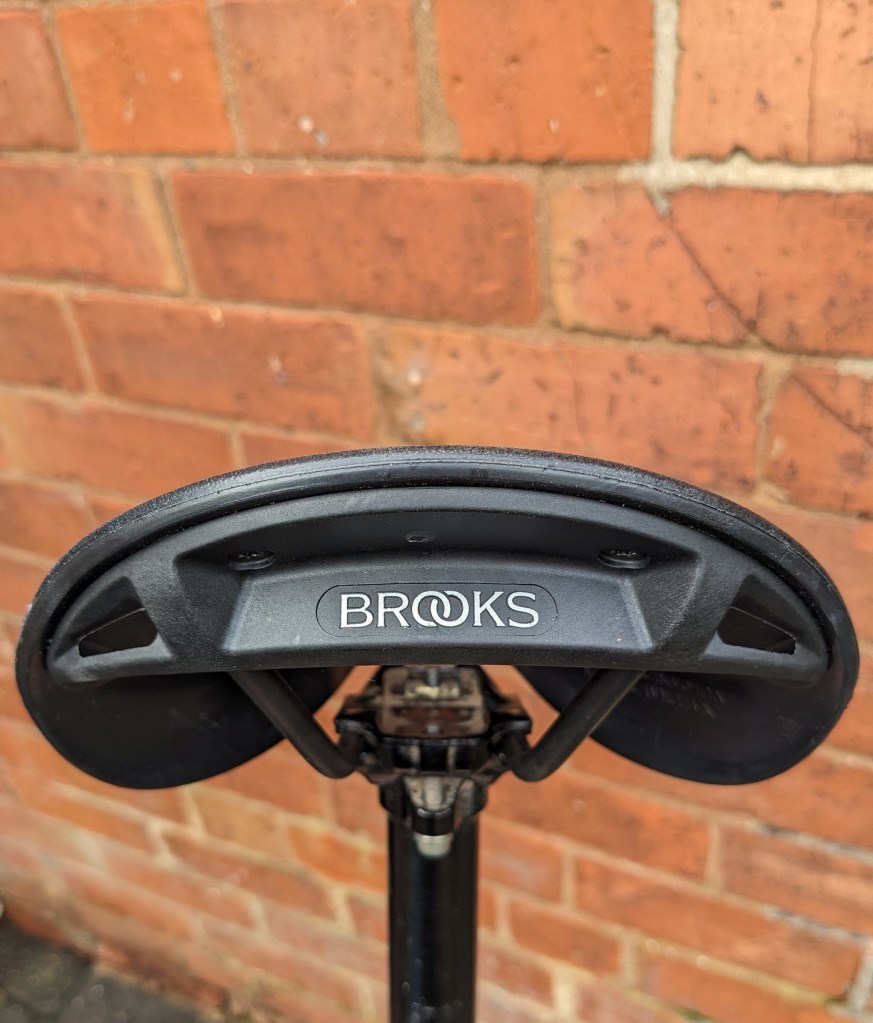
Yes rivets, you see Brooks haven’t abandonned the traditions completely. The saddle is still designed to have the “hammock” effect of the original saddle, the top is still riveted together but with anodised aluminium rather than copper rivets and it even has a traditional twin fitting for a saddle bag, such as Brooks’s own or something like a carradice waxed cotton one. Lets not stray too far into the past though, as sunlit and glorious in a rough stuff fellowship kind of way it might be. Make no mistake the Cambium is a well thought out modern saddle that has been designed for commuting, road riding, world travel, gravel biking & bikepacking in all weather conditions.
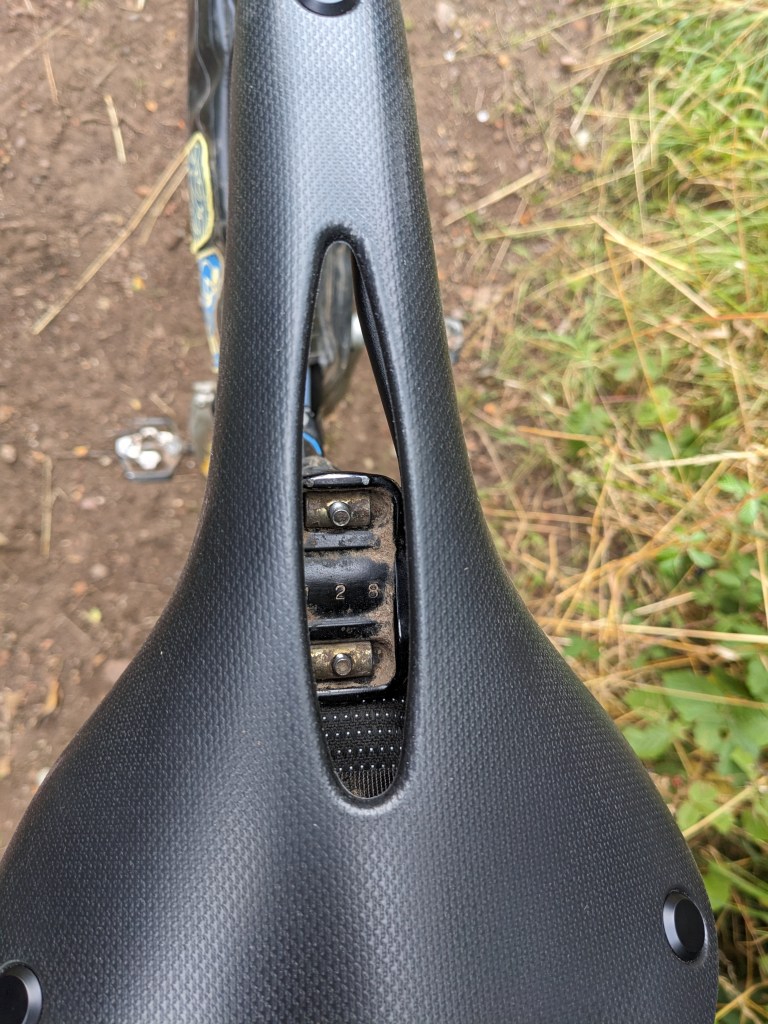
The 17 part of the name represents the width, Brooks produce a 15 and a 19 in these and their other saddles. I went with 17 as it was closest to the width of saddle I’m most used to. I received a “carved” version which means there is a cut out in the middle designed to add pressure relief and more flex for long hours in the saddle. The rails will fit any modern seatpost and theres is no tension adjustment for the top.
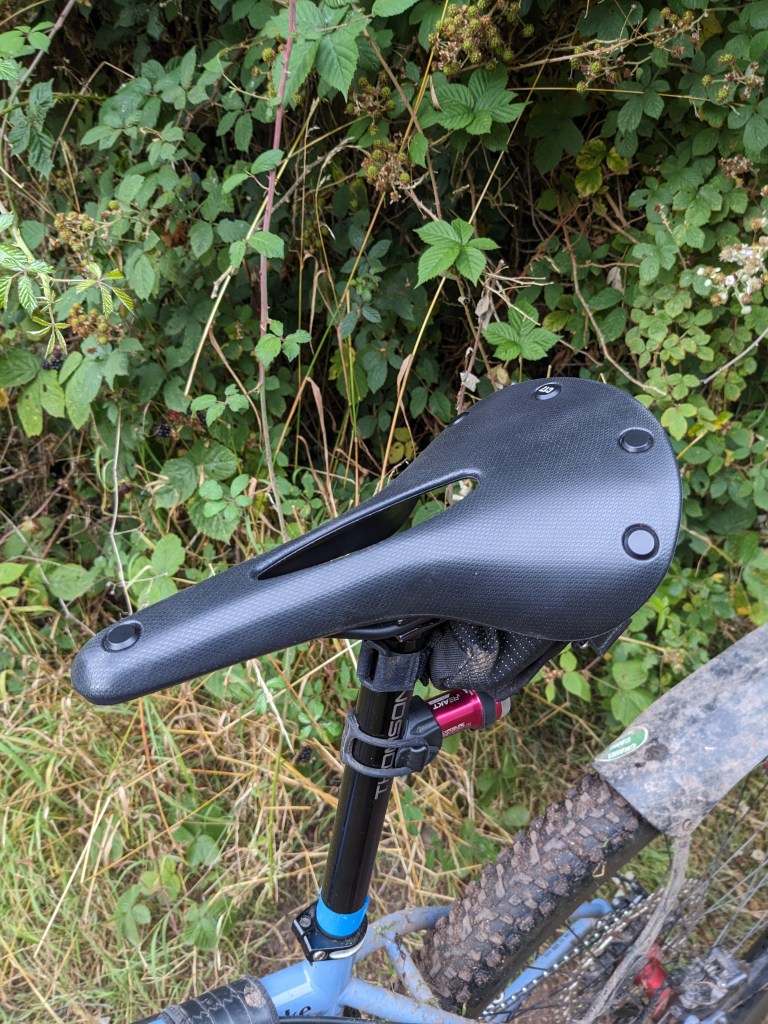
The ride then does not match what my preconceived ideas forecast. To my eyes it looks uncomfortable and hard. This though is as far from the truth as it’s possible to get! The saddle feels like you are easing into your favourite armchair. The first few rides I found the flex a little disconcerting and I thought I could feel the cut out move and close together a little as i sat down but I think this was entirely psychosomatic as it didn’t interfere with any of my delicate parts at all. I didn’t find this flex affected the ride though, there’s no bouncing pogo stick like over rough ground but I could tell the difference from my regular saddle. The ride wasn’t as harsh, its no substitute for a suspension seatpost (or full suspension bike) by any means but it does help with that trail chatter and that has got to help with fatigue over a long ride.
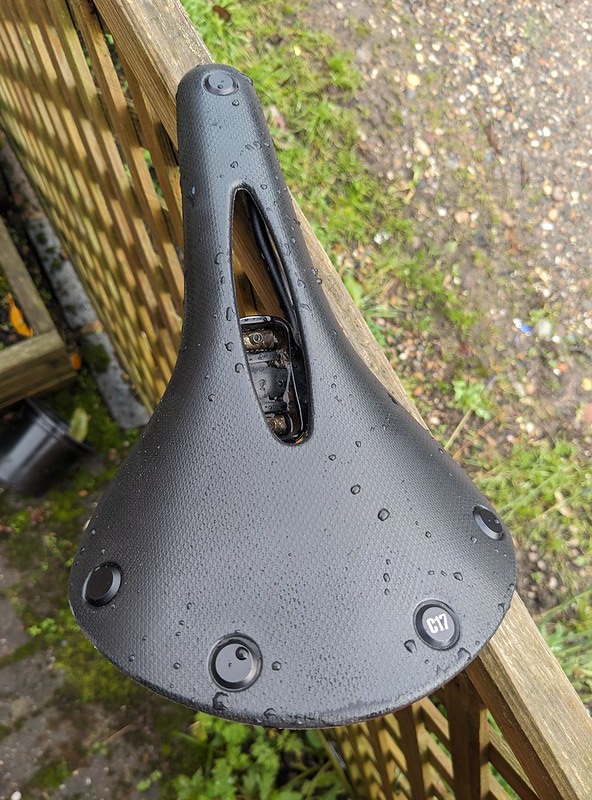
Brooks C17 carved rivetsBrooks C17 carved saddle bag mount
I’ve used this saddle over the summer and now into the wet autumn…..who am I kidding, the summer was nearly as wet! The rubber saddle cover has proved durable and actually doesn’t look like its been used at all! It shrugs off water and a quick wash with a sponge or hose cleans off any residual mud or grit completely. After multiple rides the only thing I think I’d change if I was to buy one of these saddles is to go with the narrower C15. This is because I’ve mostly been using the saddle on a bike with a standard seatpost, not a dropper post so going downhill I’ve had to get my weight and myself behind the saddle in the old fashioned way and the slightly wider rear of the saddle has made this a process I’ve had to concentrate more on than if it was narrower. The fact that this method of riding with a rigid post is the only old fashioned thing about the saddle is not lost on me given my first two paragraphs. I think I’d go with one of the colours too, black is rather too traditional!
The Brooks England C17 saddle, there for the long haul rides with armchair comfort and lasting looks
you can find out more details from Brooks England (not an affiliate link)*
*if you’d like to support these reviews and ukgravelco.com then please consider following this page, the instagram channel, subscribing to the youtube channel all of which are free to do or buying something from the ukgravelco shop, links below
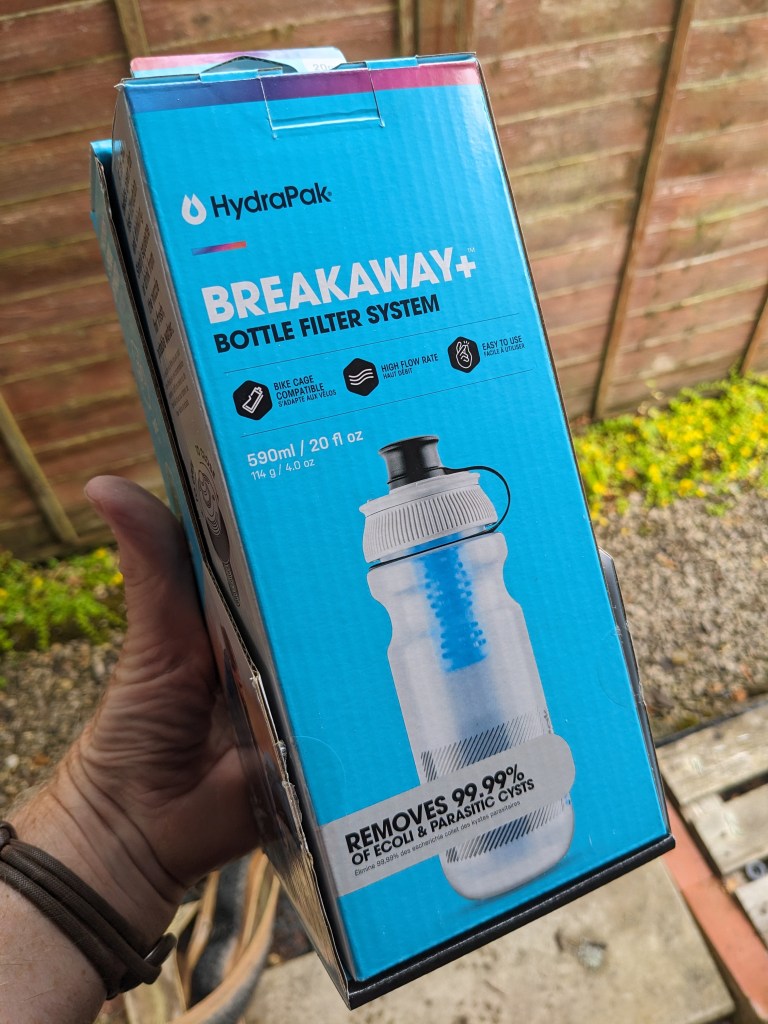
The very first thing I noticed when I received this bottle from the team at Lyon Cycles, the distributor of Hydrapak was the “removes 99.99% of ecoli and parasitic cysts” boast on the pack. Who knew there were cysts lurking out there to make your day less fun?
I will be the first to admit that I am not the worlds most prolific bike packer, I tend to like to ride between B&Bs and hotels with a clean water source rather than wild camp in a tent, bivi or bush and use streams to replenish my water supply.
Luckily I ride with people who do love that sort of riding so I was able to give them the Breakaway + bottle to try out in the environment it was designed for.
Tim is a veteran of the Tour Divide and numerous Silk road races and will be using the Breakaway + bottle in next years Atlas mountain race. He along with Maria spent a weekend in the Elan Valley in Wales on a route that even though was not far from civilisation can get pretty remote and definately doesn’t include shops to top up your water supply. they also had an over night stop in a bothy so wouldn’t be carrying enough liquid for drinking and cooking with them. Ideal then to try out the bottle filter system.
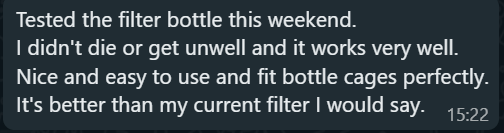
here’s the message I got from Tim
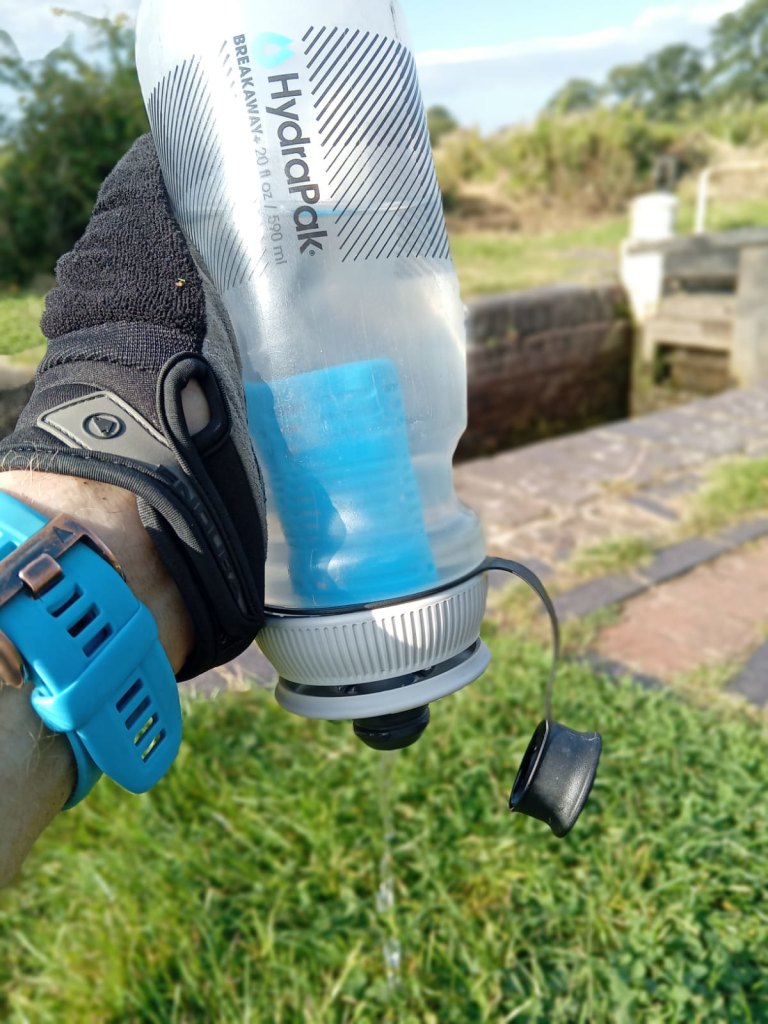
A picture paints a thousand words so they say…how about a picture of some words? Anyway I’m sure you get the gist but lets have a look at the bottle in action. This was filmed on that Welsh trip with the Breakaway+ being used with water from a stream
I can confirm that Tim and Maria are very much still alive and well and have had no side effects from using the filter bottle and Tim has continued to use the system on his ultra rides ever since.
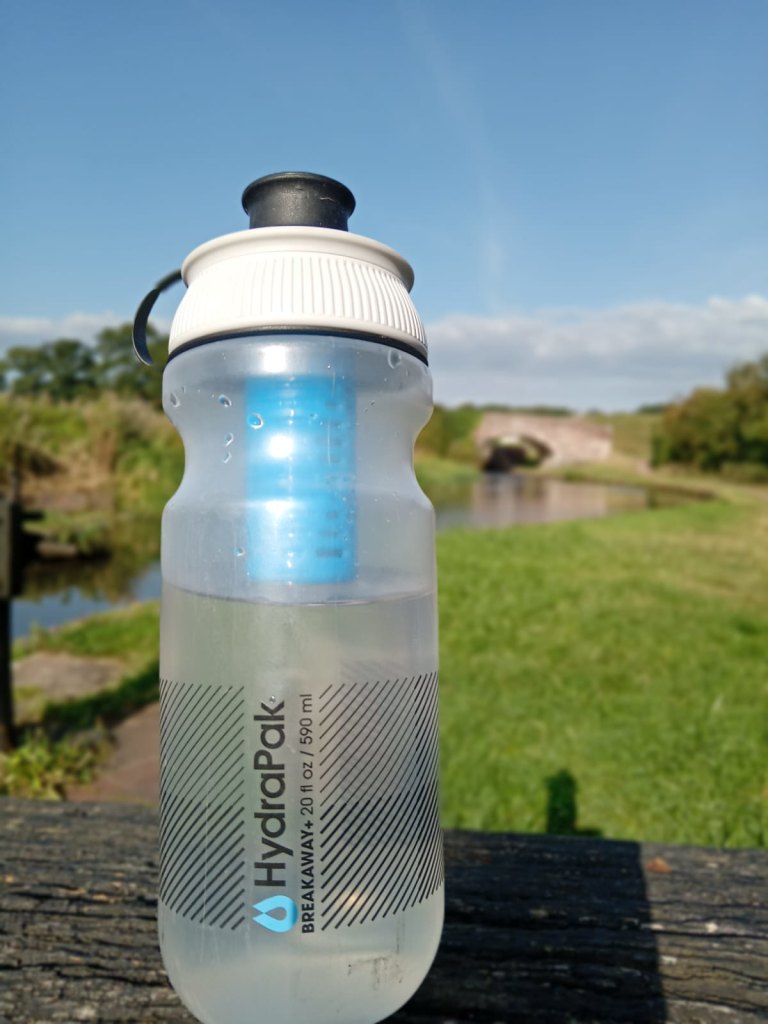
The filter will filter 1 litre of water per minute and is good for 1500 litres before its recommended to be replaced. Spare filters are readily available. The bottle itself is very squeezeable making the whole operation very easy even with freezing cold hands or big thick gloves. The cap also includes a cover to stop the drinking nozzle from being covered in spray (the hydrapak website does describe it as a dust cover…..dust! how i laughed!) the whole system, bottle and filter weighs just 114g.
To quote Tim again “I’ve used a few (filter bottles) and this is the best one I’ve ever used” you can’t say fairer than that.
more details can be found at the Hydrapak website (not an affiliate link)*
*if you’d like to support these reviews and ukgravelco.com then please consider following this page, the instagram channel, subscribing to the youtube channel all of which are free to do or buying something from the ukgravelco shop, links below
My last article on UKGRAVELCO.COM was about flat pedals and if it was possible to use them on a gravel bike and a quick review of the Crank Brothers Stamp and HT pedals. As discussed in the video you can wear whatever shoes you want with flat pedals, that’s what makes them so versatile and popular, you don’t have to have expensive specialist or specific shoes to use them. However, if you want the optimum amount of grip and performance and your budget or circumstance allows you can buy shoes designed to mate perfectly with flat pedals. the bonus of shoes without a cleat sticking out of the bottom is that you can use them as ordinary shoes too and you won’t stand out as “a cyclist” sterotype at work, the supermarket or down the pub!
The benchmark flat pedal shoe before Adidas took them over was the Five Ten range of shoes, known for their super sticky sole and robustness for trail riding. They were excellent for all round riding from cross country to downhill. They kind of lost their way especially with sizing and narrowness when taken over and lots of other companies caught up and designed and introduced their own version.
Crank Brothers are one such company, not new to the cycle industry and well known for their pedals they have introduced the Stamp Trail line of shoes. Yes, they call their pedals Stamp too so I’d hope they were designed in conjunction. I tried out a pair of the lace up version and as well as using them on the “can you ride gravel on flat pedals” experiment I’ve been using them on my mountain bike too.
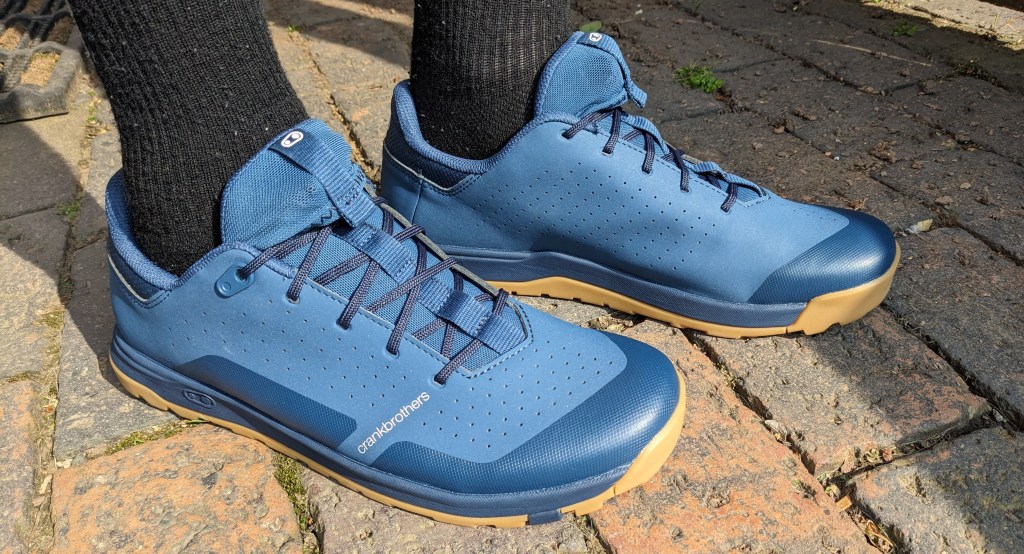
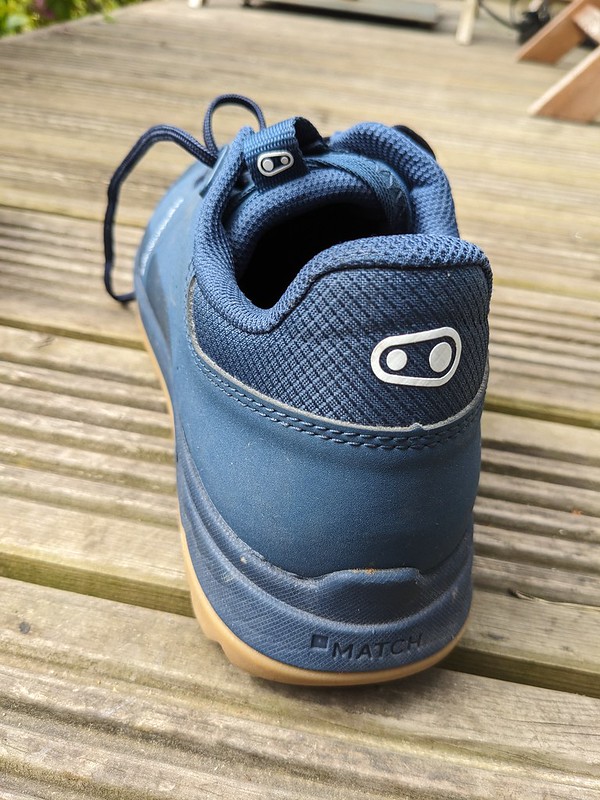
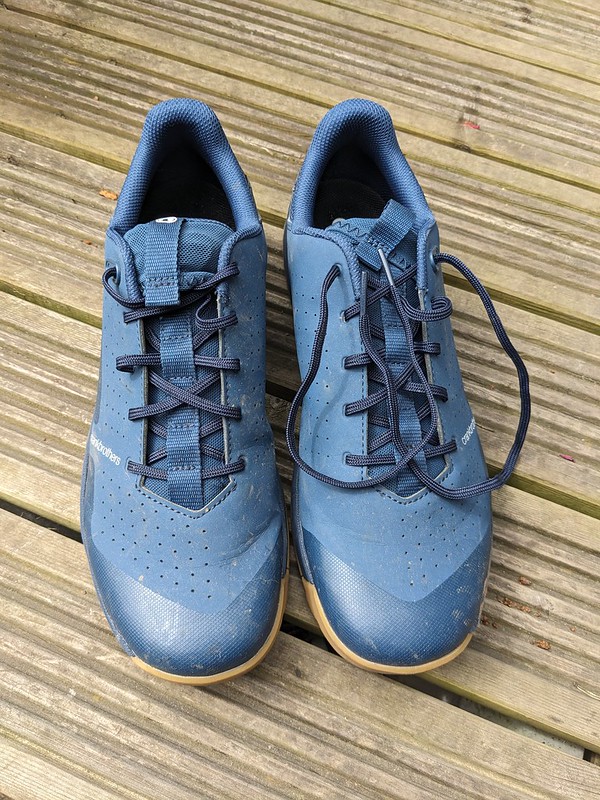
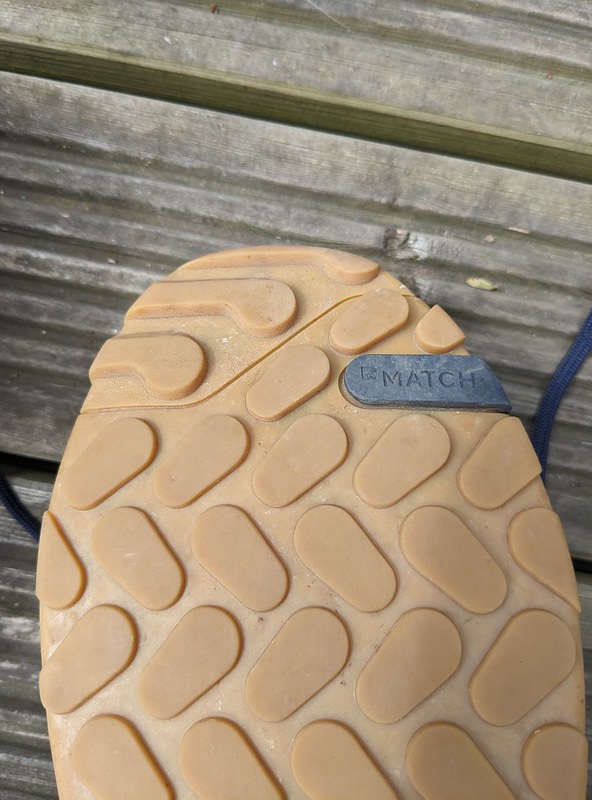
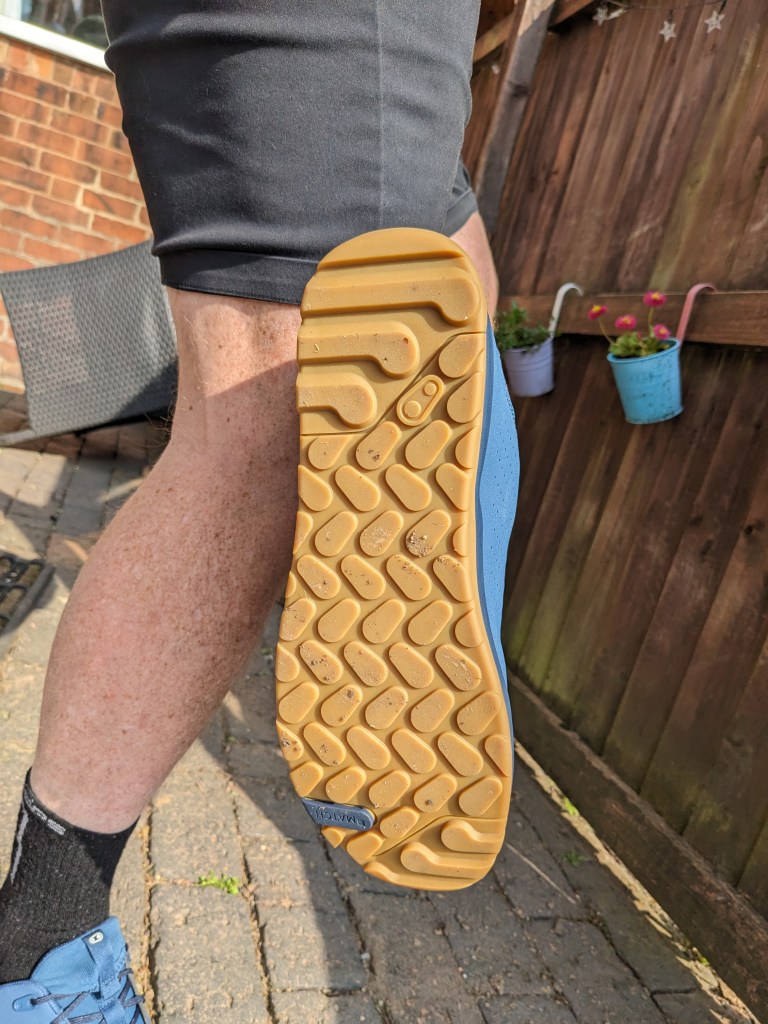
The look of the shoe is very understated (they do a white version too, perfect for UK conditions! 🙂 ) with a blue upper and a brown gumwall sole. there is a reinforced poly urethane toe bumper. the heel is well padded and the laces mean micro adjustments for fit are easy and endless. The upper is perforated for heat transfer. The tongue also has a very neat lace pocket to stop any lace-crank/chain interface. this is much better than the elastic lace strap you get on a lot of these type of shoe. I like the fact that the logos are subtle and don’t shout “LOOK AT ME” which is why you can wear them all the time with pretty much any outfit, I’ve even worn them a few times at work.
Crank Bro Stamp shoe in and out of lace pocketCrank Bros Stamp lace Shoe
Crank Bothers advertise these as the perfect blend of performance and adventure and that the sole has high-friction MC2 rubber compound combined to provide optimal grip on and off the bike. So they are pitching these as an all rounder, a shoe that can play at the bike park and also engage in a bit of hike a bike or bike packing where sections of walking might be involved.
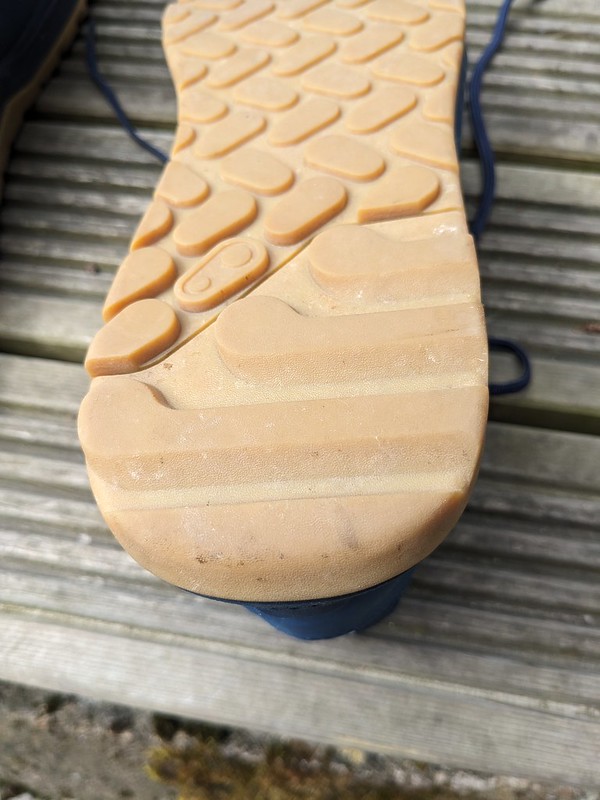
The sole is made up of “lozenge” shapes that you will realise is the same outline as the Crank brothers logo, a nice touch. at the heel and toe the pattern changes to horizontal grooves that are designed to aid traction when walking up or down slopes.
So you’ve seen the specs and the intentions fron Crank Brothers how do they compare to the bench mark?
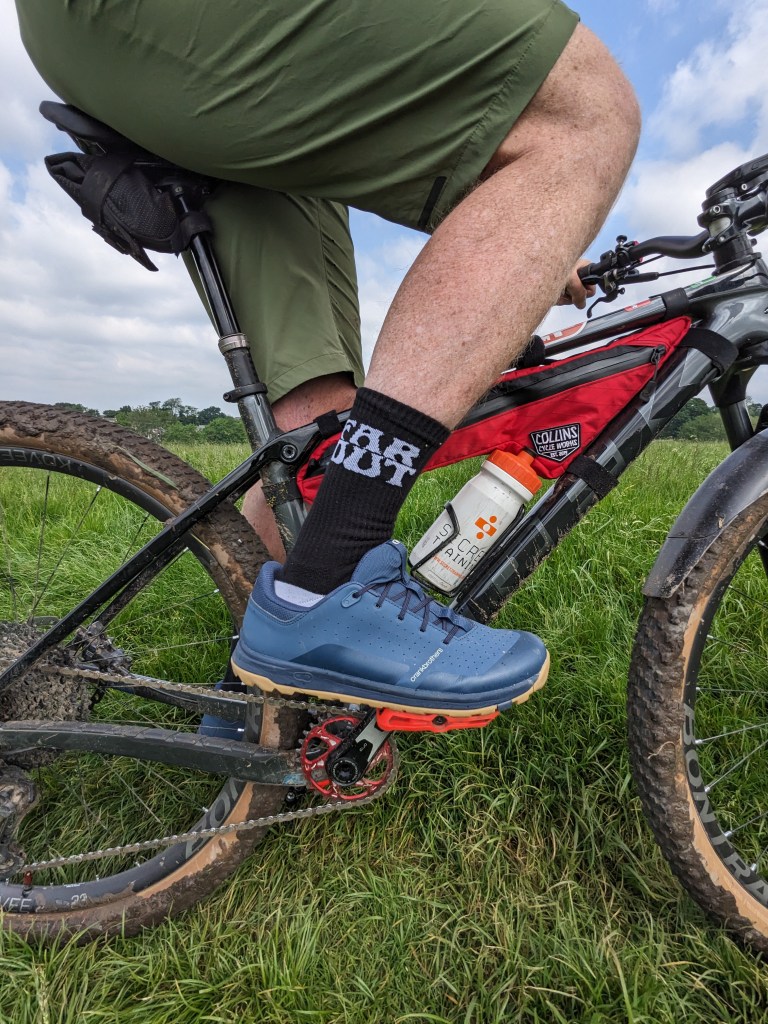
First of all sizing. I initially went for my usual size of 44 and I found them a little small so I exchanged them for a 45 and they felt spot on. In use on both gravel bike and mountain bike they are superbly comfortable i’d go as far as to say they felt like slippers on my feet. Now usually when a shoe is that comfortable it tends to be quite soft and flexible on the sole. The Stamp shoe however was not. It was good to try them on the gravel bike because on that bike I do longer distance on tarmac where any flex would be felt after a few miles through the sole of your feet. In this case the Stamp shoes were stiff enough on the ball of the foot to not feel hot spots or like my feet were curling around the pedal. i’m not saying they are as stiff as a clip in shoe but compared to the bench mark they are excellent. I’ve had the shoes since the end of april and they’ve had multiple rides but obviously I can’t say how flexy they’d get after a year etc, but up to now there’s no complaints. There’s no compromise for this stiffness in the way of grip either, they stick to the pedals tenaciously, I’ve even found myself trying to unclip like a clip in shoe when I’ve forgotten I’m wearing them such is the level of adhesion. This soft compound pleasingly hasn’t meant the sole has been chewed up by the pedal pins either. They size up a little small but only in length, width wise they are spot on for me.
The Crank Brothers aim of making a flat pedal shoe fit for adventure has been met and I’m happy to say exceeded the benckmark.
The Stamp flat pedal shoe is thoroughly recommended, if you need a flat pedal shoe for all your riding then crank bothers might just have the shoe you’ve been looking for.
I’ve been a convert to tubeless tyres for over 5 years now. Originally a sceptic I now stress if I’m riding a bike that doesn’t have the security of being set up with tubeless wheels, tyres, valves and an effective sealant. There are always debates on social media about tubes V tubeless and at one time I was the guy saying “but tubes are so easy to change and there’s no hassle or mess setting them up” but, once you’ve had to change or repair an inner tube on a fat bike 3 times in one ride you soon see that the initial work that goes into tubeless is well worth the piece of mind of knowing you are not going to have to stop and change tubes, inevitably at the worst times, usually in torrential rain on a wheel covered in mud in sub zero temperatures.
So, fair enough I hear you say, on a fat bike with large volume tyres that take an age to reinflate or get seated on the rim properly I can see his point, but on a gravel bike? I can see what you are saying, but think of it this way, most gravel bikes are being used to explore places you’ve either never ridden before or seldom do and you’re mostly going a lot further away from home when you do it. That bridleway you spot as you wend your way down that back lane could be the passage to riding nirvana….or it could be that just around the corner the local farmer might have cut the hedge and a million thorns are waiting to rip into your tyres and make life a misery, so better not risk it hey? Well on a tubeless tyre you can ride that bridleway secure in the knowledge your tubeless tyres and sealant will shrug off those thorns and let you get on with exploring and not missing possibly the best riding you’ll ever do!
I recently changed tyres and found 5 thorns in the rear and two in the front tyre I knew nothing about, the sealant had just sealed around the hole and I’d not even noticed any pressure drop. So potentially that was 5 instances of having to stop and change a tube!
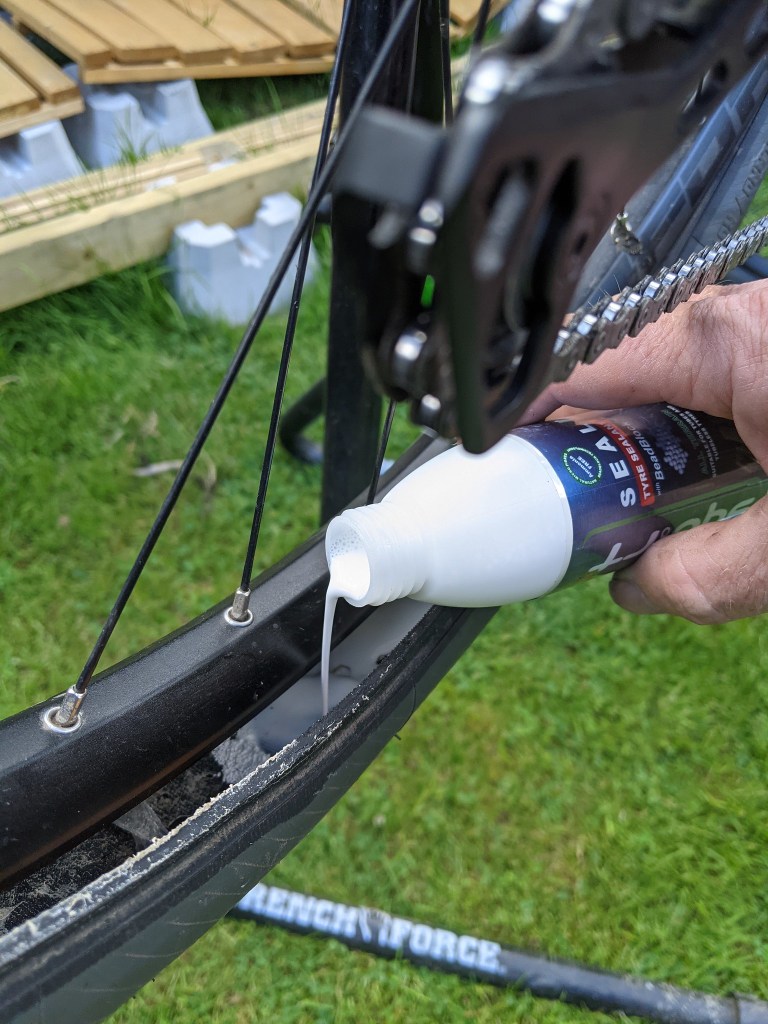
So, we’ve stablished that tubeless is a good idea, but what tyre sealant to use? I’ve used Orange seal, Muc-off, Stan’s, Joe’s no tubes and Bontrager to name but a few and i know what I like so it’s always with a little trepidation that i swap to a new brand. However, having used Squirt Lube for the past few years and found that to be simply the best chain lube I’ve tried so far I asked the guys at Squirt Products to send me some of their sealant to try out.
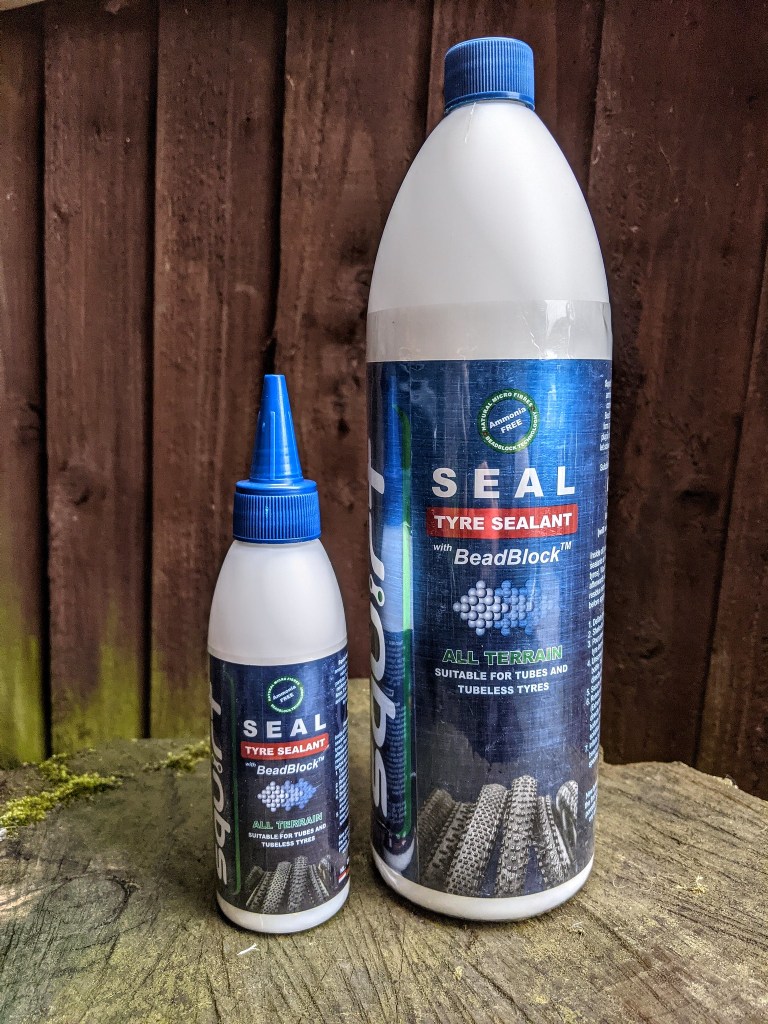
Squirt Seal liquid and Bead Block Granules
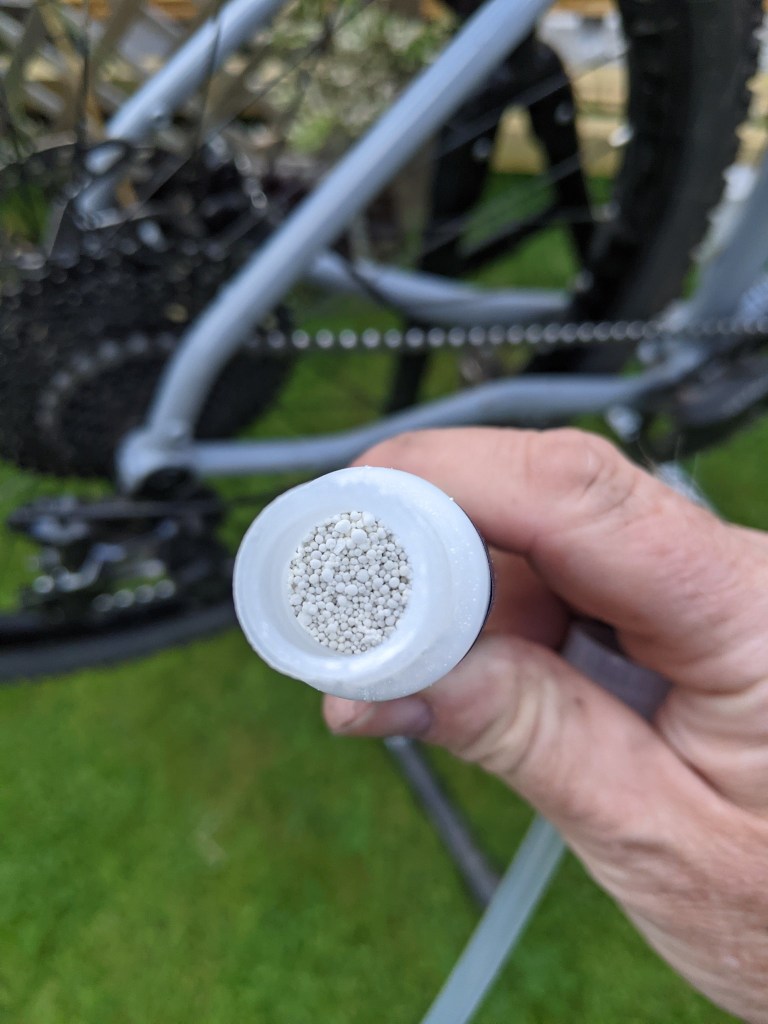
When you get the Squirt Seal it comes with a pot of Bead block particles, these help to seal bigger holes in the tyre that the “glitter” in many of the other sealants on the market contain. Squirt tested these in South Africa where they get considerably bigger thorns etc than we get in the UK so it should be spot on for every where!
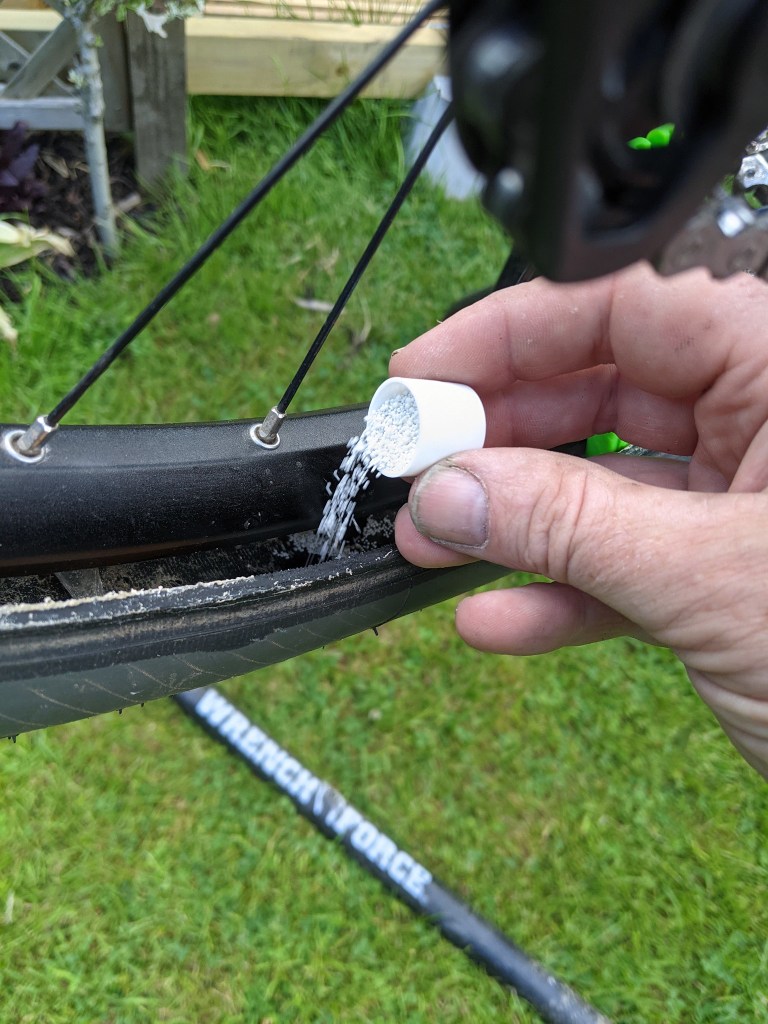
Squirt Sealant differs slightly from other sealants as they recommend you pop off a small section of tyre from the rim to apply the granules rather than go via the valve stem as they might not go through without clogging. This is especially true if the valve is still damp with a previous sealant. I tried it and they are correct. You only need to pop a very small section of tyre off the rim though so reseating afterwards shouldn’t (and wasn’t) too much of a problem.
Once up to pressure I left the wheels 24 hours to see if they lost any air but they were fine so I fitted them to a bike and spent the next 4 WEEKS without any sign of a puncture. Was this because of the superior quality of the Squirt seal or had it silently got on with it’s job and saved my ride numerous times without me noticing (this is what tubeless set ups do)? I’d put the sealant into 650×2.1 tyres on the Fearless Warlock I’ve got in to test and I’ve ridden it on unknown trails, familar puncture black spots, down a lane where hedge cutting had strewn black thorn all over the tarmac, the frankly shockingly bad surfaced roads near here, to work and back road etc but even with the big surface area of the tyres to gather debris I still didn’t notice a pressure drop the entire time.
How do you effectively test a tubeless sealant when you don’t get a puncture? time for drastic measures!
See how Tested the effectiveness of Squirt Seal Tubeless Tyre Sealant with Beadblock
Squirt claim the sealant hs minimal to zero bioaccumulation in the environment and it’s also ammonia free so doesn’t stink or sting your eyes like other sealants on the market
So I’d definitely recommend trying tubeless on your gravel bike and for that extra piece of mind look at Squirt Sealant as your tubeless fluid, it survives multiple stabbings!
you can find more details on Squirt Seal and Lube here Squirt or on the Uk Squirt Insta here
As with all my tests, this is a real world review. I’m not sponsored and I’m just an average rider like most of you reading this. companies sometimes send me things to test but i always let them know it will be an honest review good or bad
Canyon today launched the GRIZL, an update or replacement? to the Grail carbon gravel bike with the silly handlebars and it actually looks good for a Canyon. Someone has obviously thought about it for a change rather than just putting a bike out for the sake of it like a lot of the big companies have done in the past so kudo to the Canyon design team.
Also, colours! not just black or silver and with room for upto 50mm x 700 rubber it could actually be real trail friendly too. Find out more here With models from £2200 they aren’t exactly entry level but there are rumours of an aluminium version to come, maybe when the world wide bike shortages have eased we’ll see that one.
pic from canyon.com
Canyon have sizes from XS up to 2XL which they say are in stock, but given the thirst for bikes and the shortages currently that is not going to last. I’ve not ridden one so i can’t comment on the ride but the geometry on paper does look quite racy and compares to the Grail so it remains to be seen if it’s as bike packing and real rider friendly as they say. You can order one and see for yourself here