
I’m going to try to write this first paragraph without sounding like an old git reminiscing about the good old days of biking. First off I’ll say that the old days, the late 1980s early 1990s when Mountain bikes were new and those of us who got into off road riding at that time took our first pedal in the dirt were pretty bad. Bad bikes unless you spent a silly amount of money, bad components and hardly any parts back up if you broke anything. This was pre internet so no surfing the web for the best prices or “how to” videos, even your local bike shop unless you were very very lucky was really only interested in road bikes so were reluctant to stock parts for MTBs…….ok, I know those of you born this side of the milienium are now thinking “get on with it grandad!” well my point is (and this will reinforce the old fogey opinions) you’ve never had it so good!
Back then, we expected that the bike was probably not going to make it to the end of the ride without some sort of mechanical. I’m not just talking punctures either although they were many as we only had tubes and tyres were heavy and still managed to be fragile. I’m talking about broken chains, rear mechs, front mechs (remember them?) 26″ rims that needed truing after every ride, ball bearings either seizing as the seals were so bad water just flowed straight past them or bearings just falling out as the manufacturing tolerances were stuck in the 70s and not designed for the job. It was fun, learning to rebuild your bike on a friday night until 1am so you could at least get to the start of the ride on Saturday morning was a great way to learn how things worked and I’m still amazed I could rebuild a shimano freehub with bearings scrounged from my local motor factors on my stairs with totally inappropriate tools, some of which came from the cutlery draw in the kitchen!
I think I’ve painted a picture there and I’ve done it to point out how good todays bikes are. We have come a long way. The bikes still shift with deraileurs be it cable or electronic but I can’t remember the last time I had a mechanical problem out riding and with the advent of tubeless technology I have to check my pump and tyreslevers are still working every now and again as they get used so infrequently. Bikes are much more reliable now and are built so they can take on the demands of off road riding and still be in one piece afterwards. But being blasé about this reliability is a mistake. Even the best most expensive bike still needs maintenance, you need tools to do this and to fit those gram saving upgrades to your pride and joy, some tools will even indirectly save you money.
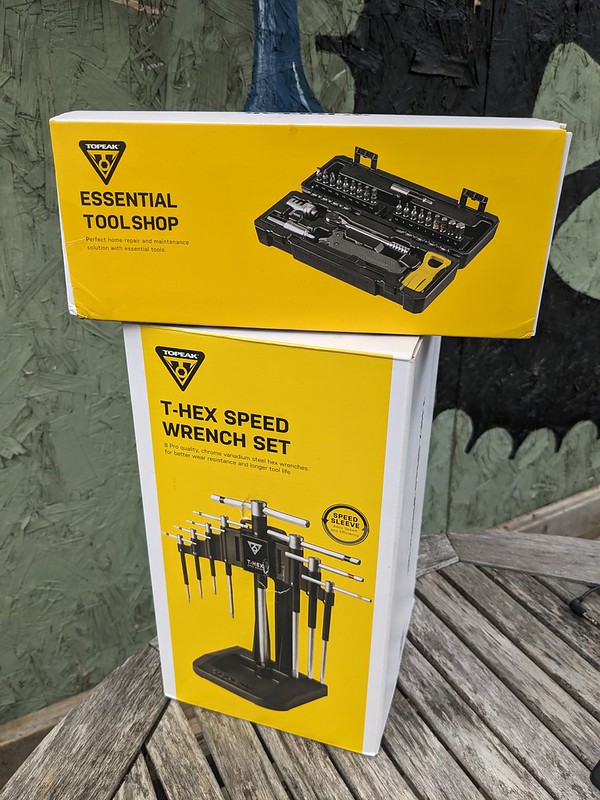
So here are a few of the tools I think every home mechanic should have in the garage/shed/bottom of the stairs, Topeak and their importer Extra UK very kindly took a look at my list and sent out the Topeak tools they thought best fitted the bill.
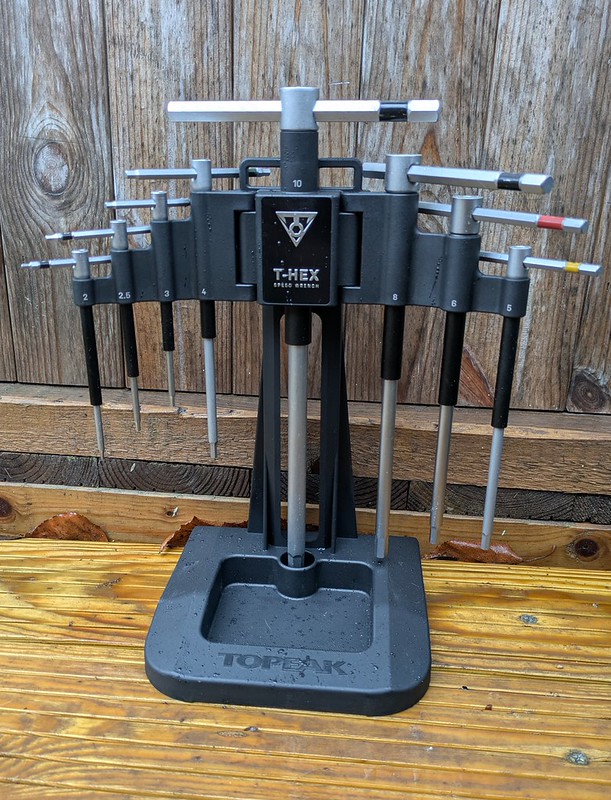
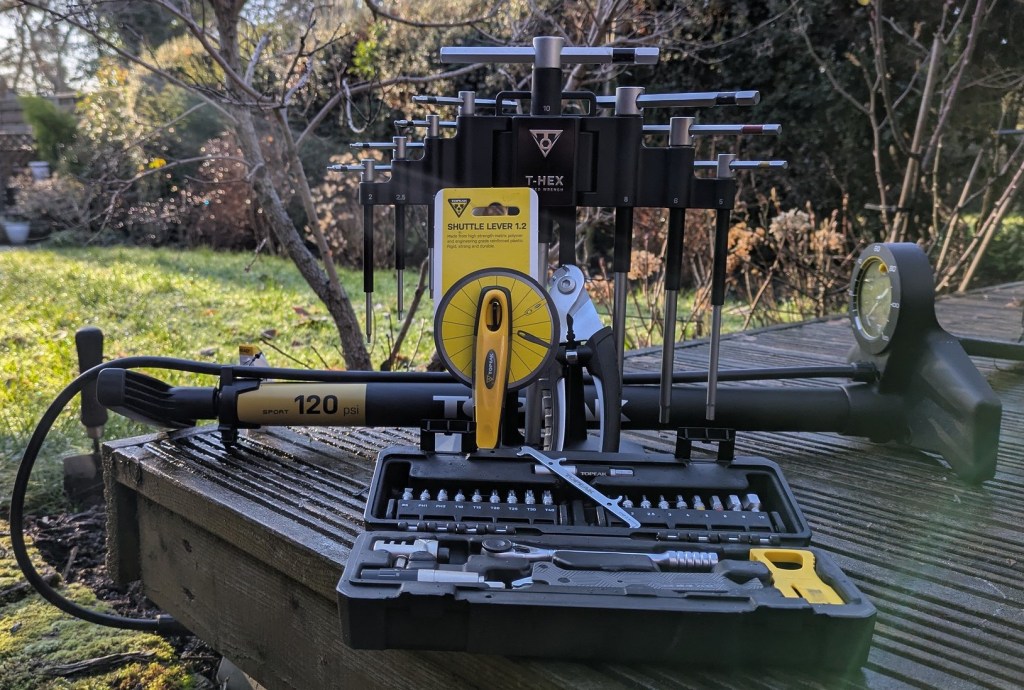
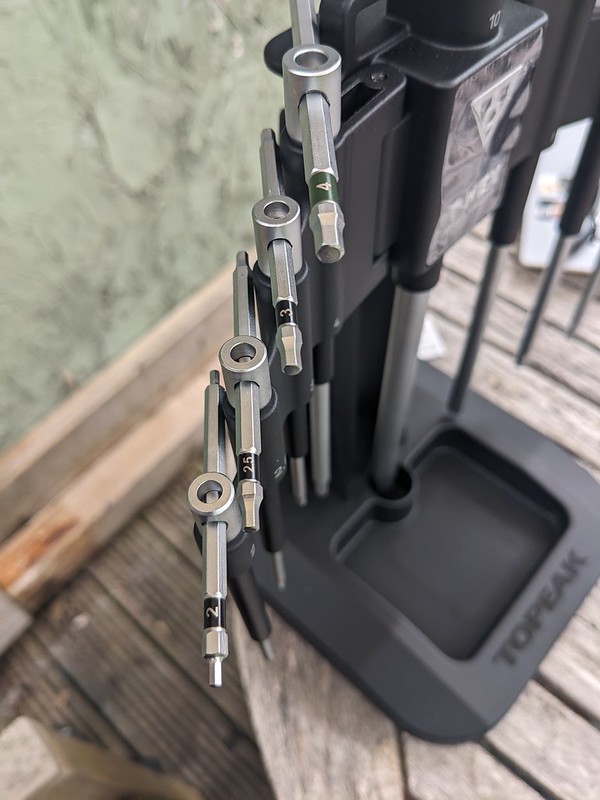
A good quality set of Allen wrenches/Keys should be at the heart of every cyclists home maintenance kit, this one from Topeak runs from 2, 2.5, 3, 4, 5, 6, 8 and 10mm. They are “T type” and the T piece is moveable, sliding from one side to the other enabling you to get into tight areas. The T gives you more control and leverage than the standard “L” shaped wrench. Each also has a plastic “speed” sleeve on the main shaft which you can hold while you twizzle (technical engineering term for turning rapidly) the end for rapid tightening and untightening of bolts. The wrenches have a straight cut end rather than a ball end. This makes engaging bolt heads at an angle more awkward but does ensure the risk of rounding off of allen bolts is reduced and gives excellent tool to bolt engagement when undoing stubborn hardware.
The tools come in a plastic stand that feels robust, has a magnetic tray so you don’t loose tiny steel parts and the hex key carrier can be detached to hang on a tool wall. It also fits to topeaks work stand, the E-up Pro. The tools seem to be of excellent quality and weight and should last many years of bike tinkering by expert and the most hamfisted amongst us *waves* alike. The size range should be adequate for all modern gravel, MTB and road bikes unless your bike has some left of field bolt head sizes, if it does its probably Italian.
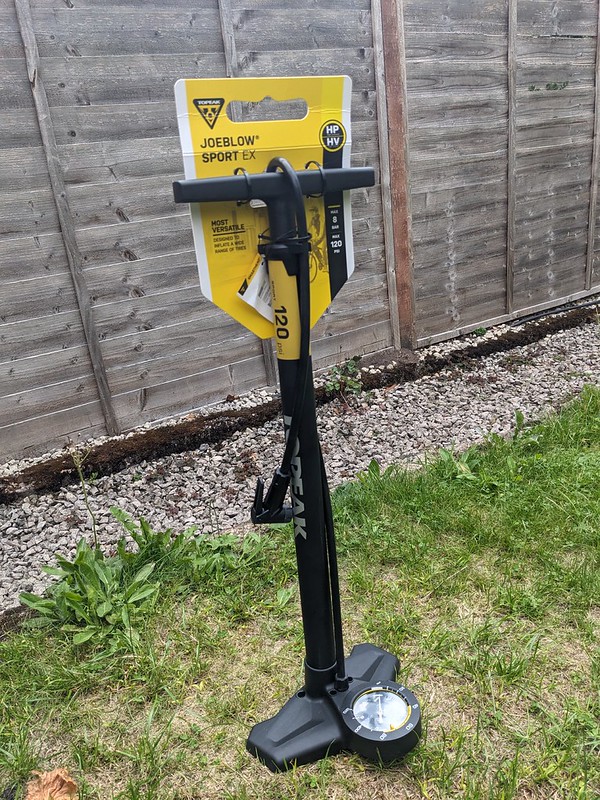
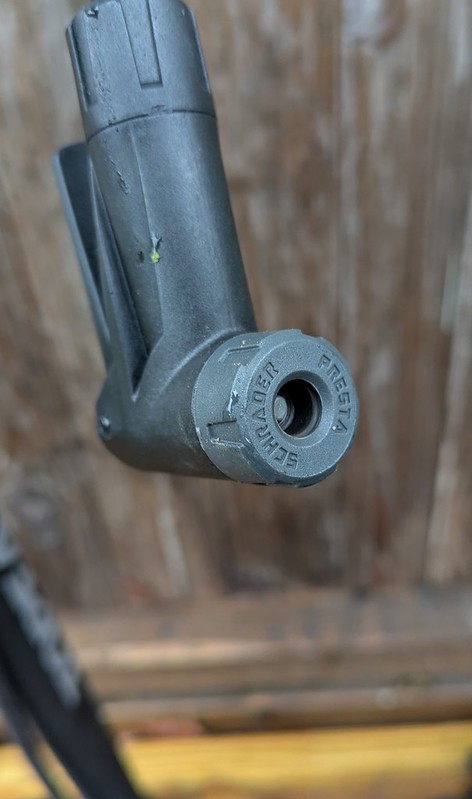
Even in the days of tubeless tyre technology you still need to add or reduce the air pressure in tyres. A track pump is a home workshop must have. It takes all the work out of pumping up tyres that you get with using a small hand pump. This JoBlow 120 is the ideal thing to have, it’s not complicated at all, you don’t even have to swap parts in the pump head to change from Presta (thin) to Schrader (car valve) valves. The Topeak smart head does both without fuss. I even used this pump to inflate a car tyre in an emergency one frosty 5am Morning. There I was half asleep on my non working day standing outside not looking forward to swapping and losing the parts of my old pump (all are set to presta) in the dark but i suddenly thought of the smart head and it just pushed straight on, with the lever locked I was able to inflate the tyre and get my other half off to work and go back to bed, I was in love with Topeak smart heads from then on!
The Topeak Sport EX pump will inflate tyres to 120psi, hence the name but even roadies have abandonned rock hard tyres now haven’t they? but if you need that pressure it’ll do it. I’ve even used it to seat tubeless tyres but that might be more about how tight the tyre bead was on the rim and the quality of my rim taping. It isn’t designed for that job but it was a pleasant surprise. The pressure dial is large and even though its situated at the bottom of the pump it is easy to read. I’ve got nothing other than my thumbs to test the accuracy of the dial but it is definately in the ball park of how much squidge I like from my tyres at 30psi. The pump has a barrel made of steel and a plastic foot and feels sturdy enough to take some knocks. At less than £37 at time of writing it is great value and I can’t see you needing anything more than this for your home workshop.
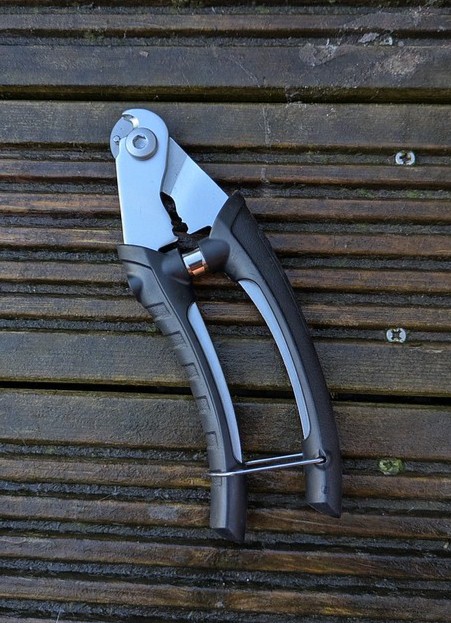
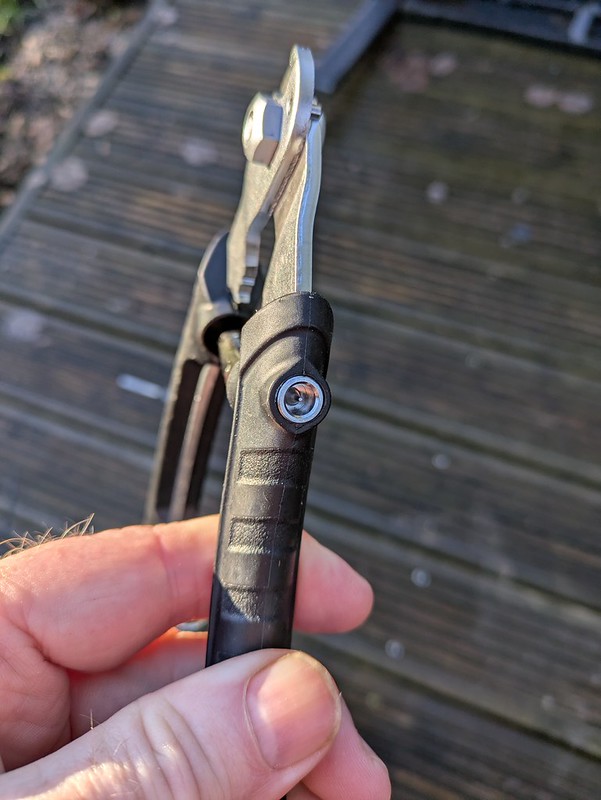
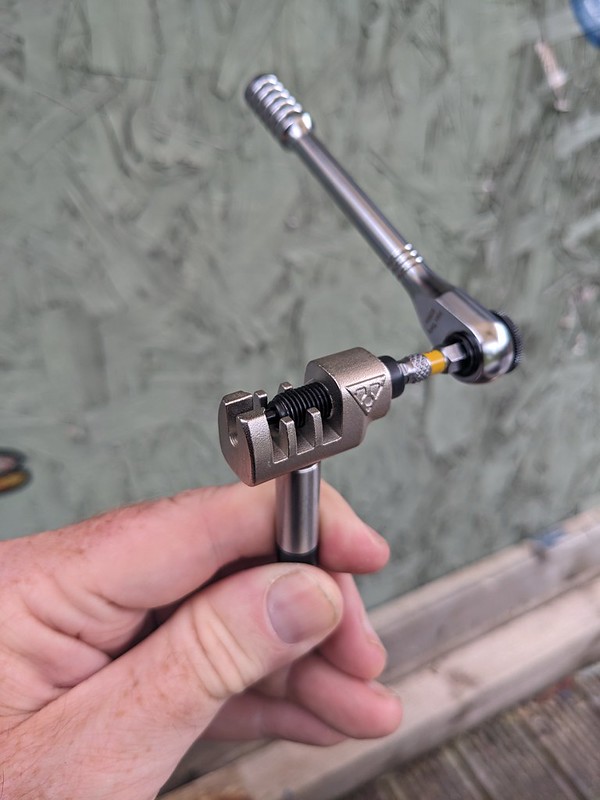
Frayed cables not only look bad they can get you into trouble too. The frayed end can fail, pull out form under a bolt when under tension and this is at best a loss of gears and at worst a loss of teeth if its a brake inner on a non hydraulic system. Frayed cables are also a nightmare to thread through cables and ferrules if not cut precisely. The Topeak cable and housing cutter looks like a set of garden pruners but it is a simple design that works perfectly every time. They are long enough to get the required leverage to cut neatly through gear and brake inner cable and also through outer cable leaving a neat end with no fraying. They are spring loaded too making life easier. These cutters also have a bonus feature I’ve not seen on other models and thats a little pin that you can push into an outer cable and to open up the plastic sleeve to allow much easier access to pass an inner cable through. In a world where there are 100s of cable cutters out there doing the same job that little feature elevates the Topeak version above all the others.
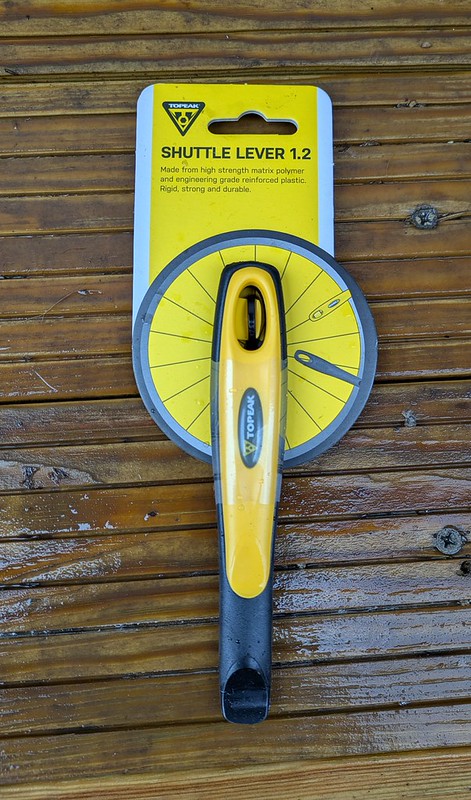
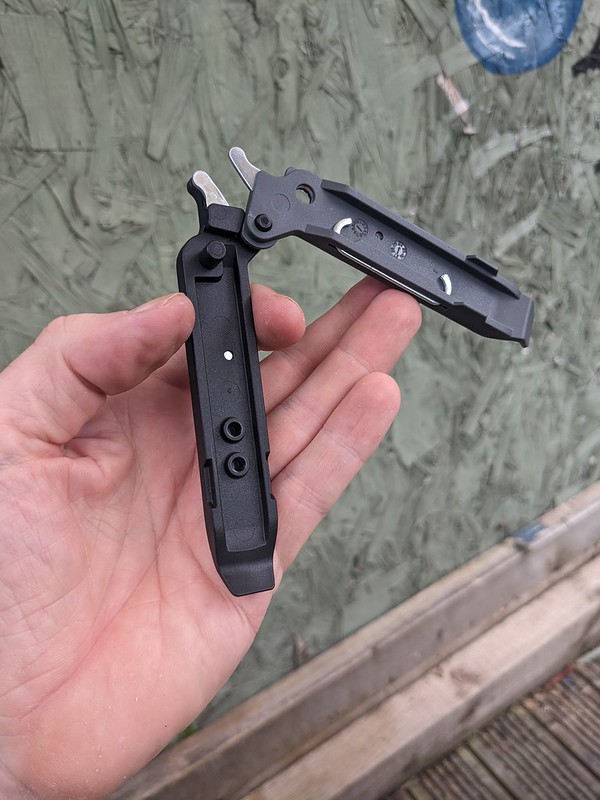
With the demise of tubed tyres, tyre levers have become somewhat redundant until it comes time to swap tyres. These Topeak shuttle levers then are a worthy edition to your tool arsenal. Made of tough engineering grade plastic (I presume that makes then stronger?) they come as a set of two levers, one long and one shorter. The longer one has more leverage for stubborn tyres and because they are plastic they are less likely to damage rim tape or wheel rims if you have to get aggressive with them. They clip together which should stop them from getting lost in messy sheds or cars.However, because of the size of the one lever its not something i’d carry on the bike as they’d take up too much room and if you are running tubeless you’ll hardly ever need them but they are perfect for home and when a little more oomph is needed to remove or pop on a tyre.

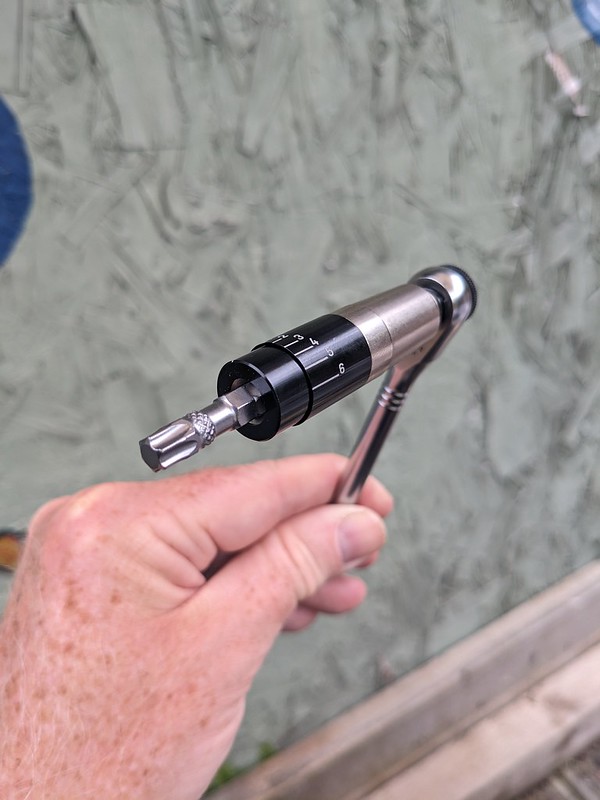
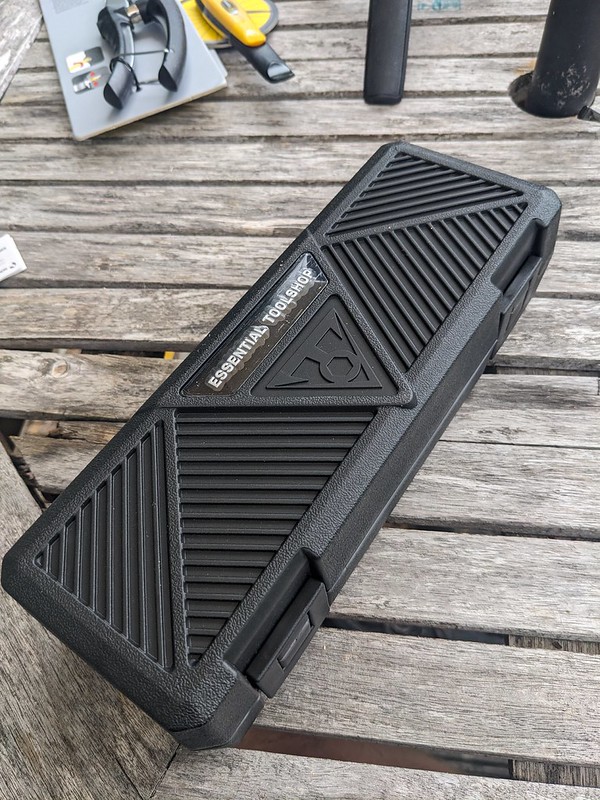
Up to now the tools have been the basic essentials you get you started with home maintenance. Now if you want to go a touch further Topeak have their Essential Toolshop and it is pretty comprehensive. It consists of Hex (allen) bits 1.5, 2, 2.5, 3, 4, 5, 6, 8 and 10 mm. Torx bits T10, T15, T20, T25, T30, T40. Phillps x 2 and flat head bits. it has a ratchet for the bits with an extension bar (or speed sleeve as Topeak call it), a chain tool, chain quick link pliers and chain hook to aid rejoining chains, a disc brake/pad spacer and a “torque sleeve” to make sure your bolts are tightened to manufacturers spec. this all comes in a robust compact carry case.
Weirdly, even though this is a lot of tools, all of which are relevant for home bike maintenance the bits are small and fiddly and when swapping the most used bits, the 4-5mm I soon reverted to the Hex key set above. However the essential tool kit was perfect for keeping in the van/car for car park repairs or bolt checks, it’s come on every biking holiday and was much better than lugging bigger tools around. So, if you are stuck for space at home, I have friends who have to keep their bike in a cupboard under the stairs Harry Potter style then the Essential tool kit is ideal for keeping on a shelf somewhere taking up minimal space and works equally well in a cluttered garage or shed filled with lawn mowers.
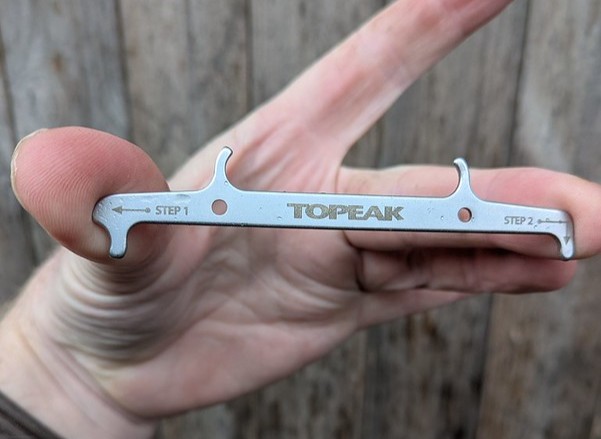
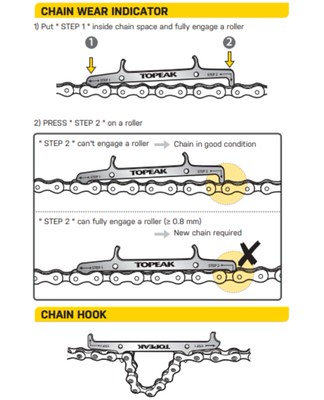
Finally a tool every cyclist should own. If you don’t own any other tools i recommend you buy one of these first. Its a chain wear indicator and it’s a tool that can save you money. A chain wears out, even a well lubricated one wears out and wears the other steel components it touches such as chainrings, cassette sprockets and pulley wheels on a rear derraileur at the same time. This is fine if you regularly change your chain. however if you don’t and wait until a chain is so worn out it starts to affect shifting or all the teeth on everything resemble sharks fins its too late. The wear on other components will be to such a level that simply adding a new chain won’t be enough. that brand new unworn chain will not interact with the other components that have litterally changed tooth shape to match the other chain. this causes skipping and chain slip. This is where it gets expensive, changing a cassette, chainring and associated items is going to cost an absolute fortune in parts (and labour if you need a mechanics help).
So this tool that costs less than £6 can save you hundreds of pounds by letting you know when to change a chain before it starts wearing out your drivetrain to the point of no return. it’s very straight forward to use but rather than write paragraphs in a “how to” style i’ve stolen Topeak’s instructions to show how easy it is, I’m sure (hoping) they don’t mind.
All of these Topeak tools I’ve written about have been in use working on my bike for the last 4 months. they endured my hamfistedness, got covered in oil and grease, have been sworn at when I’ve dropped one and the bolt I’ve been loosening has fallen to the floor never to be seen again. The essential tool kit has been to 3 different countries in the back of my van and saved a couple of my rides from being cancelled and helped a few strangers to get their bike going again. I’ve even fixed a couple of machines at work with that kit as no tools were in site! Nothing has broken, none of them look worn out so i’m confident to say that they will last the average home bike mechanic for years and years and with that longevity in mind it makes the inital outlay to buy them seem more and more insignificant.
You can find all of Topeaks tools, those above and many many more on their website here but be careful, once you start buying tools it can get addictive!
