Some folks ride gravel bikes with flat pedals and I’m not here to say that is the wrong way, infact I’ve tried it and it’s a perfectly acceptable way to ride any bicycle. In fact I published a video on the subject here Gravel biking on flat pedals
For those of us who use clip in pedals it’s not always convenient. When you want to pop to the shop for some milk, the pub without waddling like a penguin in your clipless compatible shoes and in my case when I have to park 1.5 miles away from work because there’s no parking on site. I don’t want to have to put on special shoes for such a short journey, then have to change into shoes suitable for work and have to store the “special shoes” somewhere and then of course have to reverse the process at the end of the shift.
Pre internet (yes kids there was a time before WiFi!) Shimano had a solution which was the quite frankly hideous PD22 pedal adapter. These were a struggle to clip into your pedal but that struggle was in no way at the level of purgatory that was the attempt to get the damn things back off again! Having to twist a hard plastic pedal with teeth jutting out cutting into your hand to the correct amount of degrees to attempt to release it with out the leverage of a foot inside a shoe was impossible without backing the spring tension off so far that when you eventually got to ride the pedal as intended it didn’t retain the shoe cleat at all! So to cut a long story short they were unusable. The PD22 has had many copies over the years from various companies but nearly all of them still need that twist action to remove them.
Redshift Sports, well known for their suspension stems, seatposts and the Kitchen sink and Topshelf bar may just have come up with the perfect solution.
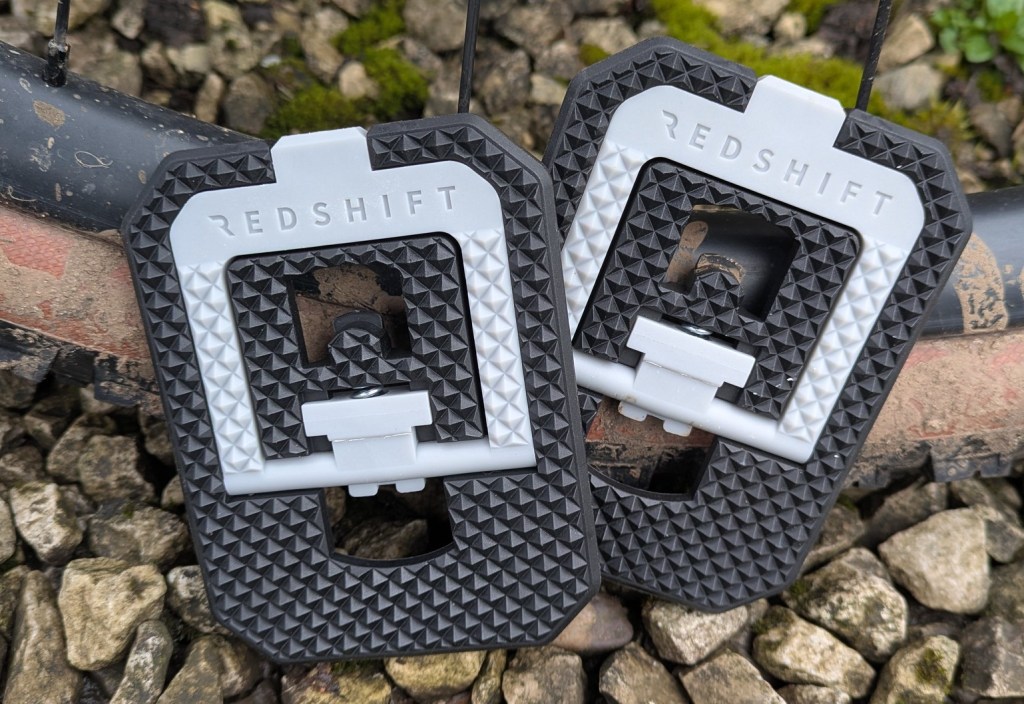
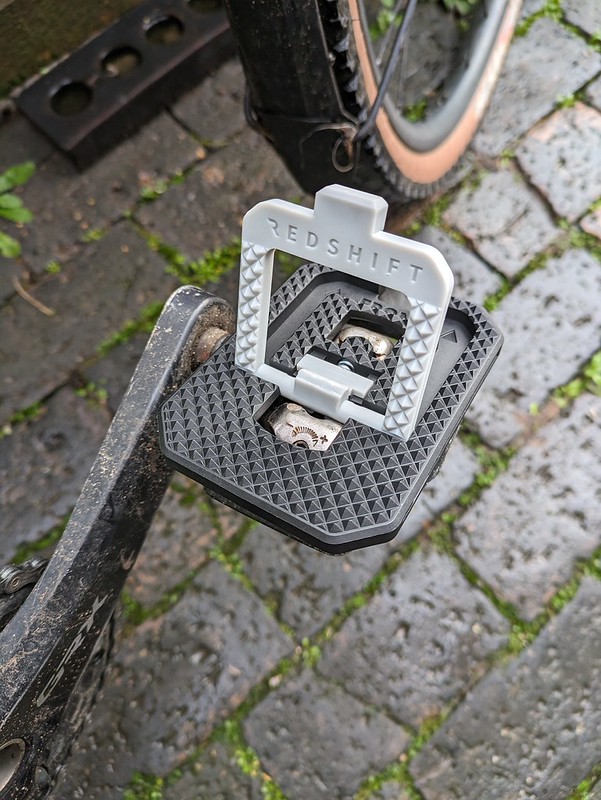
The Redshift Mousetrap Pedal adapter doesn’t do anything different from all those previous pedals. It still fits to one side of your clip in pedal and supports any style of shoe. What it does (actually doesn’t) have is that need to twist the adapter to remove it.
Redshift Mousetrap Pedal Adapter frontRedshift Mousetrap Pedal Adapter open
You just lift the lever, place the adapter on the pedal, it even has “front” embossed into it so you can’t get it wrong, then when seated you just close the lever and the adaptor is locked securely to the pedal. Guess how you release it? Yes, pull the lever and off pops the adapter, simple but effective, aren’t all the best ideas like this?
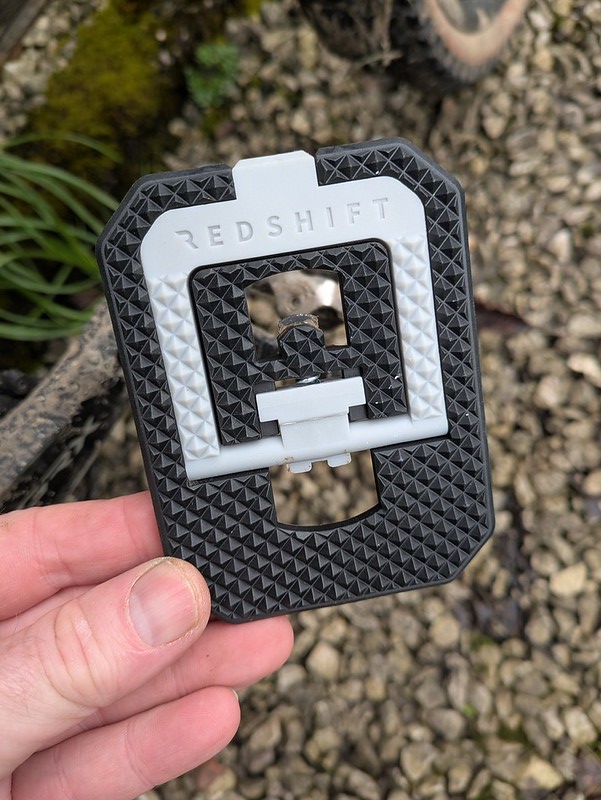
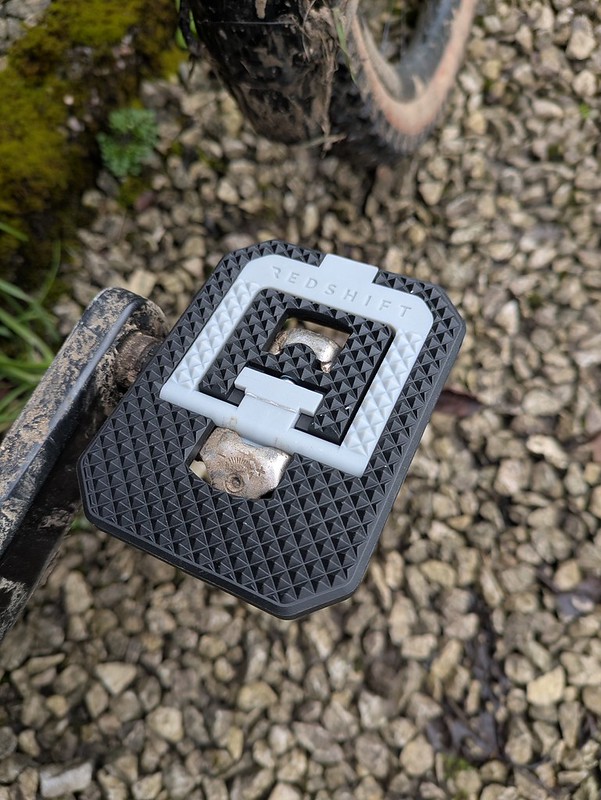
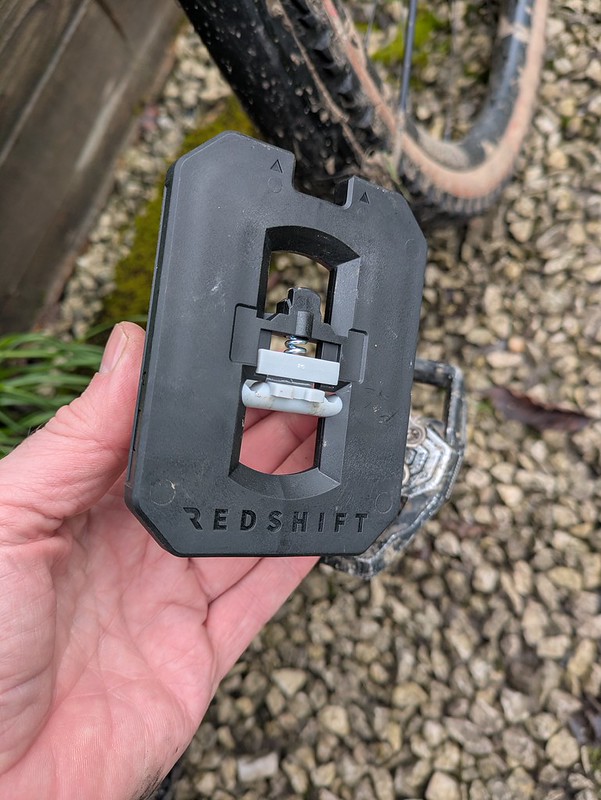
Ok, so like any one sided pedal, the heavier side with the adapter will always swing to the bottom so you will have to learn to look down to ensure you flip the pedal over with your foot, but thats hardly a chore and soon becomes second nature. Worried about loosing one? no need they have a tiny magnet that sticks them together for storage.
Redshift say they are not recommended for off road use and you can see from the tread they wouldn’t be grippy in muddy conditions. That’s not to say I haven’t ridden them off road as there’s some cheeky singletrack on my “commute” that I can’t resist and they’ve been fine.
Don’t like the colour? there will be options with different colour levers. They are Shimano SPD compatible only at the moment but SPD-SL, Look Keo, and Crankbrothers compatible variants will be out in Autumn 2026.
You may not need these adapters but for those of us who use our bikes for lots of other things apart from weekend riding the Redshift Mousetrap pedal adapters are a great design and the perfect thing to keep in your work bag/car/van for those unexpected but essential rides for beer, cake and sadly to work.
I’m going to try to write this first paragraph without sounding like an old git reminiscing about the good old days of biking. First off I’ll say that the old days, the late 1980s early 1990s when Mountain bikes were new and those of us who got into off road riding at that time took our first pedal in the dirt were pretty bad. Bad bikes unless you spent a silly amount of money, bad components and hardly any parts back up if you broke anything. This was pre internet so no surfing the web for the best prices or “how to” videos, even your local bike shop unless you were very very lucky was really only interested in road bikes so were reluctant to stock parts for MTBs…….ok, I know those of you born this side of the milienium are now thinking “get on with it grandad!” well my point is (and this will reinforce the old fogey opinions) you’ve never had it so good!
Back then, we expected that the bike was probably not going to make it to the end of the ride without some sort of mechanical. I’m not just talking punctures either although they were many as we only had tubes and tyres were heavy and still managed to be fragile. I’m talking about broken chains, rear mechs, front mechs (remember them?) 26″ rims that needed truing after every ride, ball bearings either seizing as the seals were so bad water just flowed straight past them or bearings just falling out as the manufacturing tolerances were stuck in the 70s and not designed for the job. It was fun, learning to rebuild your bike on a friday night until 1am so you could at least get to the start of the ride on Saturday morning was a great way to learn how things worked and I’m still amazed I could rebuild a shimano freehub with bearings scrounged from my local motor factors on my stairs with totally inappropriate tools, some of which came from the cutlery draw in the kitchen!
I think I’ve painted a picture there and I’ve done it to point out how good todays bikes are. We have come a long way. The bikes still shift with deraileurs be it cable or electronic but I can’t remember the last time I had a mechanical problem out riding and with the advent of tubeless technology I have to check my pump and tyreslevers are still working every now and again as they get used so infrequently. Bikes are much more reliable now and are built so they can take on the demands of off road riding and still be in one piece afterwards. But being blasé about this reliability is a mistake. Even the best most expensive bike still needs maintenance, you need tools to do this and to fit those gram saving upgrades to your pride and joy, some tools will even indirectly save you money.
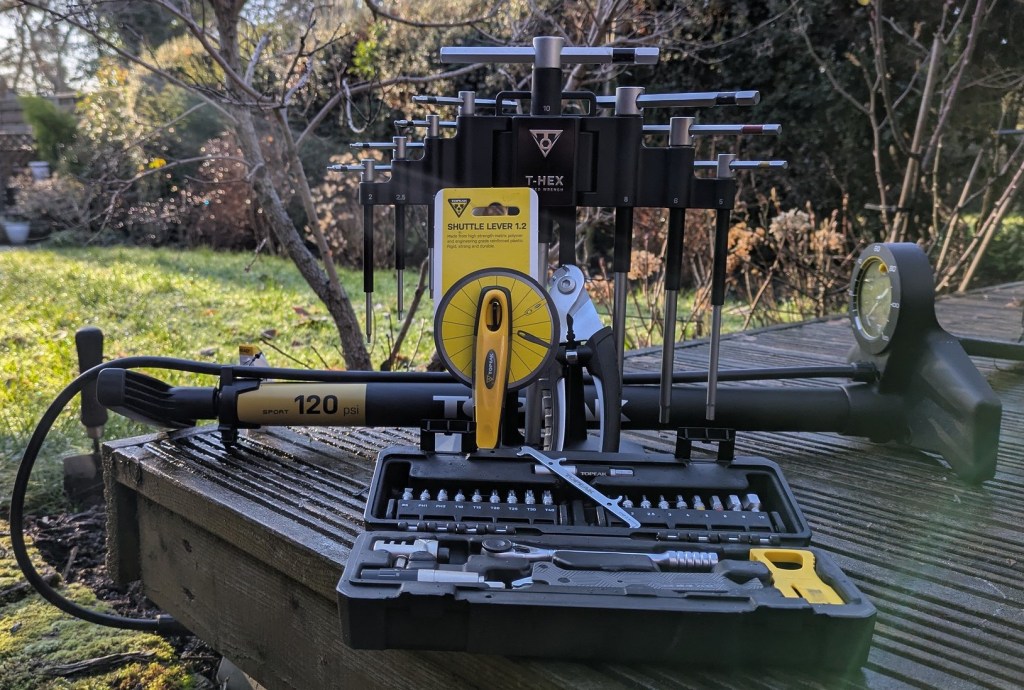
So here are a few of the tools I think every home mechanic should have in the garage/shed/bottom of the stairs, Topeak and their importer Extra UK very kindly took a look at my list and sent out the Topeak tools they thought best fitted the bill.
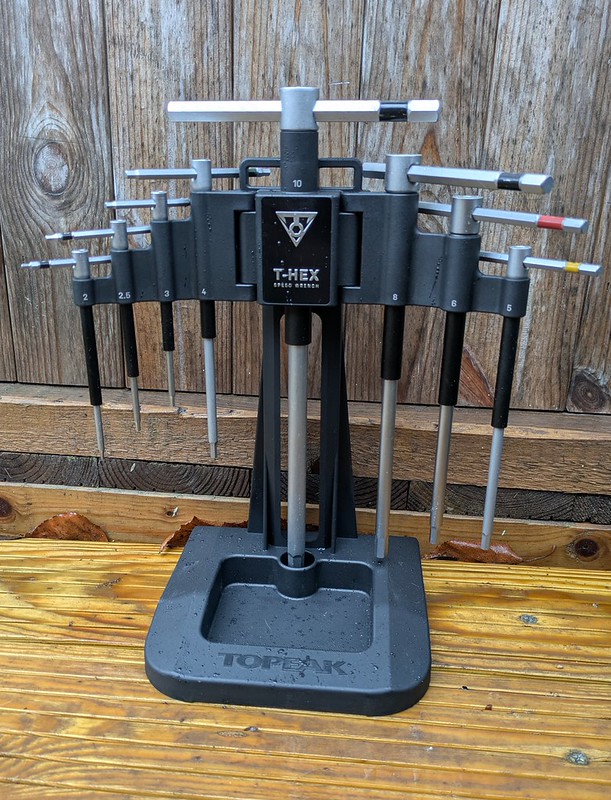
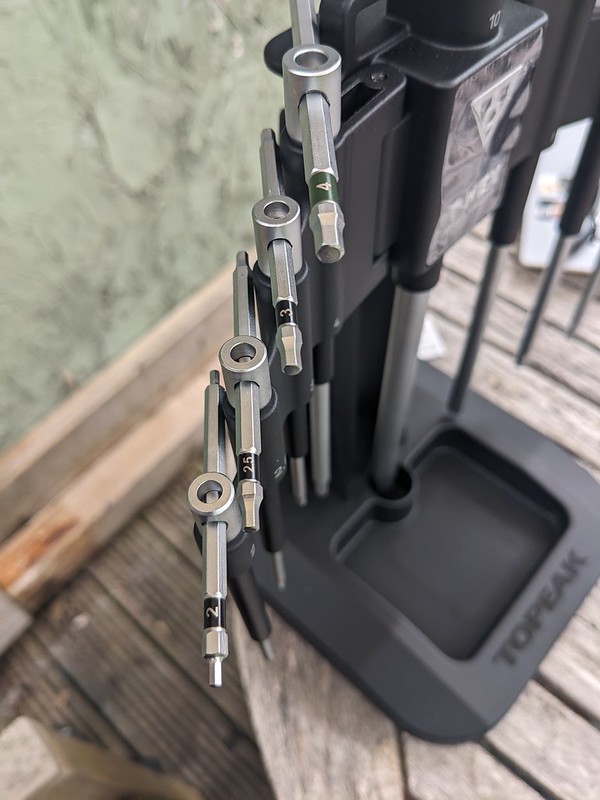
Topeak Hex set
A good quality set of Allen wrenches/Keys should be at the heart of every cyclists home maintenance kit, this one from Topeak runs from 2, 2.5, 3, 4, 5, 6, 8 and 10mm. They are “T type” and the T piece is moveable, sliding from one side to the other enabling you to get into tight areas. The T gives you more control and leverage than the standard “L” shaped wrench. Each also has a plastic “speed” sleeve on the main shaft which you can hold while you twizzle (technical engineering term for turning rapidly) the end for rapid tightening and untightening of bolts. The wrenches have a straight cut end rather than a ball end. This makes engaging bolt heads at an angle more awkward but does ensure the risk of rounding off of allen bolts is reduced and gives excellent tool to bolt engagement when undoing stubborn hardware.
The tools come in a plastic stand that feels robust, has a magnetic tray so you don’t loose tiny steel parts and the hex key carrier can be detached to hang on a tool wall. It also fits to topeaks work stand, the E-up Pro. The tools seem to be of excellent quality and weight and should last many years of bike tinkering by expert and the most hamfisted amongst us *waves* alike. The size range should be adequate for all modern gravel, MTB and road bikes unless your bike has some left of field bolt head sizes, if it does its probably Italian.
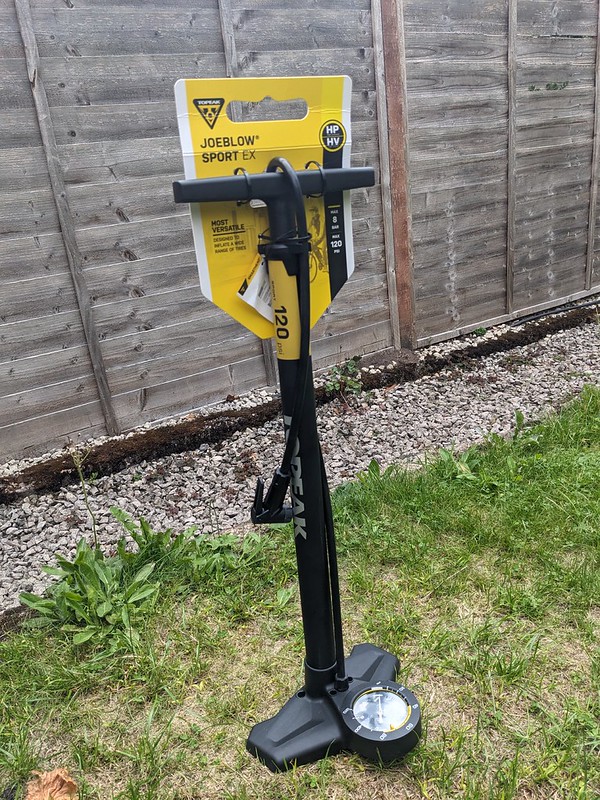
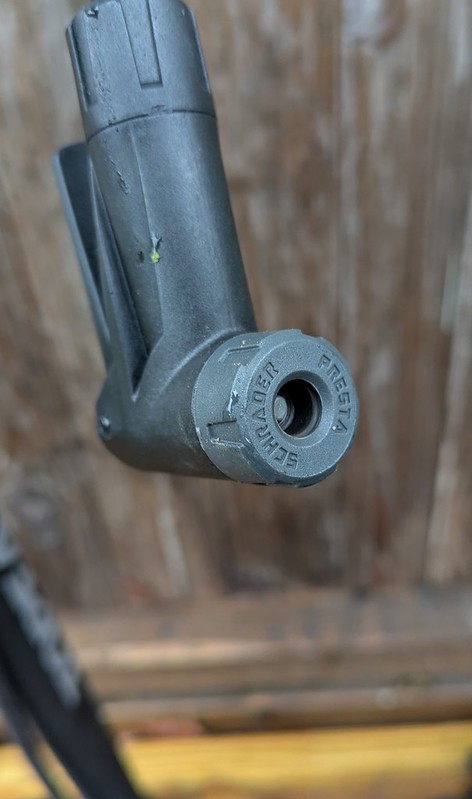
Even in the days of tubeless tyre technology you still need to add or reduce the air pressure in tyres. A track pump is a home workshop must have. It takes all the work out of pumping up tyres that you get with using a small hand pump. This JoBlow 120 is the ideal thing to have, it’s not complicated at all, you don’t even have to swap parts in the pump head to change from Presta (thin) to Schrader (car valve) valves. The Topeak smart head does both without fuss. I even used this pump to inflate a car tyre in an emergency one frosty 5am Morning. There I was half asleep on my non working day standing outside not looking forward to swapping and losing the parts of my old pump (all are set to presta) in the dark but i suddenly thought of the smart head and it just pushed straight on, with the lever locked I was able to inflate the tyre and get my other half off to work and go back to bed, I was in love with Topeak smart heads from then on!
The Topeak Sport EX pump will inflate tyres to 120psi, hence the name but even roadies have abandonned rock hard tyres now haven’t they? but if you need that pressure it’ll do it. I’ve even used it to seat tubeless tyres but that might be more about how tight the tyre bead was on the rim and the quality of my rim taping. It isn’t designed for that job but it was a pleasant surprise. The pressure dial is large and even though its situated at the bottom of the pump it is easy to read. I’ve got nothing other than my thumbs to test the accuracy of the dial but it is definately in the ball park of how much squidge I like from my tyres at 30psi. The pump has a barrel made of steel and a plastic foot and feels sturdy enough to take some knocks. At less than £37 at time of writing it is great value and I can’t see you needing anything more than this for your home workshop.
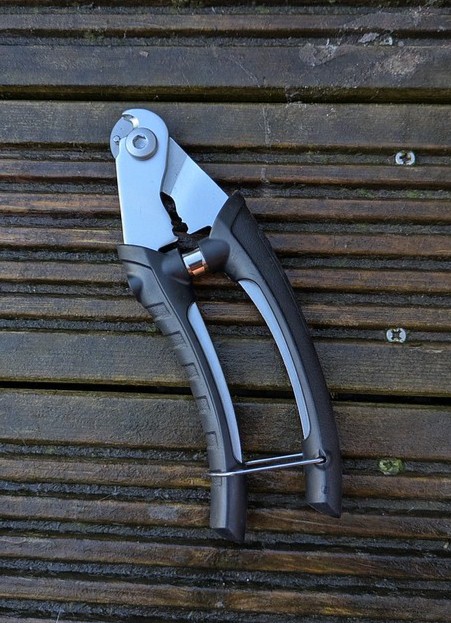
Topeak cable cutterTopeak cable cutter’s nifty cable end opener
Frayed cables not only look bad they can get you into trouble too. The frayed end can fail, pull out form under a bolt when under tension and this is at best a loss of gears and at worst a loss of teeth if its a brake inner on a non hydraulic system. Frayed cables are also a nightmare to thread through cables and ferrules if not cut precisely. The Topeak cable and housing cutter looks like a set of garden pruners but it is a simple design that works perfectly every time. They are long enough to get the required leverage to cut neatly through gear and brake inner cable and also through outer cable leaving a neat end with no fraying. They are spring loaded too making life easier. These cutters also have a bonus feature I’ve not seen on other models and thats a little pin that you can push into an outer cable and to open up the plastic sleeve to allow much easier access to pass an inner cable through. In a world where there are 100s of cable cutters out there doing the same job that little feature elevates the Topeak version above all the others.
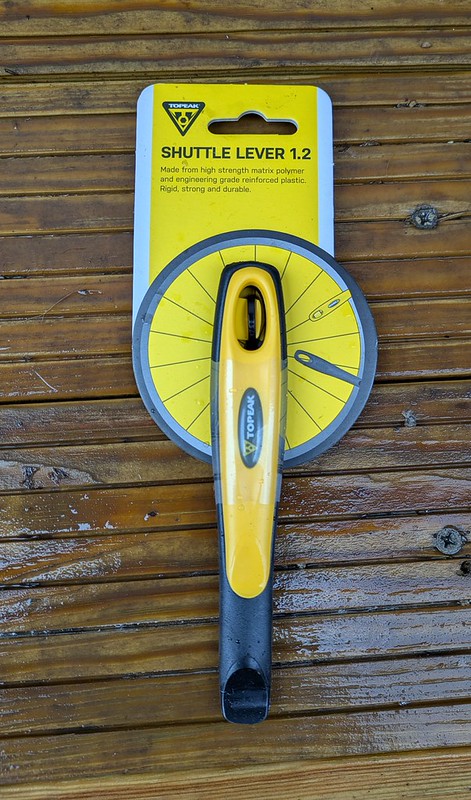
Topeak Shuttle tyre levers
With the demise of tubed tyres, tyre levers have become somewhat redundant until it comes time to swap tyres. These Topeak shuttle levers then are a worthy edition to your tool arsenal. Made of tough engineering grade plastic (I presume that makes then stronger?) they come as a set of two levers, one long and one shorter. The longer one has more leverage for stubborn tyres and because they are plastic they are less likely to damage rim tape or wheel rims if you have to get aggressive with them. They clip together which should stop them from getting lost in messy sheds or cars.However, because of the size of the one lever its not something i’d carry on the bike as they’d take up too much room and if you are running tubeless you’ll hardly ever need them but they are perfect for home and when a little more oomph is needed to remove or pop on a tyre.
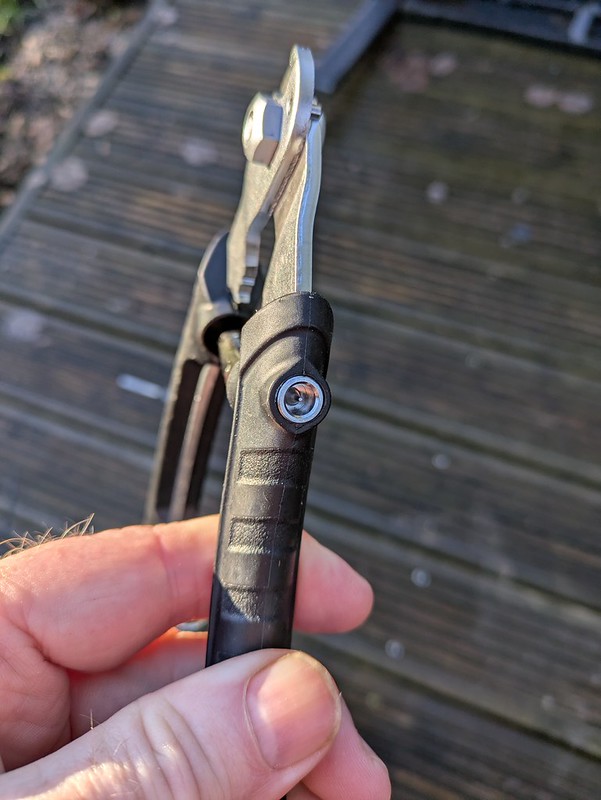
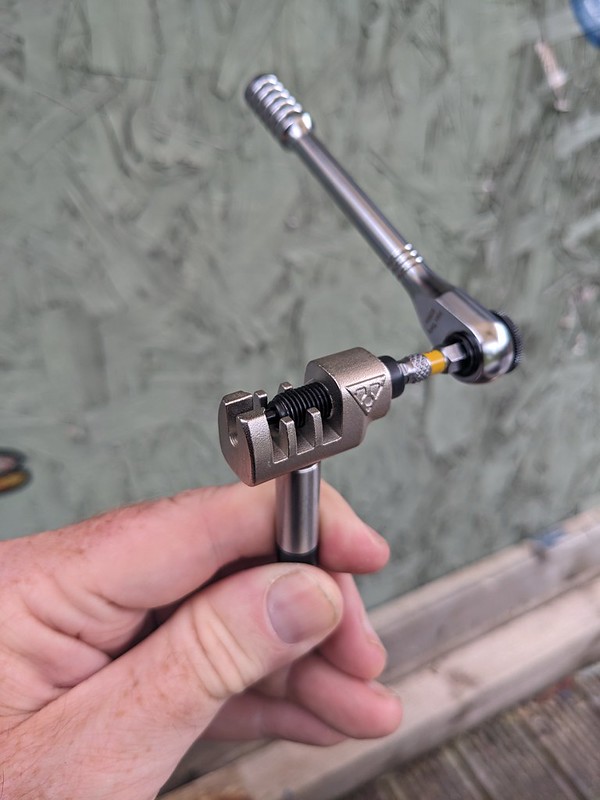
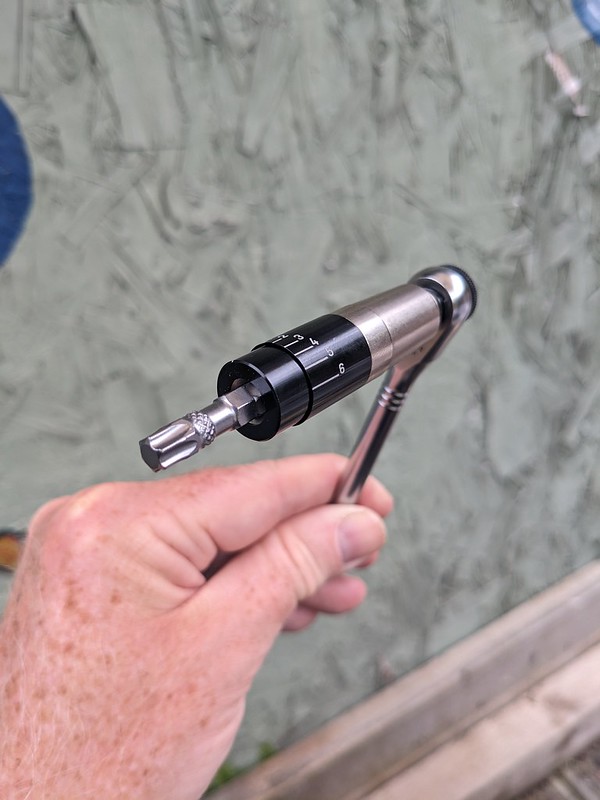
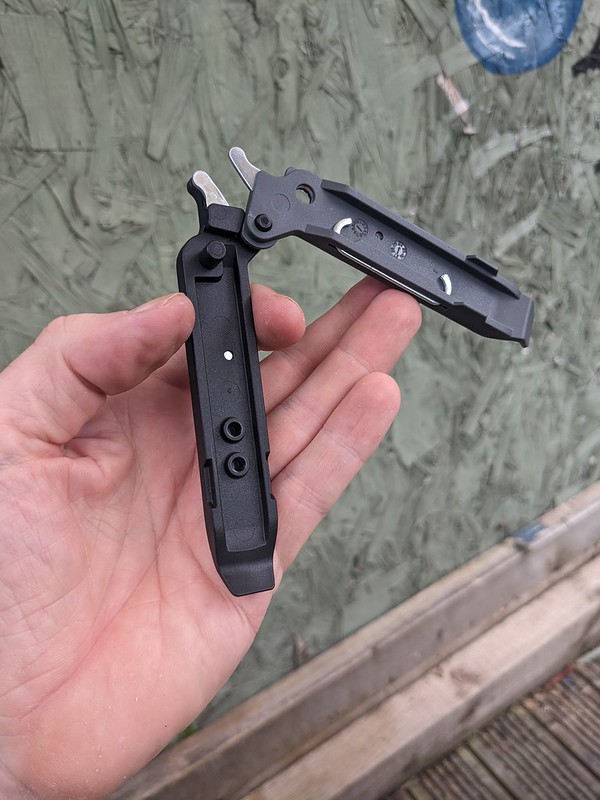
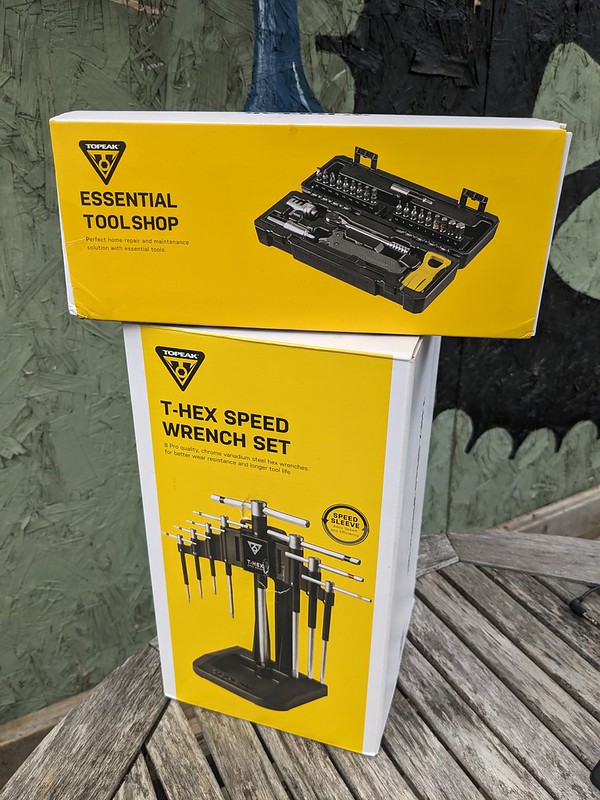
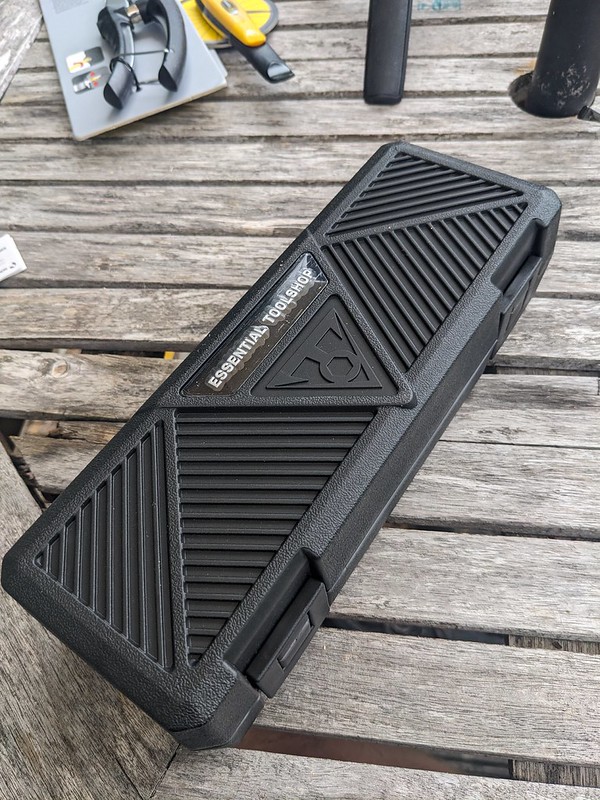
Topeak Essential ToolshopTopeak chain tool and ratchetTopeak torque sleeveTopeak quick link pliers and chain hook
Up to now the tools have been the basic essentials you get you started with home maintenance. Now if you want to go a touch further Topeak have their Essential Toolshop and it is pretty comprehensive. It consists of Hex (allen) bits 1.5, 2, 2.5, 3, 4, 5, 6, 8 and 10 mm. Torx bits T10, T15, T20, T25, T30, T40. Phillps x 2 and flat head bits. it has a ratchet for the bits with an extension bar (or speed sleeve as Topeak call it), a chain tool, chain quick link pliers and chain hook to aid rejoining chains, a disc brake/pad spacer and a “torque sleeve” to make sure your bolts are tightened to manufacturers spec. this all comes in a robust compact carry case.
Weirdly, even though this is a lot of tools, all of which are relevant for home bike maintenance the bits are small and fiddly and when swapping the most used bits, the 4-5mm I soon reverted to the Hex key set above. However the essential tool kit was perfect for keeping in the van/car for car park repairs or bolt checks, it’s come on every biking holiday and was much better than lugging bigger tools around. So, if you are stuck for space at home, I have friends who have to keep their bike in a cupboard under the stairs Harry Potter style then the Essential tool kit is ideal for keeping on a shelf somewhere taking up minimal space and works equally well in a cluttered garage or shed filled with lawn mowers.
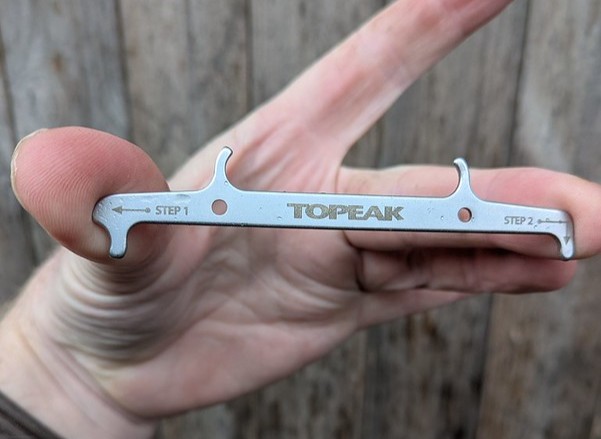
Topeak chain wear indicator
Finally a tool every cyclist should own. If you don’t own any other tools i recommend you buy one of these first. Its a chain wear indicator and it’s a tool that can save you money. A chain wears out, even a well lubricated one wears out and wears the other steel components it touches such as chainrings, cassette sprockets and pulley wheels on a rear derraileur at the same time. This is fine if you regularly change your chain. however if you don’t and wait until a chain is so worn out it starts to affect shifting or all the teeth on everything resemble sharks fins its too late. The wear on other components will be to such a level that simply adding a new chain won’t be enough. that brand new unworn chain will not interact with the other components that have litterally changed tooth shape to match the other chain. this causes skipping and chain slip. This is where it gets expensive, changing a cassette, chainring and associated items is going to cost an absolute fortune in parts (and labour if you need a mechanics help).
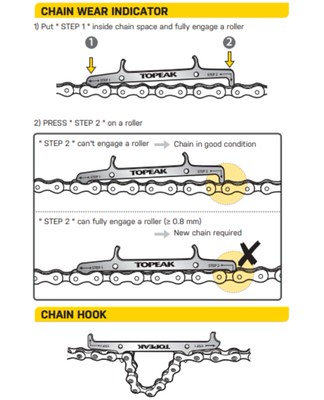
So this tool that costs less than £6 can save you hundreds of pounds by letting you know when to change a chain before it starts wearing out your drivetrain to the point of no return. it’s very straight forward to use but rather than write paragraphs in a “how to” style i’ve stolen Topeak’s instructions to show how easy it is, I’m sure (hoping) they don’t mind.
All of these Topeak tools I’ve written about have been in use working on my bike for the last 4 months. they endured my hamfistedness, got covered in oil and grease, have been sworn at when I’ve dropped one and the bolt I’ve been loosening has fallen to the floor never to be seen again. The essential tool kit has been to 3 different countries in the back of my van and saved a couple of my rides from being cancelled and helped a few strangers to get their bike going again. I’ve even fixed a couple of machines at work with that kit as no tools were in site! Nothing has broken, none of them look worn out so i’m confident to say that they will last the average home bike mechanic for years and years and with that longevity in mind it makes the inital outlay to buy them seem more and more insignificant.
You can find all of Topeaks tools, those above and many many more on their website here but be careful, once you start buying tools it can get addictive!
Over the last 6 months the bike accessory market has seen a flood of “E-inflators”. These small rechargable pumps have been marketed as a replacement for the traditional hand pump. Those pumps have been around really since bikes changed from solid tyres to pneumatic rubber versions and are carried on the bike or in a pocket so in the event of a puncture or just a tyre pressure adjustment to cope with a change in riding terrain you can add or release air to suit.
The big thing that those traditional pumps have going for them is that they are mechanical. You as the rider are the engine that powers them. As long as you’ve made the required number of cake shop stops on your ride you should have endless energy to power them. The downside of course is that you need to carry that pump and pumping up a tyre, especially a road tyre to say 90psi takes quite a bit of effort. CO2 cannisters I hear you say! small, effective and they can seat a tyre onto the wheel rim easily. What I say is that they are mainly a one shot job, if you get the applicator incorrectly fitted to the valve you lose all the gas in one go, they can burn your fingers with the extreme cold the escaping gas produces and that cold doesn’t always play well with tyre sealant. They are also not refillable and become litter straight away.
So a small, rechargable pump sounds ideal doesn’t it. lightweight compared to a frame pump, can be used again and again and they work with any sealant on the market. The air being pushed out of them even creates heat instead of cold (there’s even a warning about this on most inflators). The fact that it’s powered by a battery (hard to dispose of) and charged by electricity that (in the UK) is generated by coal fired or nuclear power stations and so is bad for the enviroment is another thing to consider. Then again modern frame pumps are mostly plastic and lets not even go there!
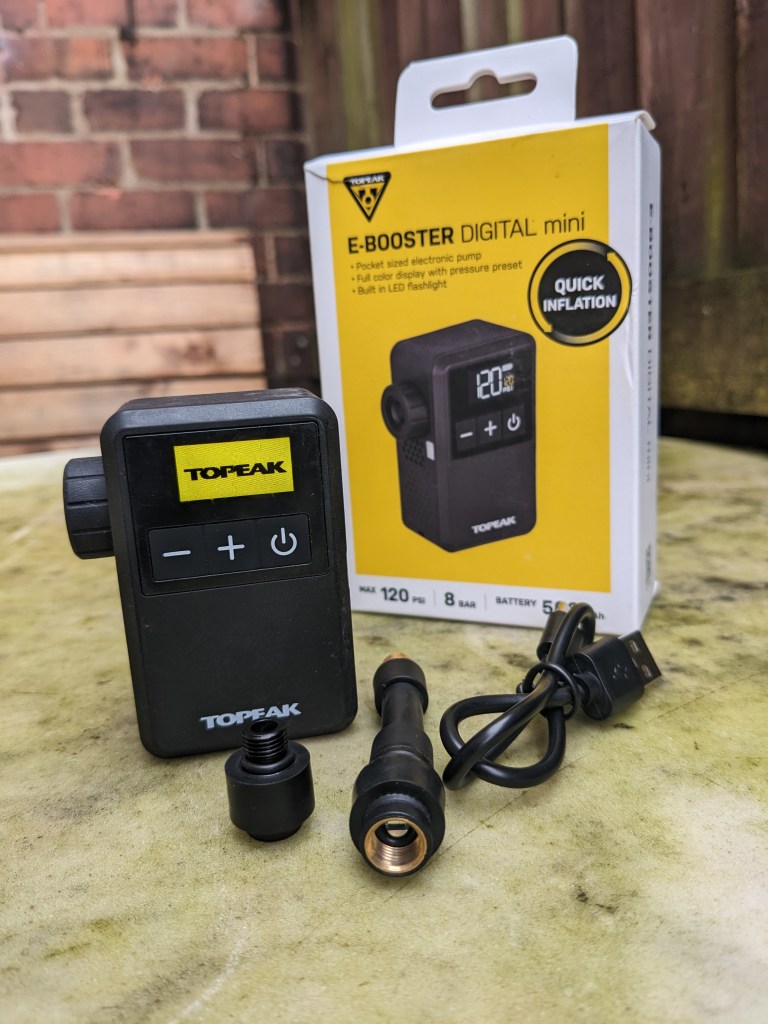
So, with the positives and the negatives of the concept of an e-inflator laid out lets look at the Topeak E-Booster mini. I’ve tested quite a few inflators now (5 others in fact) but the Topeak version has come along as the first that has UK distributor backing when it comes to warranty etc. Obviously they are all manufactured in China. All the others were direct from China also and any issues would need to be dealt with by contacting a company overseas. So 1st point to Topeak and Extra UK.
The Topeak E-Booster Mini weighs in at only 121g on my unverified kitchen scales and is 5.4 x 3.2 x 7.3mm in size.. It has an electronic display showing battery status and switchable PSI/BAR, an on/off button and +/- buttons. it comes with interchangable parts to fit presta or schrader valves and some disassembly is requred to change these over, but that’s no different to any other pump. Generally you’ll adjust it to how your valves are configured once and never change it again. it also comes with a flexible extension tube so if the inflator doesn’t fit between your spokes because of deep section rims or weird spoke patterns you can still use it. Topeak also recommend using the extension on TPU inner tubes as the heat generated by the pump might melt the plastic valves!
Operation is simple, a long press on the “on” button to turn the pump on. then using the + or – buttons set the PSi you want your tyre to inflate to. Then push the pump onto the valve and press the “on” button once and the pump will start pushing air into the tyre. Here’s a warning, these things are LOUD! and that goes for all e-inflators I’ve tried. The Topeak E-Booster Mini then happily pumps your tyre up to the pressure you’ve chosen and then shuts itself off when the pressure is achieved. If you want to stop it before then then one press of the “on” button will stop the inflator.
I’ve not checked to see if the pump achieves the stated pressure as I don’t have anything accurate enough to check. What I do have though is my thumbs and they are never wrong! So a quick squeeze to see if it’s in the normal range I like and then pull the pump off the valve and you are good to go. An extra feature on the Topeak E-Booster Mini I’ve not seen on any other inflator is the fact it has a torch light. A double tap on the “on” button turns the light on or off, quite handy when you drop your valve cap in the grass on a night ride!
Topeak claim that the E-Booster Mini on one charge will pump 80psi into 700×28 road tyres 3 times and 25psi into 29 x 2.4 4 times. I’ve found that it’ll inflate a typical gravel tyre such as a 700 x 45 to 35psi 4 times. The inflator takes 45-50 minutes to charge from zero to full using a USB-C cable and a little longer if that’s via a laptop or similar. The box also contains a handy drawer string cloth bag to keep the inflator and accessories together.
So, would I choose to throw away my traditional frame pump and just use an e-inflator? Well, yes and no. For local riding which in my case is probably 85% of my riding I’d definately only take the electric inflator. With the reliability of tubeless technology these days I can’t actually remember the last time I had to use a frame mounted pump, in fact I’d better check it’s not seized up! So I’m more than happy to rely on an e-inflator when i’m not too far from home and know where i am at all times and I think 4 tyre inflations would cover any eventuality. If i was riding a multi day ride somewhere remote I’d want analog back up of a manual pump.
Would I chose the Topeak E-Booster Mini over all the other e-inlfators I’ve tried? Yes definately, it’s proved to be reliable and robust, it’s taken a few knocks and drops and continued to work as described but a big thing for me is the UK back up and the peace of mind that comes with it.
you can find more details on the Topeak E-Booster Mini here
Cyclists get a lot of flak from the non cycling fraternity for wearing the “uniform” of lycra shorts, tight fitting hi-viz yellow jersey (or dayglo/aero, add your own social media insult, usually from a post reporting a collision between a motor vehicle and a cyclist, their clothes somehow proving it was the riders fault!) and a cap and it’s a shame that even though lots of us don’t wear that outfit for riding we get grouped into the same tired stereotype.
However, one item on that list I’d say while not essential to riding, can enhance the experience much more than the latest carbon wheelset or electronic shifting gizmo. That item is the humble cycling cap or if you want to be really pretentious, a casquette.
Caps are great for wearing under a helmet when it’s cold, hot, when it’s wet or when it’s sunny. they also work for all these reasons without being under a helmet. At the cafe stop, the pub, the campsite etc etc. i take one on every ride in case I need it for any of the above reasons and not just because I’m folically challenged. I also did the same when i had enough hair to flick out of my eyes…..did i say they’ll keep hair and sweat out of your eyes too?
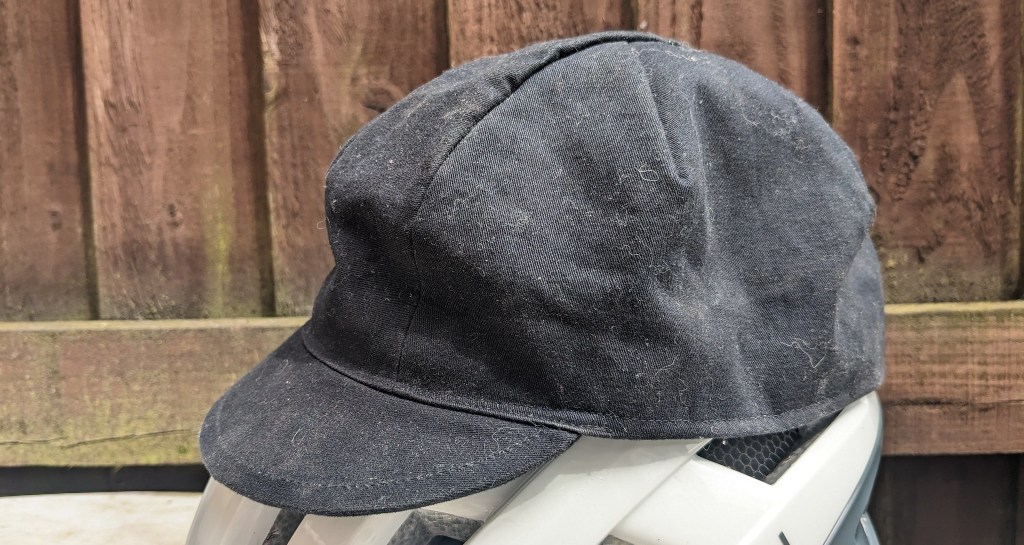
Uncle Pete THIS IS UNCLE PETE on instagram sent me a message asking if I’d like to review one of his handmade cycling caps. Being a big fan of the humble cap I of course agreed. Pete asked me to measure my head where the rim of a cap would normally sit, easily done with a tape measure and a mirror or a piece of string and a rule. Even easier if you have someone to measure it for you. He asked me what colour/pattern material I wanted and to look at his Etsy site for ideas. Now, I am lazy and colour blind so I said I’d leave it to him to decide.
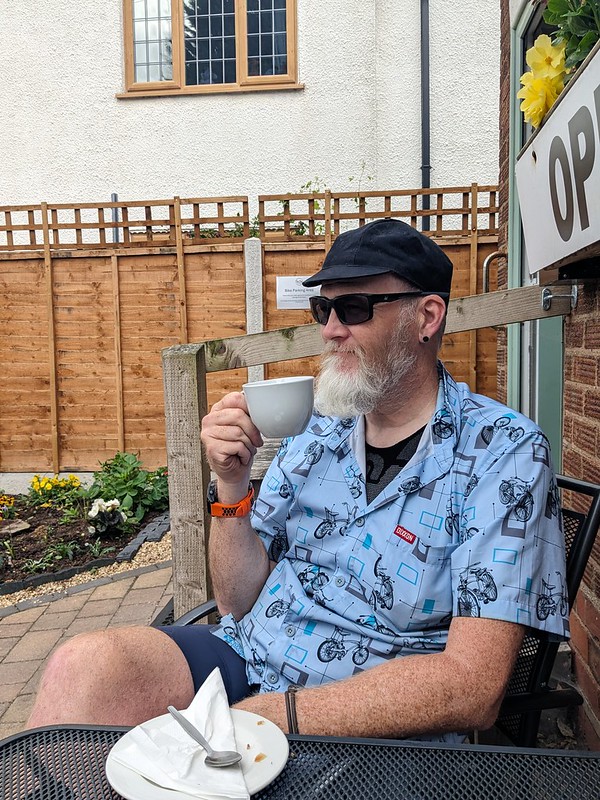
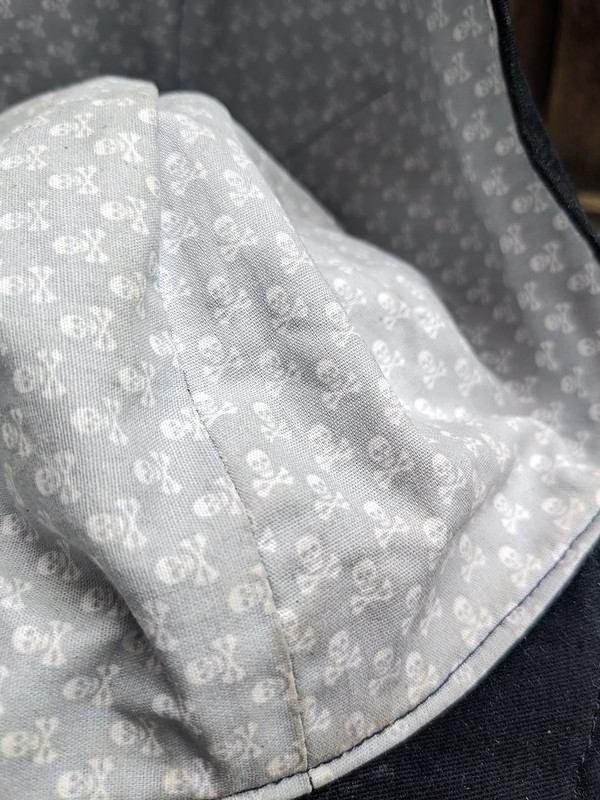
A few days later a parcel arrived for me and the cap in the pictures was the result. This navy blue cap is very understated, i was expecting something much more jazzy but I have to say it looks classy and not out of place in the non cycling side of my life, then i checked the lining material which was covered in a skull and crossbones material! A hidden treat.
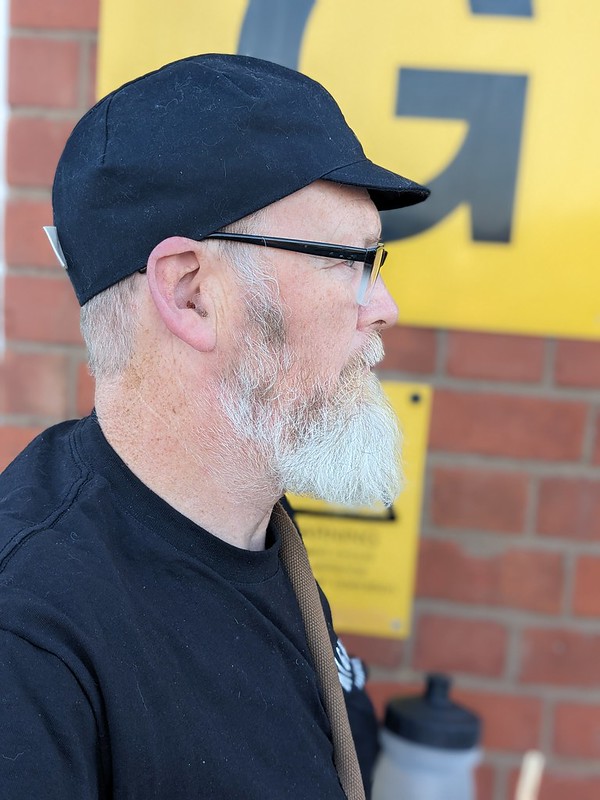
The cap is super soft with a shallow stiff brim, I much prefer the smaller brim, it fits with helmets much better and looks so more stylish than the usual long brim seen on most caps which i always find hinders vision when on the bike unless you push your helmet too far backwards. The cap doesn’t have an elasticated rim because it doesn’t need one, it’s made to measure. This cap wins massively over off the peg caps because of this. Off the peg caps in my experience are either too big or too tight if you don’t possess an average size head and not many of us do.
The cap has served me well the last few weeks and is so comfortable and it’s been tested in some of the best weather the UK has had in a while. It’s kept my head from being sunburnt and you can see from the pictures it’s been sweated in a few times. It’s made of cotton with a cotton liner and so is quite breathable but obviously in really hot weather the cotton does soak up any moisture. It does however wash really well.
I really wish I’d taken the time to choose a brighter colour as this cap has quickly become my favourite and it deserves to shout “look at me!” the quality and finish is top notch and many many times better than the run of the mill caps available. Yes, its currently £30 for a cap, but thats only £5-10 more than the will it/won’t it fit cap with a big brand name on it that probably cost pennies to make in china.
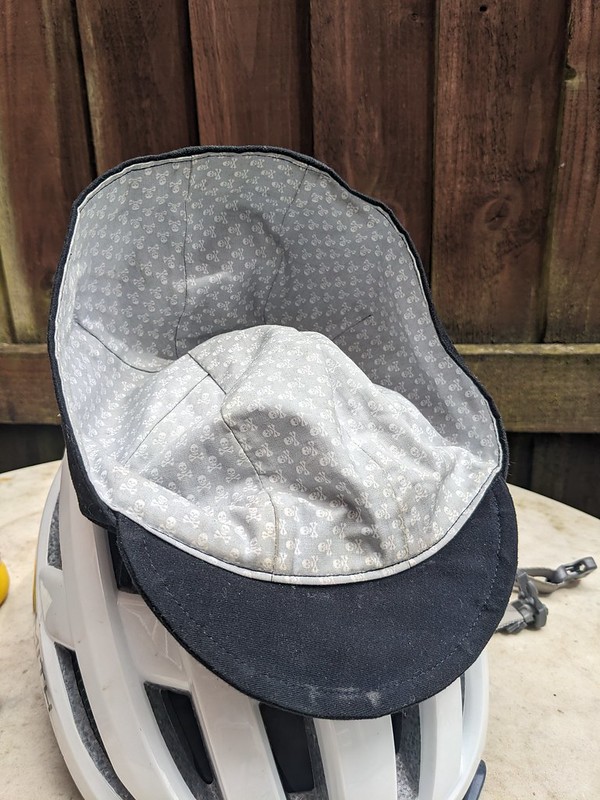
I’ve even experimented with wearing it with the lining on the outside!
The quality of construction, the comfort, materials used and the fact it’s specifically made for your head by hand is worth every penny, just choose your colour and pattern wisely and treat yourself.
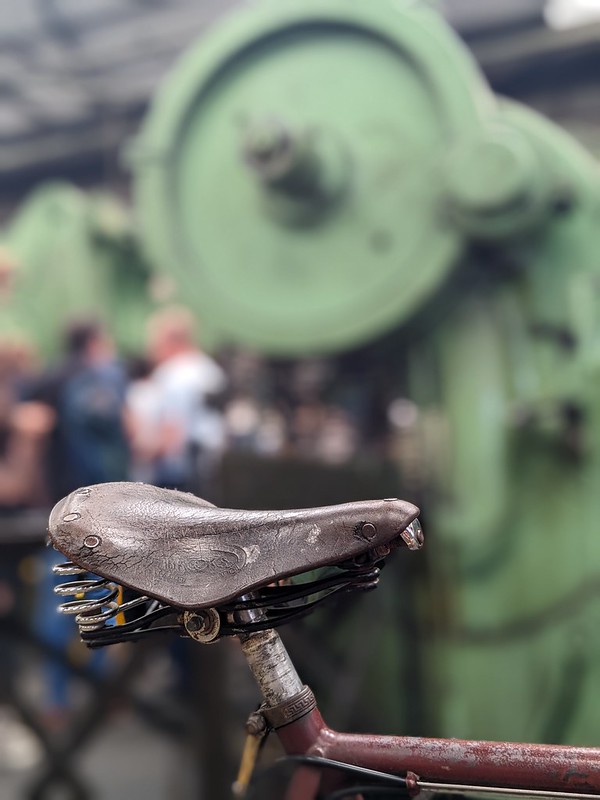
I recently got invited to visit the Brooks England factory in Smethwick, Birmingham as they were having an open weekend and conducting tours of the factory. Of course I accepted, especially as the premises is only a 14 mile pedal from my house using the extensive local canal system.
It wasn’t until I looked into the intinery and the history of the company that I realised what an opportunity this was. Brooks haven’t opened their factory to the public for over 150 years so this literally could be a once in a life time visit!
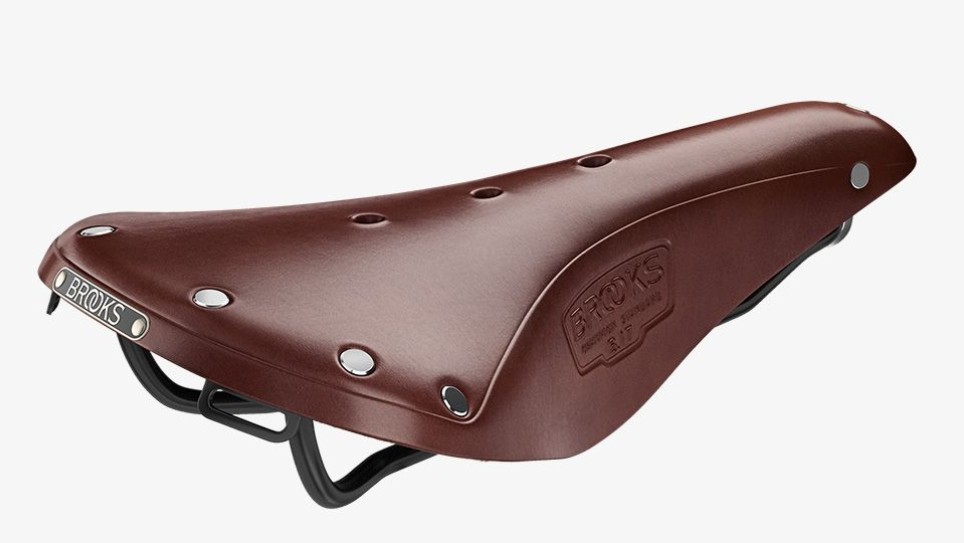
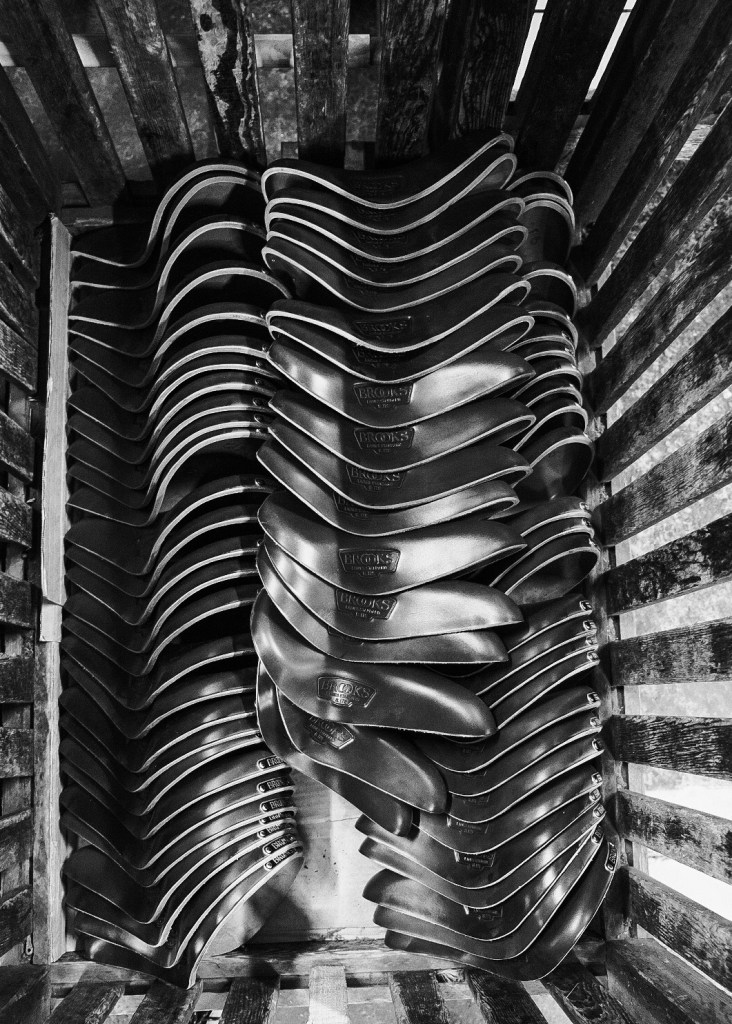
Brooks have a long long history in cycling, if you are seriously into your cycling then you have probably heard of Brooks and their leather saddles. If you are not into cycling at all and are asked to describe or draw a bicycle saddle i guarrantee you will picture the traditional Brooks B17 saddle that has been in continous production for over 100 years.
Brooks B17
It said that Brook’s founder John Boultbee Brooks, a horse saddle manufacturer since 1866 when the company was founded was unhappy at how the wooden saddle on his bike felt (we can all sympathise I’m sure) and decided he was going to make a better one out of leather and the first patent was filed in 1882. The company has been making saddles since then, it has been bought, sold, rescued and is now owned by Selle Royal who make all the non leather saddles in Italy but the Smethick factory continues to hand make saddles to this day.
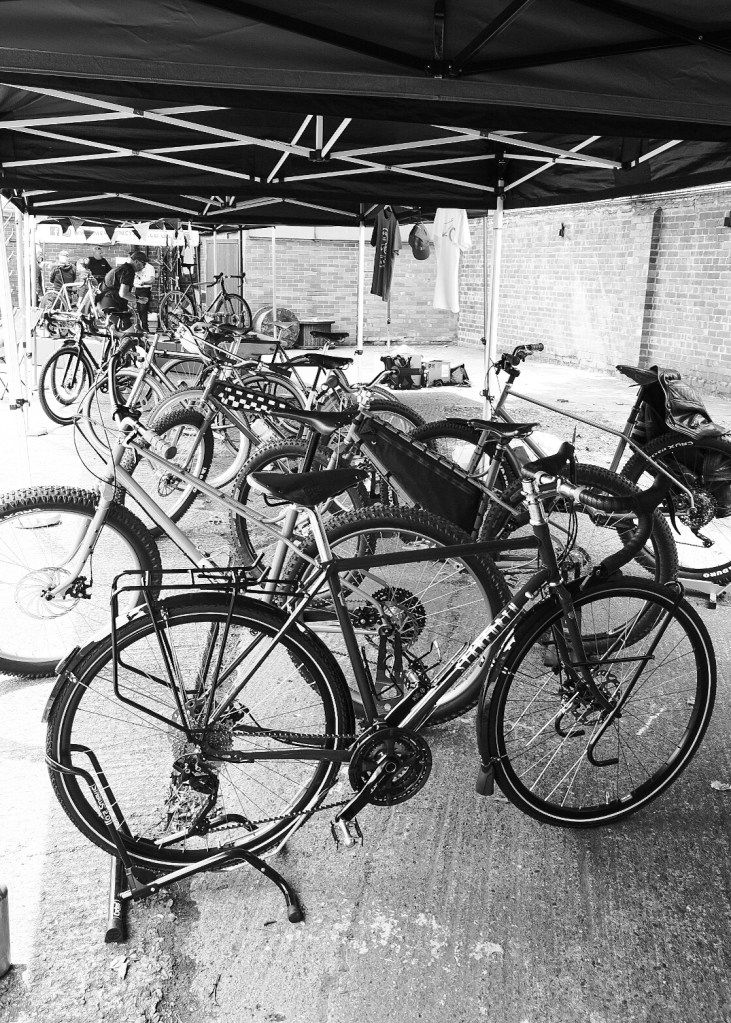
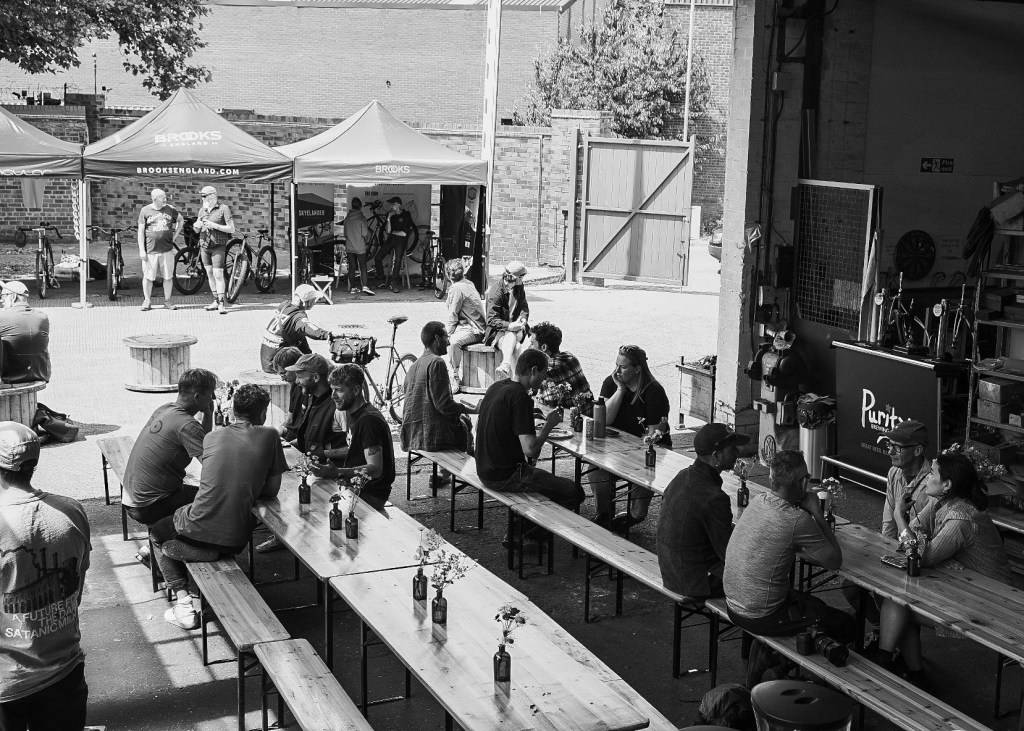
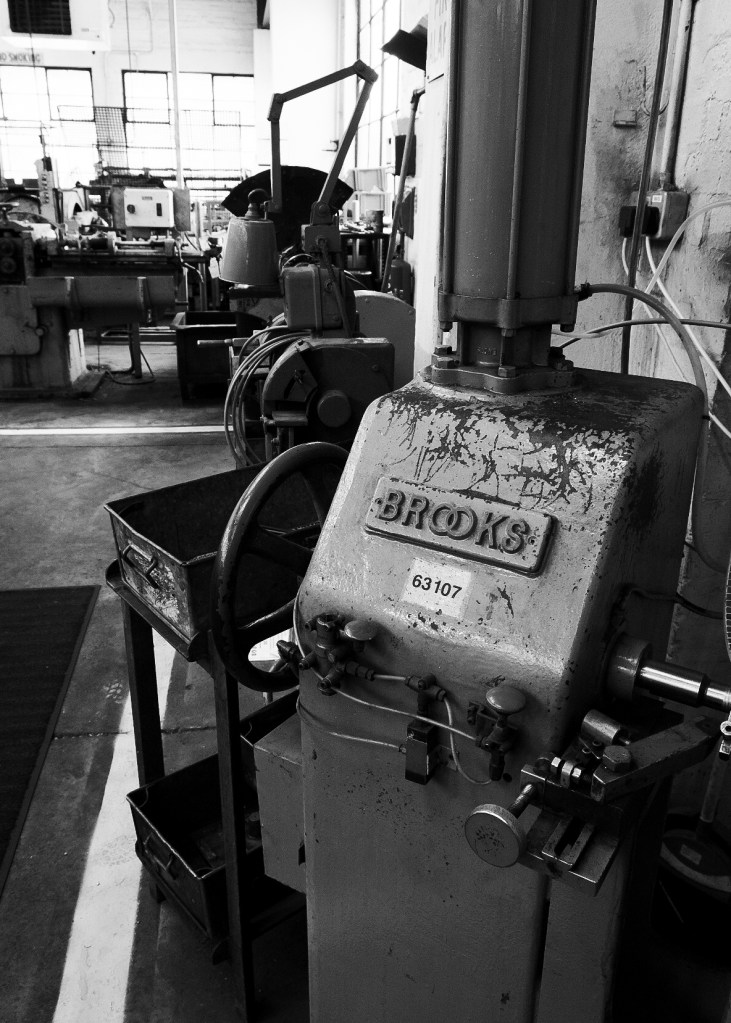
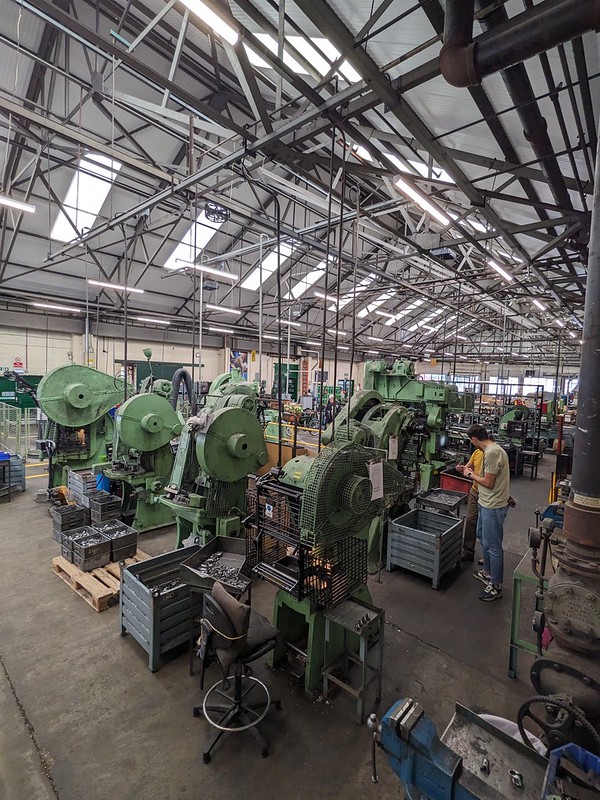
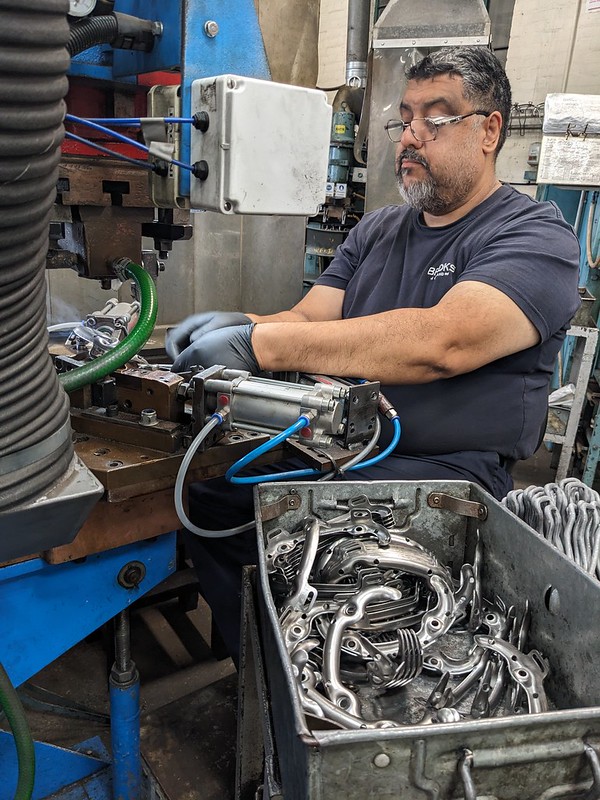
The Day started with coffee and pastries in the factory loading bay and a tour of the bike makers and designers set up in the courtyard who were all known for their use of Brook’s saddles on their bikes. its the best coffee I’ve had in a loading bay ever! The factory is just how you’d expect one to look dating back that far, it could have been a movie set but all the old boxes and stock on the shelves were there for a reason, even the toilet block should be a listed building it was so authentic!
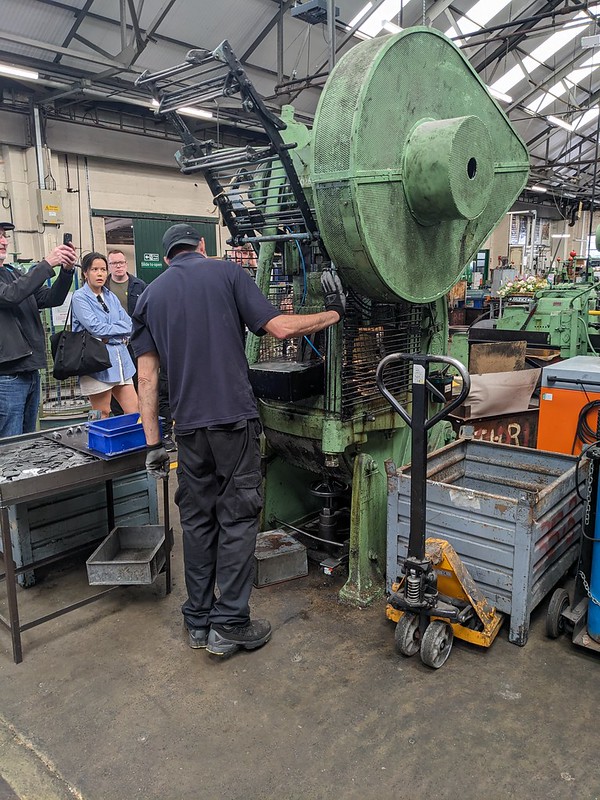
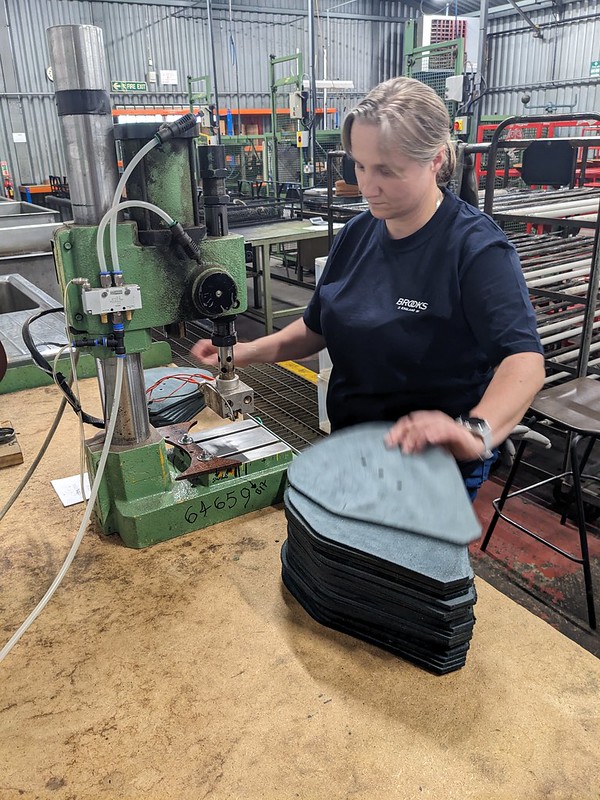
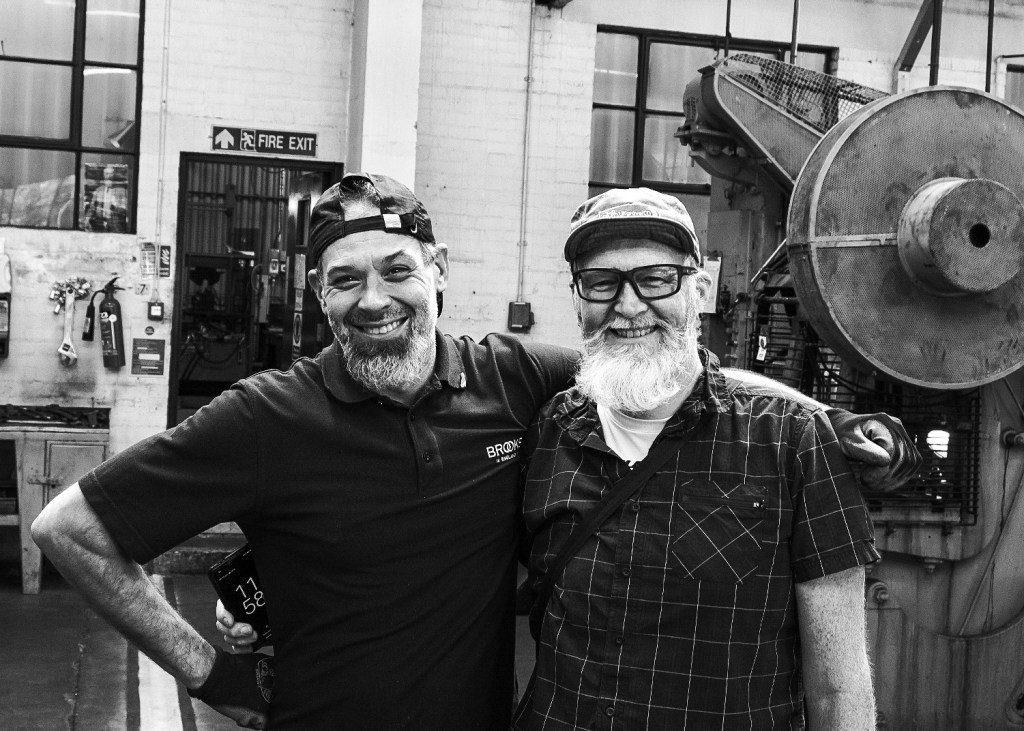
We then began the tour, guided by Steve who had been at the factory since he was 16 and he explained later he’s done pretty much every job in the factory from tea boy to machine press operator, even a stint in HR!
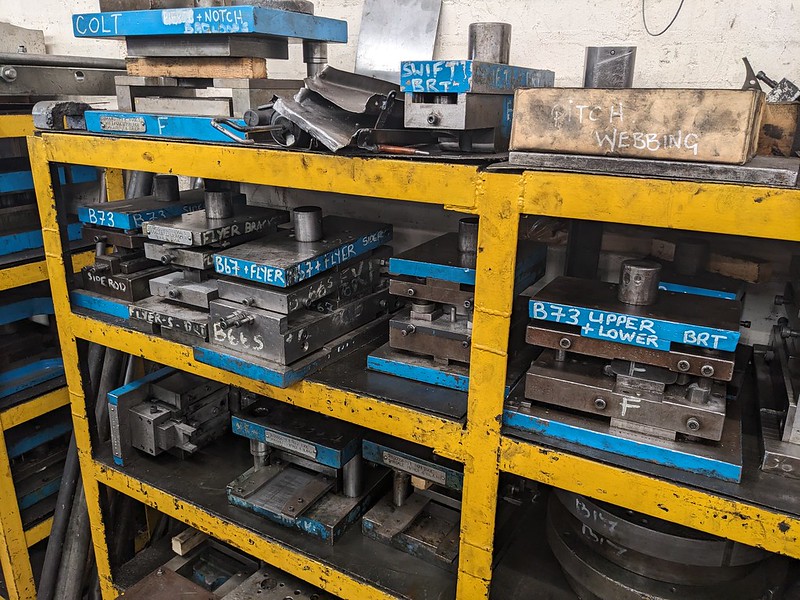
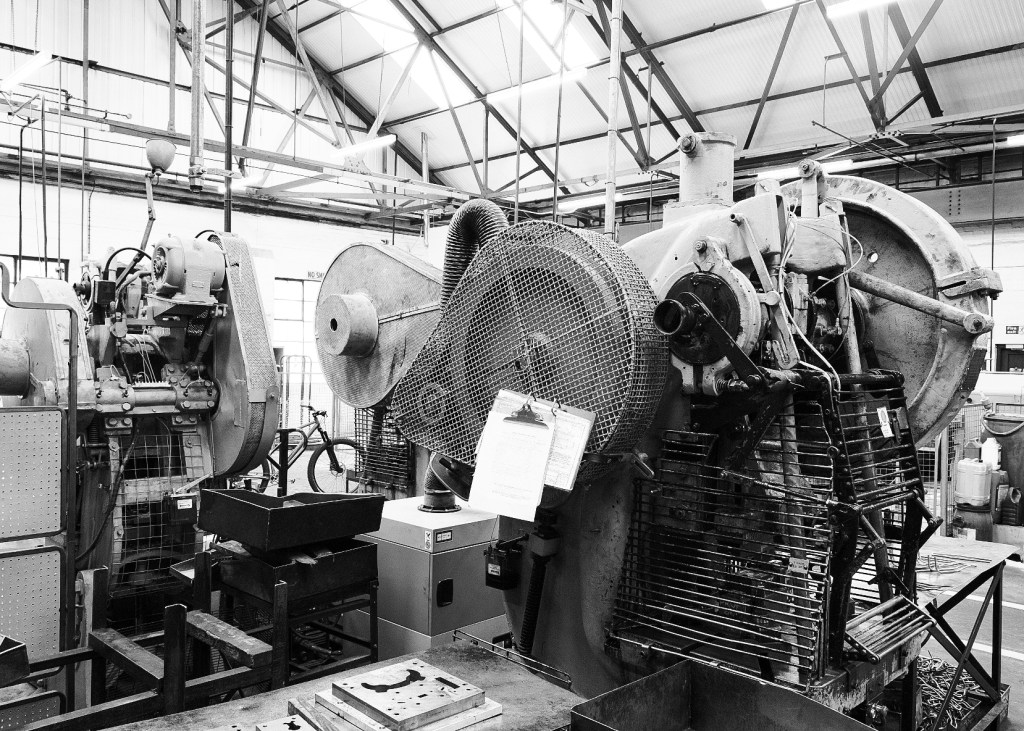
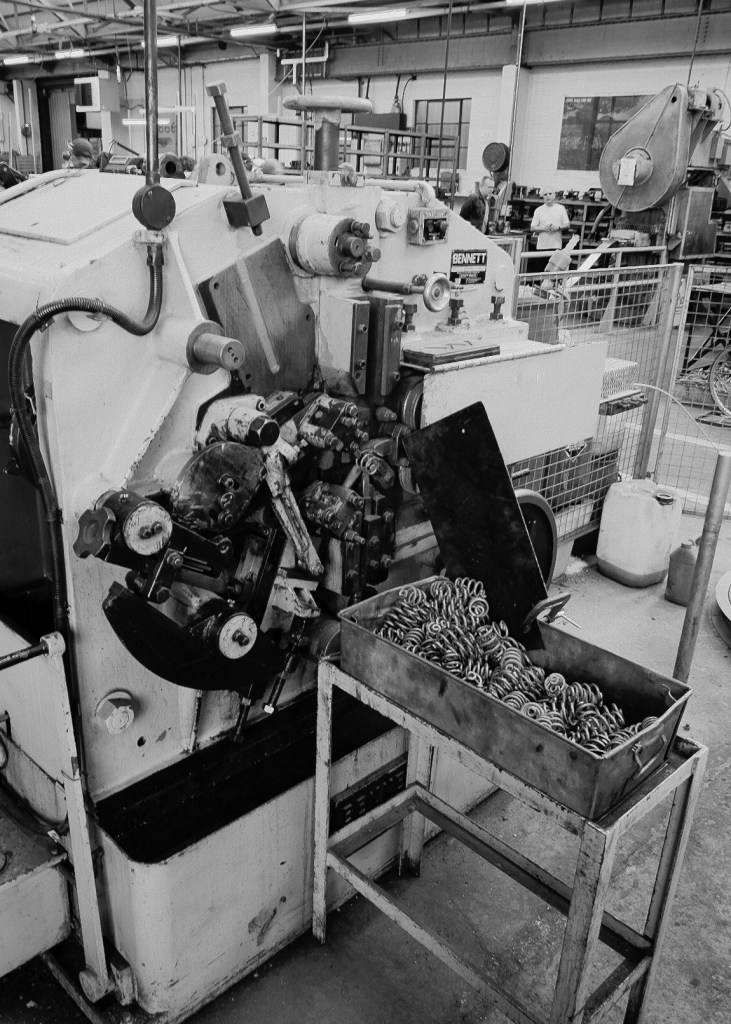
The tour progressed from the very vintage presses which were very loud to the cutting out of the leather which is soaked in water to soften it before it’s put into a press/shaper. Some of the machines were over 100 years old and i asked one of the guys, what happens when one of these machines that hasn’t been in production for so long breaks? He said, we just make a new part from scratch for it and if we can’t do it Birmingham’s renowned jewelry quarter is a couple of miles away and there are small factories there that can make anything you want.
Everything is done in house apart from the tanning of the leather which is done in Belgium. No UK company can cure the British hides to Brook’s exacting standards
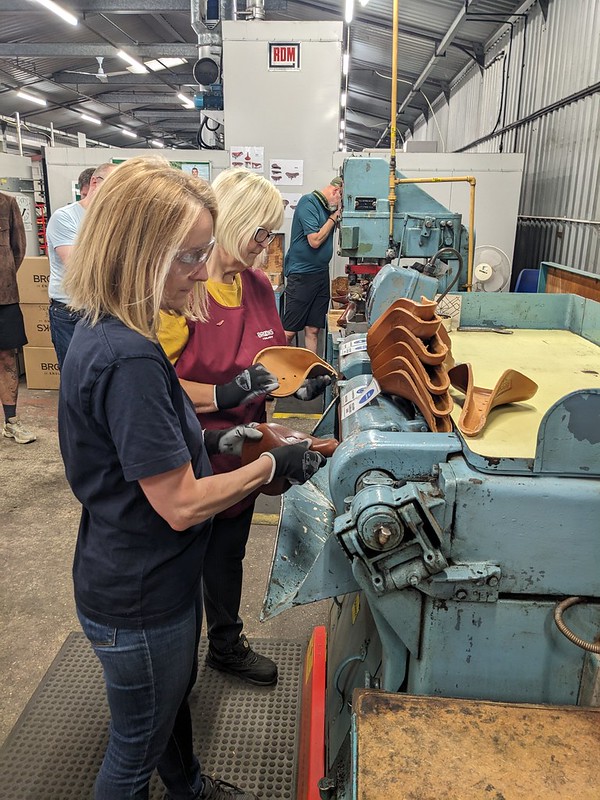
The sights, sounds were outstanding but the smells in the factory were what made the experience so visceral.
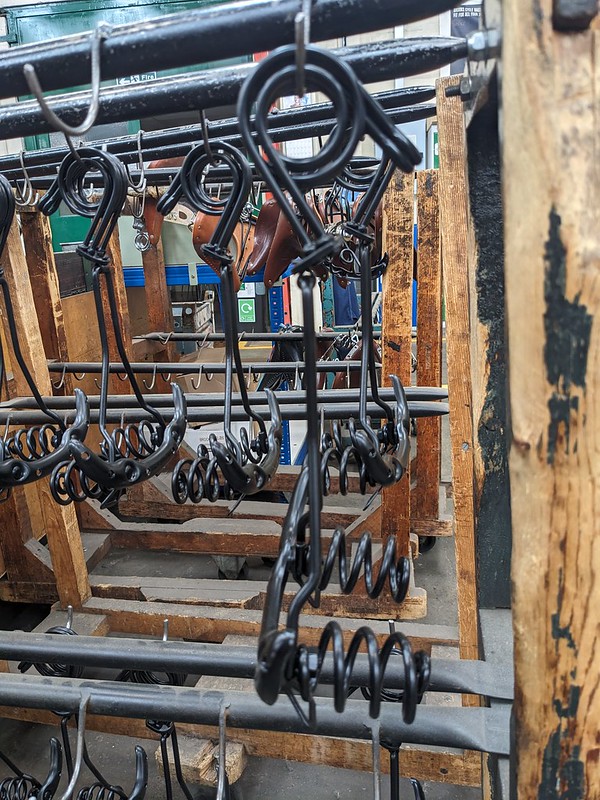
we saw springs and saddle frames being bent into shape using, quite frankly lethal looking machines which undoubtedly back in the day didn’t have all the safety guards they do now attached to them.
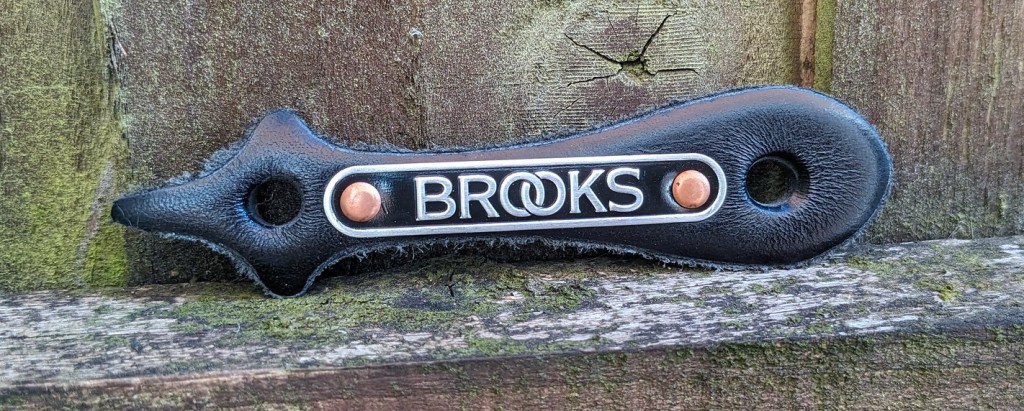
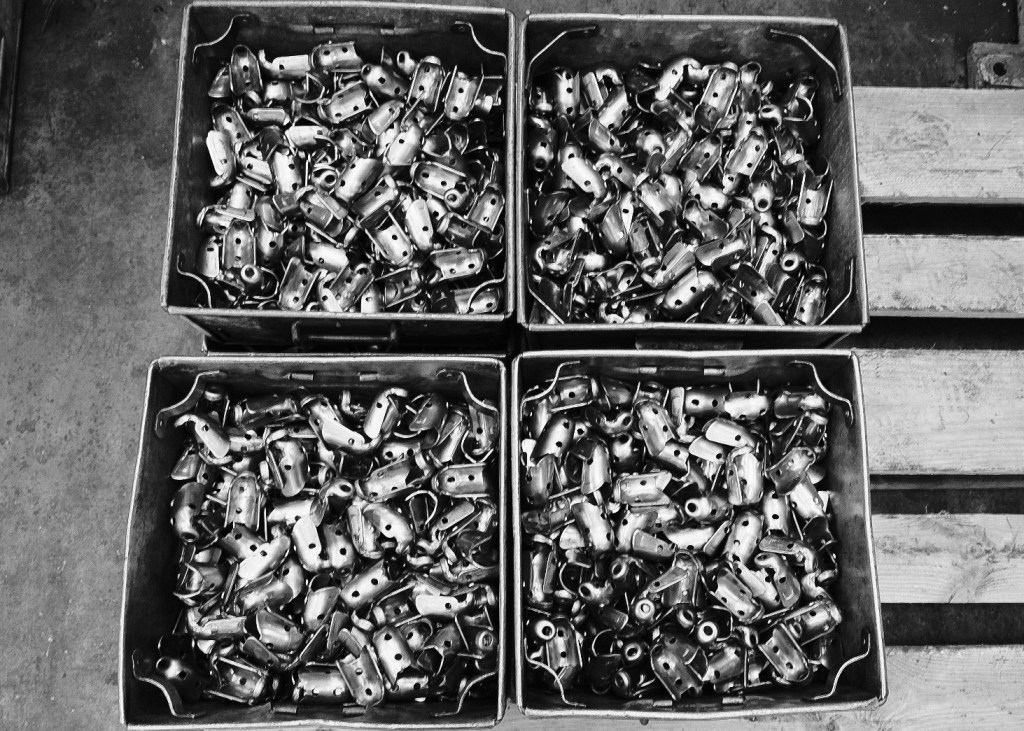
we went from raw materials through to the finishing touch of riveting the Brooks logo, also stamped in house, to the saddles. At every stage there was a human operating the machinery, it was mass production but on a much smaller and personal scale than I’d expected before visiting.
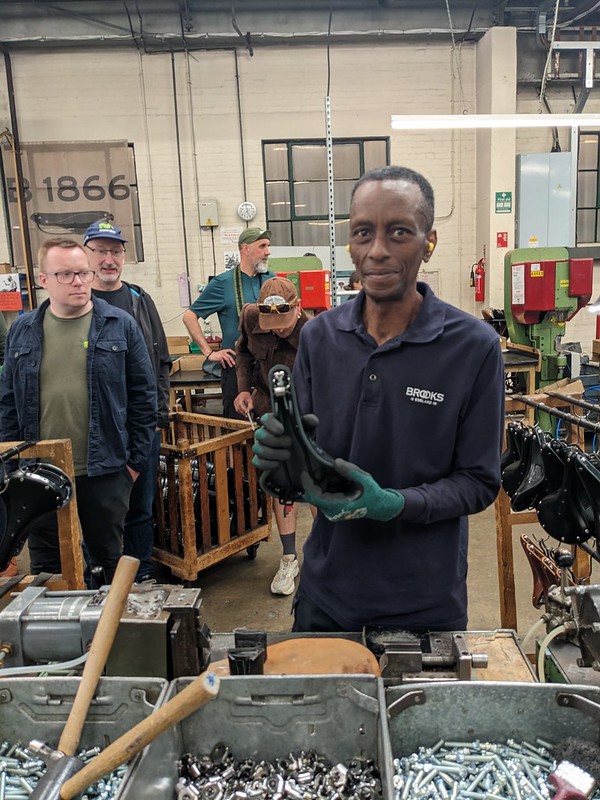
As we walked around I took the time to chat to the staff working there and I asked one candidly if they were amused that all these people were interested to see and photograph all the small parts of what must be a mundane everyday job to them and he said, no, he was proud that there was interest and he loved being there and what they do, of the people i chatted to the shortest time working there was 16 years, so they must like it!
It was an incredible day, i can honestly say one of the best things I’ve done as part of running UKGRAVELCO, I could have stayed there watching the process all day and not been bored. totally not how i thought it would be. The day was so well organised, fascinating and the people so friendly, open and warm.
No robots, no CNC machines just skilled craft persons shaping metal and leather into some of the best cycling products on the market. What made it great for me was being able to chat to the people on the factory floor and despite it being their day job the enthusiasm and pride in the company came through.
You can get a bit blasé when you read the phrase “hand made” but now I know the true meaning and value of that label. With Brooks England though I think that also includes pride and maybe a little love in every product too.
Massive thanks to @brooksengland and @extra_uk for inviting me. you can see all the products that Brooks manufacture here Brooks england and if it doesn’t take another 150 years for them to open the factory to the public again make sure you are on that tour!
all the black and white professional pictures were taken by Dan Phillips Photography the less professional colour ones by me!
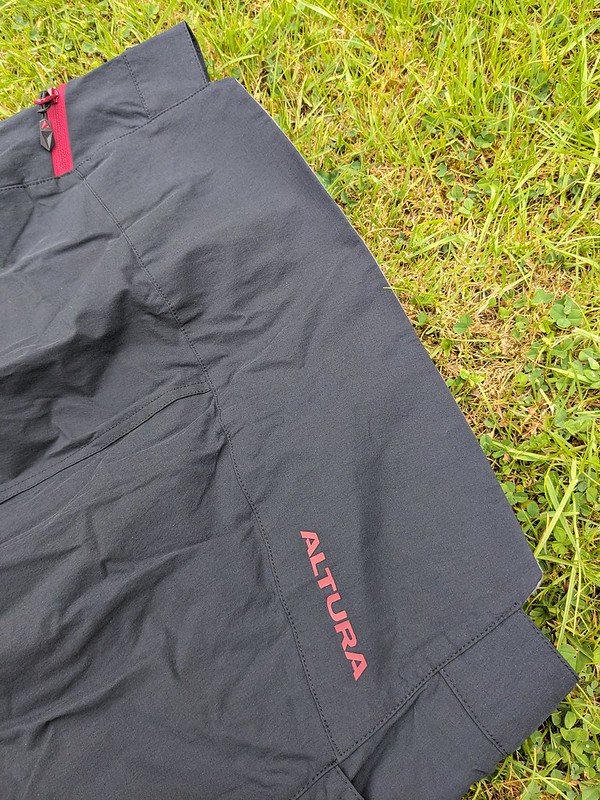
British brand Altura have long been known for good value practical clothing and kit. This season they have expanded their “all roads” collection and these items seem perfect for commuting, gravel biking and riding in general so to see if what’s written on paper is true I tried a few pieces out to see if they lived up to their billing.
altura all road cargo shortsaltura all road cargo shorts
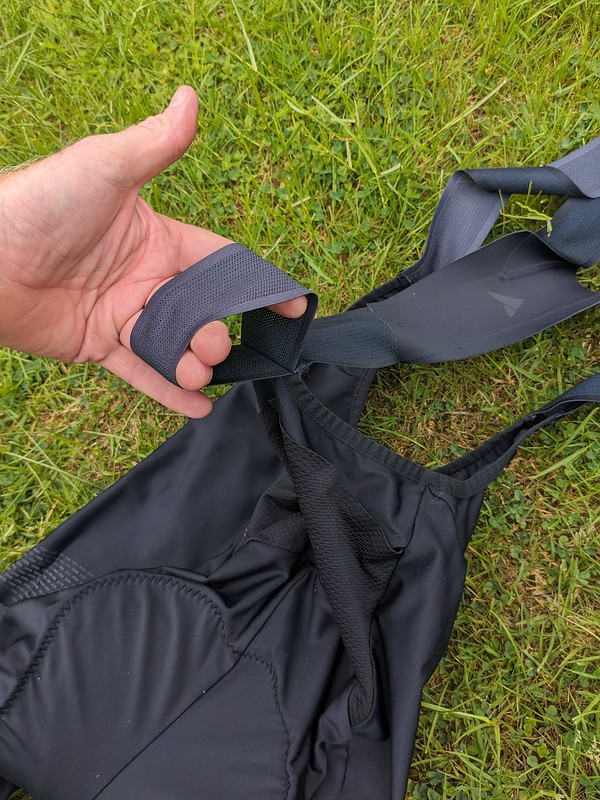
All roads Cargo Shorts. First up then is an essential, in my opinion, part of any cyclists wardrobe if riding medium to long distance and that is a pair of padded shorts. I was a long time sceptic of bib shorts with pockets on the legs but since trying them I’ve become a complete convert and now wouldn’t consider a pair of bib shorts without some sort of storage option.
The Altura Cargo shorts actually have 5 pockets. two on one leg, one on the other, two rear pockets in a similar spot to where jersey pockets would be and also a loop at the rear which I found perfect to store an Altura rain pullover jacket.
The two pockets on one leg i found a perfect size to hold a phone and some gels and keep them separate from each other and the other side perfect for a bag of walkers! The two rear “jersey” pockets are sized just like jersey pockets so anything you’d be able to stuff in a top you’ll be able to fit here too. Bear in mind though that whatever you stow here will be nearer the heat of your body so chocolate bars are probably out but gels should be easier to swallow when warmer! Obviously if you put something heavy or unwieldy in the pockets they will drag the short legs down but trial and error is your friend here.
altura all road cargo shortsaltura all road cargo short pad
The pad in the shorts is comfortable for short and medium rides without any chamois cream for me, anything over 50 miles I’ll be slathering on the cream to stop any hot spots, but this is the same for any padded short regardless of cost.
The sizing is realistic, I usually take an XL to feel comfortable at over 6ft tall and XL in these shorts was spot on. numerous washes haven’t made the shorts baggy or tight so I can say with confidence they are worth a place in your wardrobe and may end up as your go to shorts.
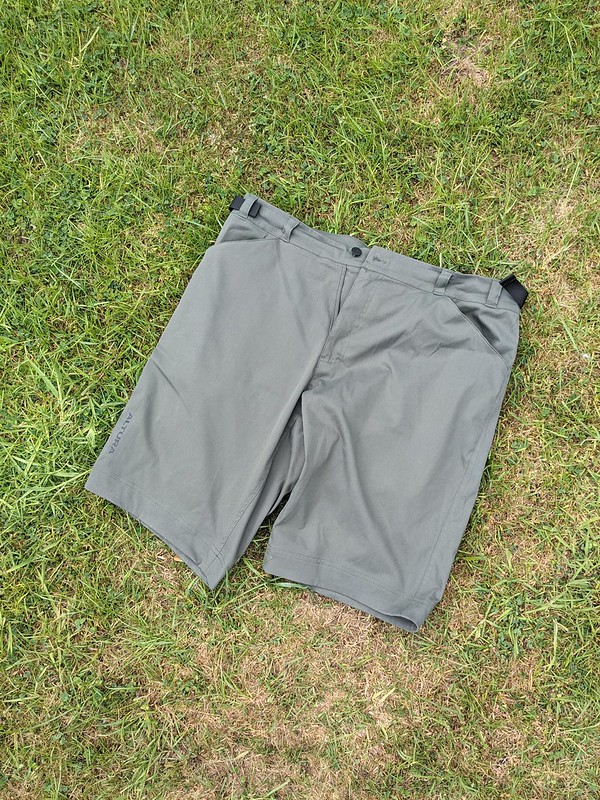
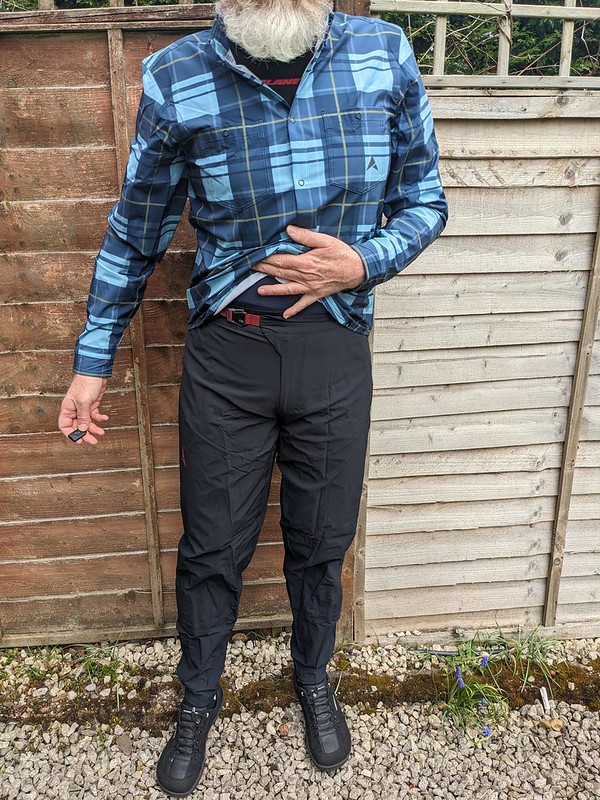
All Roads Shorts At the other end of the spectrum are the Altura All Roads “baggy” shorts. I’ve put those quotation marks in as although the shorts are baggy compared to bib shorts they are quite fitted and so look “normal”, more quotes but what I mean is you could wear these as everyday shorts and no one would bat an eyelid. Ride to work and wear them all day or in the pub. Personally i’d add a padded short too if going any distance as these shorts have no padding. What they do have tough is a stretch fabric so pedalling is easy in them with no pulling.
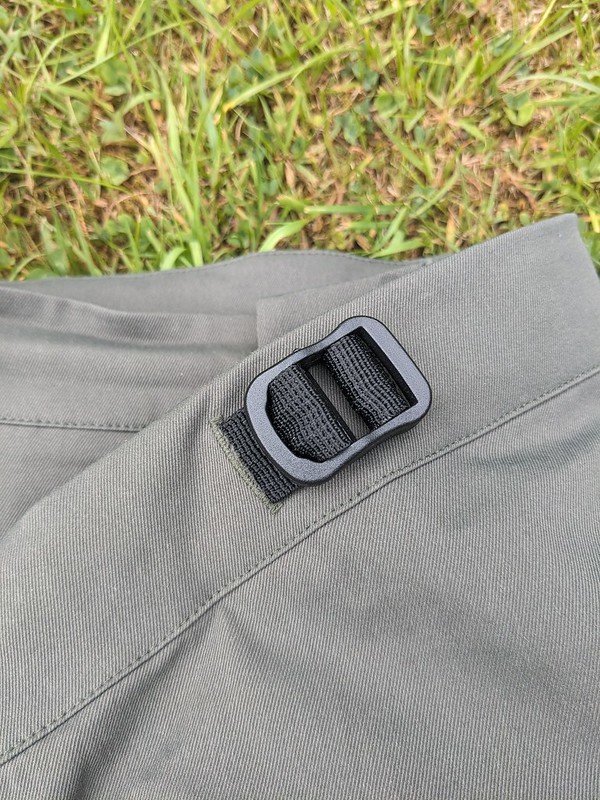
altura all road shortsaltura all road shorts adjuster
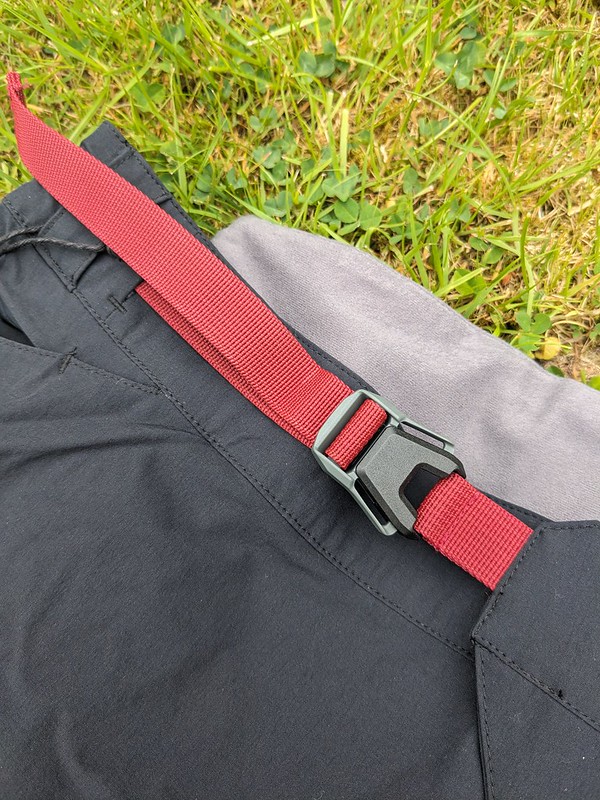
The shorts have waist adjusters and three pockets. The rear is zipped for security and the two side pockets are very useable in that you can ride with a phone in the pocket without it interfering with pedalling action. The material is lovely and soft to the touch but maybe a little thick to wear on the hottest of days. Sizing again is realistic and large for me with a 34″ waist was spot on.
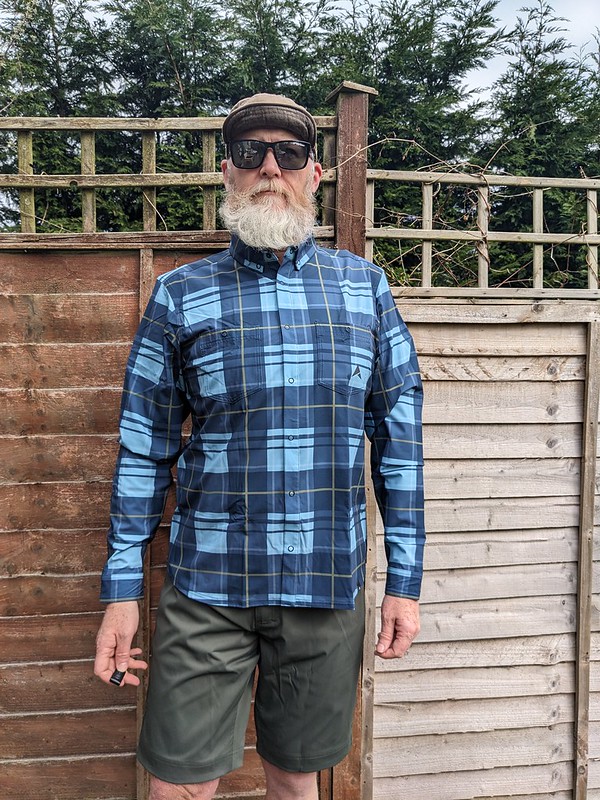
altura all road shortsaltura all road shorts and shirt
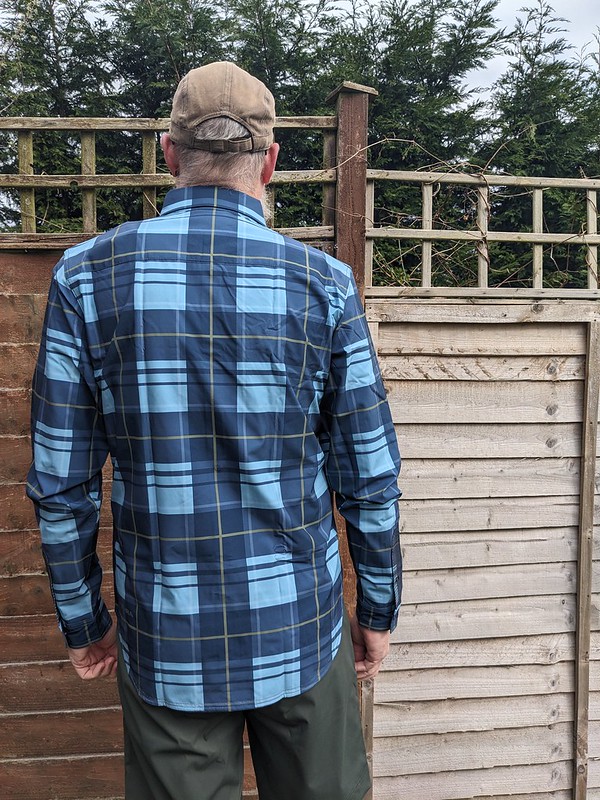
All Roads Cycling Shirt The ubiquitous check shirt, sometimes known as a flannel. Well Altura’s verion is not flannel at all. It’s a technical fabric more akin to a cycling jersey and is made of a polyester ripstop material, very handy when riding through the UK’s overgrown bridleway network. It has a lovely amount of stretch to the fabric has two chest pockets and snap button (or press-stud if you’re old enough) which makes venting on climbs very easy. Because it’s not flannel it folds up compactly so is great to stow away on your bike for pub stops or bike packing when you’ve made camp and are sitting around the fire…ok, maybe eating rehydrated cardboard dinners and hiding from midges but you know what I mean. The shirt also has some reflective detailing if the check pateern isn’t enough to get you noticed.
altura all road cycling shirtaltura all road cycling shirt front
A shirt like this should be in every riders kit as it’s so versatile and comfy to wear.
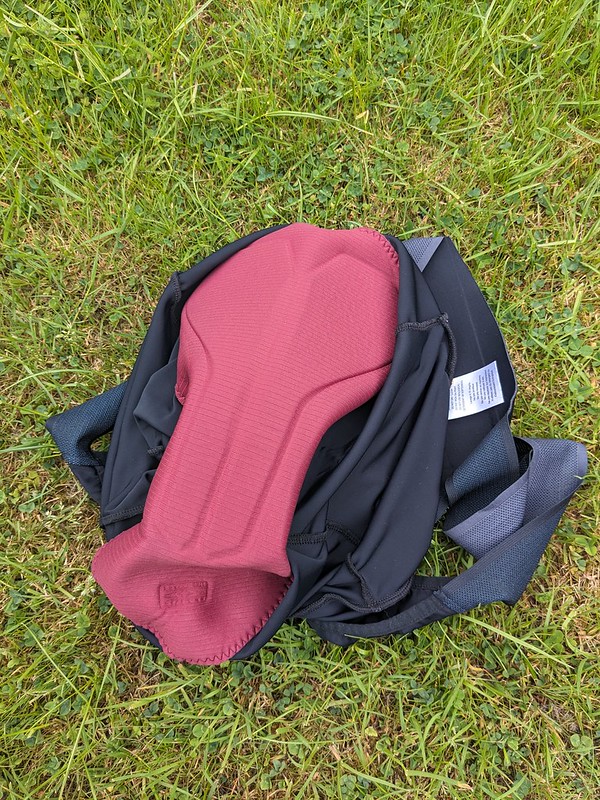
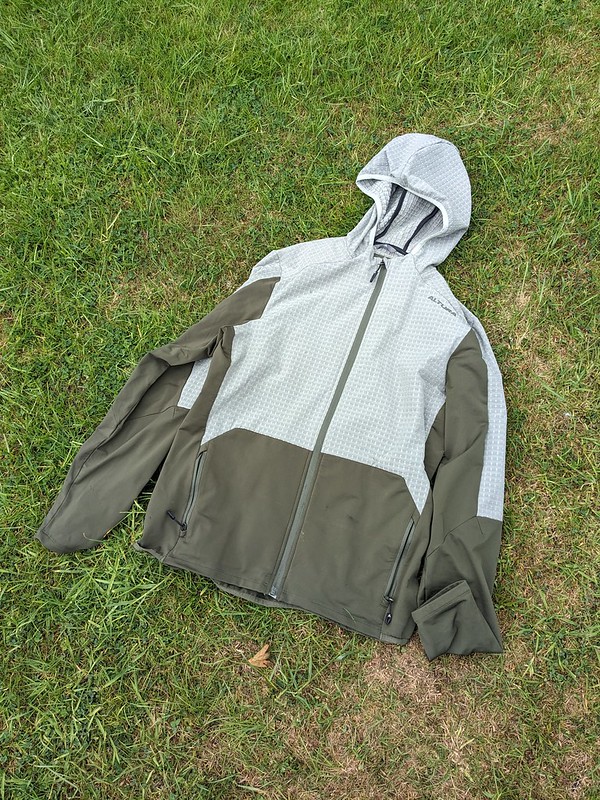
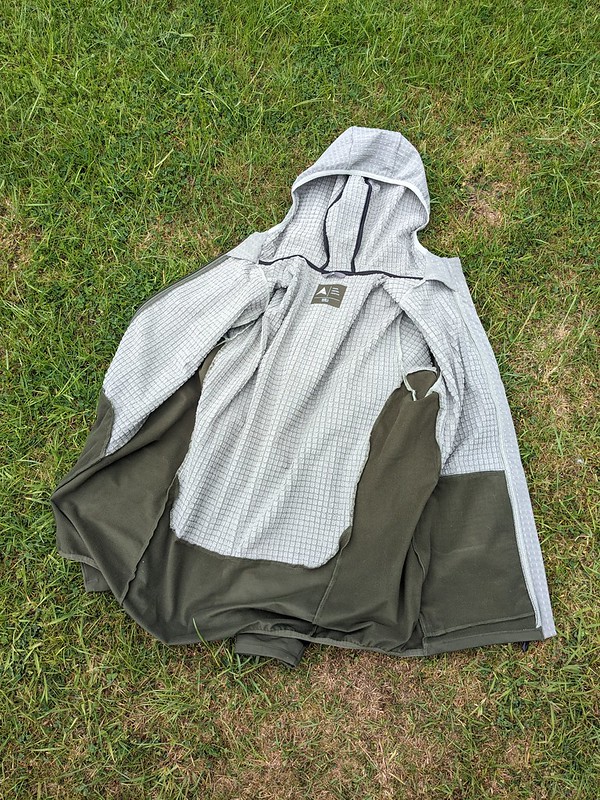
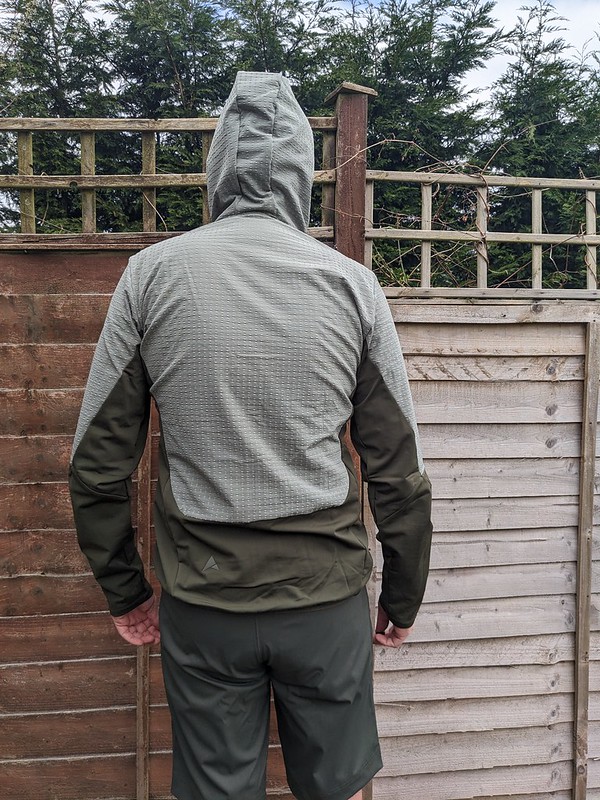
Altura Esker Cave Trail Hoody Hoodies for bike riding? doesn’t the hood just fill with air and act as a brake? sometimes yea in a high wind or speed situation but it really is just occasional and the benefits outweigh that drawback massively. The Altura Cave hoody (not sure what the Cave bit is about if i’m honest) is a soft feel jacket with high loft fleece areas on the chest and outer upper arms, just where windchill will make it’s presence felt. because of this it’s really an early or late in the day or an Autumn-winter-spring garment. The two zippered front pockets are big enough to stash a phone and the hoody is treated with a water repellent coating to shrug off spray and a light shower. And the hood? it’s actually elasticated so it’ll fit over a helmet and not fly off.
altura Esker hoodyinside altura Esker hoody
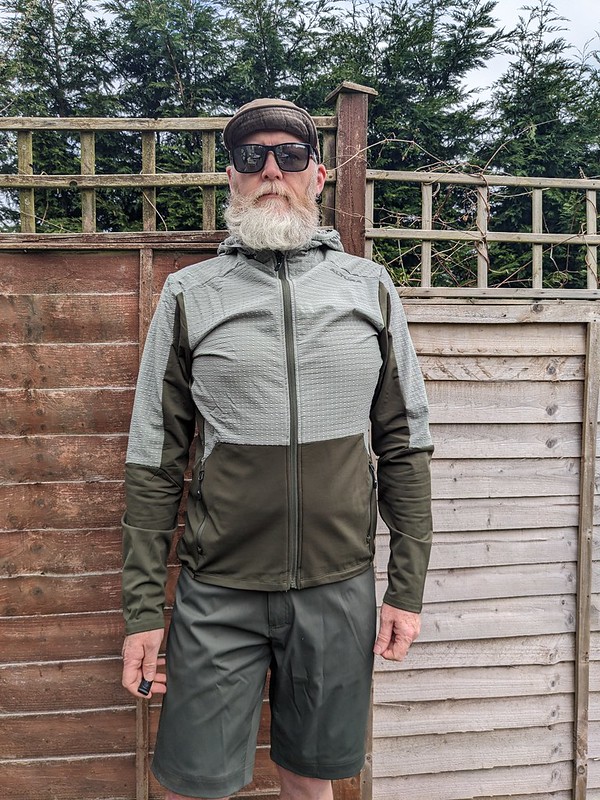
This hoody has been so comfortable and because the test period co-incided with the hottest spring for years has seen more use off the bike than on. That just shows it’s versatility though.
altura Esker hoody and all road shortsaltura Esker hoody and all road shorts
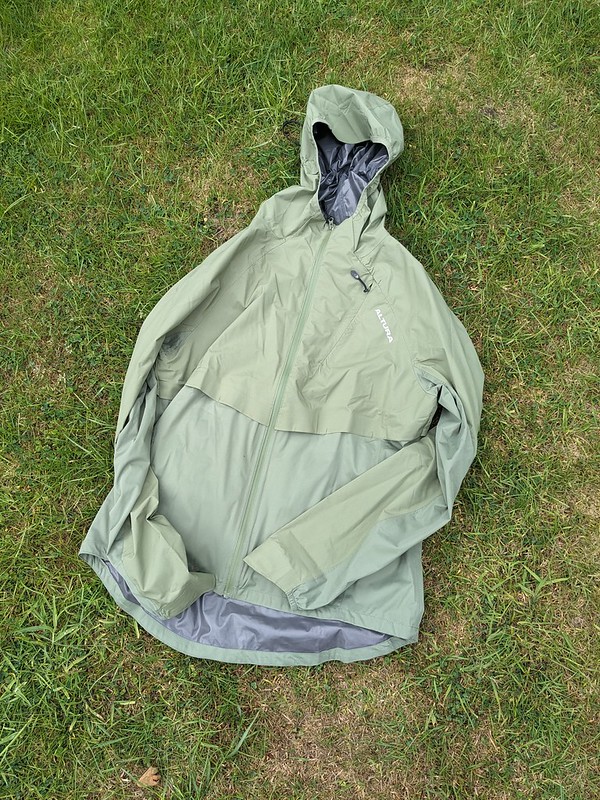
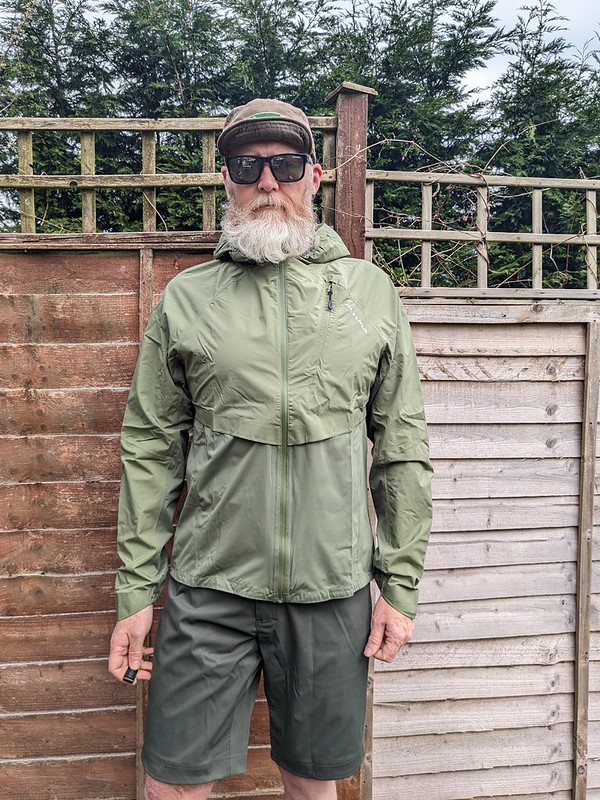
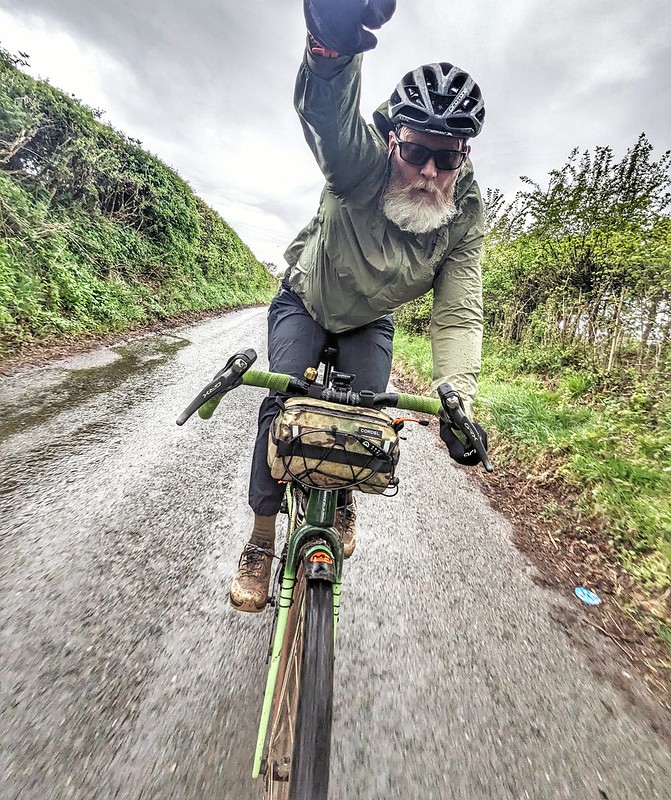
Altura Esker Waterproof Packable jacket Riding in the UK you will need a waterproof jacket at some point unfortunately. In my mind there are two types of waterproof cycling jacket. One that you wear when it’s already raining when you leave the house or one that you take with you, tucked away somewhere on you or the bike incase it starts raining when you are already mid ride. This Altura jacket is for the latter and it works pefectly in this respect as it is very packable and will fold away into it’s own pocket.
altura all roads waterproof jacketaltura all roads waterproof jacket
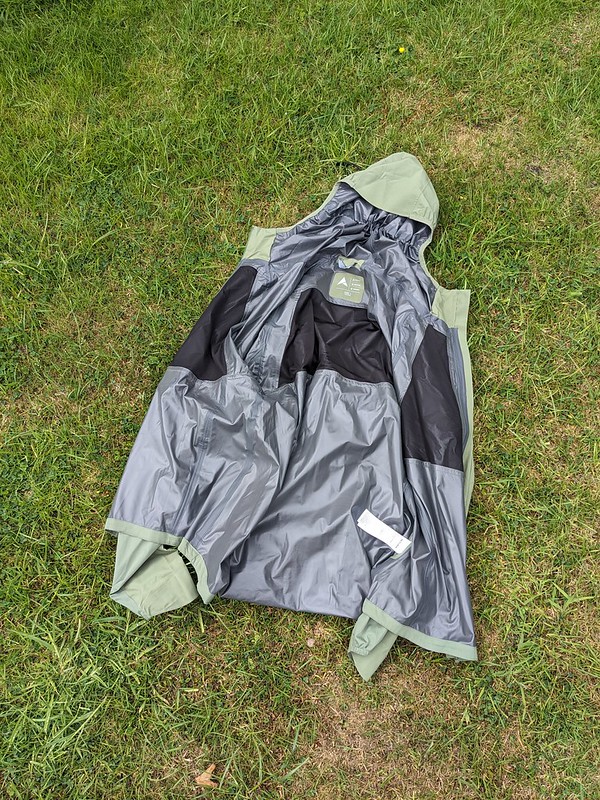
It is full waterproof with taped seams and has vents front and rear to aid breathability and an integrated hood. the hood has a drawstring adjuster to tailor the fit and prevent it blowing about. the jacket is cut for cycling and has sleeves that are longer to account for the cycling position. The cuffs are also partially elastic to stop draughts blowing up the sleeves. Again the fit is real world.
altura all roads waterproof jacketaltura all roads waterproof jacket and waterproof trousers
As with any waterproof jacket, even the most expensive, you will get warm riding in this jacket in warm humid conditions, that’s unavoidable but this jacket is no worse in that respect than jackets costing three times as much.
An essential waterproof jacket that takes up no room at all so you can take it with you for when you need it….and you will!
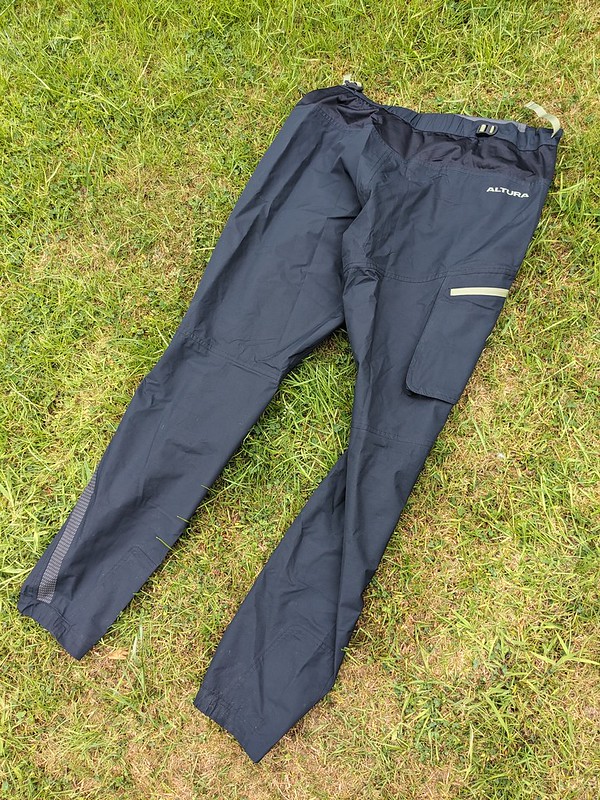
Altura All Roads Packable Waterproof Trousers Do you really need waterproof trousers? I’ve always thought this as all the waterproof leg wear I’ve tried in the past has been franly, horrible. Rustlely, clammy and hot is my experience with waterproof trousers so I put these on in trepidation, prepared to absolutely hate them but, what a revelation, these Altura waterproof trousers were truly excellent.
Altura All Roads Packable Waterproof TrousersAltura All Roads Packable Waterproof Trousers side zip
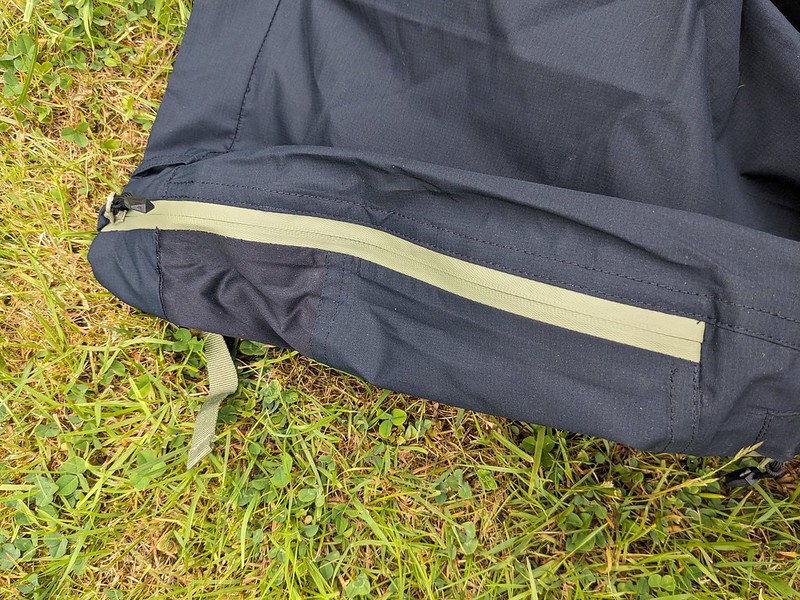
I picked a day when it had been raining for a couple of days and was still raining to give them a proper test. First thing to note is that the zip “fly” is off set to one side so no bunching up when you bend over and there’s a waist adjuster to get the fit just right. there’s also a side pocket that these trousers actually roll up into and are of small enough bulk to stash away on the bike making them perfect for bike packing or commuting.
Altura All Roads Packable Waterproof TrousersAltura All Roads Packable Waterproof Trousers
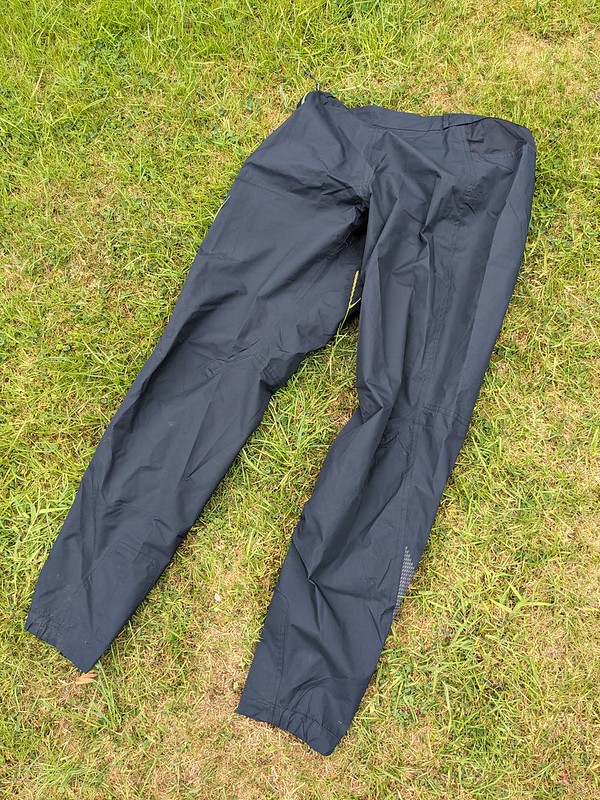
The main thing I loved about these trousers was the fit. most cycling trousers tend to not have the correct articulation at the knee and the pedalling action pulls the trousers down when the knee grips the fabric. No such thing happened here, even standing up i didn’t have to adjust the waist height everytime. The material has a waterproof coating which made water bead off them and despite riding for a couple of hours in the rain in them I didn’t feel like i was over heating.
Fit again is good but I’d like to improve a couple of things, first the length. I’d like the legs to be longer, when riding there was a gap between trouser leg hem and shoe. easily rectified with a waterproof sock btu if you were using these as an emergency rain stopper them water will run off them into your shoes. the other thing is also hem related. the hem is elasticated and this ensures minimal trouser-chain interfaces but they fit so well here it’s definately a shoe off situation to get them on in that emergency deluge situation.
Those two things are far outweighed by how good the trousers perform and also how quiet they are when pedalling. no annoying rustle of the fabric. Invest in some waterproof socks, buy a pair of these altura all roads waterproof trousers and go and play in the rain!
Altura Esker Eco Trail Trouser winter riding sucks right? Its cold, dark and motivation is at an all time low. bib tights are just not cutting it in the single digit temps. That’s my feeling anyway so I bought the old version of these trousers and wore them with bibs and knee warmers underneath and they kept me toasty and able to extend rides because of the warm and how comfortqble they were.
Altura Esker Eco Trail TrousersAltura Esker Eco Trail Trousers adjuster
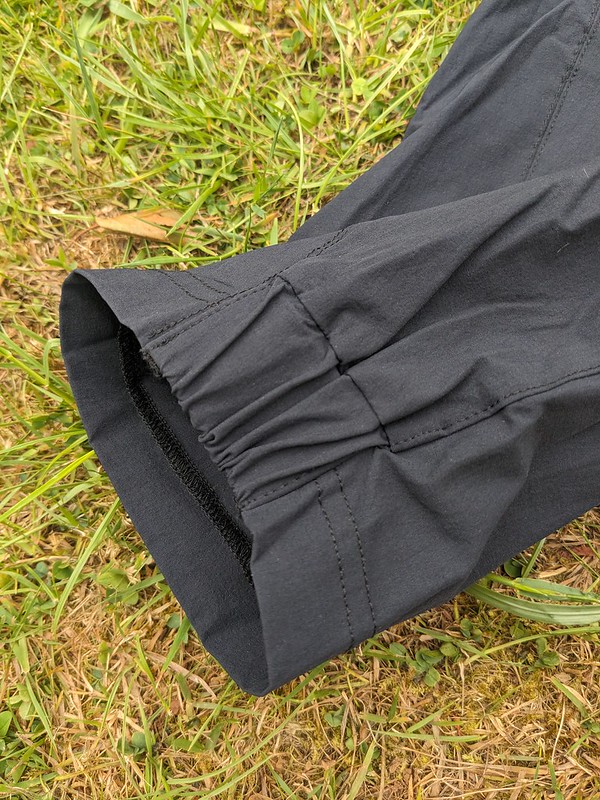
I was keen to try this new version to see if they were still as good and what differences there might be. The ECO part of the name is the result of using recycled materials in the fabric. there’s a water repellent coating that works well and the fit is great. the waist is a wrap around design with the adjuster over to one side so it doesn’t stick in your belly when in the cycling position. The material has a great stretch to it and it doesn’t hamper pedalling at all. Altura say there’s enough room at the knee for low profile knee pads, not something I’ve ever used but this room means the knees are free to move and don’t pull the material down. the close fitting hem length means there’s no flapping that might put the material into the chain.
Altura Esker Eco Trail Trousers hemAltura Esker Eco Trail Trouser raised rear
The fit is just as good as the original pair i bought and they pedal equally as well. If you hate riding through nettles and brambles in summer then these trousers are your go to. Despite me wearing mine in winter i have tried them in more clement conditions just to see how they faired and you won’t feel like a grain of rice in a boil in the bag sachet. They also pack up fairly small too so definately an option for bike packing.
The Altura Esker trail trousers are still my favourite full length riding trews!
This is just the tip of Altura’s clothing iceberg, they do road specific , commuting and MTB stuff too but these pieces above seem to cross all genres and so fit gravel riding perfectly.
The Altura All roads and Esker clothing range is good value, has realistic, real human sizing and is carefully designed by people who know about UK riding. Definately check them out when looking for kit to go riding in.
here’s a link to altura’s website, it’s not an afiliate link so I don’t get any money for this review, I do however get to keep the kit that they sent to me, afterall, no-one would want those bib shorts now would they?……hmm, maybe of of those specialist websites!
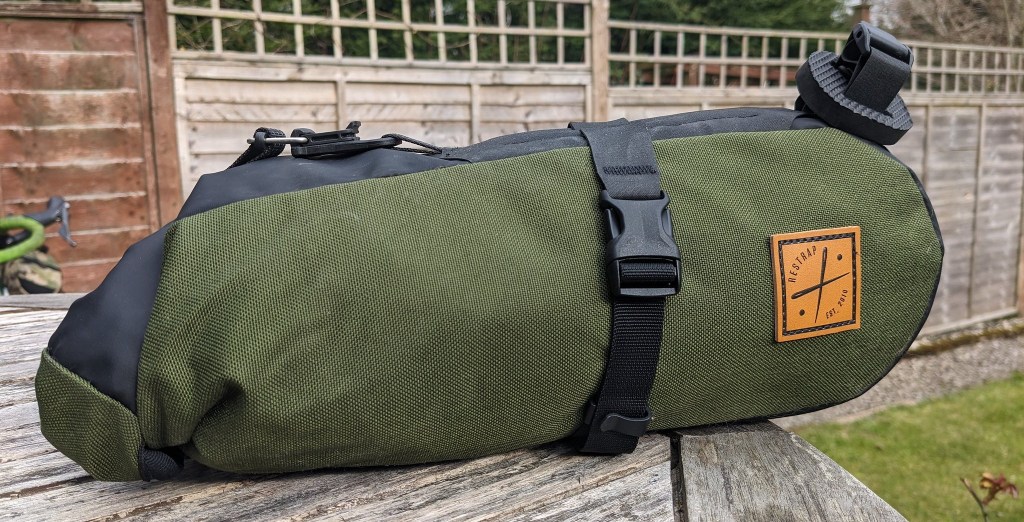
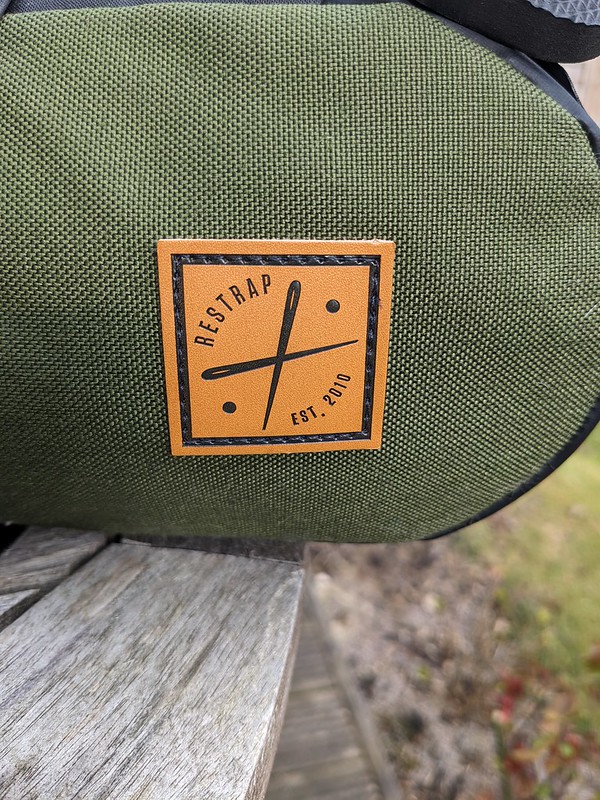
Restrap is a British company who have been producing bike packing bags and accessories since 2010. The company started from a bedroom in the North of England.
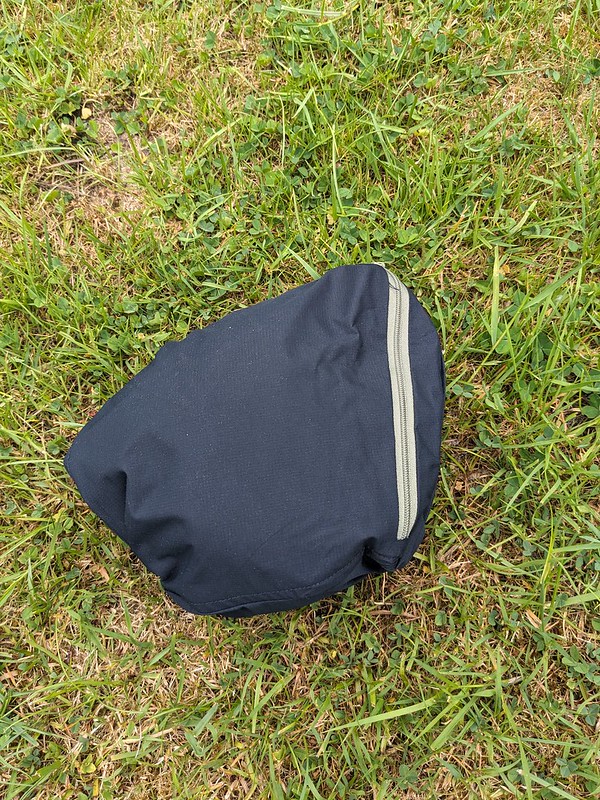
Now anyone who knows Northern England will know all to well that they get, and I’ll describe it generously as, “mixed” weather up there. So, they should know a thing or two about what works on a bicycle in those varied conditions. Restrap have had saddle bags in their range for many years but recently introduced some new models a 2.4ltr and a 4.5ltr bag. i was lucky enough to be contacted by Restrap and they asked me to give my opinion on the new models.
Restrap saddle packRestrap saddle pack dropper post
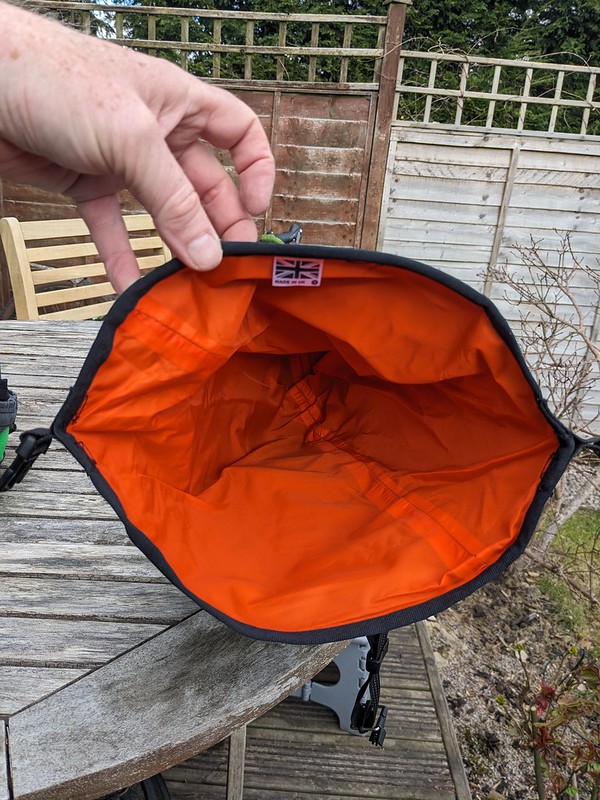
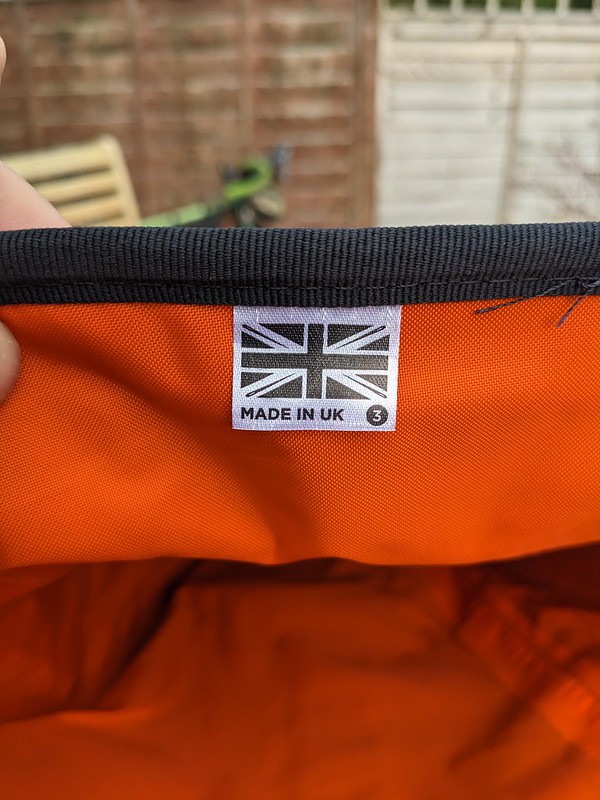
I plumped for the 4.5ltr version in a green colour (to match my Fustle Causeway) but they are available in black and orange too. Made from super hard wearing 1000d cordura nylon material the bag looks quality from the outset, it is also easy to wipe clean. The part of the bag in line with potential spray from the rear wheel is coated with a TPU rubber for extra water protection and the interior is seam sealed to keep 100% of any moisture out. The interior material is also a bright orange colour which makes finding items inside the bag in varying light conditions much easier than if it was the usual black colour.
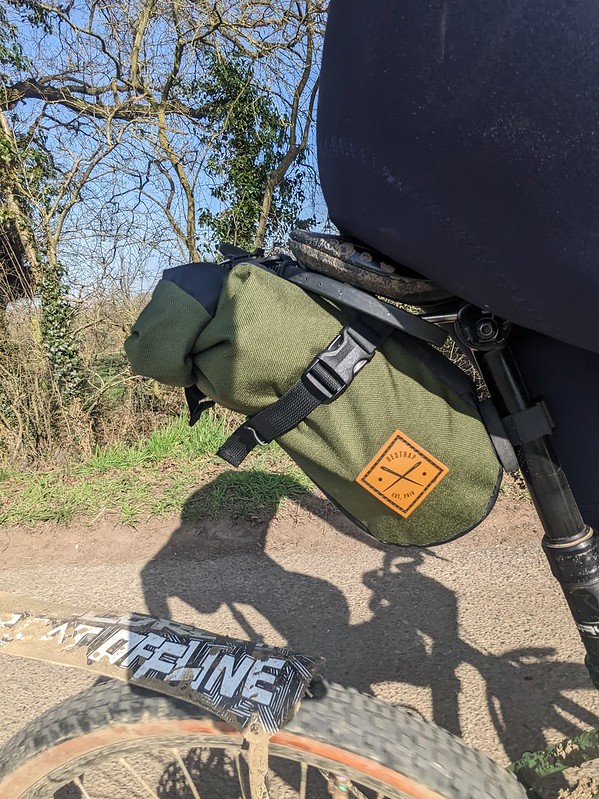
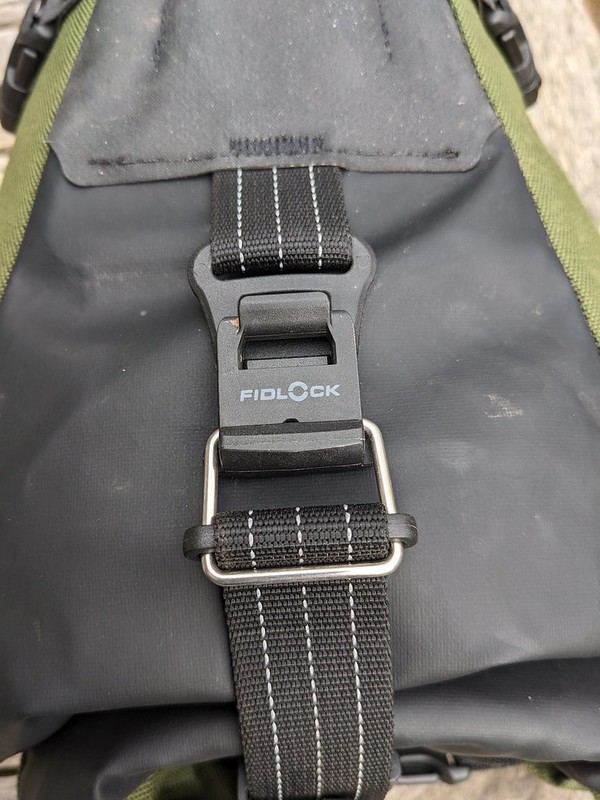
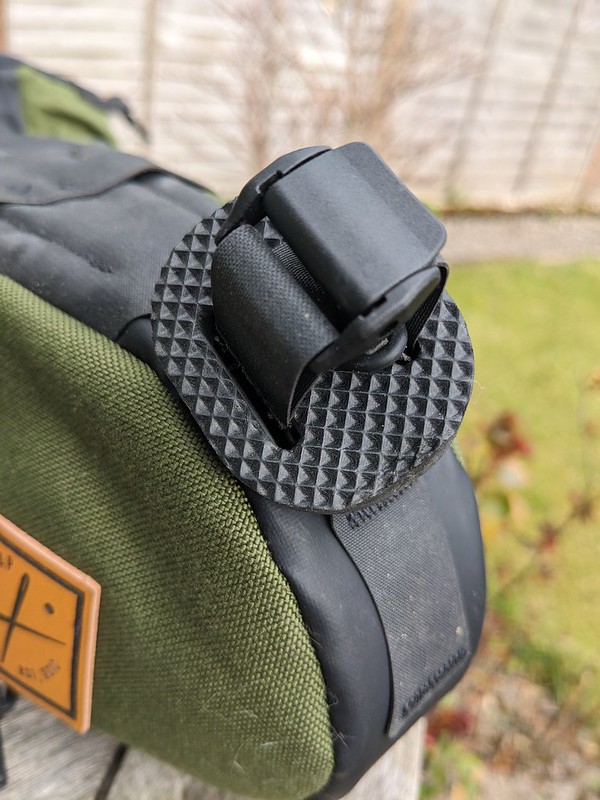
Fixing the bag to the bike is very easy. It has straps and buckles that fit over the saddle rails and a rubber strap with a sponge spacer to fit around the bike’s seat post. All these straps can be snugged right down to fit the bag neatly under the saddle, minimising movement. the straps can be neatly tucked away too with the supplied plastic clips making for a very neat surplus strap solution.
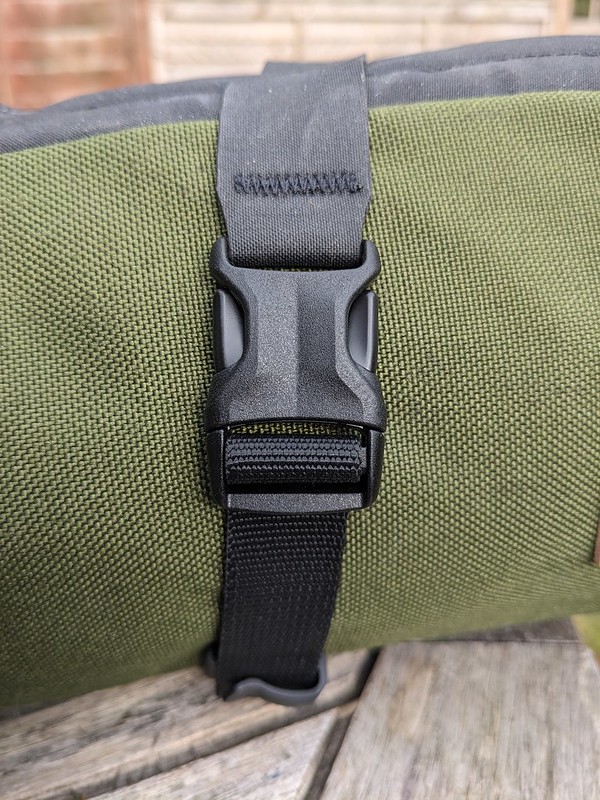
The saddle bag has a roll top and this means if you have only a small cargo to carry you can cinch it right down to stop any baggyiness and of course if you have a lot of kit you can do the smallest amount of roll and really stuff the contents in and it’ll still be secure. The bag closure features a lovely fidlock magnetic clasp that emits a very satisfying click when it engages.
Although Restrap don’t mention it on their website the back will work with a dropper post. I’d recommend taping the post where the strap sits though.
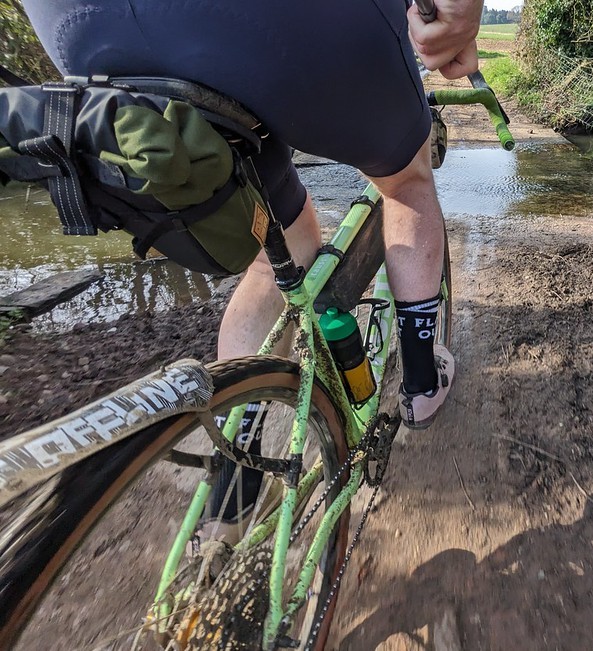
On the bike and fully loaded the bag has impeccable manners, there’s very little side to side “wag” even when i deliberately put the heaviest items to the back of it. check out the video below to see it in action. it’s not a quick access bag as it sits out back, but if you wanted to replace a bar bag and just run a top tube bag for essentials it would be ideal. the fact that it easily detaches means if you are touring and need to take the bag with you into accomodation it’s straightforward and convienient. On that note, it’s not really a long distance bike packing bag unless you are one of those riders who can ride ultra events on 1 mars bar and 2 hours sleep in a hedge! For the rest of us it’s a great day ride or “credit card” touring bag where you carrying minimal kit and travel between B&Bs/AirB&B etc and aren’t carrying a tent and cooking paraphernalia.
Restrap saddle pack est 2010Restrap saddle pack proudly made in the UK
the Restrap saddle bag is hard to review really as there aren’t any downsides. it’s always nice to suggest an improvement or a short coming and the bag doesn’t have these. I’m reluctant to say it’s boring, maybe drama-less is a better description as it just gets on with the job,…. if i think hard maybe it’s lacking a loop to attach a rear light as it’ll probably cover your seat post, the traditional spot for a light but really that’s just nit picking.
The Restrap saddle bag is made of quality materials with years of design experience learnt in true British conditions built in. it’s even great value when you look at other bags of similar size. there aren’t any downsides*
here’s a link to the Restrap website for this bag Restrap 4.5ltr please note this is not an affiliate link. i don’t get any kick back (£) from this review so you can be assured it’s a genuine one.
please check out the videp that goes alongside this review and please take the time to subscribe to my youtube channel, it’s absolutely free to do so!
*the only downside is i’ll have to probably send it back to Restrap!
In a recent poll on my instagram channel @ukgravelco I asked what things put people off trying a gravel bike. Overwhelmingly the highest results, apart from the cost of a gravel bike, was that people didn’t want to have to wear lycra and didn’t want to use clip in pedals.
Well spoiler alert from the start, YOU DO NOT HAVE TO WEAR TIGHT CLOTHING OR USE CLIP IN PEDALS if you don’t want to. That is part of the beauty of gravel biking, because it’s relatively new there are no rules and long may this continue! As a clip in pedal user on the gravel bike myself it got me thinking that maybe I should try riding on the gravel bike with flat pedals to back up my above statement. I do use flat pedals when riding my mountain bike so I’m no stranger to the concept but that is used for a majority of off road riding. Gravel riding has a lot more potential tarmac riding (where i live at least) so that could make a difference. there was only one way to find out.
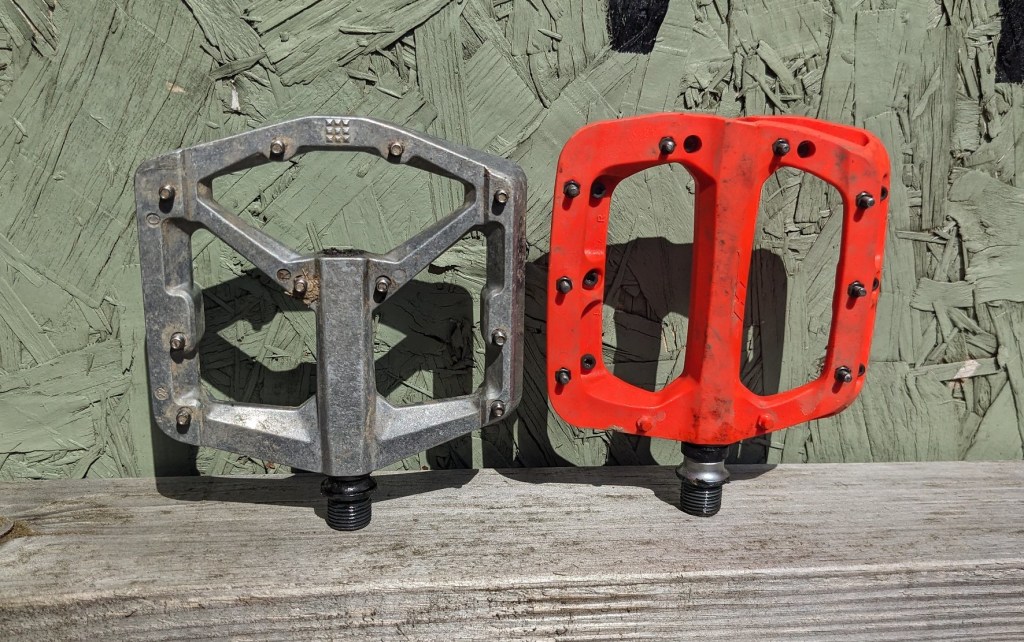
The guys at Extra UK and Ison Distribution the distributors of Crank Bros and HT respectively agreed to send me a pair of pedals. I decided to try an affordable pedal, the HT PAO3A (not the snazziest of titles) which at time of writing costs £60 at full RRP and the Crank Bros Stamp 2 (see what they did there?) at £100 RRP to see what the difference would be by spending a little more.
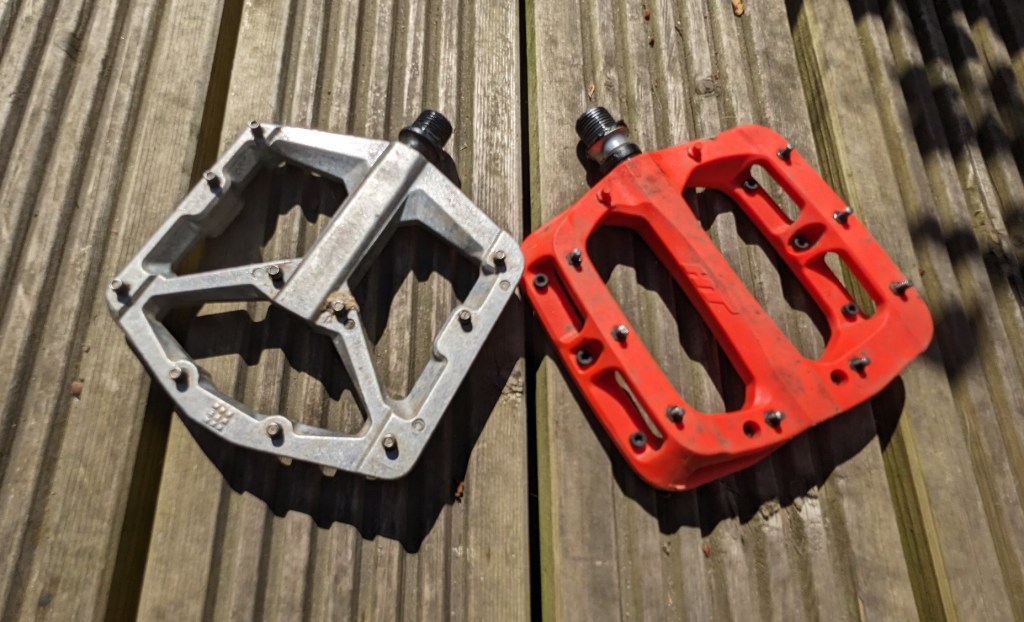
Crank bros (right) HT (left)
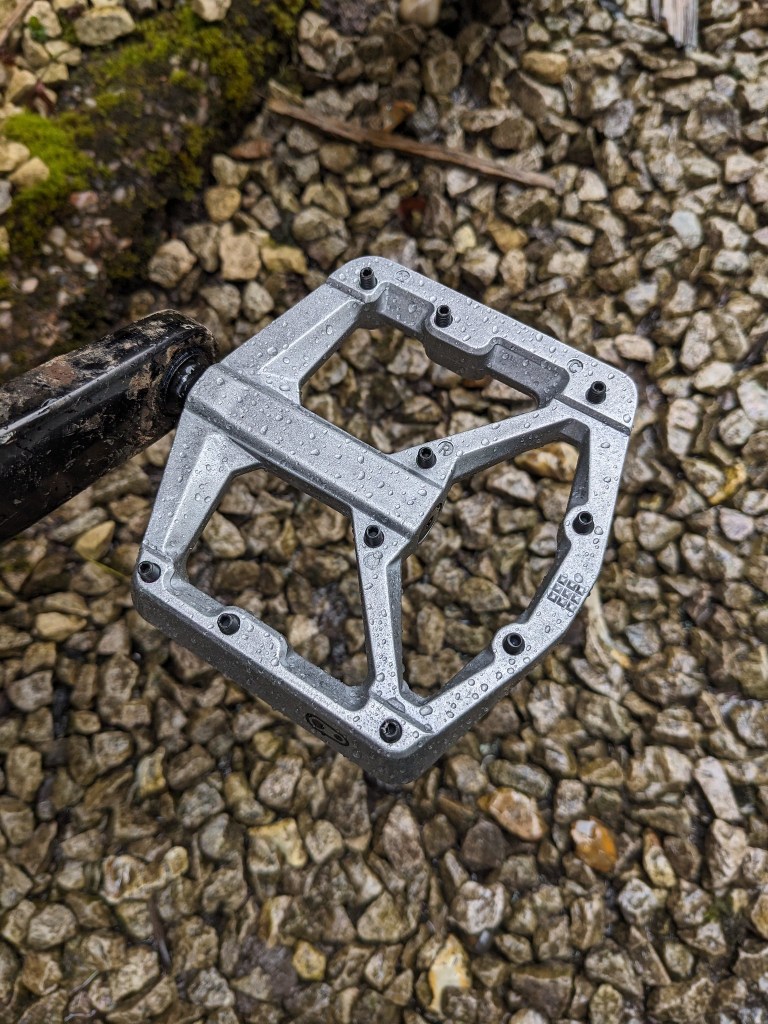
the Crank BrosStamp 2 pedal is from their quite extensive flat pedal range which they have been producing for a long time, so they know what makes a good flat pedal. They come in two sizes, this version is the large and the basic rule of thumb is to size the pedals according to your shoe size, there’s a guide on the Crank Bros website for this. The Body of the pedal is made from aluminium. It comes with 10 10mm removeble pins per side, has a steel spindle and the pedal spins on an inner ignus bearing and twin cartridge bearings on the outside. They are only available in silver or black and have a 5 year warranty. They weigh 494g on my kitchen scales.
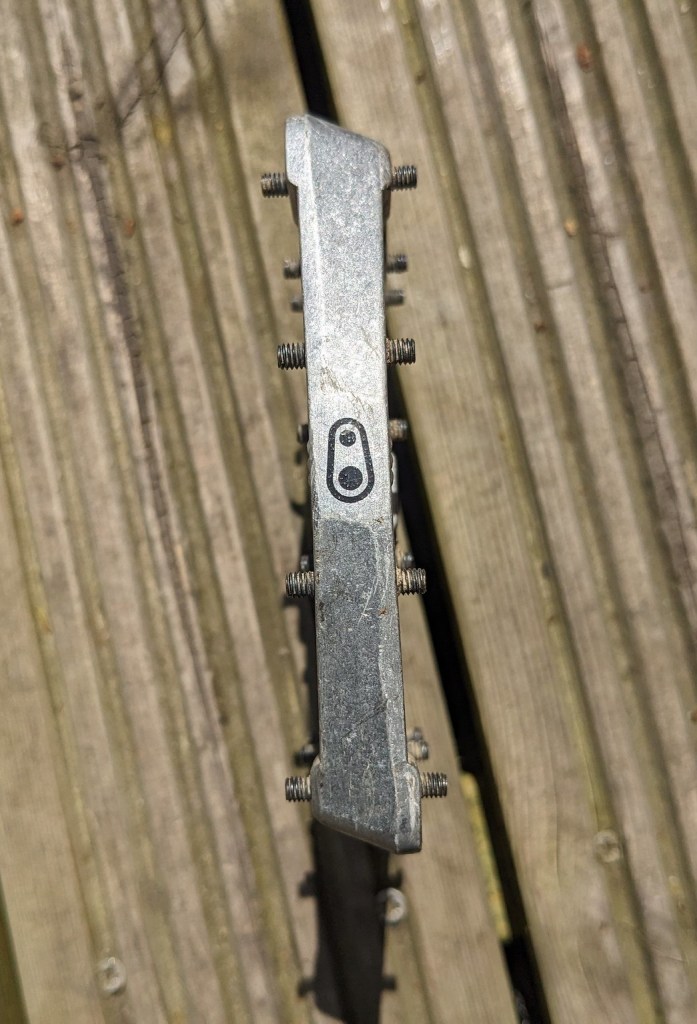
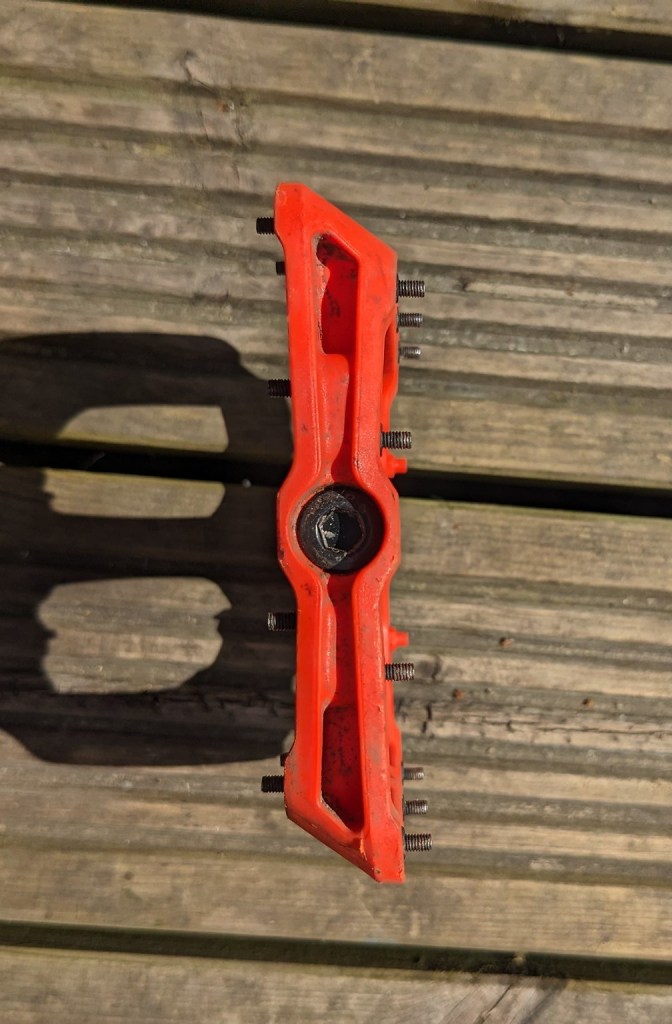
side view crank bros stamp 2side view HT PAO3A
The shape of the body allows maximum mud shedding room and if you look from the side the pedal is concave, so the outer edge is higher than the spindle allowing your foot to “sit in” the pedal for maximum grip and security from slippage. it’s quite difficult to photograph this but check the video below for a better example of this.
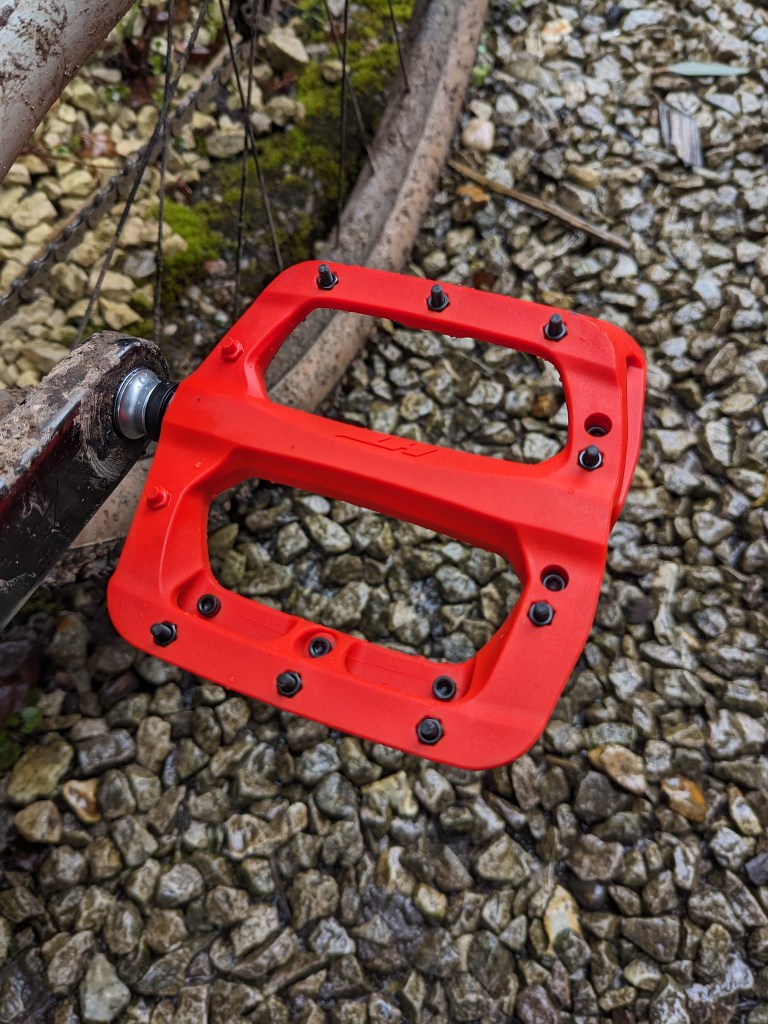
the HT PAO3A pedal in contrast is made of glass reinforced nylon with two in mould pins and 8 replaceable pins per side. Again HT make a huge range of pedals and these come with DU bushings and one dual sealed bearing. The platform is just a hair smaller than the Stamp but weighs less at 351g on my not very accurate kitchen scale. the platform also has the concave shape that is essential in a flat pedal. It comes in just about every colour you can think of and as its “composite” (plastic) there’s no worry about it looking tatty after a few rock or gravel strikes as there’s no paint to flake off.
In use both pedals have performed flawlessly offering up oodles of grip in all situations. Now, as a clip in pedal user usually on the gravel bike, i found myself automaticaly twisting my foot to unclip such was the amount of adhesion to my foot when dismounting.
Pedal dynamics wise there’s a theory that clip in pedals are more efficient and give more power as you can push down and pull up but in the real world unless you are racing or analysing efficiency to a microscopic level I don’t think there’s a great difference, not one that would bother me out for a leisure ride anyway. Both these pedals shed mud 100% better than a clip in pedal. If you ride in the UK this is almost a year round problem. Clogged pedals and shoes can stop engagement between the rider and the pedal, not what you want in slippery downhil situations. Both the Crank Bros and HT pedals were there and accessible in all muddy foot out, flat out scenarios.
So which is the best? well there’s not a lot in it to be honest, the bearings in the Crank Bros pedal seem nicer and spin well without stiction, the HT bearings feel smooth but spin the pedal and it soon stops, this maybe though because the bearing seals are so good. The Crank bros pedal does feel more robust being made of metal and looks like it’d take more knocks at the expence of a bit of paint and are approx 100g over the HT but it does come with a 5 year warrant.
Grip wise there’s nothing in it though. Both are at the top of their game, so i guess it comes down to that warranty and the slightly nicer bearing for me to prefer the Stamp pedal, but then I can put up with silver, if you want a colour and pay a lot less ££ then there are no drawbacks to the HT pedal.
check out the video below to see the pedals in action
With the current war of ratios that is going on between Shimano and Sram over who can shoe horn the biggest sprocket onto their 12 speed cassettes ,at time of writing, Sram has gone one better with 52T over Shimano who introduced 51T just to outdo Srams 50T from a while ago…phew! it was refreshing to see that there are options further down the price scale that don’t need a specific freehub to work. Shimano 12sp needs their propitiatory “Micro Spline” freehub and in turn to run Sram big cassettes in most cases you need their “XD” driver.
However if you haven’t invested in the 12sp technology yet and are still running 11 speed then there is now a very good alternative from Shimano. The Deore M5100 cassette which happily fits straight on to the standard Shimano freehub that everyone running the big “S’s” gears already has. Before this new cassette the biggest sprocket on a 11sp Shimano cassette was 46T which is a very low gear indeed and originally ideally suited to a mountain bike. It does suffer though from a hug gap between the penultimate sprocket and that 46t, namely 37t-46t. I ran this cassette through the winter months on my gravel bike on a set of 650b wheels with much knobblier tyres than those I use in the drier months as my local terrain is very muddy and clay rich so i need all the traction i can get for the seated climbing necessitated to stop the wheel from spinning out. The gap was very annoying and when I needed a slightly lower gear than the 37t to stop stalling (I’m no climbing super hero as you can tell) the big jump to 46t was too great and I ended up loosing balance as my legs spun wildly.
The solution pt1
to over come this i butchered a 11-42t cassette, removing the 15t sprocket and adding a very second hand expander sprocket which used to be all the rage before huge cassettes but seem rare these days. This sprocket had 45 teeth so making the final jump between cogs 42-45t which was much better and this is what i ended up running for most of the damp months. Unfortunately the horrible gritty/grinding local conditions all but destroyed the cassette and chain (ok, i should have checked the chain wear more regularly) so knowing that the new Deore cassette was imminent I nursed that chain and cassette for as long as possible until my local bike shop called to say the new cassette had arrived!
The Solution pt2
The old and the new side by side
The Deore M5100 has a ratio of 11-13-15-18-21-24-28-33-39-45-51T and those last 3 sprockets are very evenly spread so even tough the gaps are bigger than at the other end of the cassette the transition is easier to keep a good cadence on and aids balance and traction as your legs aren’t all over the place when concentrating on traction and line choice. The smaller sprockets are much closer in range and this is a good thing as on a gravel bike this is where you will mostly be sat. Small ration changes enabling smooth pedaling and letting you carry your speed on tarmac and less technical off road sections. the new cassette was 70g heavier than my modified 11-45 extended cassette)
Lucky?
M5100 in action
When I came to fit the cassette I was expecting to have a fight to get it to work, probably requiring a rear hanger extender/road link but i thought i’d try it out first anyway. I did fit a complete 116 link chain ( the old one was left this long too to accommodate the 11-45/46T) , set the clutch to on and with trepidation cycled through the gears. As you can see from the video, I was lucky and it worked straight away without any modification. I didn’t even have to adjust the “B” screw it was fine on the setting from the previous cassette. Please note if you try this your set up may be different! it’s not my fault if you damage anything!
So there it is, as mountain bike cassette on a gravel bike. the rest of the gearing is all GRX 810 with a 1 x 40 chainring. the 51t sprocket gives very very very low gearing and other than deliberately trying it out when riding I doubt if I’ll ever use it on this bike. the next sprocket down tends to be my extreme sit and spin gear. However for a heavily laden touring or bike packing bike that has done away with the fuss of a double (or triple) chainset this could just be what you are after at the end of a long day with that last long steep incline to grind up.
The cassette has now done a couple of hundred miles around my local area and is so far trouble free so I’m in no hurry to swap it for something less silly. in fact i’m going to get one for my mountain bike as the cost of the cassette is much less than the cost of upgrading to 12 speed to get that extra gearing and who needs that extra one tooth (sram)?