

How do you secure your bikes when traveling in a vehicle? Personally I’d rather not use a car/van at all but we are not all lucky enough to have fabulous riding right from our door. Even if you do have great singletrack on your doorstep you can get bored of it, especially in winter. So, you’ll need at some point to travel with your bike.
Up until now I’ve been bungy cording mine to the side of the van, which is ok but not ideal as the bike can slip and if you have more than one bike in there they can rub together. I was looking for a solution and came across Bikestow.com which looked interesting. I then checked their contact details and found they were situated only 20 minutes from my shed! I dropped them a line and they very graciously offered and trusted me to review a demo Original 3 bike rack.
I popped over to their unit in Stourbridge and got a tour of the workshop (i have to comment how clean and well organised it looked) and chatted to one of the owners. They were about to leave for the Ardrock event in Yorkshire so after a quick demo on how to use the rack it was in the back of my van and I was home pcking for my own trip to Norfolk.
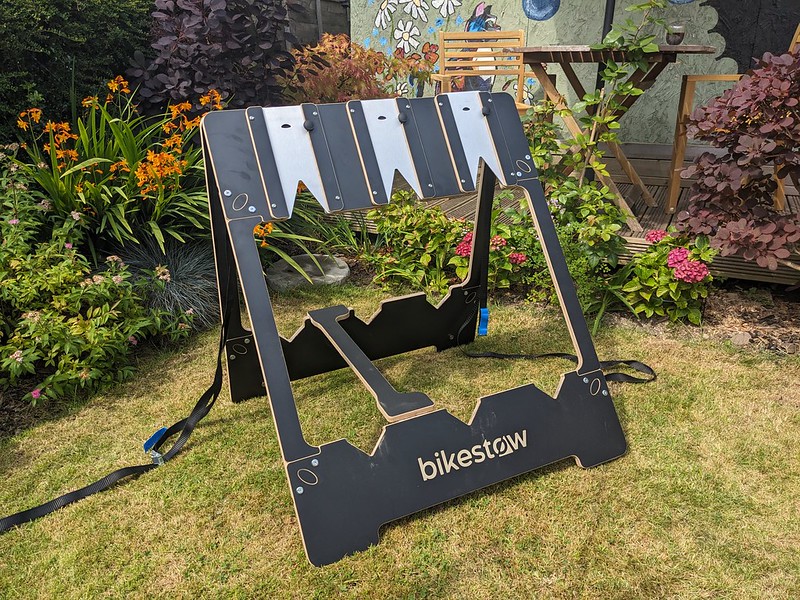
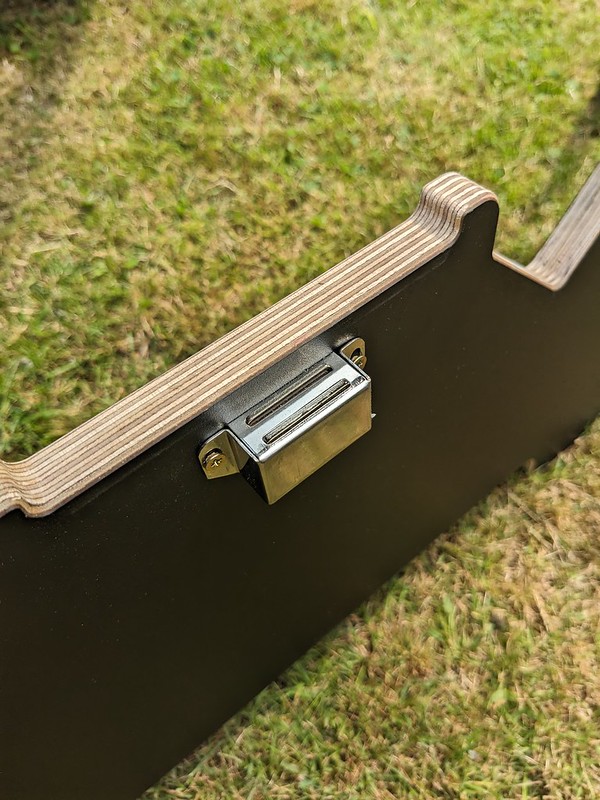
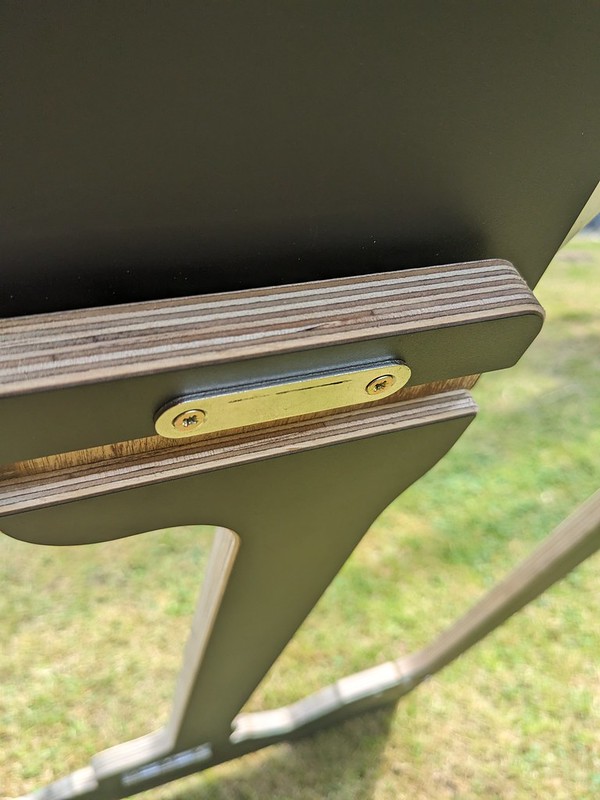
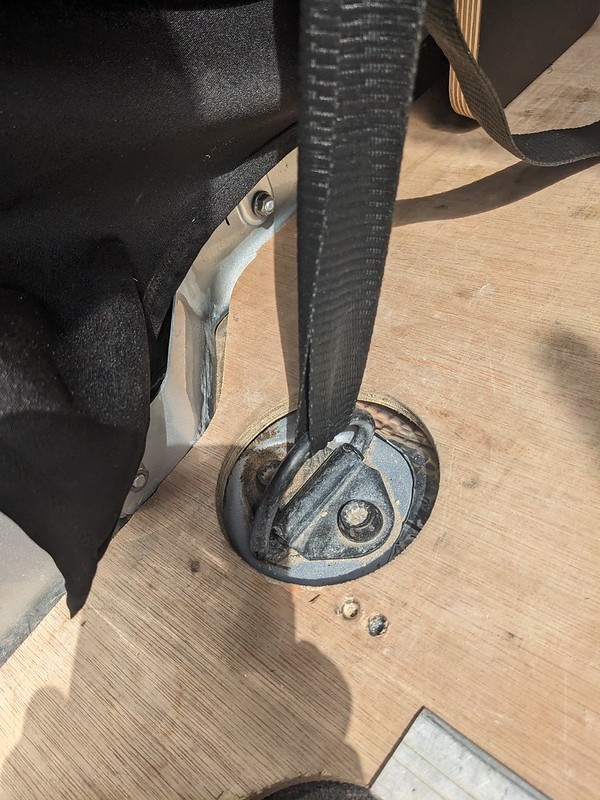
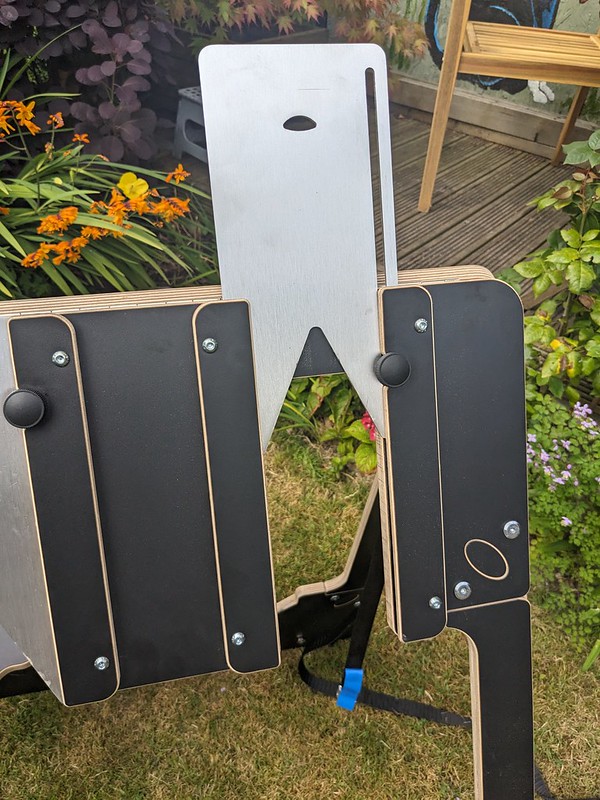
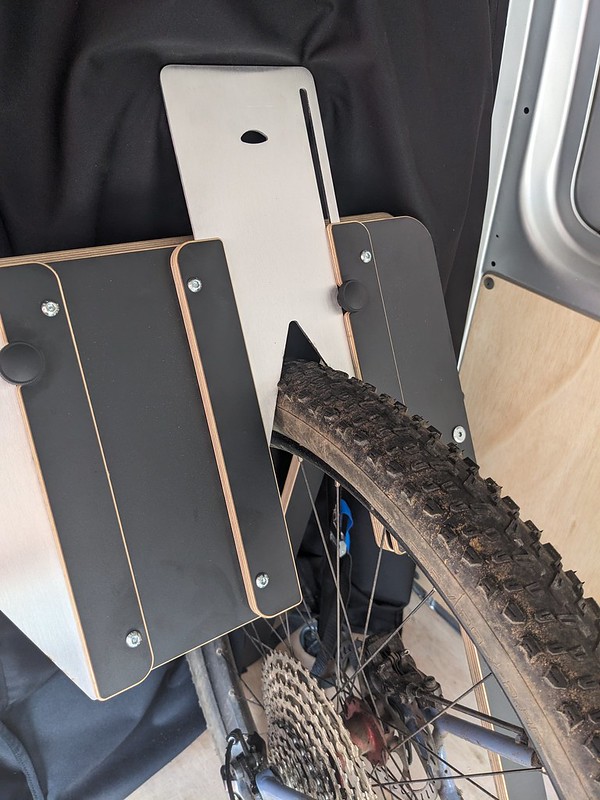
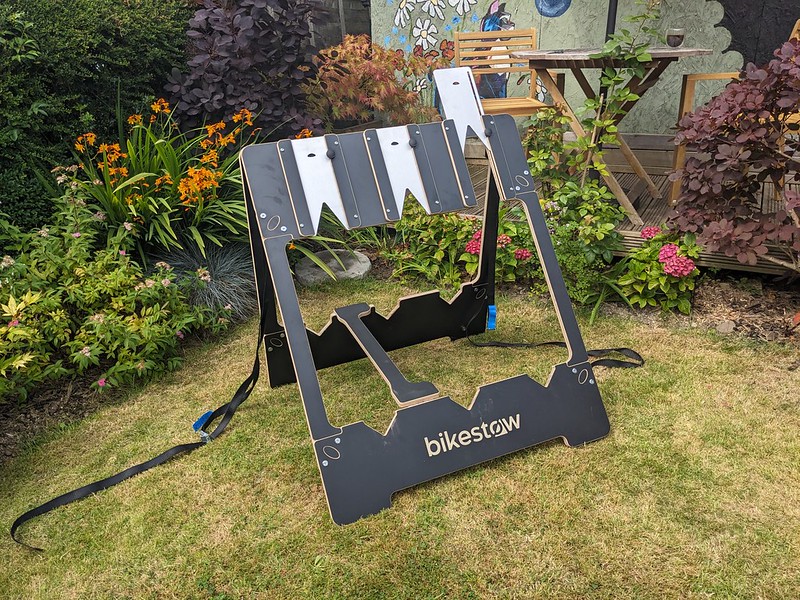
The racks are made from exterior grade birch plywood so it ok if your tyres are wet when the bikes go in. All the shapes are CNC cut with a very high standard of finish. All smooth edges and straight lines (not like my attempts at jigsawing I can tell you!) and this was a demo unit so has been used and abused by lots of different riders and press. It folds out from absolutely flat to a triange design and clips into position using magnets, very easy to use. See the video below for a better understanding of how simple but effective this design is. The rack is then secured in the vehicle with two tie down straps using the anchor points bolted into the floor.
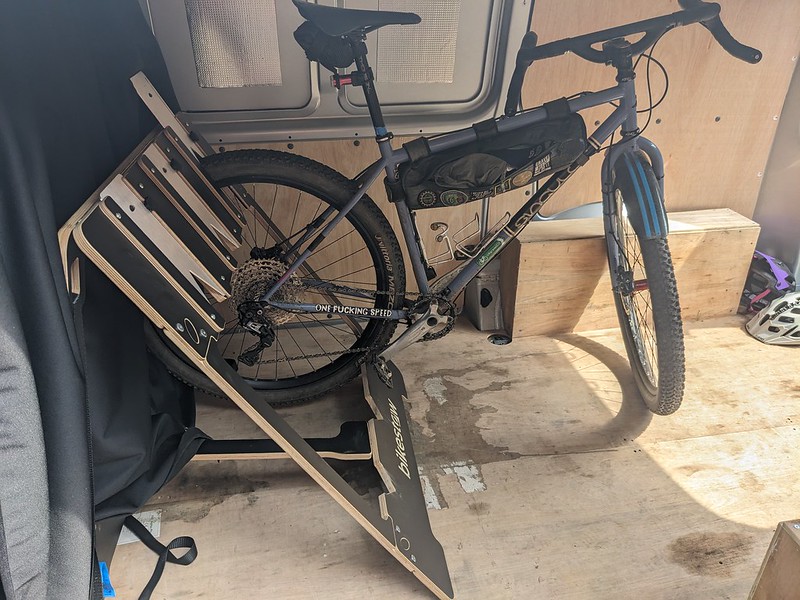
you then undo the little knob on the aluminium slider, lift it up until you can slide your bike wheel in, slide the slider down over the tyre, tighted the knob and it doesn’t need to be tight at all and thats it!
When you get back from the trip, reverse the process, remove bike, unto tie straps, fold the bikestow rack completely flat and remove from vehicle and store in your shed/garage/under the bed until its needed again.
Anyone who has driven in Norfolk will know that they don’t seem to like main roads over there, either that or my sat-nav was on the blink. We seemed to spend the entire time driving down twisty narrow lanes with hair pin bends and stop-starting to give way to huge lorries nad tractors weighed down with hay bales. This gave the Bikestow rack a proper workout and i’d removed the bulkhead not long before so any rattles or noise was going to be easy to detect. I had two gravel bikes in the rack, toe to tail next to each other and didn’t hear a peep out of either of them. I have to say I was very impressed.
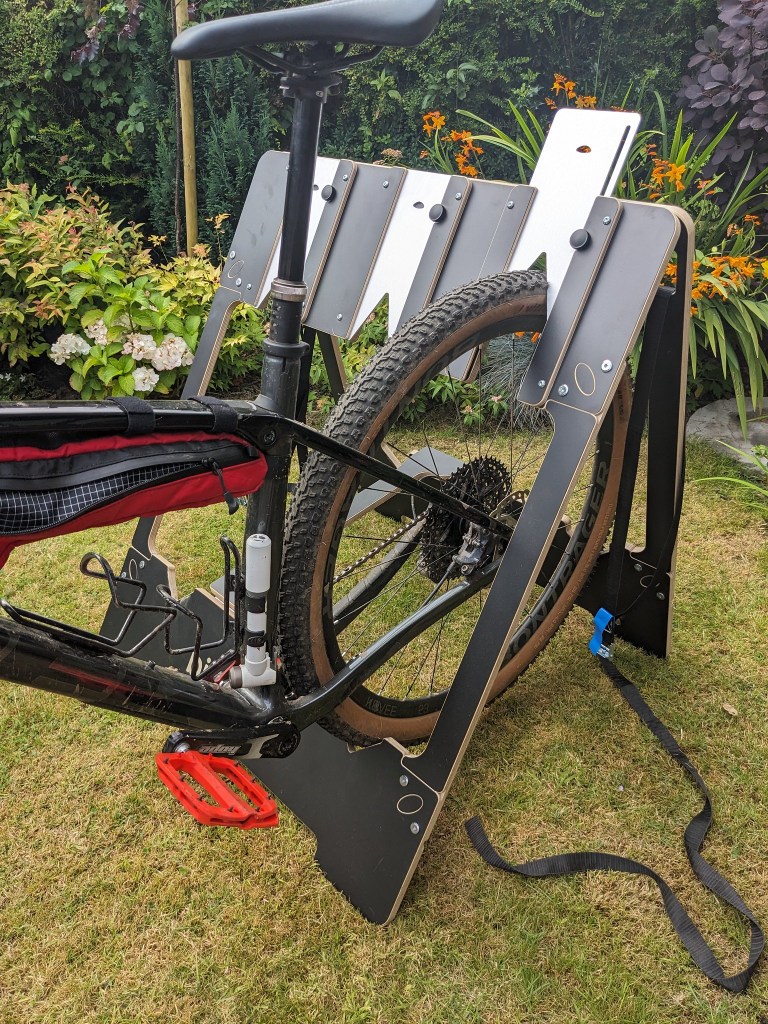
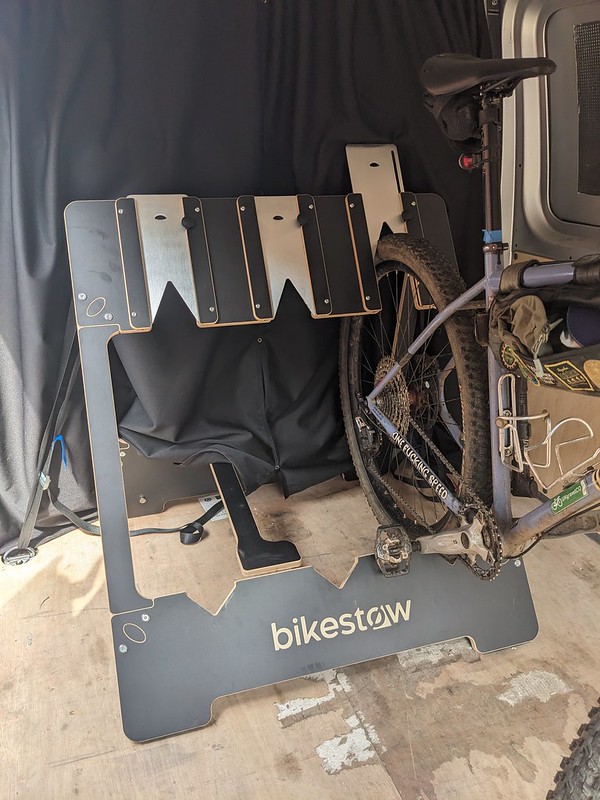
I’ve also tried mountain bikes in the Bikestow rack and they work perfectly too, in fact the rack will take up to 2.6″ 29er tyres and the website does show a + option too which takes up to 5″ tyres for the fat bike riders! I used the space between the rack sides to stow (see what I did there) a tack pump, shoes, helmets and a bag of kit too so no space was wasted.
Products and ideas get overcomplicated and they work but with lots of setting up and fuss. No one wants to spend hours constructing a bike rack and having to find somewhere to store it between rides, we want maximum saddle time in our busy lives.
The Bikestow Bike Rack is a simple idea that really works, easy to use, very secure and folds away for storage. It will maximise your saddle time and make your life simpler. Now I’ve just got to decide if I want a two or Three bike version!
check out my youtube review below to seethe Bikestow rack in action, oh and if you could subscribe to my youtube channel that would be awesome. It costs you nothing but helps me approach companies like bikestow to review kit for you to see and save you forking out hard earned cash for someting that might not suit you.
