How probably the least gravel friendly bike I own showed it’s all about the ride, not the bike

and that i need to work on my titles

The last snow we had locally was in 2017, three years into owning a fat bike and it was brilliant, the culmination of all that promise of how good a fat bike could be. I’d ridden on normal trails in both summer and winter and yes it was great but it wasn’t snow, the reason fat bikes came about really. But as the snow melted so did my enthusiasm for fat biking. i’d done snow so nothing else was going to compare. I’ll admit i put the fat bike away in the loft at the beginning of spring due to lack of space for other bikes and although I made sure everything was good to go on it so i could drag it out and ride it after setting up the tyres I pretty much forgot about it apart from the annual Global Fat Bike Day which is always on the first Saturday in December (until Gomez says’s it ain’t). On this day I travel down to the surrey Hills where some great friends organise a ride that I haven’t missed since its inception.

2017 vintage snowmageddon

Fast forward to 2020 and through the UKgravelCO network I met a couple of riders and during a gravel ride conversation, undoubtedly over a socially distanced (I can’t wait to be able to stop saying or writing that) cake or coffee talk turned to other bikes we owned. It turned out we all owned fat bikes and the subject of Global Fat Bike day 2020 came up. Travelling down south in lockdown wasn’t sensible so we decided a group of us would ride and go for a brew up in the woods. So I climbed up into the loft and got the fatty down. A quick gear check and topping up with sealant and she was ready. A couple of test rides followed and made me realise that fat bike riding is a lot harder than gravel bike riding, there’s a little more resistance rolling those wheels along after the grav machine. It made me feel like I was going backwards fitness wise. I began to regret getting it back out until this Christmas break.

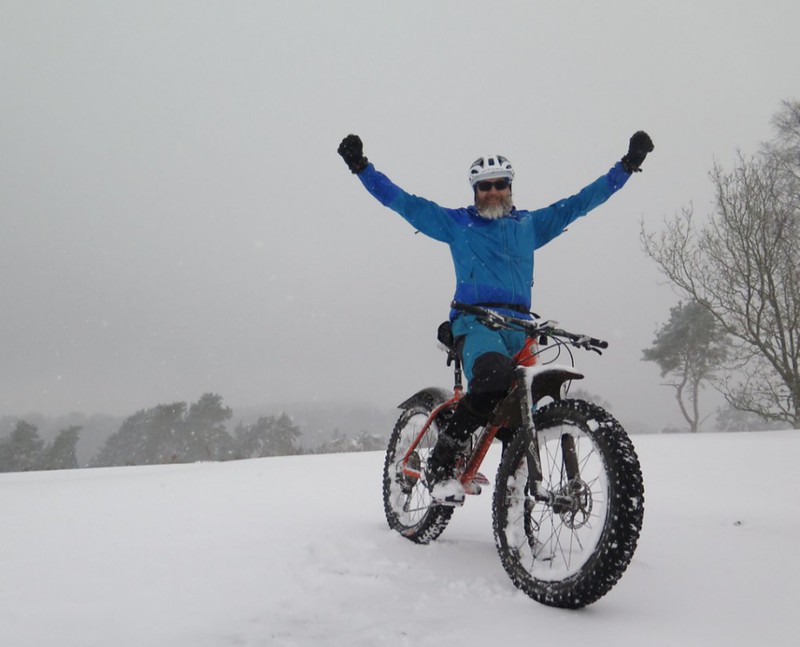
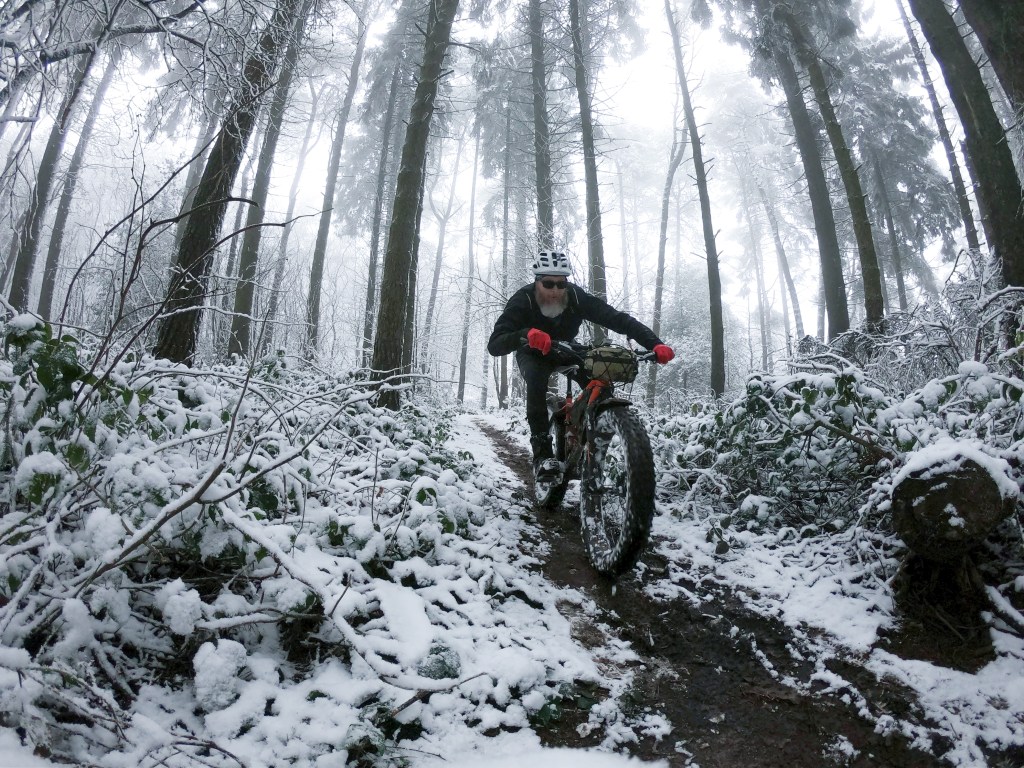
The snow came down quickly and we managed to get around 3 inches of the white stuff in just a few short hours. The fat bike was probably the safest bike to ride in the conditions so I headed out into the whiteness. As I was riding along deliberately pedaling into the thickest patches of snow, sliding on the hidden soft mud underneath I got into the groove where you are just thinking about staying upright and trying to maintain as much momentum as possible to get up the next slippery climb and staying off the brakes as long as you can to avoid locking the wheels and loosing control. I stopped for a breather (riding in virgin snow is hard work!) and realised this is what I’ve been missing these last few months. After this hellish year and less opportunities to get out and do long rides I’ve found myself getting stressed about not doing as many miles as last year or four years ago and looking back on my mileage for that particular time of year and how i’d need to do “X” amount of miles to make up for it. I’d find myself thinking “if i don’t do 30+ miles it’s not worth riding” and be disappointed if I only had time for 15 miles and pushing my limits on the next ride to make up for it. It’s amazing how you can get into a rut about things, I’m sure I’m not the only one who’s channeling the stresses of every day life into their hobbies and sports. Standing there at the top of the hill watching people sledging an laughing it made me realise it doesn’t matter how long the ride is or if the average speed is lower or if you “only” ridden on a cycle path the thing is that its the riding that is the important part.

In fact getting back on the fat bike has reinforced my mantra of No Rules Just Ride, it doesn’t matter what you ride, drop bar, flat bar, thin tyre or fat, just ride. that’s why any bike or rider is welcome on a UKgravelco ride.

Fast forward to 2020

I rode 8 miles on the fat bike in the snow and it was 8 miles of just riding along. It doesn’t matter how far you ride or if the route is epic or just round the block of your housing estate. The most important part is that you are out on your bike enjoying the freedom because you want to, not because you think you ought to.

The fat bike, probably the most inappropriate bike for riding gravel but the best bike for making you realise it’s all about the ride, not the destination or the bike.

As we near the end of 2020 Let’s hope that longer rides and rides with friends old and new can happen again but if that doesn’t happen I’m going to do my best to enjoy it no matter what and no matter which bike it’s on.

#NORULESJUSTRIDE

Miss Grape Node Top Tube Bag

This image has an empty alt attribute; its file name is 50769437591_2c45a38625_k-1.jpg
new post…on a top tube bag!

Miss Grape are an Italian company from near Venice and have been making bike packing bags since 2014, although the company have been going since 2005. The UK arm of Miss Grape sent me a range of their bags to try out, the first being the Node top tube bag.

The Node, weighing in at 125g is a robust looking bag made from a nylon polyester mix with a water repellent polyurethane resin coating. this means the bag will shrug off a shower but if using in torrential rain a dry bag for the contents is advisable. A rather hefty looking weather resistant zip opens to reveal a lightly padded interior with a velcro centre parting that can be pulled apart to allow full length storage. On the outside two mesh pockets give quick access storage. Underneath the bag the base is a very shiny looking surface which turns out to be very grippy and stops the bag moving from side to side, A velcro strap at the rear of the bag wraps around the top tube and a neat strap and clasp with a rubber band to tidy the strap goes around your steerer. this has 3 height positions to swap depending on your steerer spacer configuration.

big enough for a sarnie, side pockets for essentials and interior adjustable divider

Using the Node I strapped on the node and used it for the small bit of commuting and local weekend rides. with the interior velcro divider open it easily fir my Pixel 3 phone, a container of hand sanitiser, a face mask (don’t you just love 2020?) a spare buff and house keys. On other rides I also put a gopro and mini tripod inside. The bag is quite tall ( 12cm) and so as with most other top tube bags careful packing is needed to stop the bag leaning over. Pack sensibly and there’s no movement. The rear strap wrapping around the frame is long enough to accommodate the largest diameter top tube. My frame has quite a thin steel tube so there was a lot of surplus strap that did catch my leg. If the pack didn’t have to be returned after the test I’d have trimmed this to fit and so this won’t be an issue for purchasers. The zip is easy to open and close with one hand while on the move so snacking without stopping is easy (pre cut your pork pie if not a fan of energy bars) and the bag will take a sandwich easily. It’ll also take a spare tube, multitool and tubeless repair kit for those minimal summer rides.

The Miss Grape Node top tube bag is a great bit of kit and will take a surprising amount of stuff and could be an important part of your bike packing or everyday it. the only things i’d like to see is maybe a media port to run a power pack through to or from a dynamo/computer etc and if the dotted surface of the material was reflective if would make for effective side on visiblity at night.

It’s definitely one to consider unless you run your stem slammed when it might be a bit too tall and the steerer mount might be difficult. Pair it with Miss Grape’s frame, seat post and barrel handlebar bags and it could be a perfect matching combo……good job tests on those very bags will be published here soon!

This image has an empty alt attribute; its file name is 50713043307_95acaacc6e_k.jpg
integration station with Miss Grape

more info can be found on the Miss Grape Insta page or the official webpage

As with all my tests, this is an impartial and real world review. I’m not sponsored and I’m just an average rider like most of the cyclists out there. I do inform anyone who sends me things to test that It will be an honest review good or bad.

Spatzwear GRAVLR overshoes


The search for comfortable feet in winter

This image has an empty alt attribute; its file name is 50714775127_2057d4c7f7_k.jpg
there’s no way you’ll forget the name of the GRAVLR overshoe

I suffer with cold feet in winter, fellow sufferers will know how bone gnawingly awful it is to have feet so cold you lose the feeling in them and it actually feels like you are pedaling with ice blocks surrounding your feet. Cold feet sufferers will also know how annoying it is when a person who has all year round warm feet tells you to “put a thicker sock on”. Buying bigger sized shoes to put more sock layers on doesn’t work either as usually the cleat is then in the wrong position even at it’s extreme adjustment, I’ve tried it I know. I’ve also tried kitchen foil, plastic bags, pop socks and those chemical hand warmers you can get for feet, all to no avail. Once the temperature dips below 5 degrees I know I’ve got around 10-20 miles before it’s so miserable I head for home. The pain however doesn’t stop there as once back in the warm the blood gradually being allowed back into the capillaries of the feet brings intense pain and a lengthy wait until your feet are defrosted enough to stand in a hot shower without screaming.

So the Spatz GRAVLR has a big task to overcome. I admit I didn’t mention this when I contacted Tom at Spatz to see If I could get a pair to try. The overshoes have been ridden in conditions around 1 degree to 12 degrees over numerous rides. They been ridden in rain, drizzle, frost and through all manor of gloopy wet muddy trails that my local area can provide. So how did they do?

The GRAVLRs are made from “aero armour” which is a very stretchy smooth surfaced material which is reassuringly thick but not at all heavy. They have kevlar reinforcement to stop abrasions on the toe and ankle and this really works, there have been no tears or marks even though they’ve been through some tough conditions. They have a sort of quilted panel on the inside next to your shin to keep the warm blood flowing down to the toes. The side zip is robust and is glove friendly with a velcro flap to keep it neat. Underneath the foot area there is more kevlar reinforcement on the velcro flaps.


The Ride I got a tip from Tom about putting on the overshoes, “set the Achilles heel first, then pull the toe over” which was top advice. The overshoes are designed to be fitted so It does take a couple of tries and practice to perfect the process, but once worn in it became easier to do. To do an effective test I wore standard socks and a pair of shimano XC5 shoes.

This image has an empty alt attribute; its file name is 50736287468_297839307d_k.jpg

Once on the overshoes were pretty much unnoticeable as the fit was tight but not constrictive. Once the velcro under the shoe was set it never moved, even after some walking (into a bakery or two and up and down grass and mud slopes) Clipping in and out was unaffected and the overshoes didn’t need any readjustment during any of the rides.

Did I get Cold feet? On rides between 5-10 degrees I could have ridden on for as long as my energy could last, my feet were extremely comfortable in feel and temperature. On the coldest ride which was around 1 degree where in my normal set up I’d have been suffering after around 10 miles The GRAVLRs kept my feet comfortable for longer, In fact I could still wiggle my toes and had feeling in them after around 30 miles, they were cold but this is a massive improvement to how my feet normally feel. This is a complete win for me! In all temperatures and some really gritty wet conditions my feet stayed dry. The construction of the overshoes keeps the wind chill and damp at bay and together with that panel on the shin this the secret of their success.

This image has an empty alt attribute; its file name is 50739492038_d88fa8ad96_k.jpg

If you don’t suffer with cold feet I think you will find the GRAVLRs an excellent way to allow you to ride into deep winter with warm, dry comfortable feet. If you do suffer then these overshoes are an excellent part of your arsenal to keep going for longer in deep winter weather.

This image has an empty alt attribute; its file name is 50737130707_9f517b4978_h.jpg

the Spatzwear website says “these revolutionary knee length overshoes will transform your wet/cold riding experience” and riding along cocooned in these neoprene long length overshoes I’d pretty much agree.

for more info see Spatzwear.com

As with all my tests, this is an impartial and real world review. I’m not sponsored and I’m just an average rider like most of the cyclists out there. I do inform anyone who sends me things to test that It will be an honest review good or bad.

Redshift ShockStop SeatPost

Redshift shock post in ideal conditions to test weather proofness

In an ideal world suspension seatposts are designed to take the sting out of surfaces allowing the rider to be less fatigued and so ride further and longer. They should be simple to adjust, be reliable, be a reasonable weight and hardest of all maybe, they should look good (or not too weird). So can the Redshift Shock Post achieve all these?

Suspension seatposts are a curious thing. They are made to isolate the rider from the surface the bike is rolling over. However they are not a rear suspension system like those found on mountain bikes. So if you are expecting trail bike plushness and inches of travel you’ll be disappointed.

The Post is aluminium with an offset parallelogram design. the saddle clamp is a two bolt one and enables easy micro adjustments of the saddle angle and position. The adjustment to the amount of travel the post has and the “plushness” is found inside the main shaft of the post. There, a preload screw in cap hides the space where one or two springs (depending on your riding weight) sit. The parallelogram has a very neat cover that is magnetic and this protects the mechanism and the seat clamp adjustment bolts from rear wheel spray. The post is 27.2mm in diameter, shims are available when you buy to fit any size frame. Suspension travel is 35mm.

neat cover protects from the elements and is magnetic!

Set Up is very easy but does take some trial and error and a few test rides to get spot on. Get yourself kitted up in your normal riding gear and start by following the rider weight guide in the comprehensive instructions that come in the box. There are two springs that come with the post, one is already installed and depending on your weight you might need to add the smaller spring too. this fits inside the larger one on the inside of the post shaft, preload is adjusted by a screw in cap at the bottom of the post

I set the preload to “2” then went for a short test ride, finding the post a little too soft for my liking I then turned the cap to “4” another short test and I turned it to “3” which seemed to suit me the best given my weight and how I wanted the post to feel. I like quite a firm ride so the post doesn’t bottom out on anything but a big impact and there is no noticeable bounce when pedaling on a smooth surface. It’s worth while taking some time setting the post up properly but the actual adjustments are quick and easy. Saddle fitting was equally easy, the magnetic cap pulls aside and the bolts are accessible with a standard Hex key and they haven’t come loose or needed adjustment during the length of the test period over a variety of surfaces.

The Ride The first ride after the couple of set up rides was completely in the dark due to the time of year and work commitments so I really didn’t want to be tweaking any of the post adjustments by torch light So i rode it as i had initially set it up. Anyone who knows me will tell you I can set the saddle position and post height to exactly how i usually have it and within one mile of the first ride I’ll have moved it at least twice to get the right feel! This time I raised the post a few millimeters to get that ” just right” feeling. This is a good example of why a few short test rides are needed before any long rides are undertaken especially on group rides as the people you are riding with won’t want to keep stopping for micro adjustments.

With the post raised I rode on for around 15 miles on a mix of road and off road light trails. the post showed no side to side movement or rattles and the vertical movement was smooth. i knew straight away that I’d set the preload too soft as the post bottomed out on larger bumps.

The next ride was in daylight and on much bumpier terrain and in the meantime I’d added one full turn on the preload. The post sat at the top quarter of it’s movement and this was my sweet spot. it wouldn’t bottom out except on the harshest of hits, those that I deliberately sat down for to test the post, normally I’d have been standing up for those anyway. The post action was smooth and there was no discernable bobbing up and down while pedaling. Over a few 30+ mile rides I actually forgot it was a suspension seat post so good was the experience.

I do suffer with lower back pain and after a 20+ mile ride my back tends to stiffen up especially in cold weather and i have to start on the bike stretches to help cope with it. I can report though that this was much reduced using the shock post. Tested back to back with a standard rigid post on the bike on consecutive days over similar distances my back was a lot more flexible and less painful using the Redshift post.

The only issue I had with he post wasn’t the fault of the post at all. The magnetic cover moves downwards as the post compresses to cover the pivots at all points of the travel but when I’d set the post too soft I was using a band on rear light around the post. As the post reached full travel the end of the magnetic cover would touch the mode button on the light and change the settings of the flash mode! It took me a while to work out what was happening while riding in the dark. Setting the compression preload correctly stopped this and it hasn’t happened since.

Does the Redshift shock post take the sting out of rough surfaces? Yes, my back issues seemed much improved using the shockpost compared to a standard post

Simple to adjust? yes, just screw in or out the preload cap to adjust, no bolts to undo and no special tools needed.

Reliable? yes, no play has been felt or seen over the duration of the test, the action is still smooth and silent. The magnetic cap keeps rear wheel spray out of the mechanism and the saddle clamp has not moved since i set it.

Weight the post with the second smaller spring weighs 559g

looks good (or not weird) the post is actually very low profile compared to other shock posts on the market. The engineering that has gone into the design is clever and the mechanism is compact. It takes a second glance to realise that it is actually a suspension post, so yes I think it passes the looks test.

A Redshift Suspension Shock Post will let you ride further for longer, is easy to set up and look after. It doesn’t have a massive weight penalty and would suit any rider. It shouldn’t be confined to just gravel bikes either. A bike packing hardtail MTB would benefit from this post too and fitting a rear bag to the post should be easy. The action is subtle enough (if that’s the way you set it) or you can set it to get more bounce. that’s all down to personal preference.

The post has stayed on my bike since the initial test rides when I could have easily gone back to my favourite rigid post and that is I think that decision is all you need to know.

more details on the shock post can be found here Redshift Shockpost or the Redshift instagram page has more pictures

As with all my tests, this is an impartial and real world review. I’m not sponsored and I’m just an average rider like most of the cyclists out there. I do inform anyone who sends me things to test that It will be an honest review good or bad.